nuxx.net
Making, baking, and (un-)breaking things in Southeast Michigan.

Category electronics

Successful Ceiling Fan Modification
For the last two or three works the ceiling fan in my bedroom hasn’t been responding to signals sent by the remote control leaving us with only a dim table lamp to illuminate the room. Not long after cleaning the contacts in the remote the fan would occasionally fail to respond to signals from the remote unless its power was cycled by the light switch under the remote holder. After flipping the switch off then on it would then work for a few days before needing another reset, but this failing state only lasted for a few weeks before the system simply failed leaving neither the light nor fan usable.

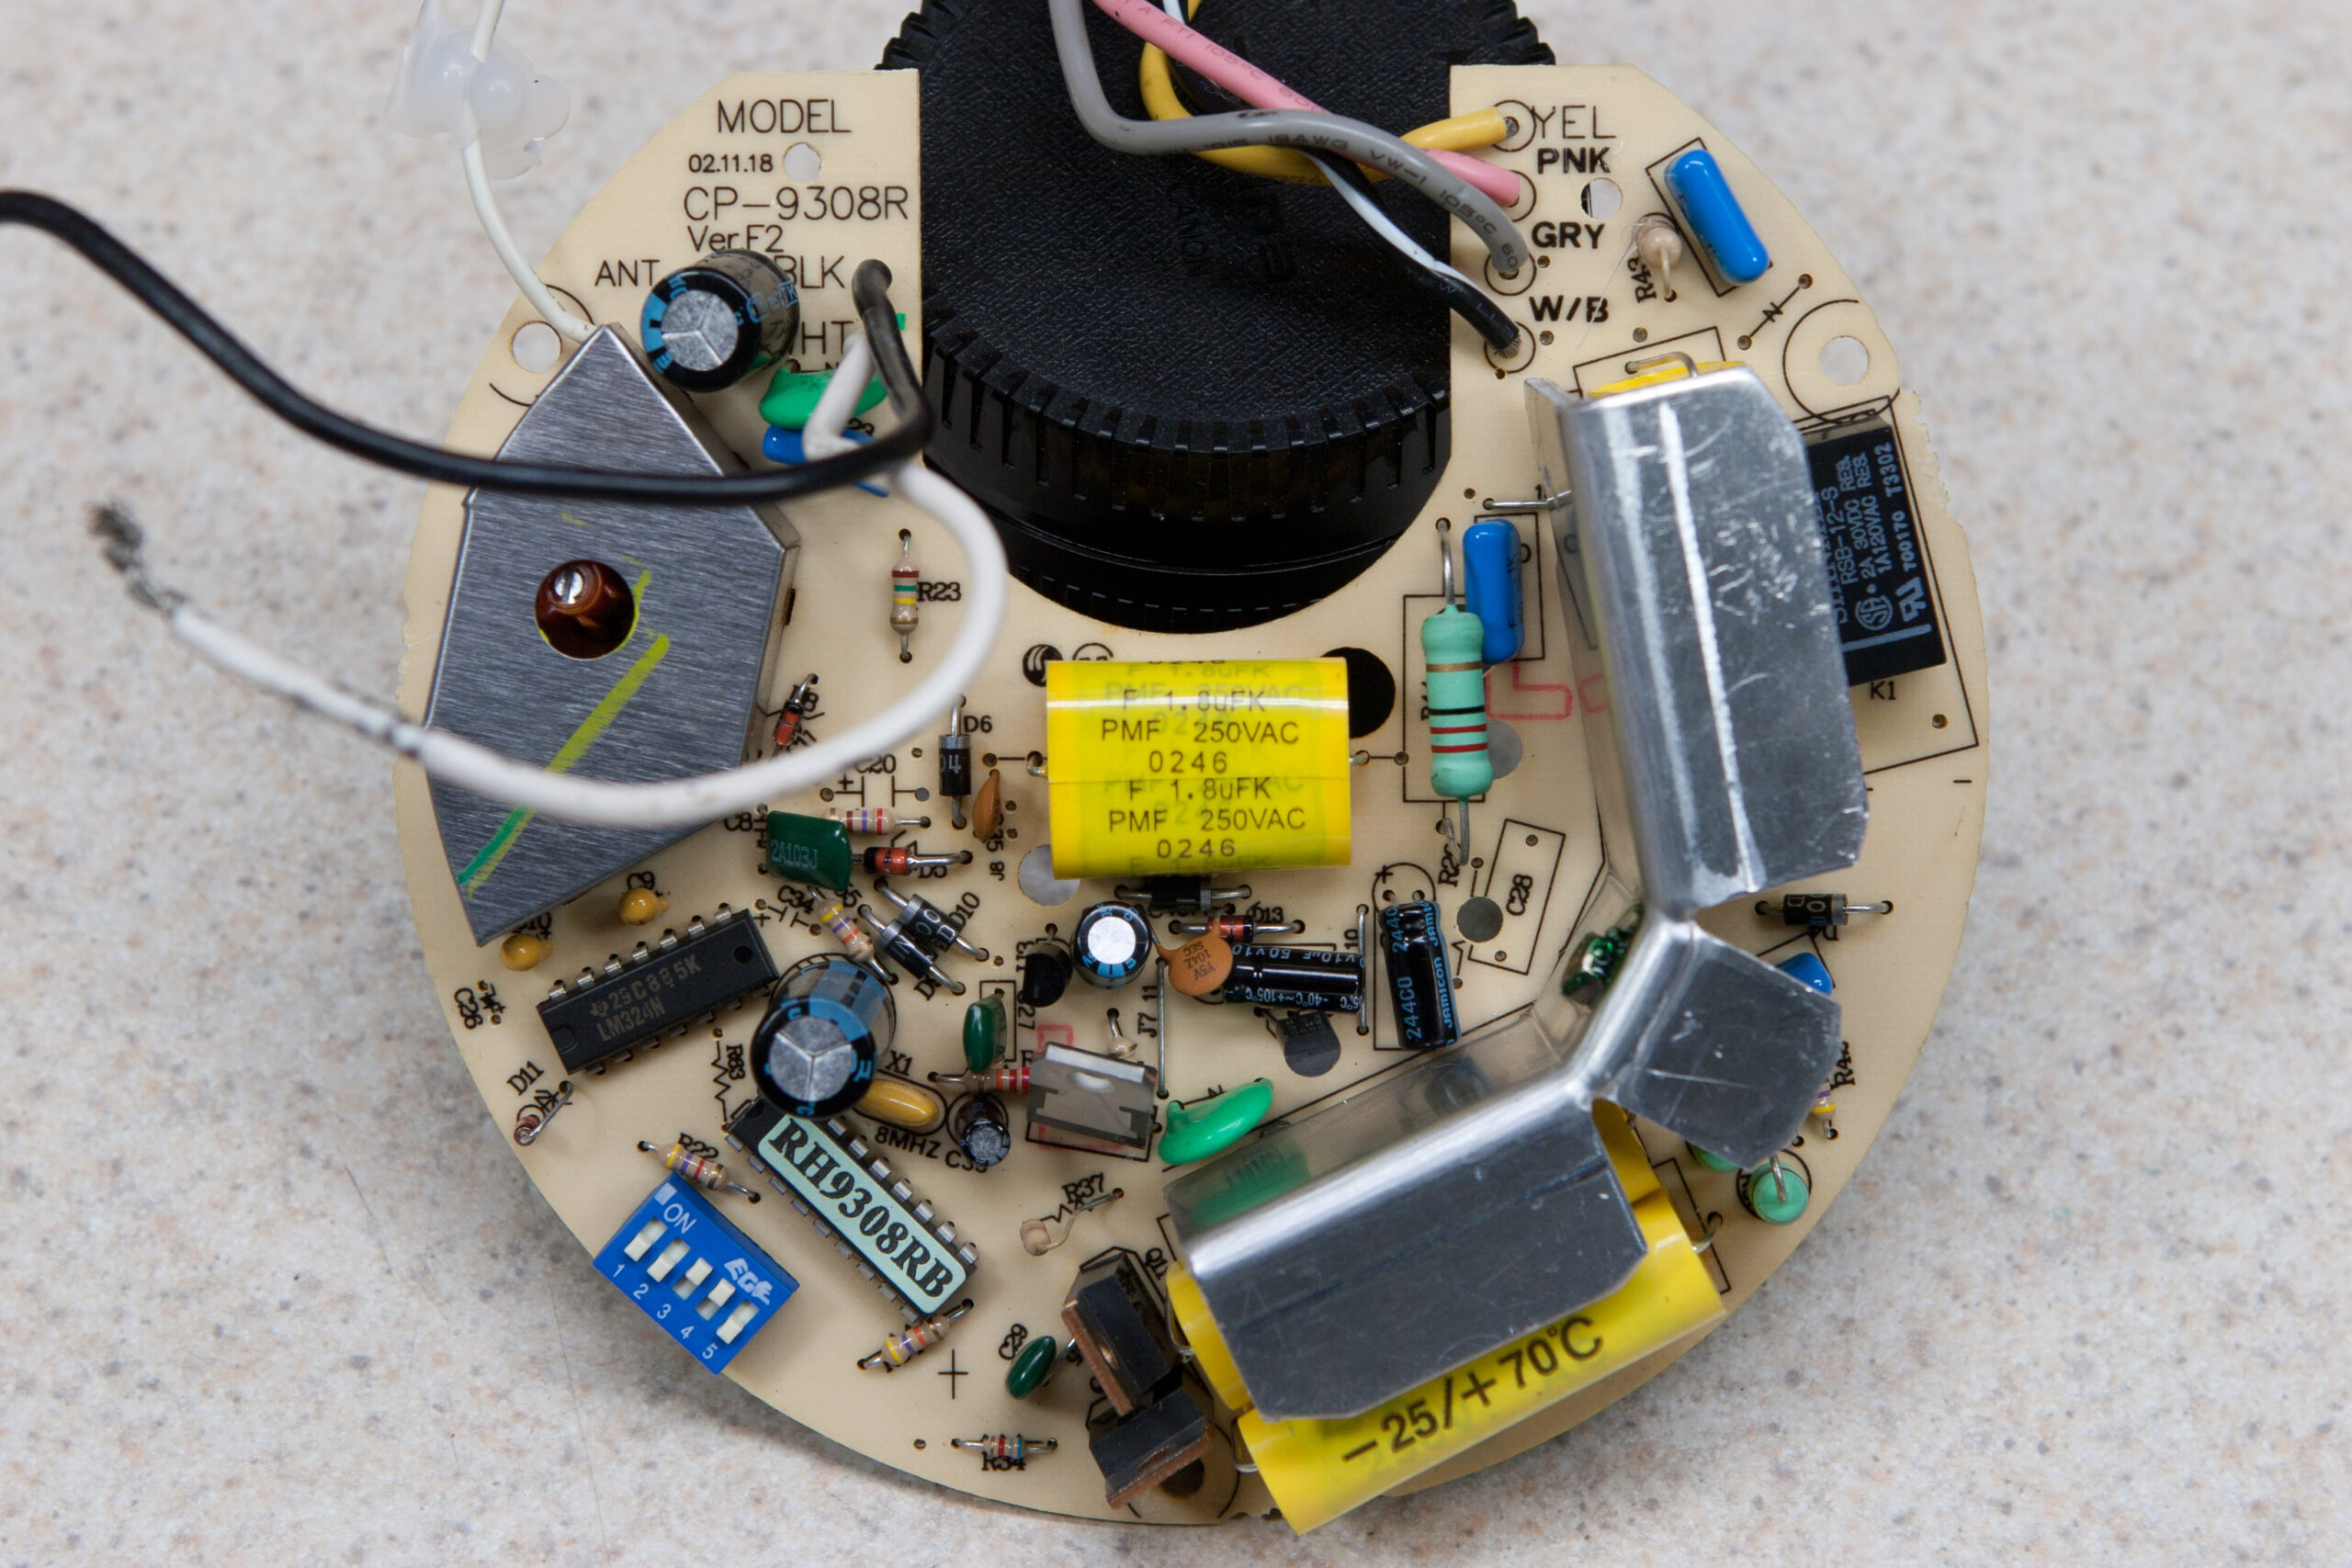
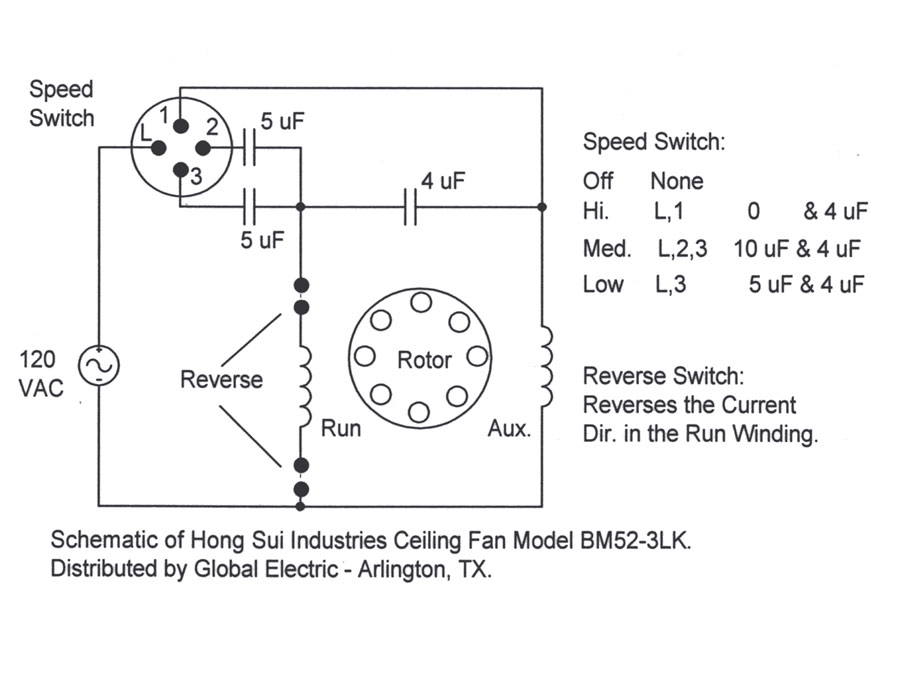
Frustrated by this I decided to bypass the wireless entirely and switch the unit to a typical fan/light dual switch setup on the wall. I figured that the light kit and fan motor itself were still fine so I set to work eliminating the failed fan control module. Having a spare dual-switch for the wall and a third (red) wire already between the electrical boxes made the house wiring part easy, but I still had some work to do modifying the fan. By reading Ken L. Klaser’s article Ceiling Fan Capacitor Solutions I was able to understand the basics of fan speed control, but this this schematic which he linked to was most helpful.

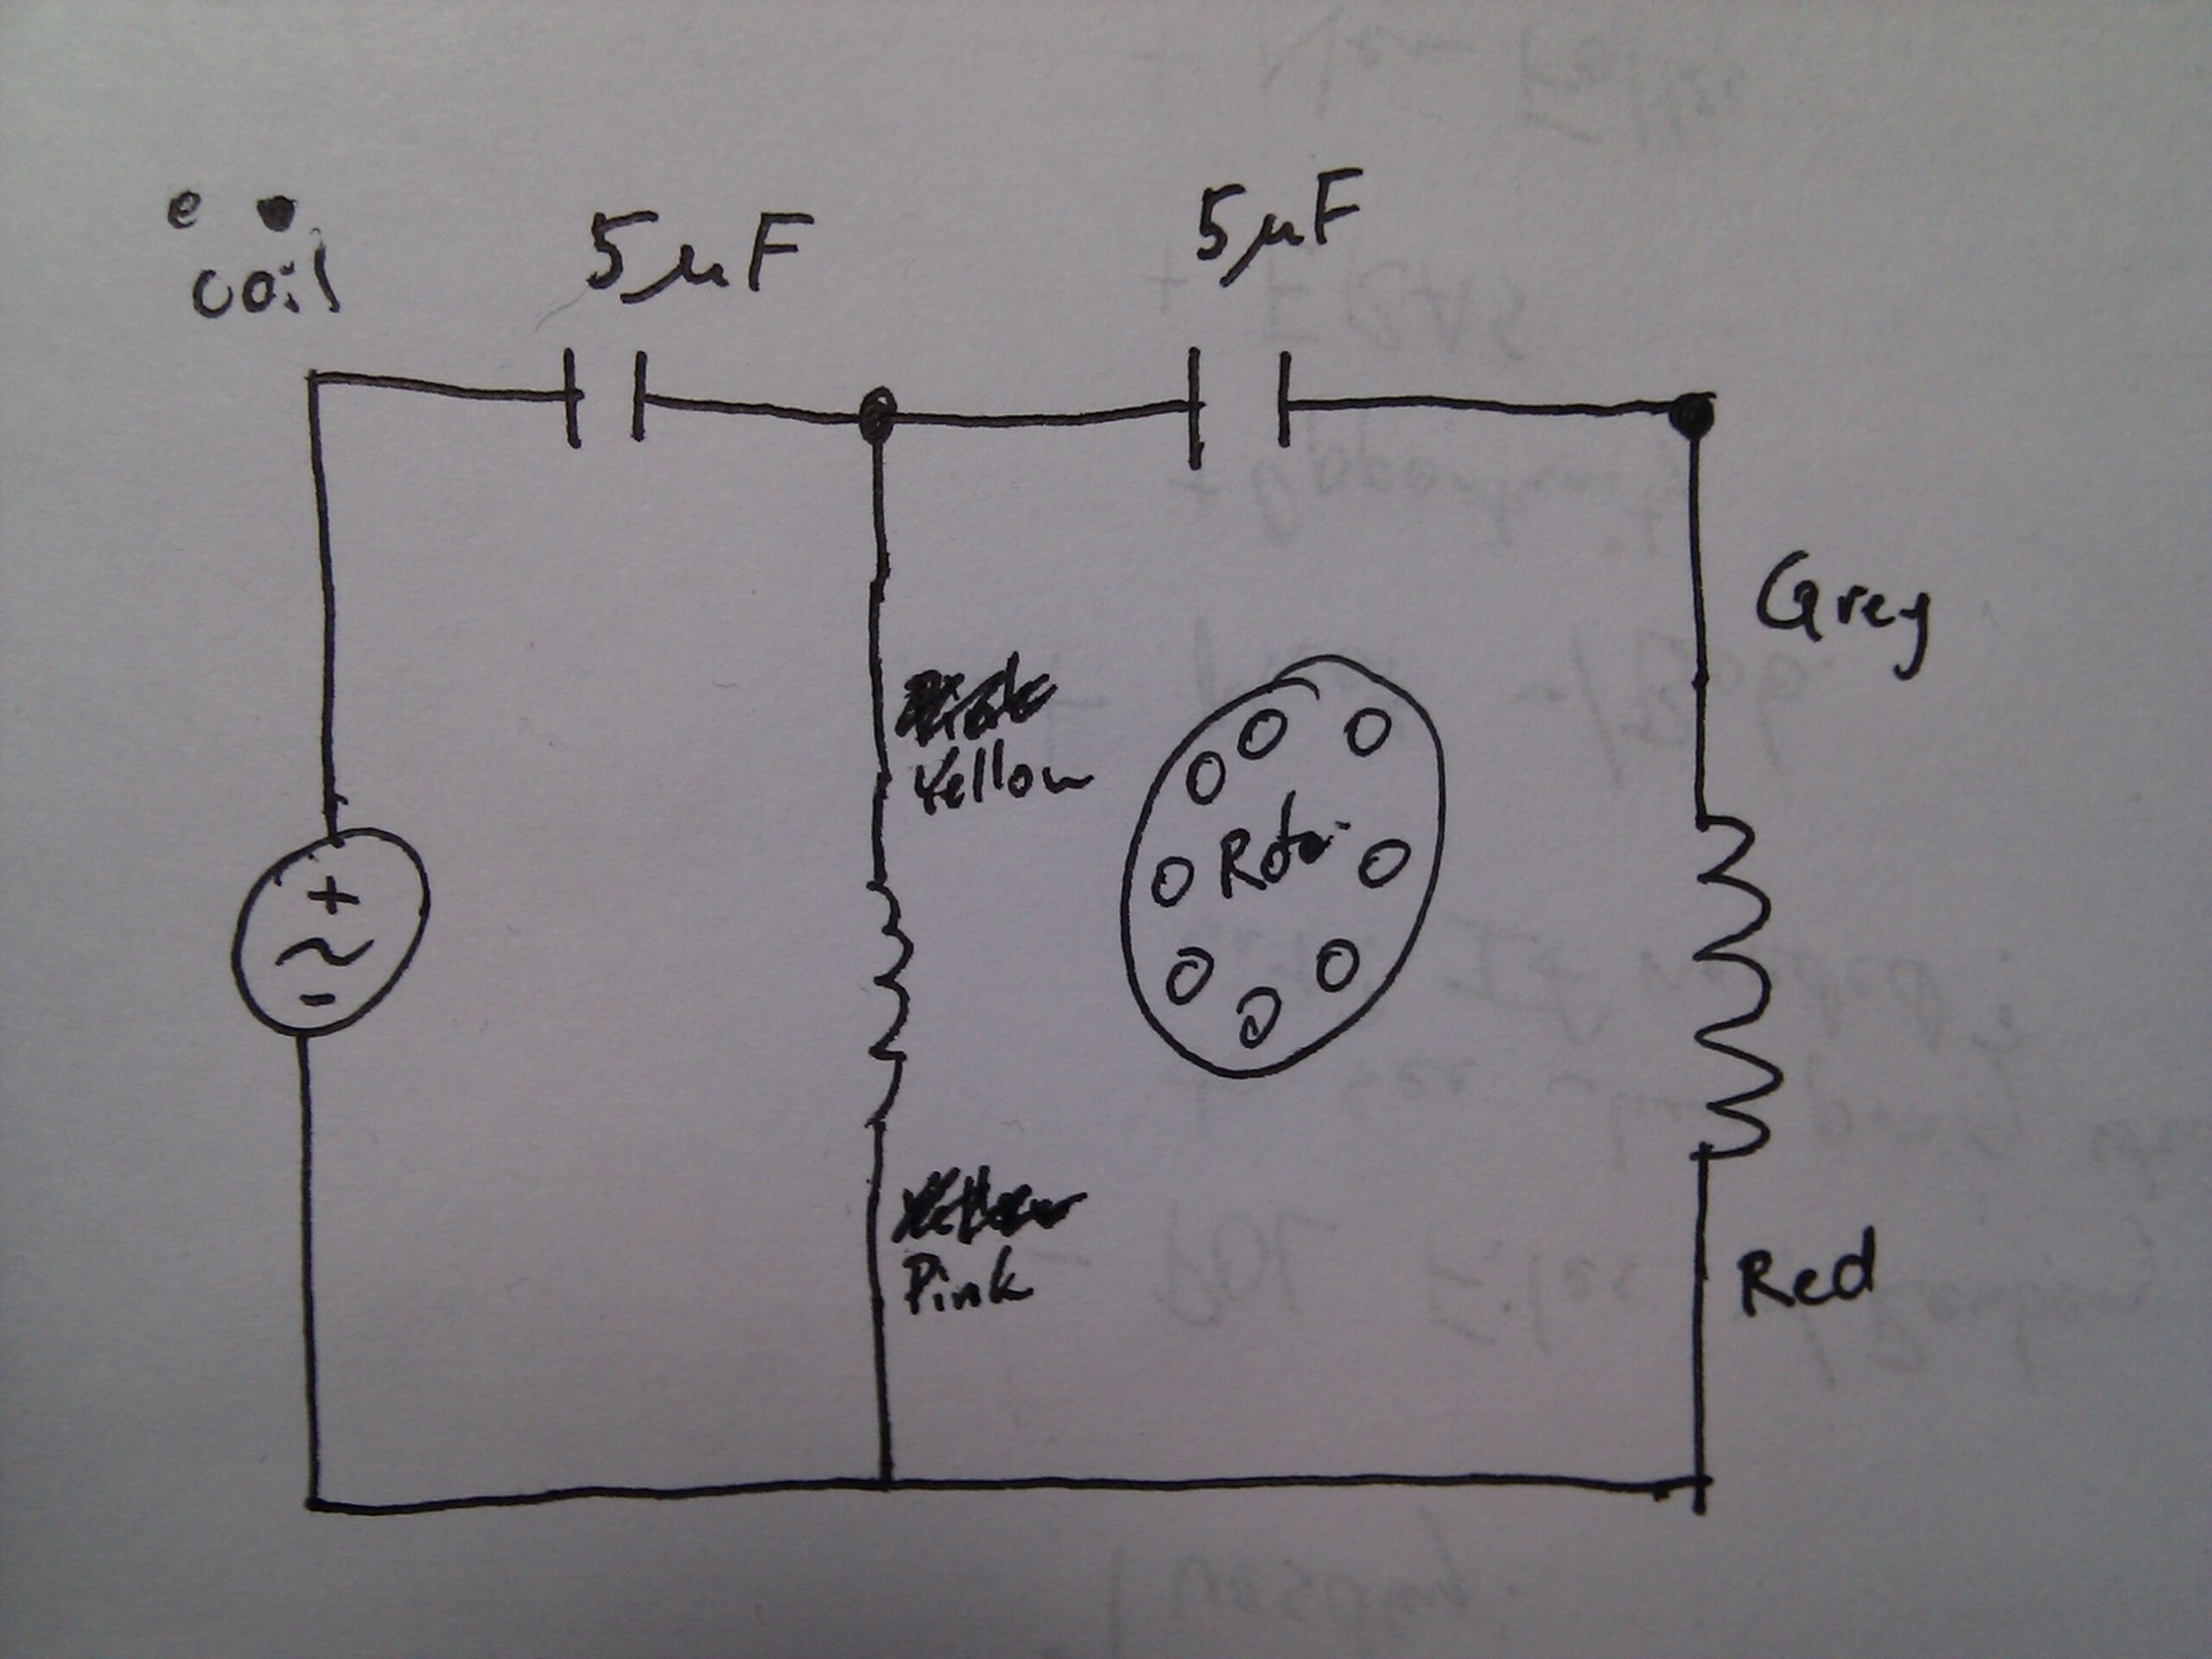
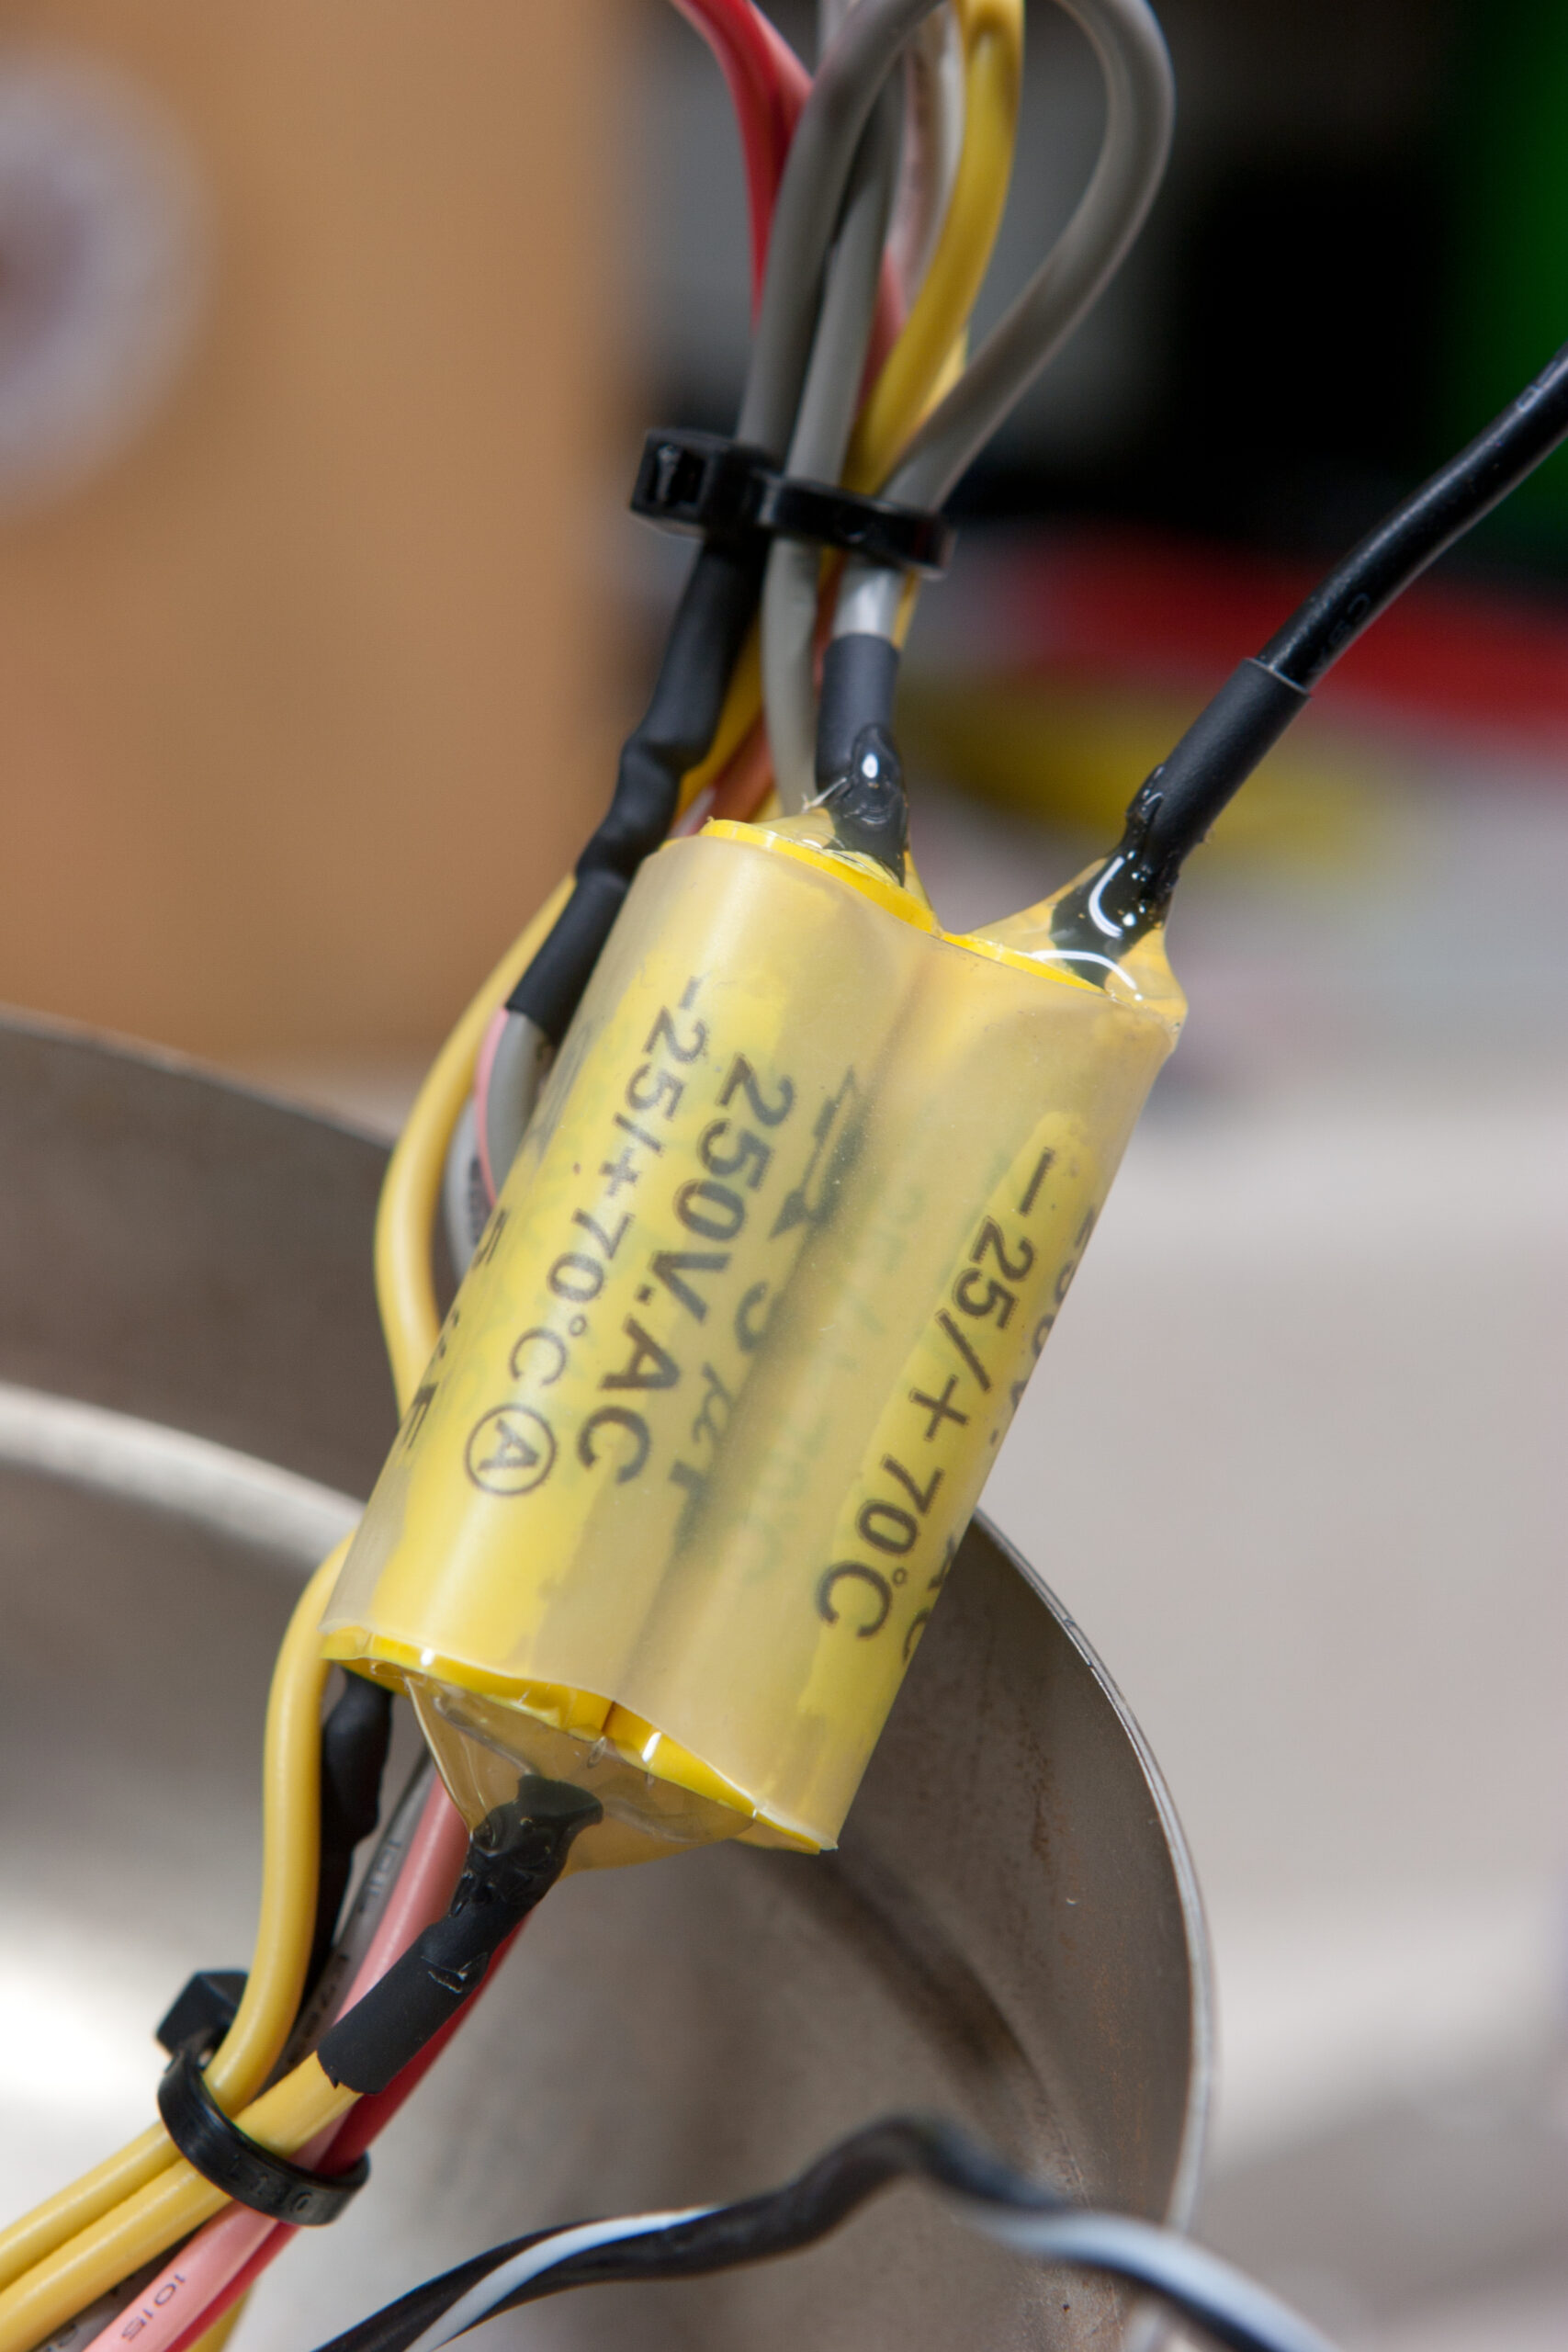
After looking over the control board to understand how the wires to the two coils in the motor were connected I came up with this schematic of how I felt the fan would be powered when set to run slow and in reverse. Removing the capacitors and building a test assembly showed that my initial thought was right, and this resulted in my building the assembly shown above. The fan now runs in reverse and on slow speed when powered and the wireless circuitry has found its place in the trash.

I could have purchased a new selector switch and capacitor assembly to have variable speeds and fitted both it and DPDT switch into the housing to offer the original control selection, but throughout its life the fan was almost exclusively used on low and in reverse, so I didn’t see the need. The fan also looks as it originally did with no new switches sticking out of the side or bits hanging off. I may add these selectors in the future if they are needed, but I don’t see that happening. Thus this was a $0 modification, costing only a few hours of time to learn something new and then redo the wiring.

(Yes, I realize that I should have used a longer piece of clear shrink tubing to better facilitate potting the ends. By the time I realized this I had most of the harness together and decided that simple stress relief and a bit of insulation should be sufficient.)

around the houseelectronicsmaking things

Video Ads in Angry Birds on Android

Angry Birds (Rovio’s Site), the extremely popular (and quite fun) physics / artillery / puzzle game, is only available in ad-supported format on Android. Initially I didn’t mind this, as the ads started out as simple banners taking up a small portion of the top of the screen. Within the past few days (perhaps after an update?) there are now video ads present in the game. One plays on game launch and then another will play every few levels.

While the video ads can be skipped I find the idea of them terribly irritating. They play sound even if the game itself has been muted and eat up bandwidth. I’d much rather pay for the game than have to see this crap in order to play, so I’ve uninstalled it.

UPDATE: Rovio has responded to the note that I send about this, and apparantly starting some time in 2001 it will be possible to pay to circumvent the ads in Angry Birds.

computerselectronics

Mercury Wetted Contact Relay

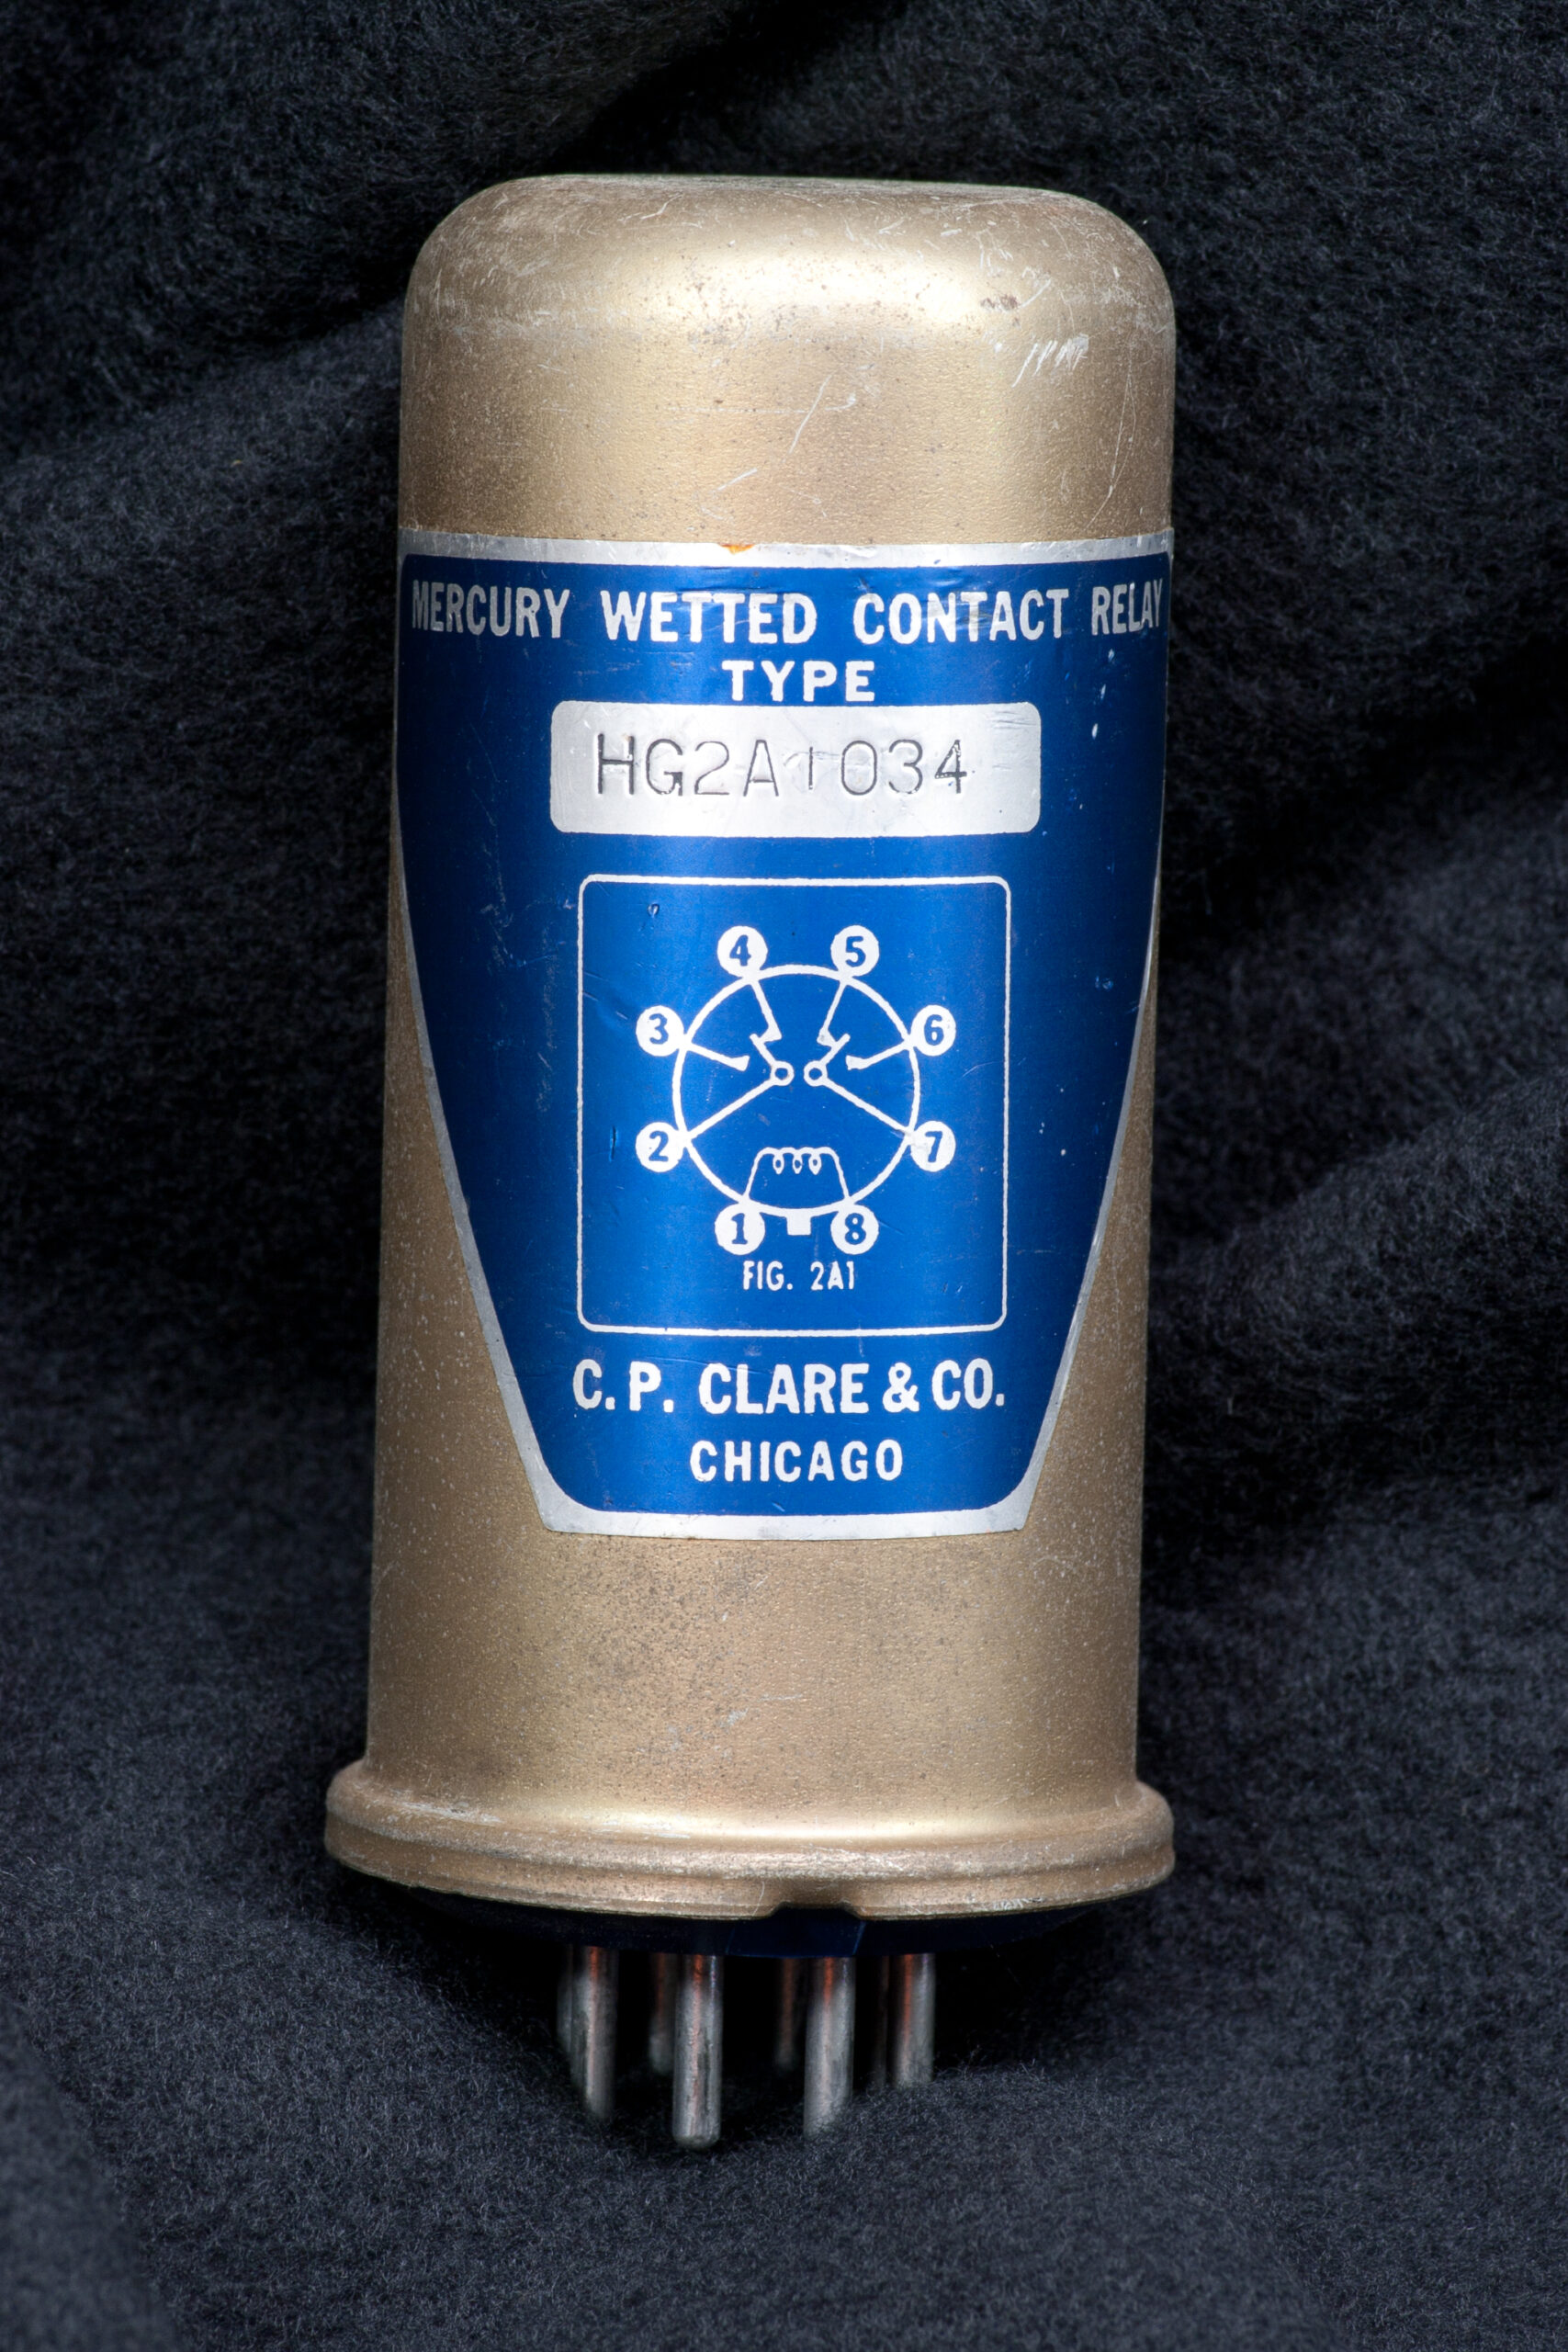
Would anyone like a type HG2A1034 mercury wetted contact relay? I acquired this a number of years ago when I had the chance to salvage electronics from the basement of my friend Brian’s deceased neighbor (photo gallery retired) and it comes with the (not pictured) socket.

More than just being a classic and likely very reliable DPDT relay, the metal canister sloshes with mercury when shaken!

electronicsfound things

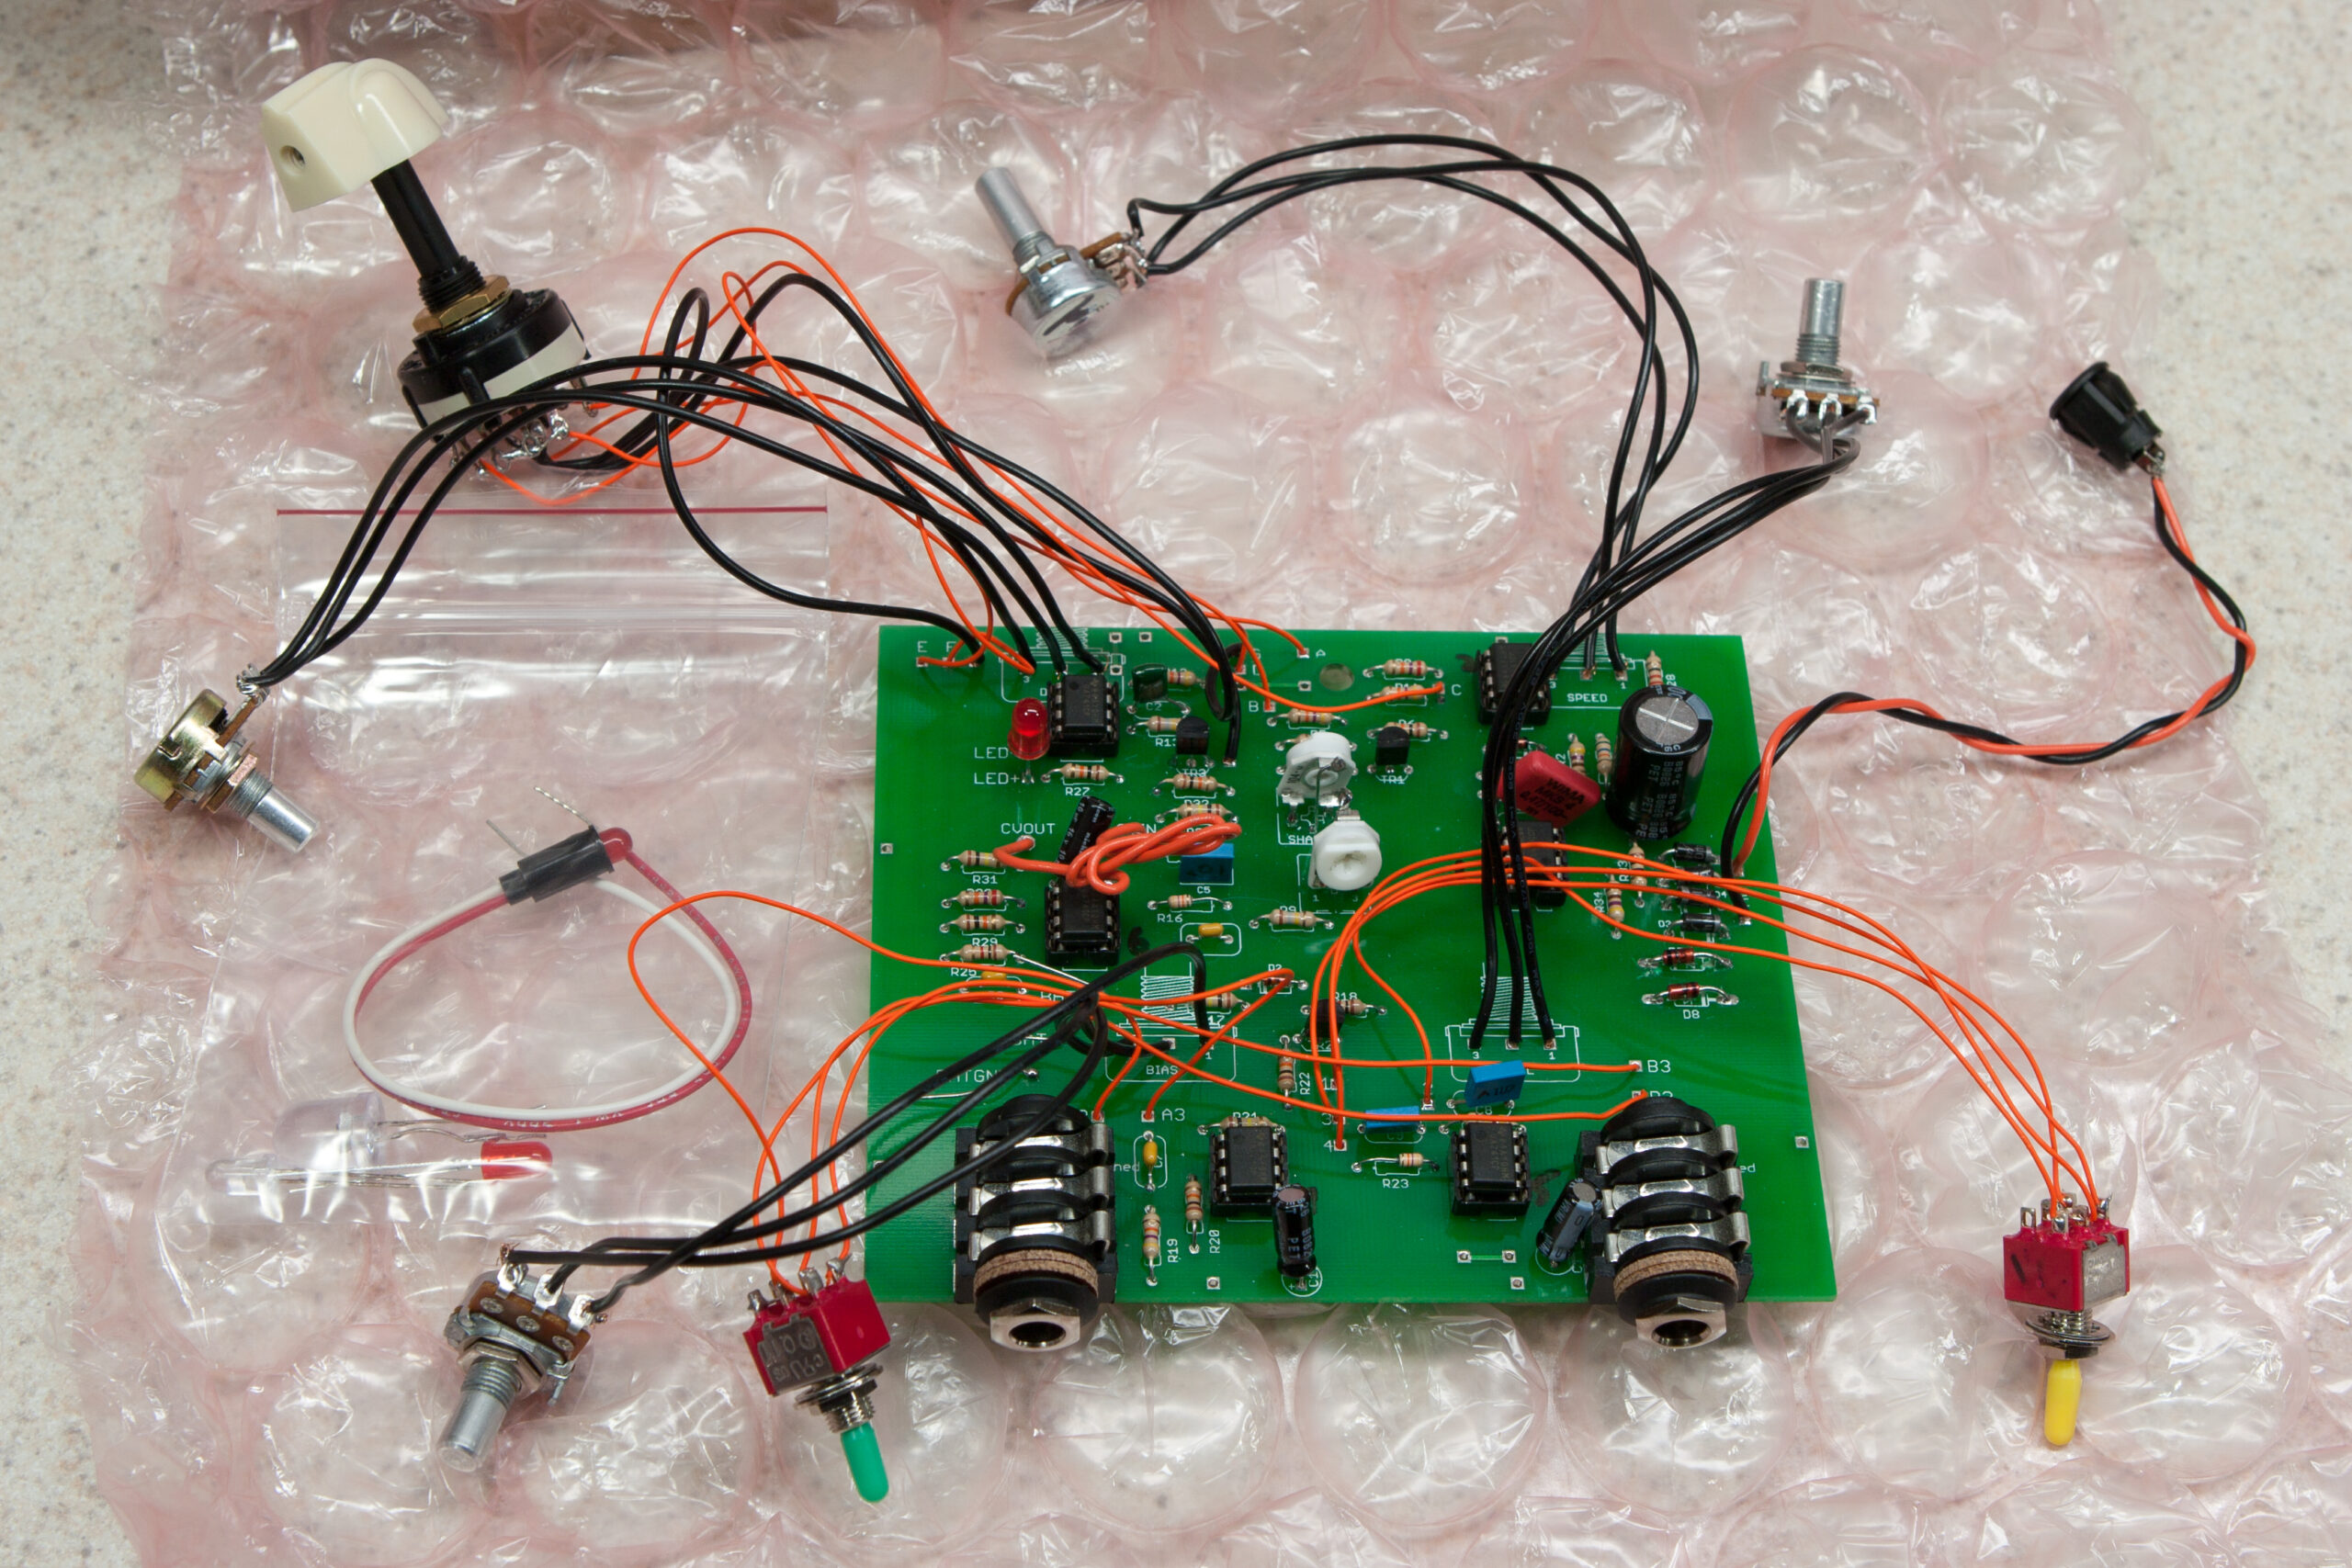
(Somewhat?) Fixing a Gristleizer

I recently did a bit of work on the original version of this kit, a clone of Chris Carter‘s original Gristlizer; an analogue effects unit used by Throbbing Gristle. This one seemed to have the wrong type of LED on it (a blinking one), fitted backward so it wouldn’t illuminate.

After replacing the LED I hooked it up to my x0xb0x and ran some audio through it. It definitely seemed to be doing something to the sound, but I’m not completely sure what. I’m also not sure how it’s supposed to sound, so I don’t know if it’s working quite right or not. Since it’s analog and a lot of the pots and switches ground through their chassis, it’s hard to say what it’s supposed to do until it’s all buttoned up in a case. I have a feeling that some (or all) of the op-amps on the board might be cooked, but I don’t know enough to tell right now. At <$1/ea it's also easiest to test them out by just replacing them. (After looking over this PCB and photos of the v2, I can't help but want to pull an SDrive NUXX with it and release a much-improved, CC-licensed PCB / BOM / end panel set. I think I could do a much cleaner job on the board design and incorporate very useful connector footprints that allow flying wires to be terminated at headers, direct-mount pots, etc. I’d also like to do an end panel set that fits right into a nicely solid off the shelf enclosure. This would make assembly easier for kit-builders easier resulting in far more elegant devices with less room for assembly mistakes. Maybe this will be a winter project.)

electronics

Driving Skill and CR2032 Batteries in Short Supply

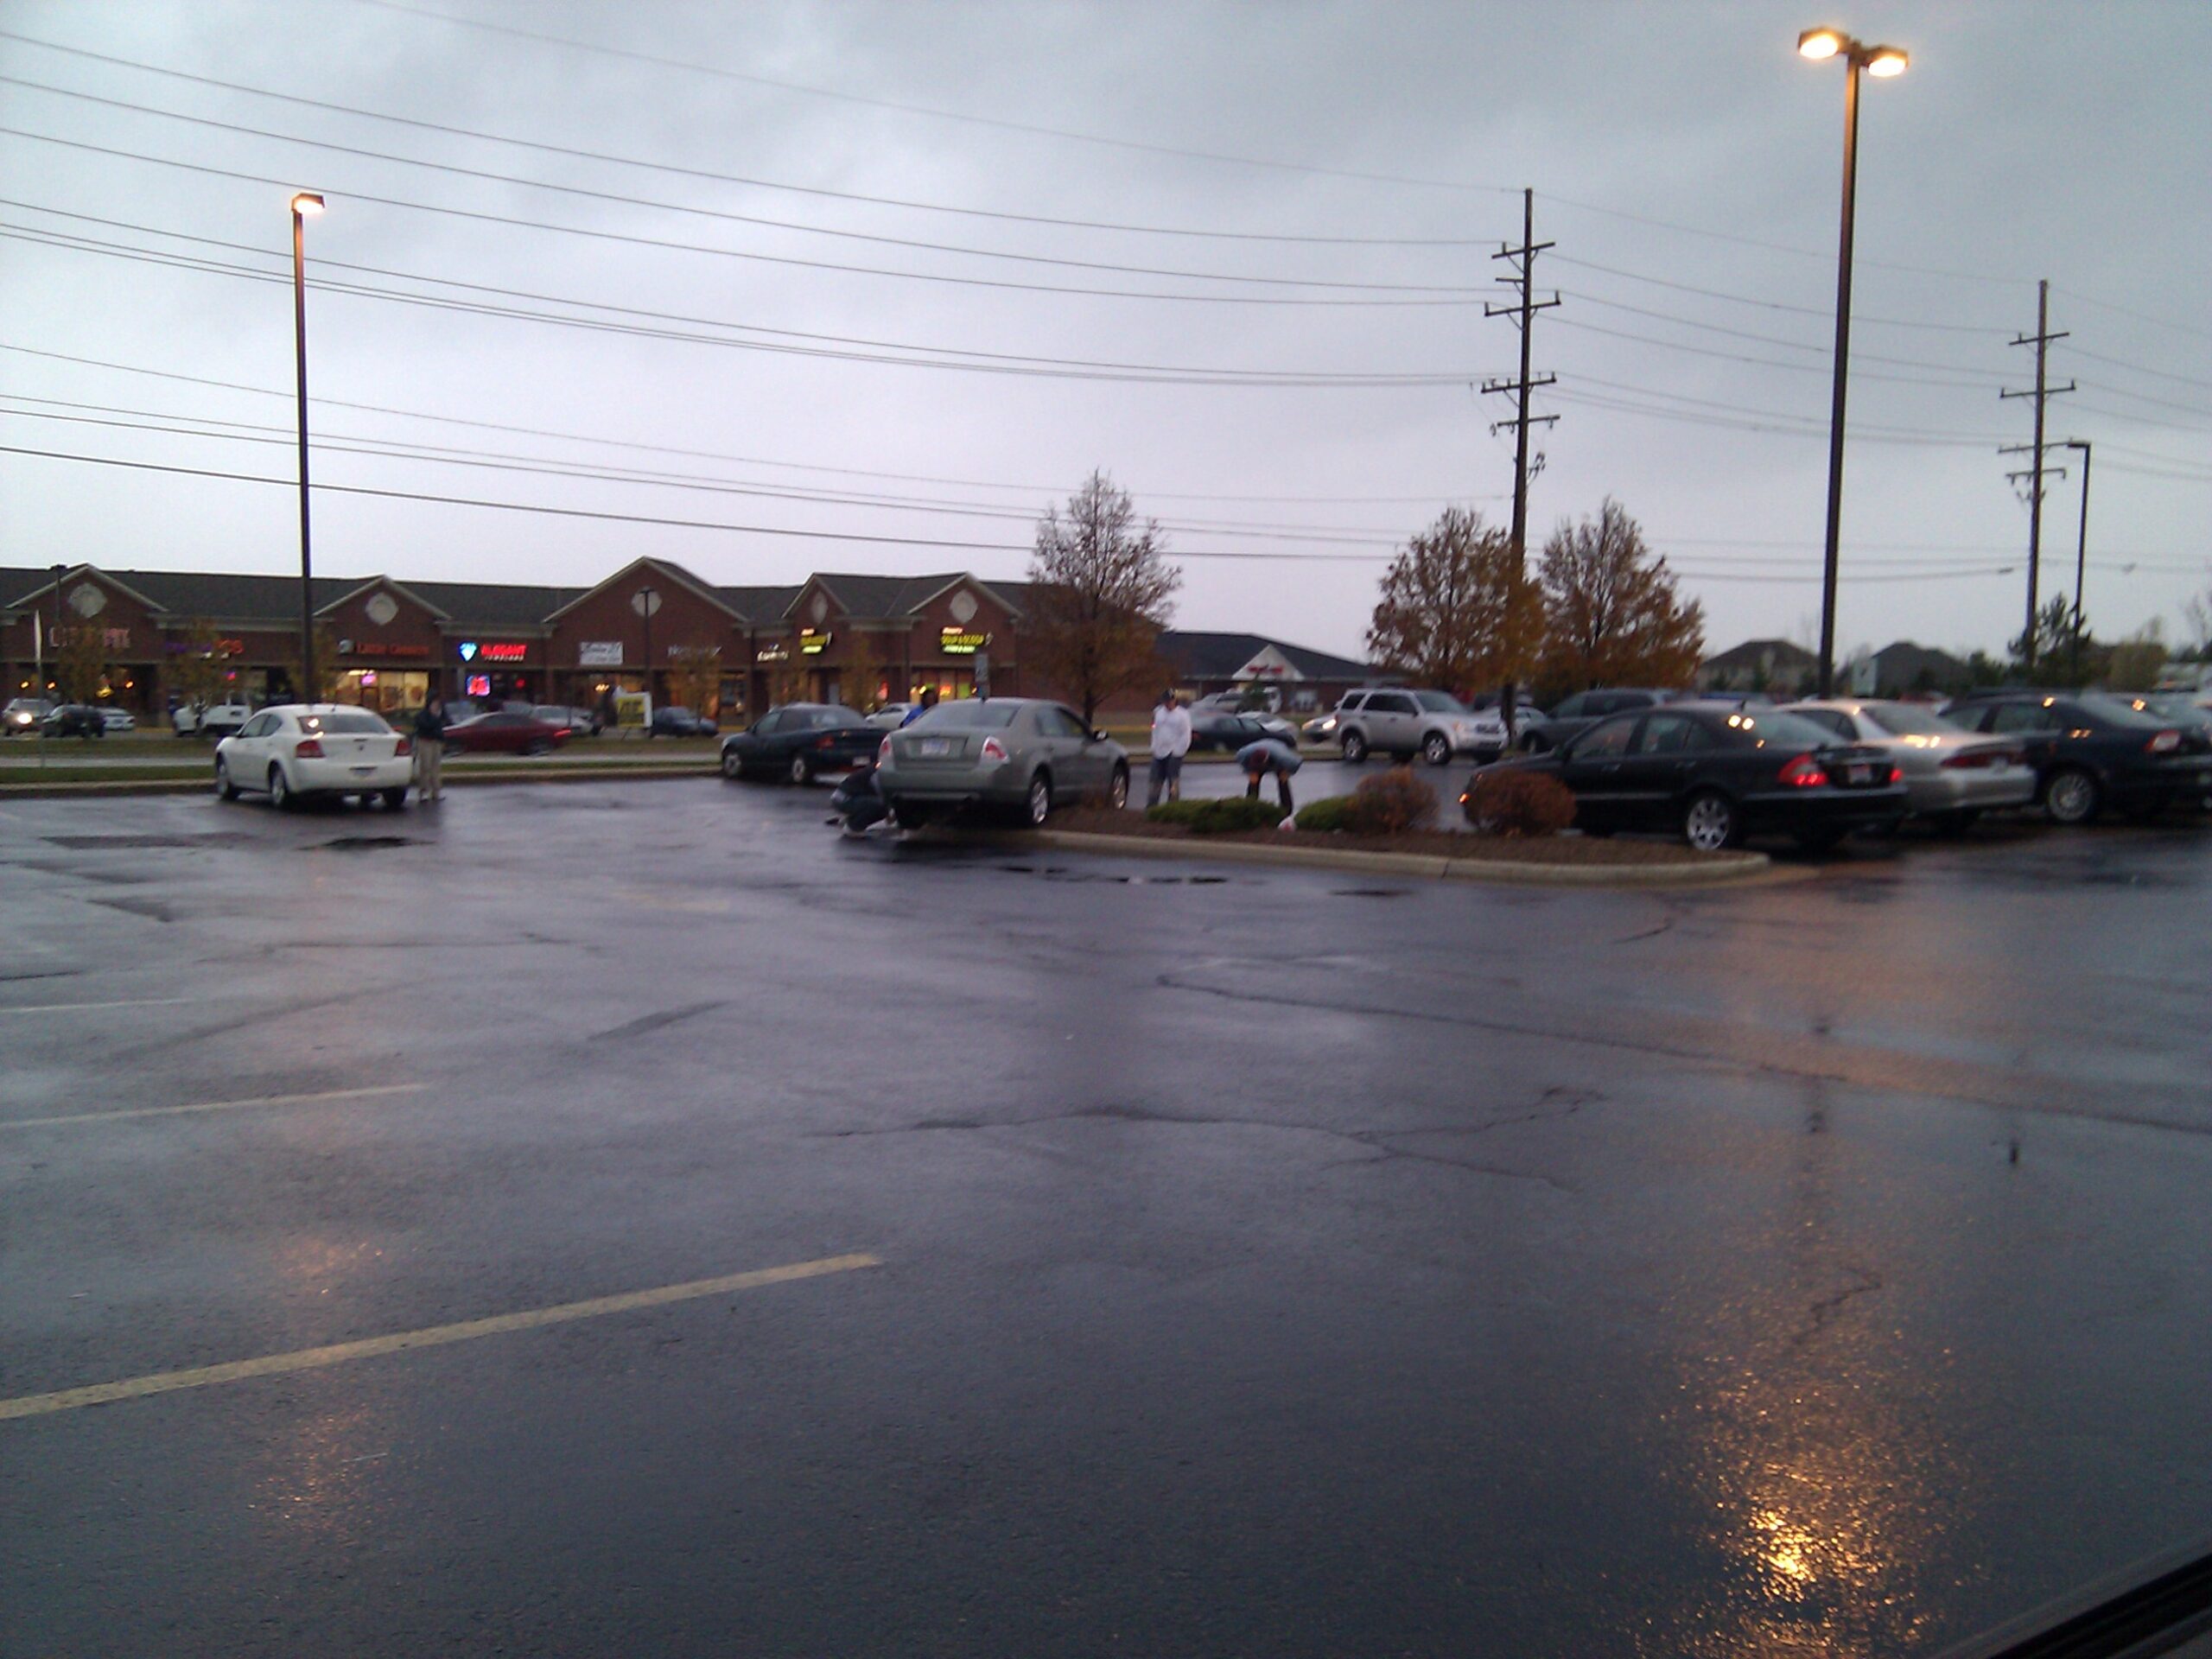
Admittedly this is a poor photo, but I didn’t want to get too close to the people working to remove this vehicle from the curb on which it was stuck. Apparently a driver with a handicapped license plate drove over the curb of the Walgreens at 21 Mile and Hayes, solidly lodging their car on a parking divider with the front (drive) wheels hanging in the air. Some people were working on removing it by jacking the rear of the vehicle up in the air to try and make the front wheels contact the ground.

I’d come across this scene while stopping in search of CR2032 batteries, as the local Target and Meijer are both sold out. I can only surmise that there is either a supply issue or there is some hot new consumer device which requires them.

automotiveelectronics

Replacement NiteRider Pro 1400 Extension Cable

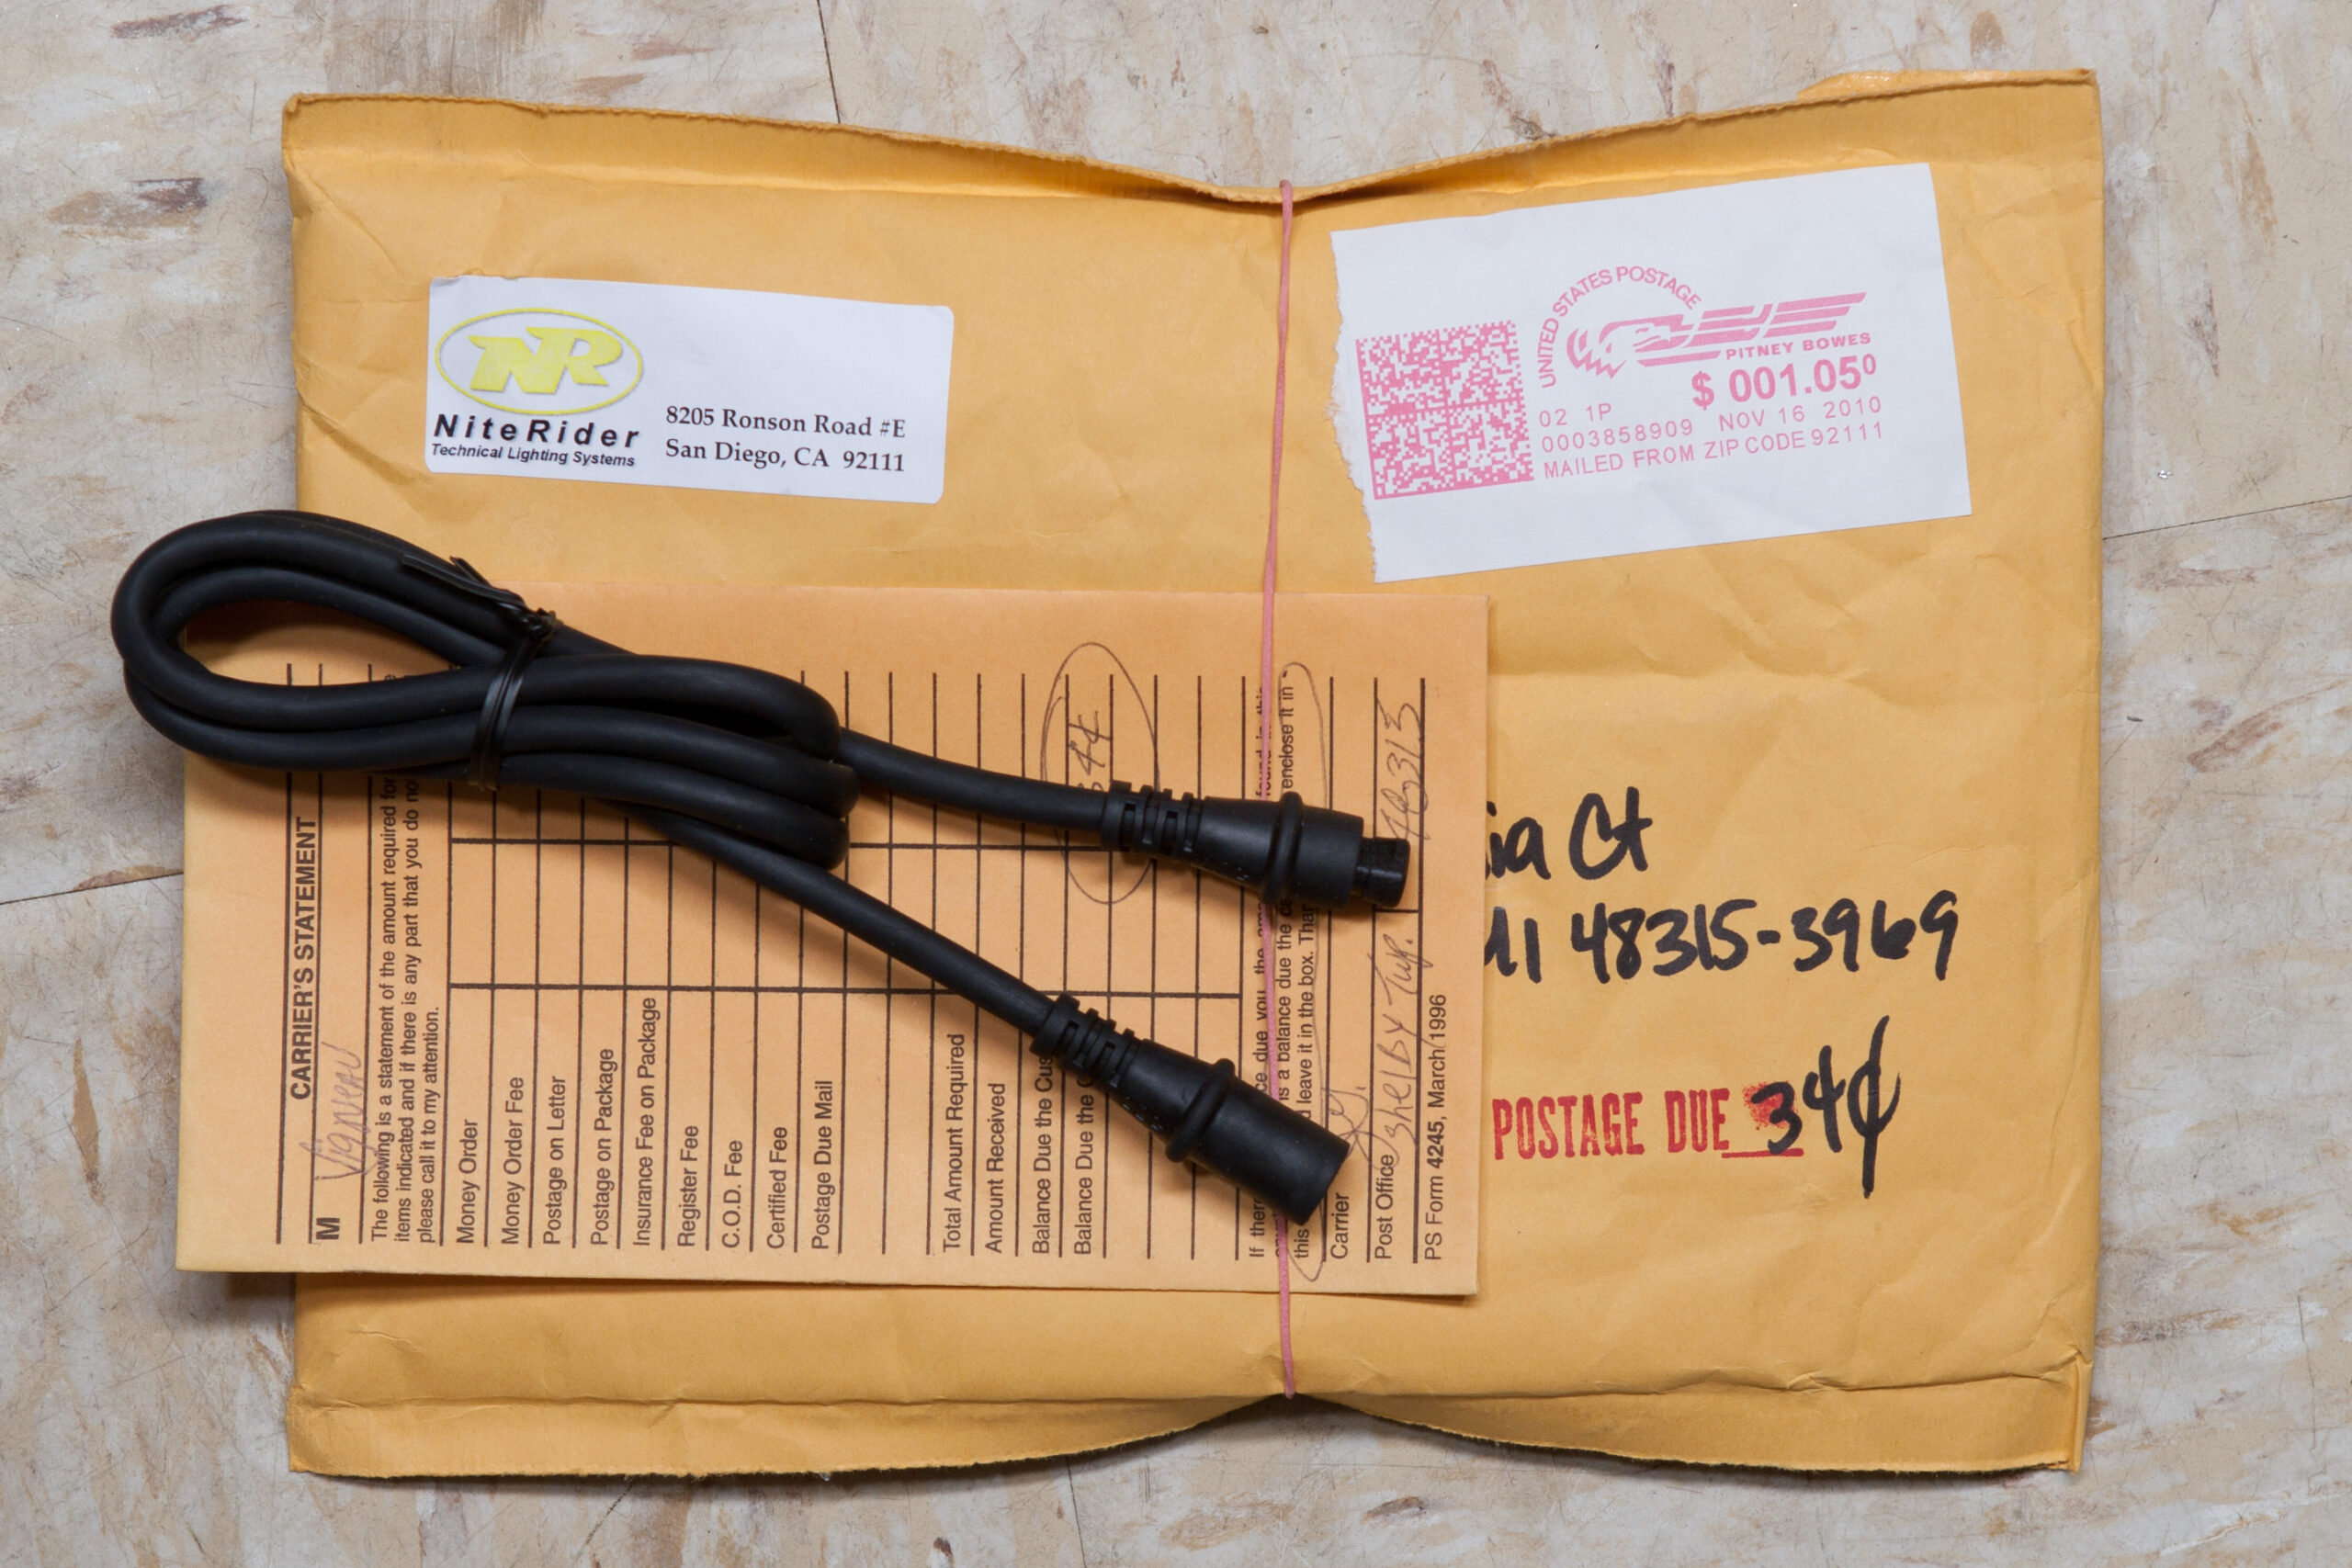
After contacting NiteRider about the ill-fitting extension cable which shipped with my Pro 1400 they sent a replacement. This one fits much, much better as it’s actually the right cable. The textured indicator will also make it easier to make blind connections, which are exactly what I have to do when getting ready to ride since one connection is made behind my head.

Amusingly, the package came with 34¢ of postage due, which I’ll happily pay to the mailman. More amusingly the postage due envelope (a 1996 vintage design) is stuck shut, likely from having sat around in a mail truck for years. I think I’ll just tape a quarter and dime to the envelope and see what happens to the extra penny.

acquired thingscyclingelectronicsfinances

NiteRider Pro Docking Station Internals

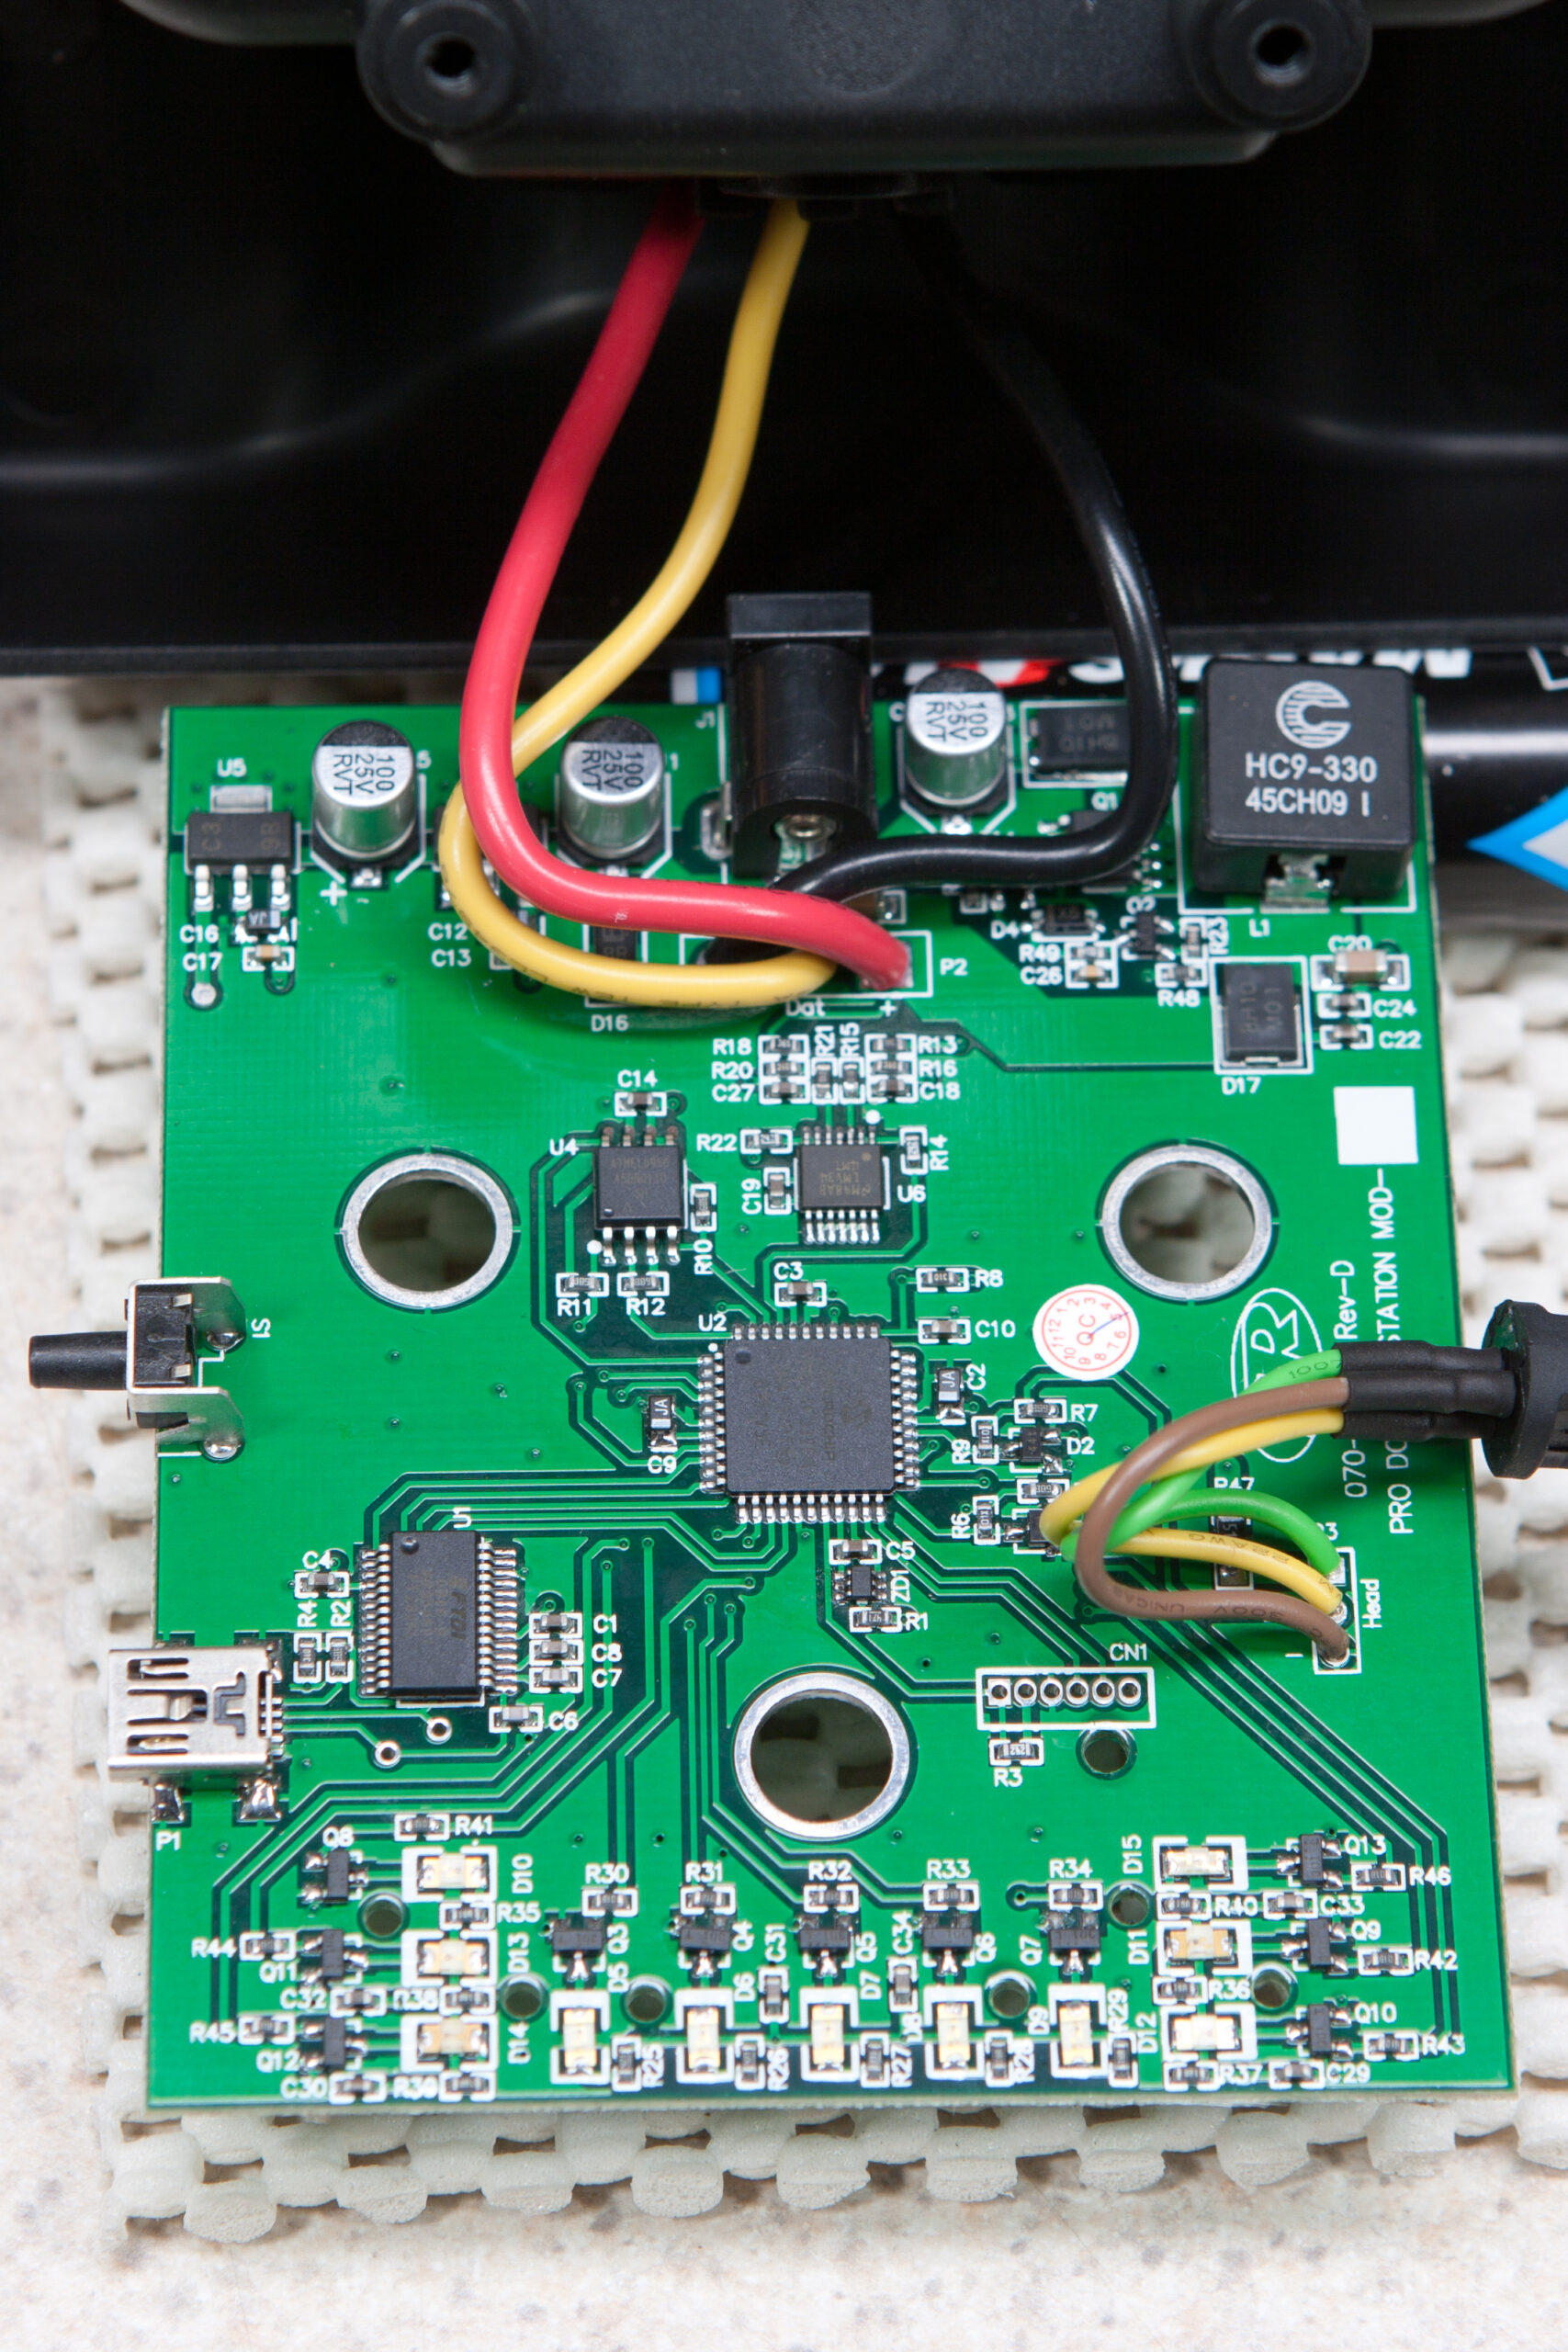
This is the inside of the NiteRider Pro Docking Station (a dual-purpose battery charger / headlight programmer) that came with the NiteRider Pro 1400. While using the programming software to set up the brightness settings that I wanted (to avoid another way too bright ride) I noticed that the base station appeared as USB VID 0403 and PID 6001, FTDI’s defaults. This had me a bit curious, so I opened it up to look around.

Beyond the charging circuitry, LEDs, lightpipes, custom connectors, and an unlabeled button (reset?) I found an FTDI FT232RL (U1), Microchip PIC PIC24J32GA004 (U2), Atmel AT45DB011 (U4), and a National Semiconductor LMV344MT (U6). I made no effort to trace out the board, but it’s pretty easy to tell that the FT232RL is used so the NiteRider D.I.Y. software can just talk to a serial port which will make it very portable to different OSs.

Perhaps later I’ll try and figure out just what the software sends to the base station for programming the light. Maybe then I could work up a Mac version of the program.

cyclingelectronics

NiteRider TriNewt Wireless For Sale

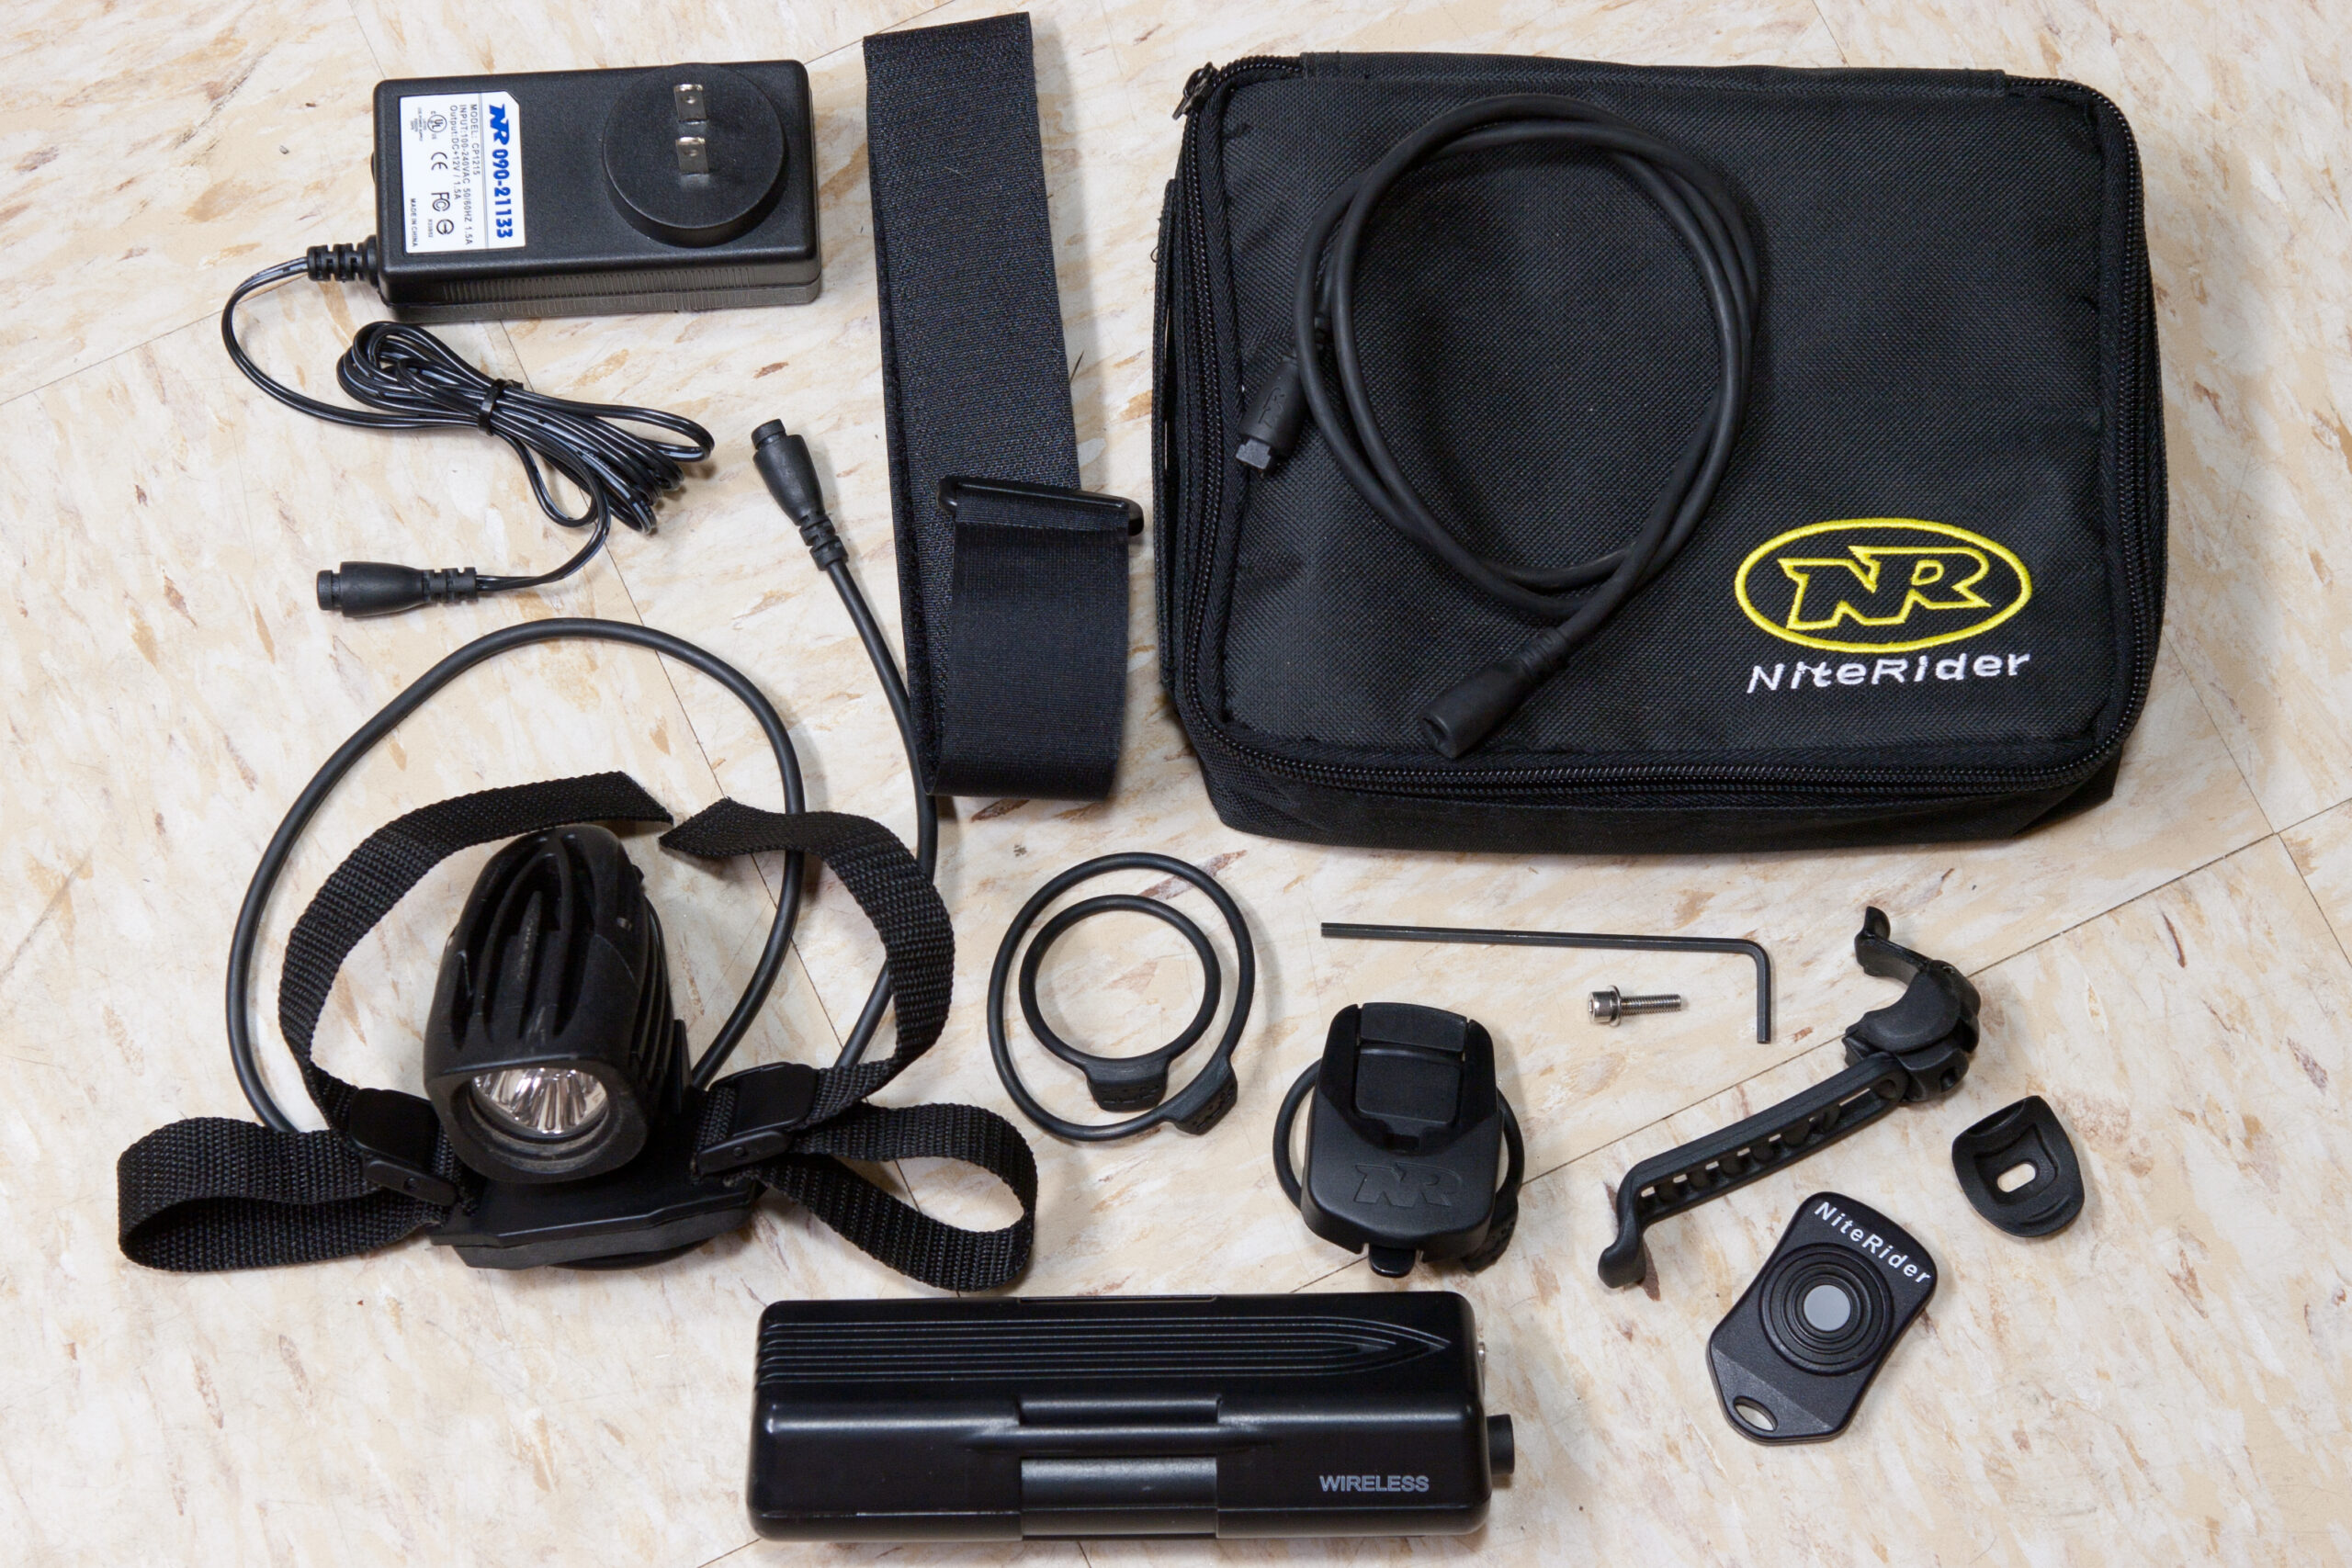
Since I’ve acquired a NiteRider Pro 1400 my TriNewt Wireless (originally mentioned here) is up for sale. This light and battery are in great shape, I’m just selling it because I no longer have a need for it. It’s a great light for trail riding year round and had I not picked up a brighter light I’d still be using it.

This is the complete TriNewt Wireless package, which includes:

· Light Unit
· Battery
· Charger
· Helmet Mount
· Handle Bar Mount for Light
· Handle Bar Mount for Remote Control
· Frame Mounting Strap for Battery
· NiteRider Carrying Case

Asking price is $200, and I will ship domestically and internationally at buyer’s expense. Email me at c0nsumer@nuxx.net if you are interested.

cyclingelectronicsfinances

NiteRider Pro 1400 Cable Keying Indicator Inconsistancies

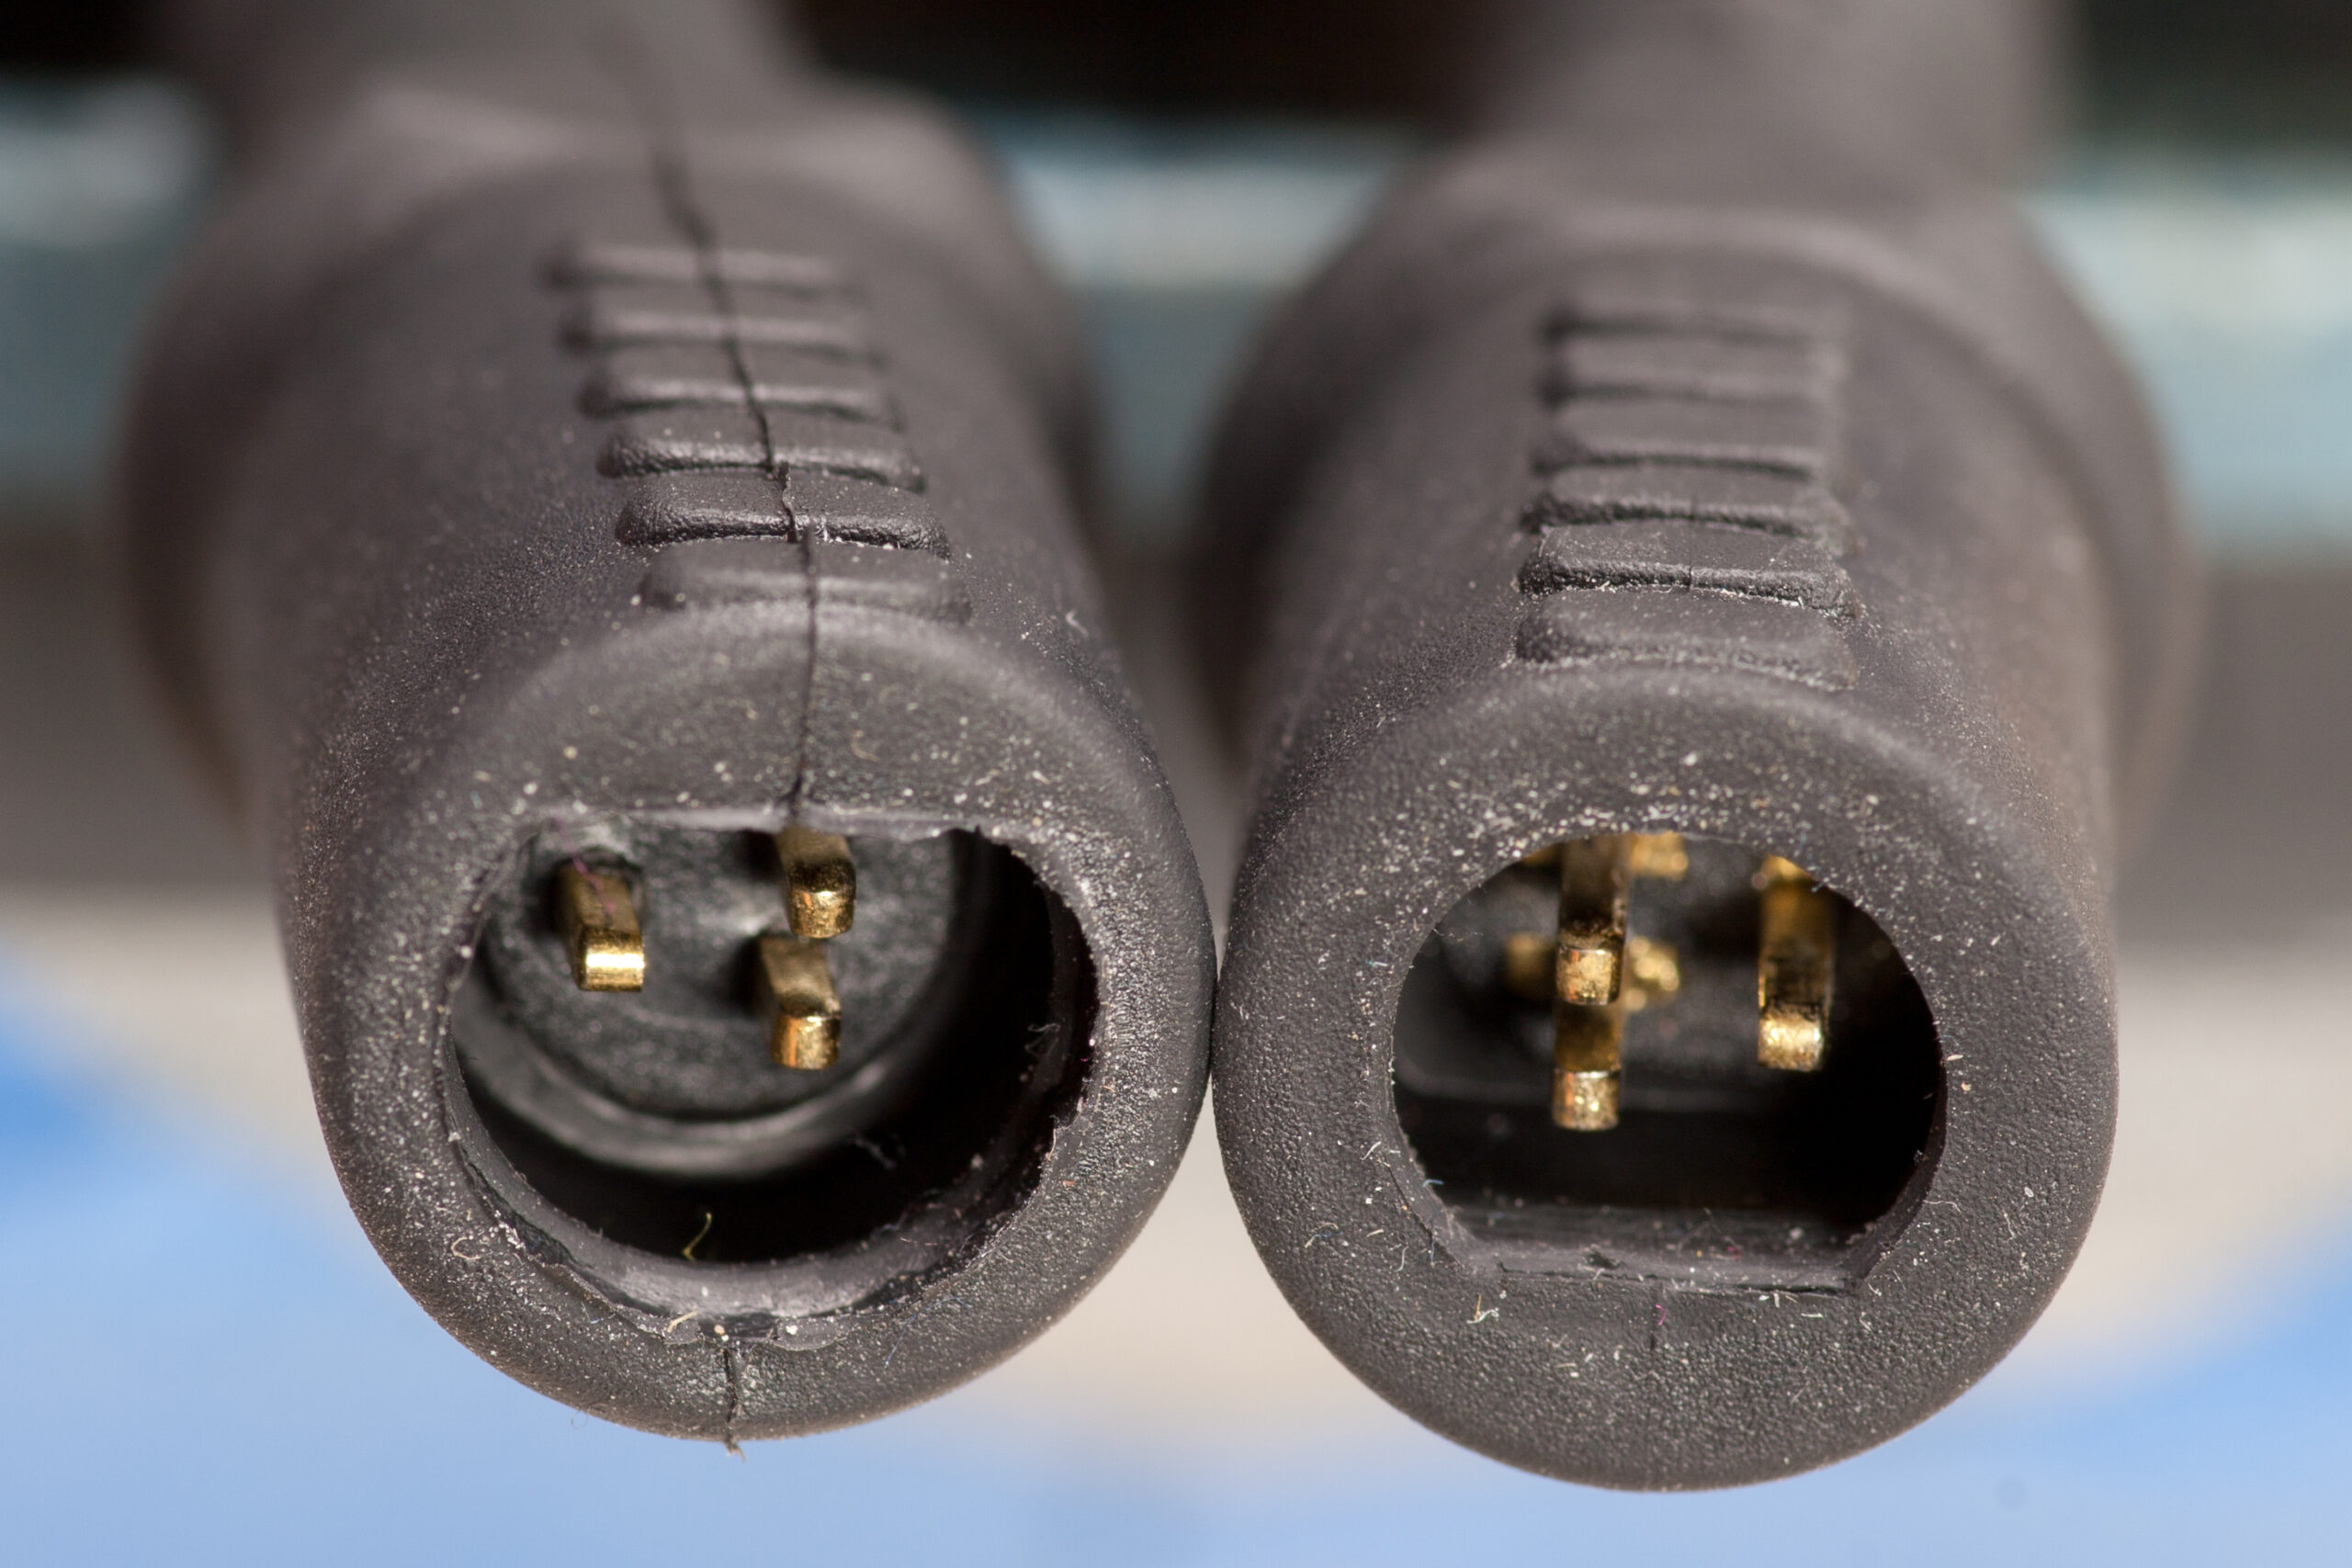
Today I received a NiteRider Pro 1400 (more on this later), a new bike light for trail riding. NiteRider lights typically have a textured indicator on the connectors to make blind connections easier, such as when plugging in the light behind one’s head or while in the dark. When setting up this unit I noticed that the cables on the light and battery pack have this textured piece opposite the flat side of the connector, but the extension cable (so that the light can be helmet mounted) has it on the flat side of the connector.

This inconsistency means that when using the extension cable one has to be sure that one cable has the texture on one side and the other is the opposite. I’ve contacted NiteRider via their contact form and hopefully I’ll hear back from them soon.

Pictured on the left above is the extension cable, which has the textured keying indicator on the same side as the flat part of the keyed connector. The battery pack’s cable (on the right) and the light’s cable (not shown) has it on the left. It only seems logical to me that the keying indicator would be on the flat side which is opposite how the Pro 1400’s light and battery pack are set up. It’ll be interesting to see what NiteRider’s response is. Maybe this first run of Pro 1400s (it is a newer product, after all) have their keying indicators inadvertently backwards?

UPDATE: NiteRider has sent me the proper, and much better fitting cable as a replacement. Per Davilynn over at NiteRider:

Some of the systems were packaged with our older extension cords by mistake.

acquired thingscyclingelectronics

Ceiling Fan Light Working Again

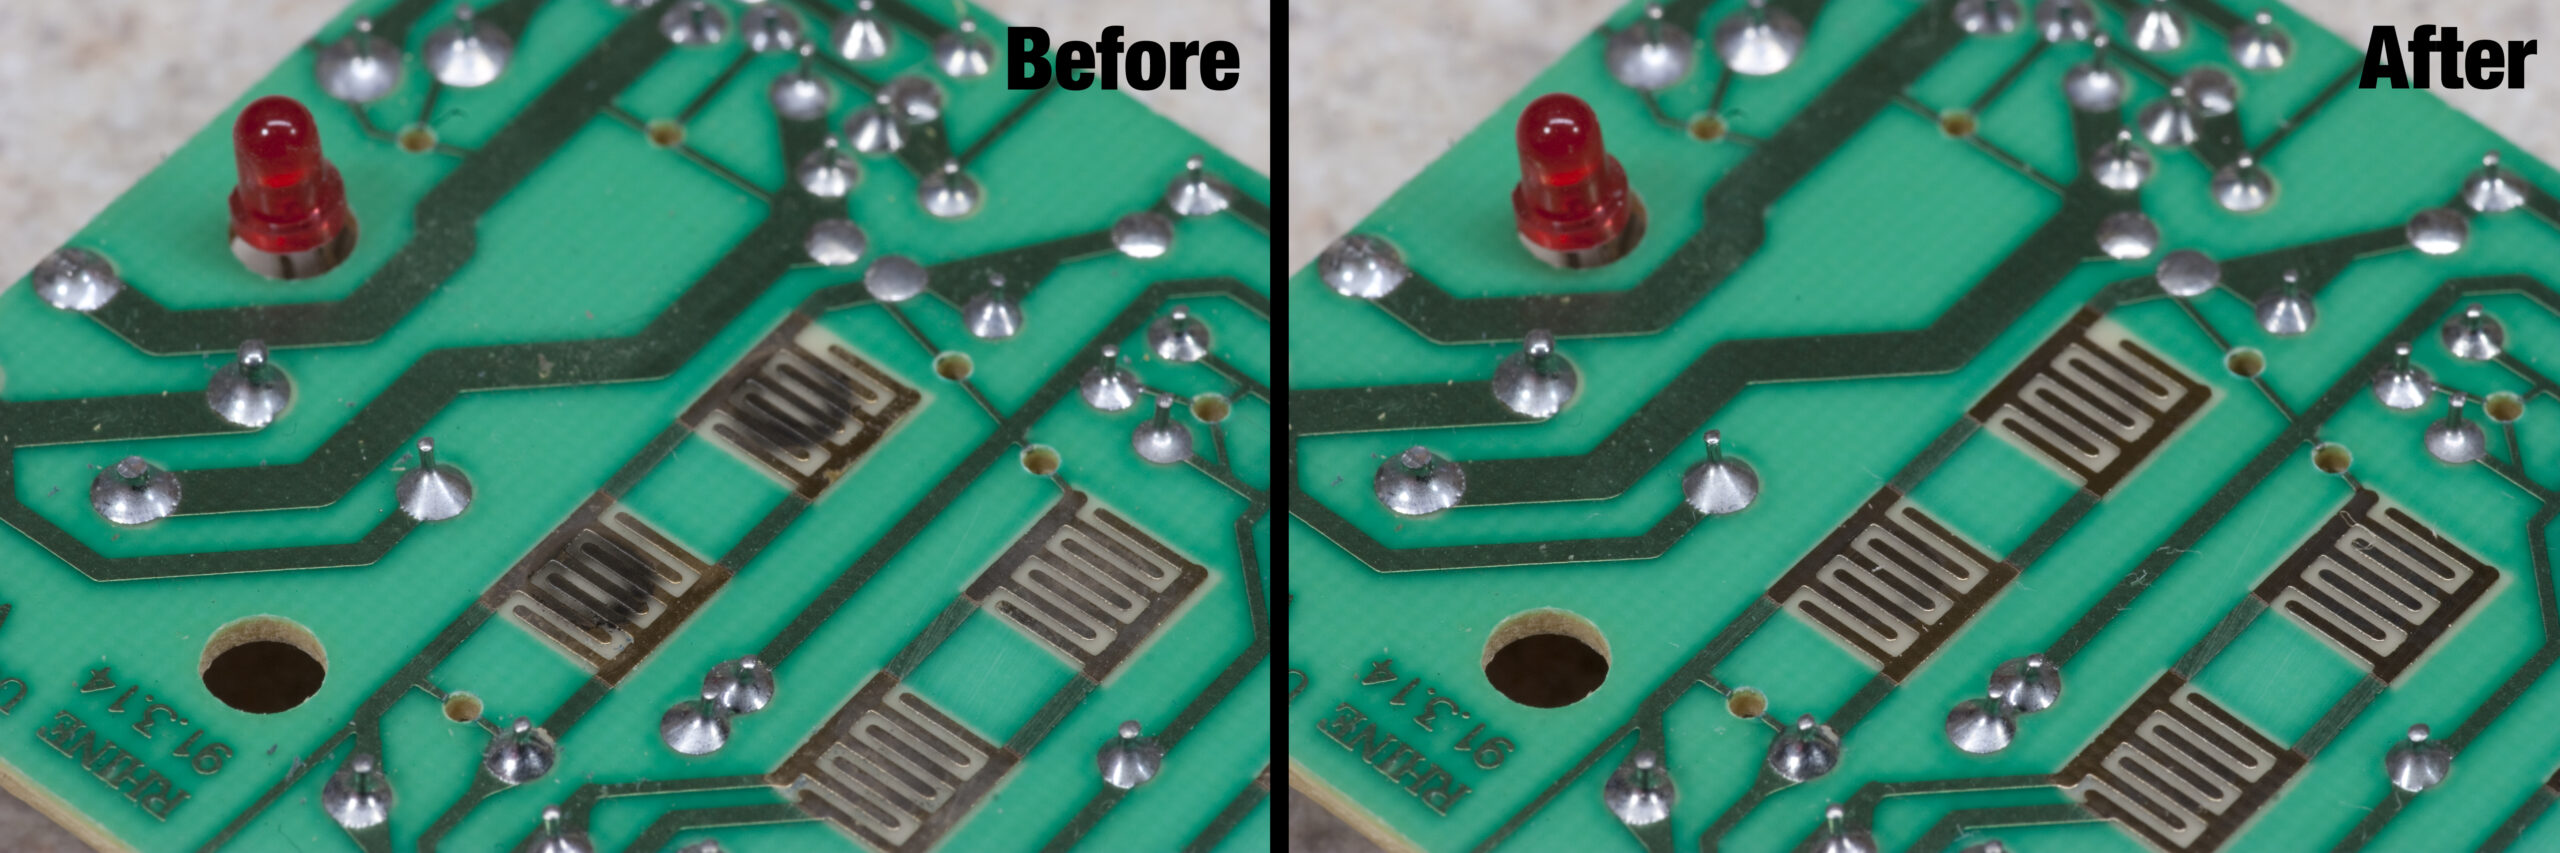
The ceiling fan in the bedroom has a remote control to turn it on and off. Over the past few weeks it’s become increasingly hard to turn it on and off, with the switch inside the remote feeling like its failing. Taking apart the remote tonight I found that instead of small tactile switches (like I thought it had from the feel) it instead has cheap, printed contact switches actuated by conductive rubber on the back-side of the buttons. As common with switches like this some of the rubber had worn off on to the PCB, fouling the copper and causing the buttons to not work well. A bit of quick work with a pencil eraser and alcohol-soaked paper towel cleaned the contacts up nicely and everything is working great again.

Click here to see a high-res version of the photo above, clearly showing the bits of rubber stuck on the PCB.

around the houseelectronics