Torklift EcoHitch 2″ Hitch for my 2015 Outback
Back in 2015 when I purchased a Subaru Outback, I ordered it with a OE hitch. At the time it was the best (and thanks to IMBA discount the cheapest) option for mounting a bike rack on the back of the car. Due to load limits on what the vehicle can tow there was only a 1-1/4″ receiver available, and while this fit the 1Up USA rack previously used on my Civic it just didn’t provide the stability of a 2″ receiver.
Fast forward to late 2018 and, out of the blue, I was contacted by Torklift, via Reddit, where they offered to send me their Torklift EcoHitch 2″ receiver hitch in exchange for providing feedback to their designers and engineers. After some email back and forth this was all set up, and a few days ago I received the rack: Torklift 2015-2018 Subaru Outback EcoHitch, part number x7266.
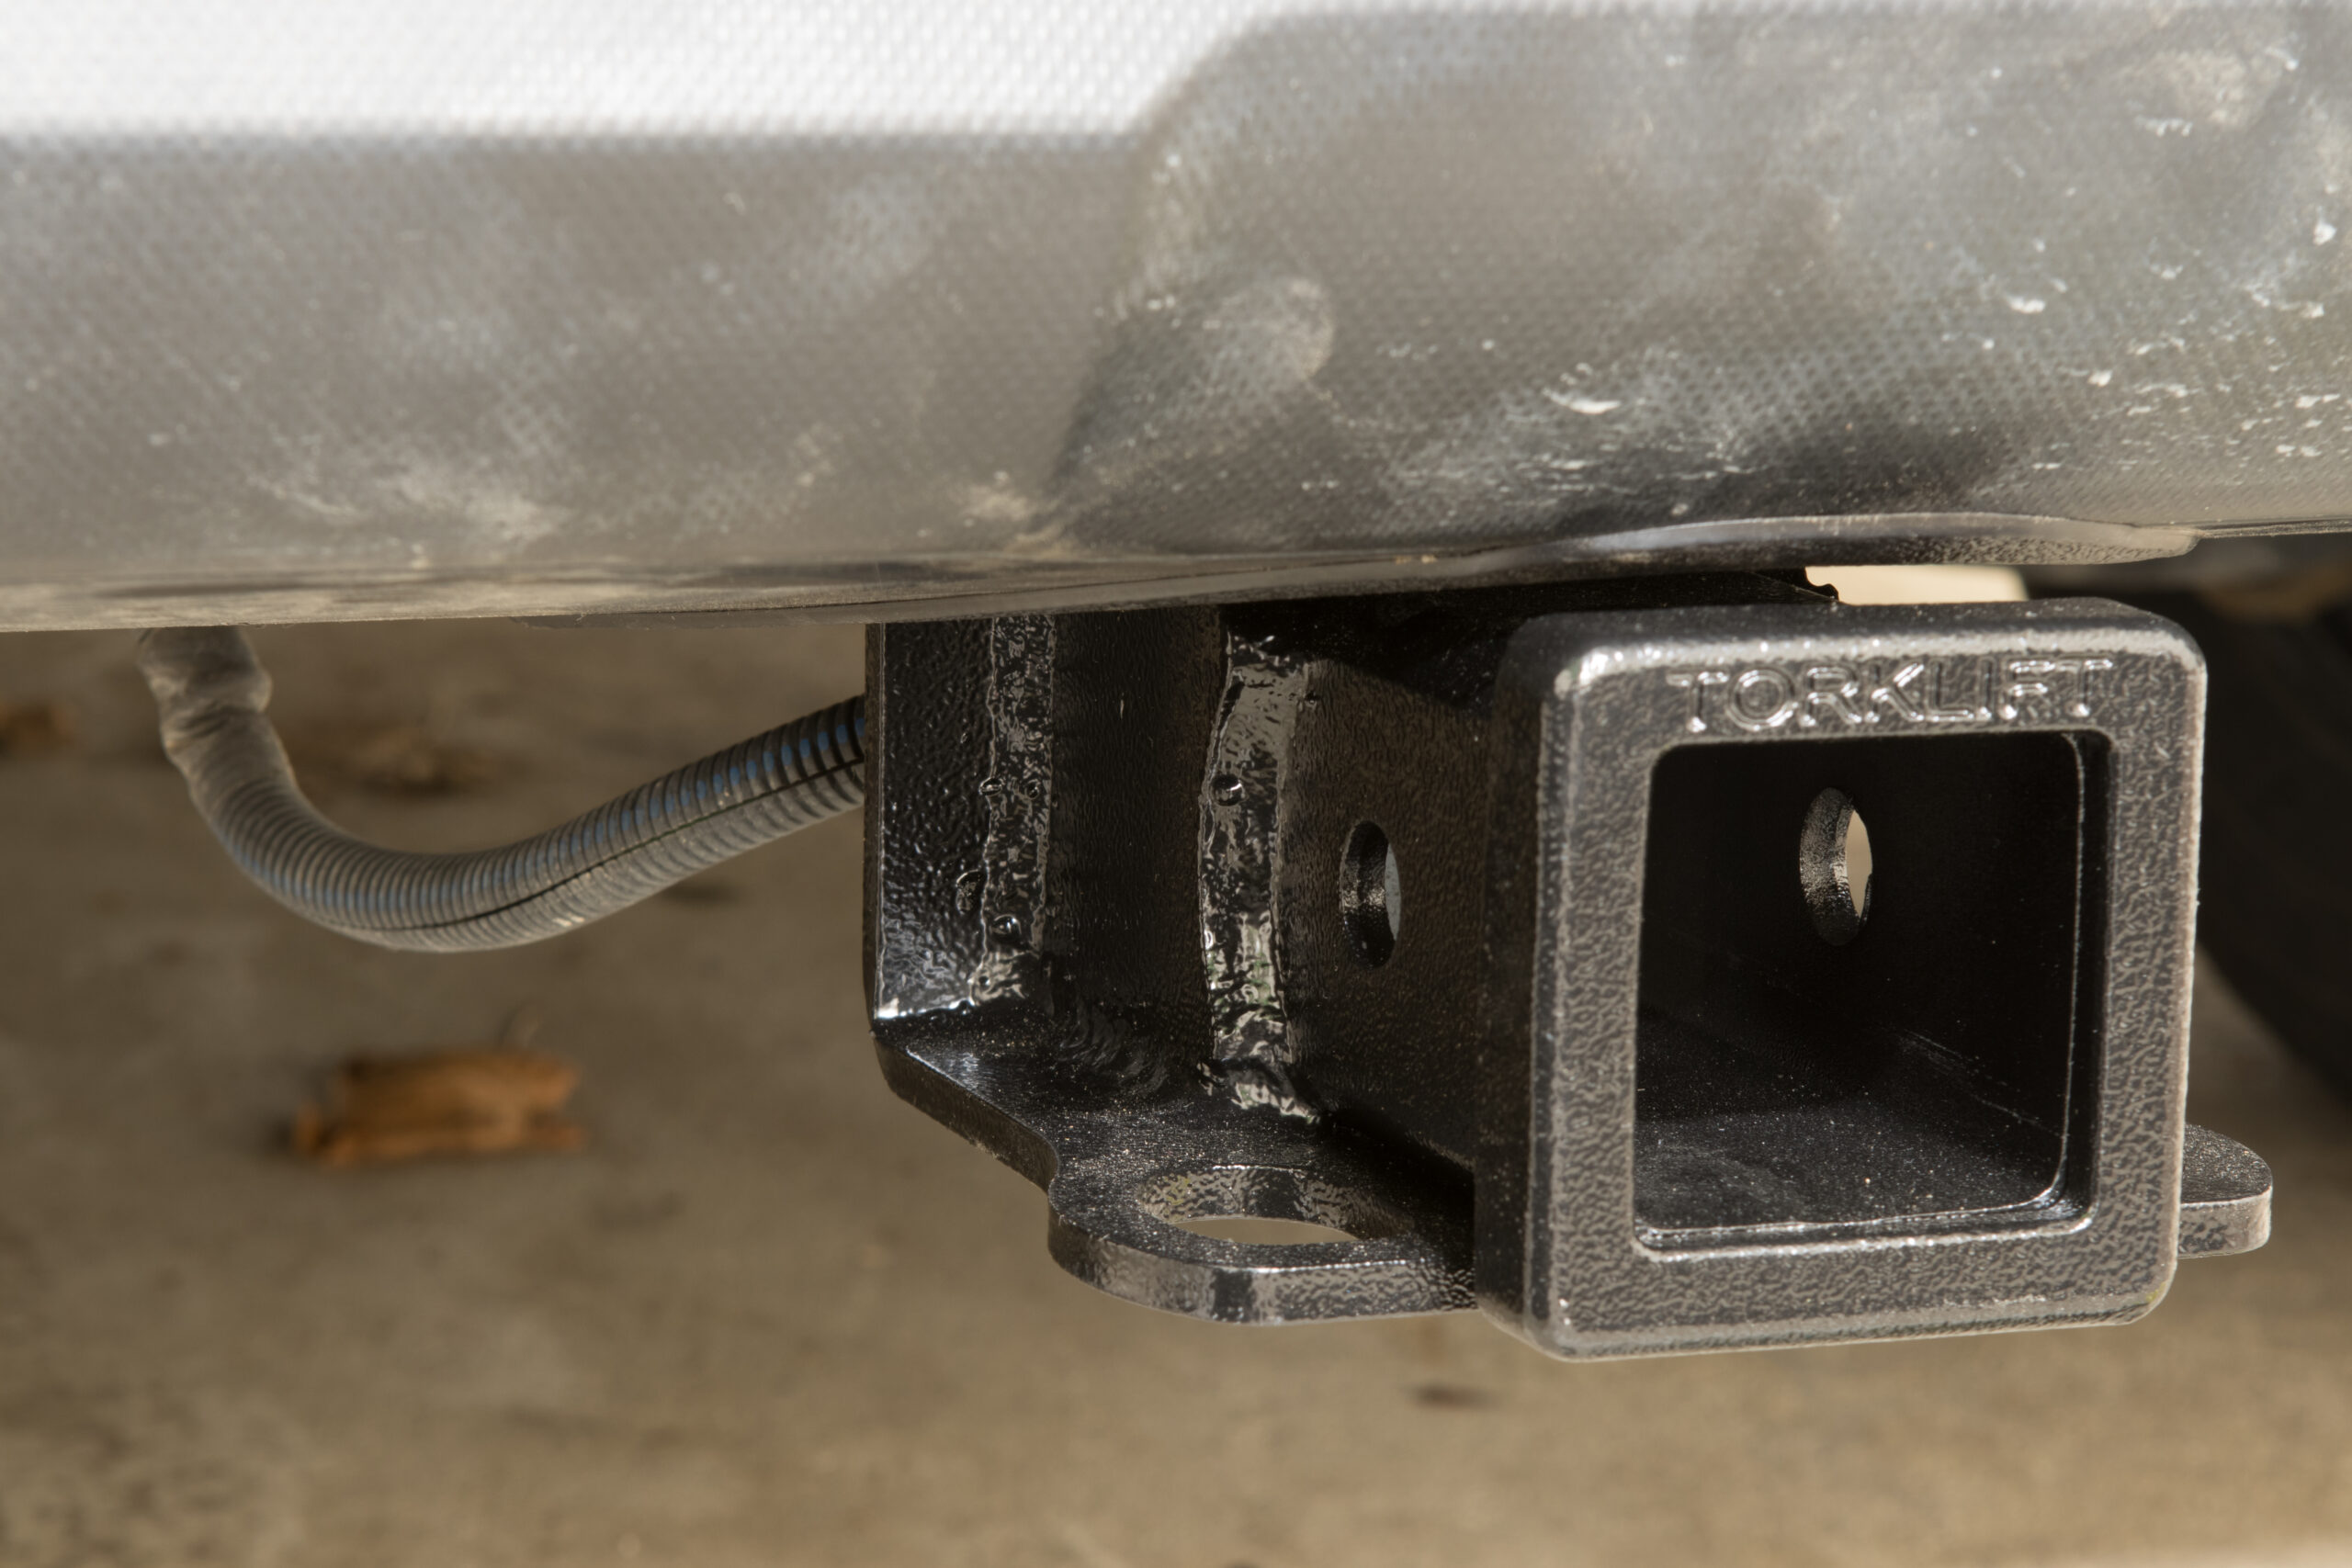
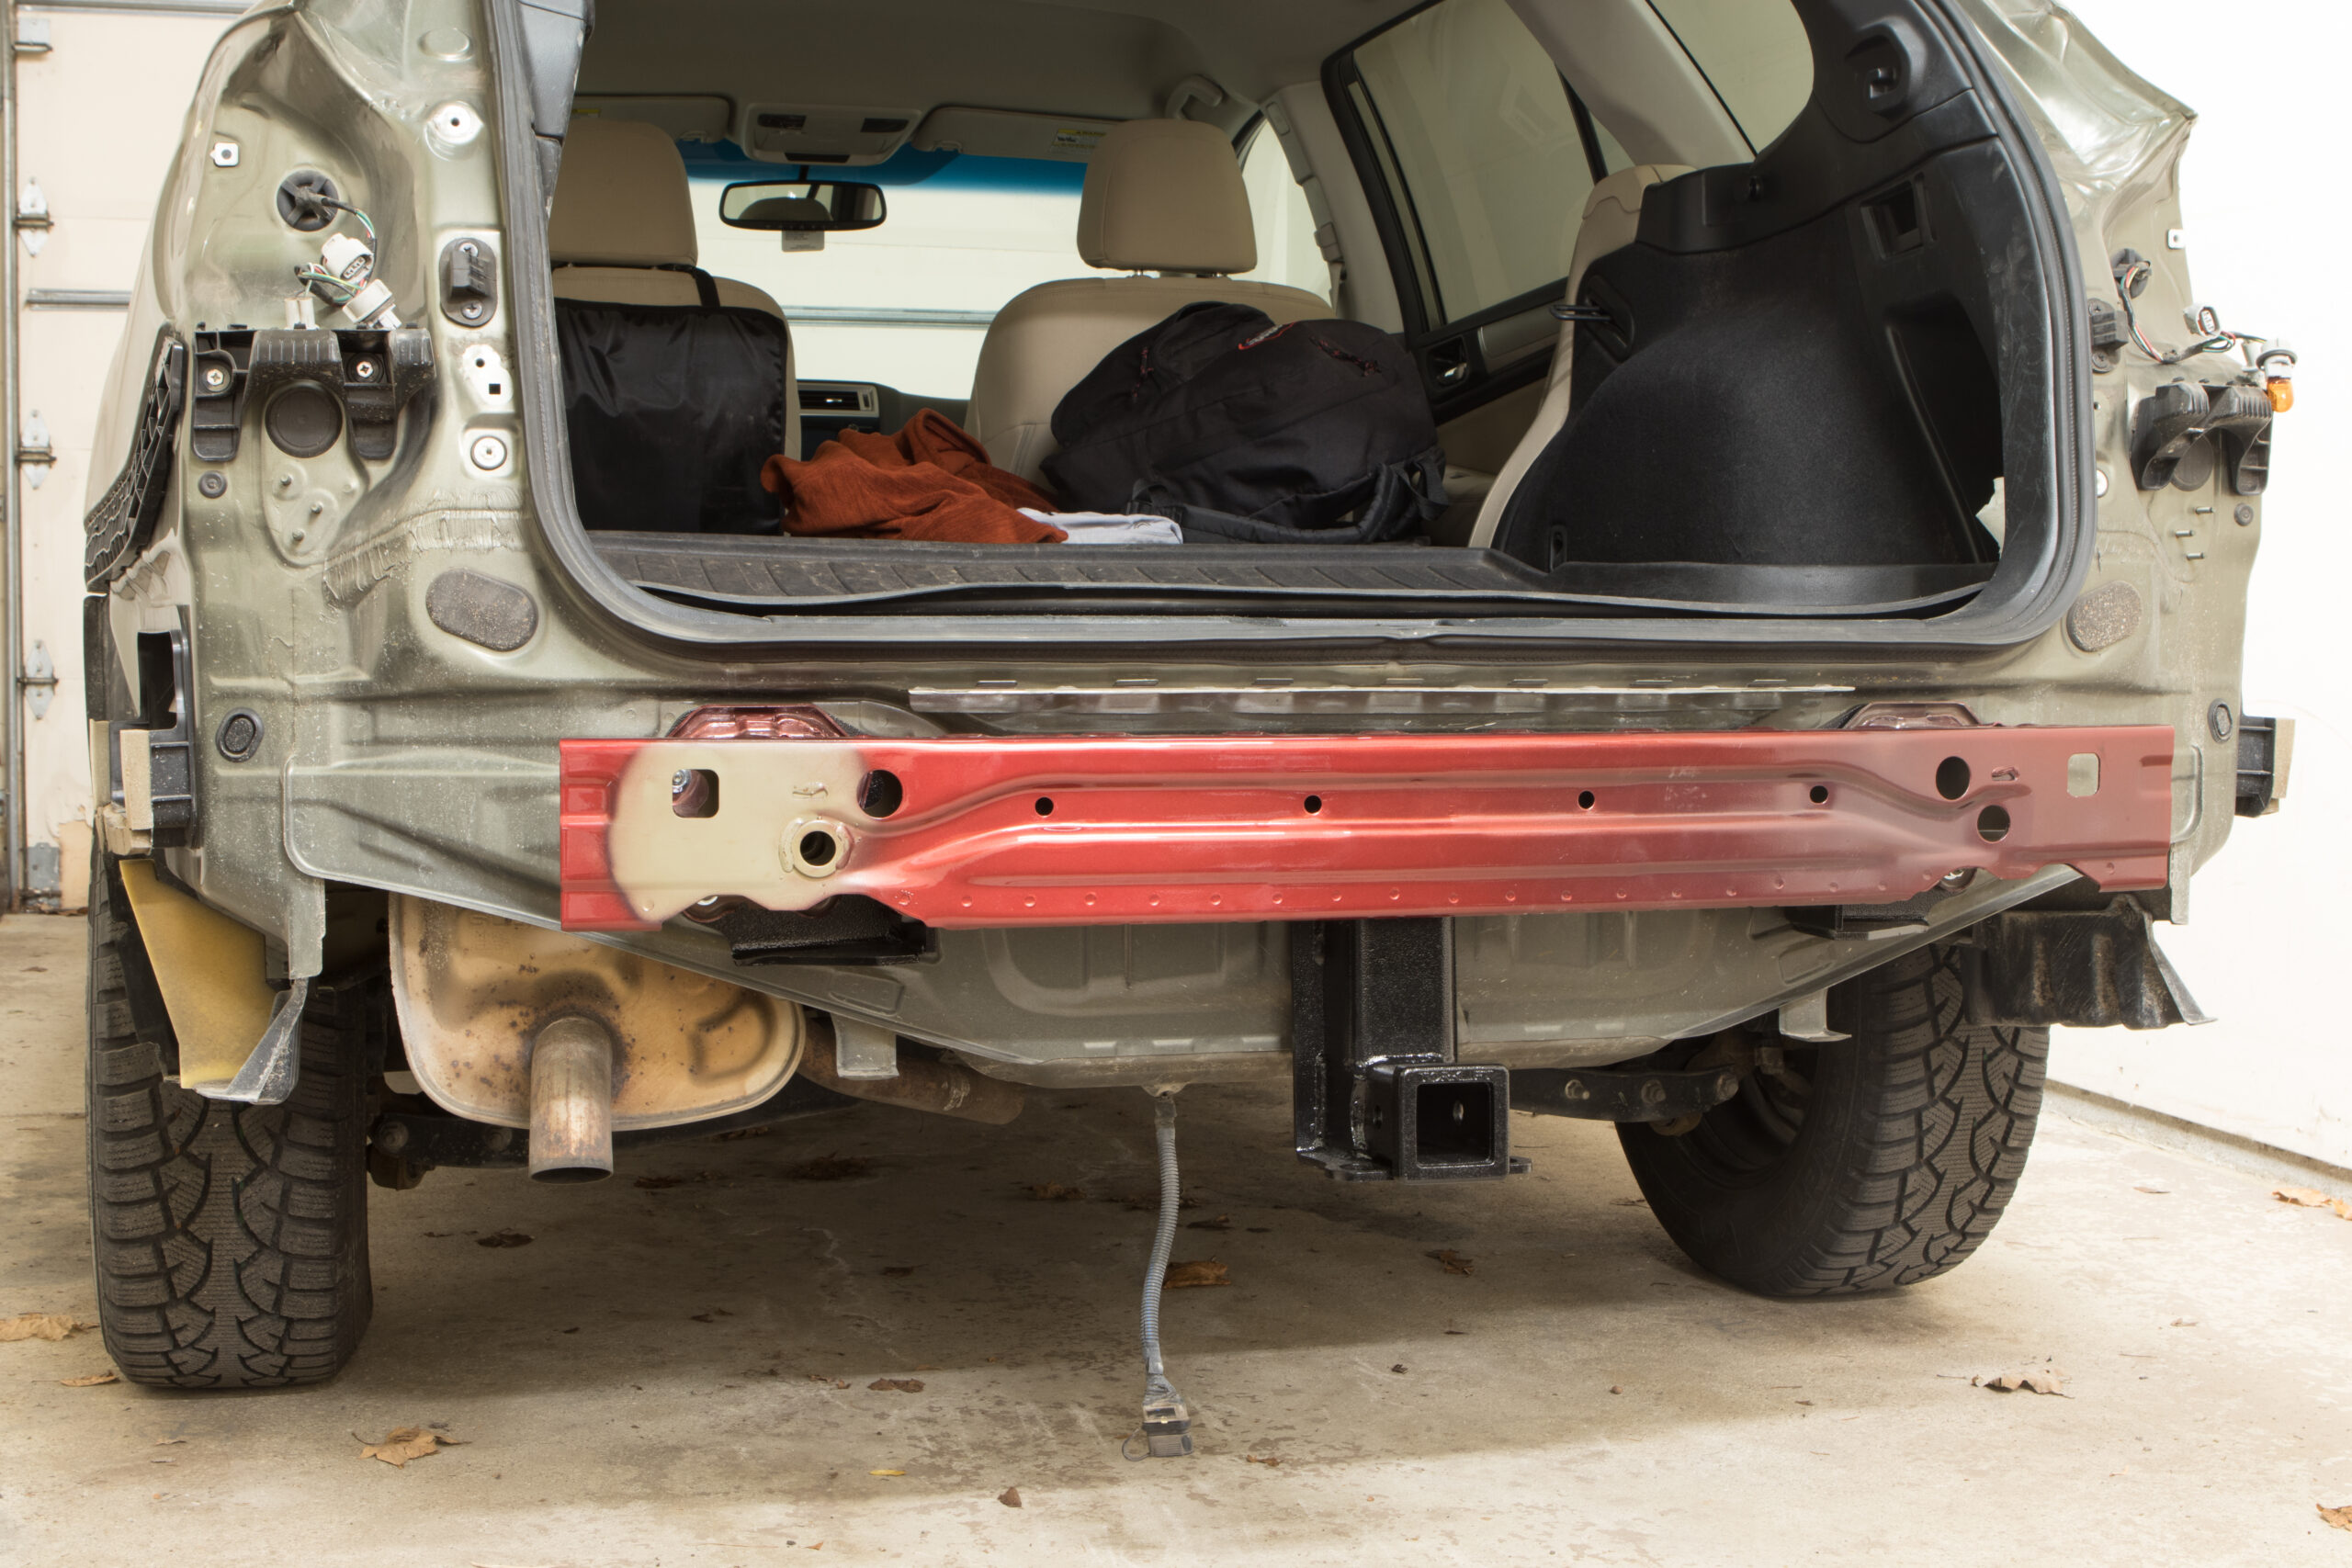
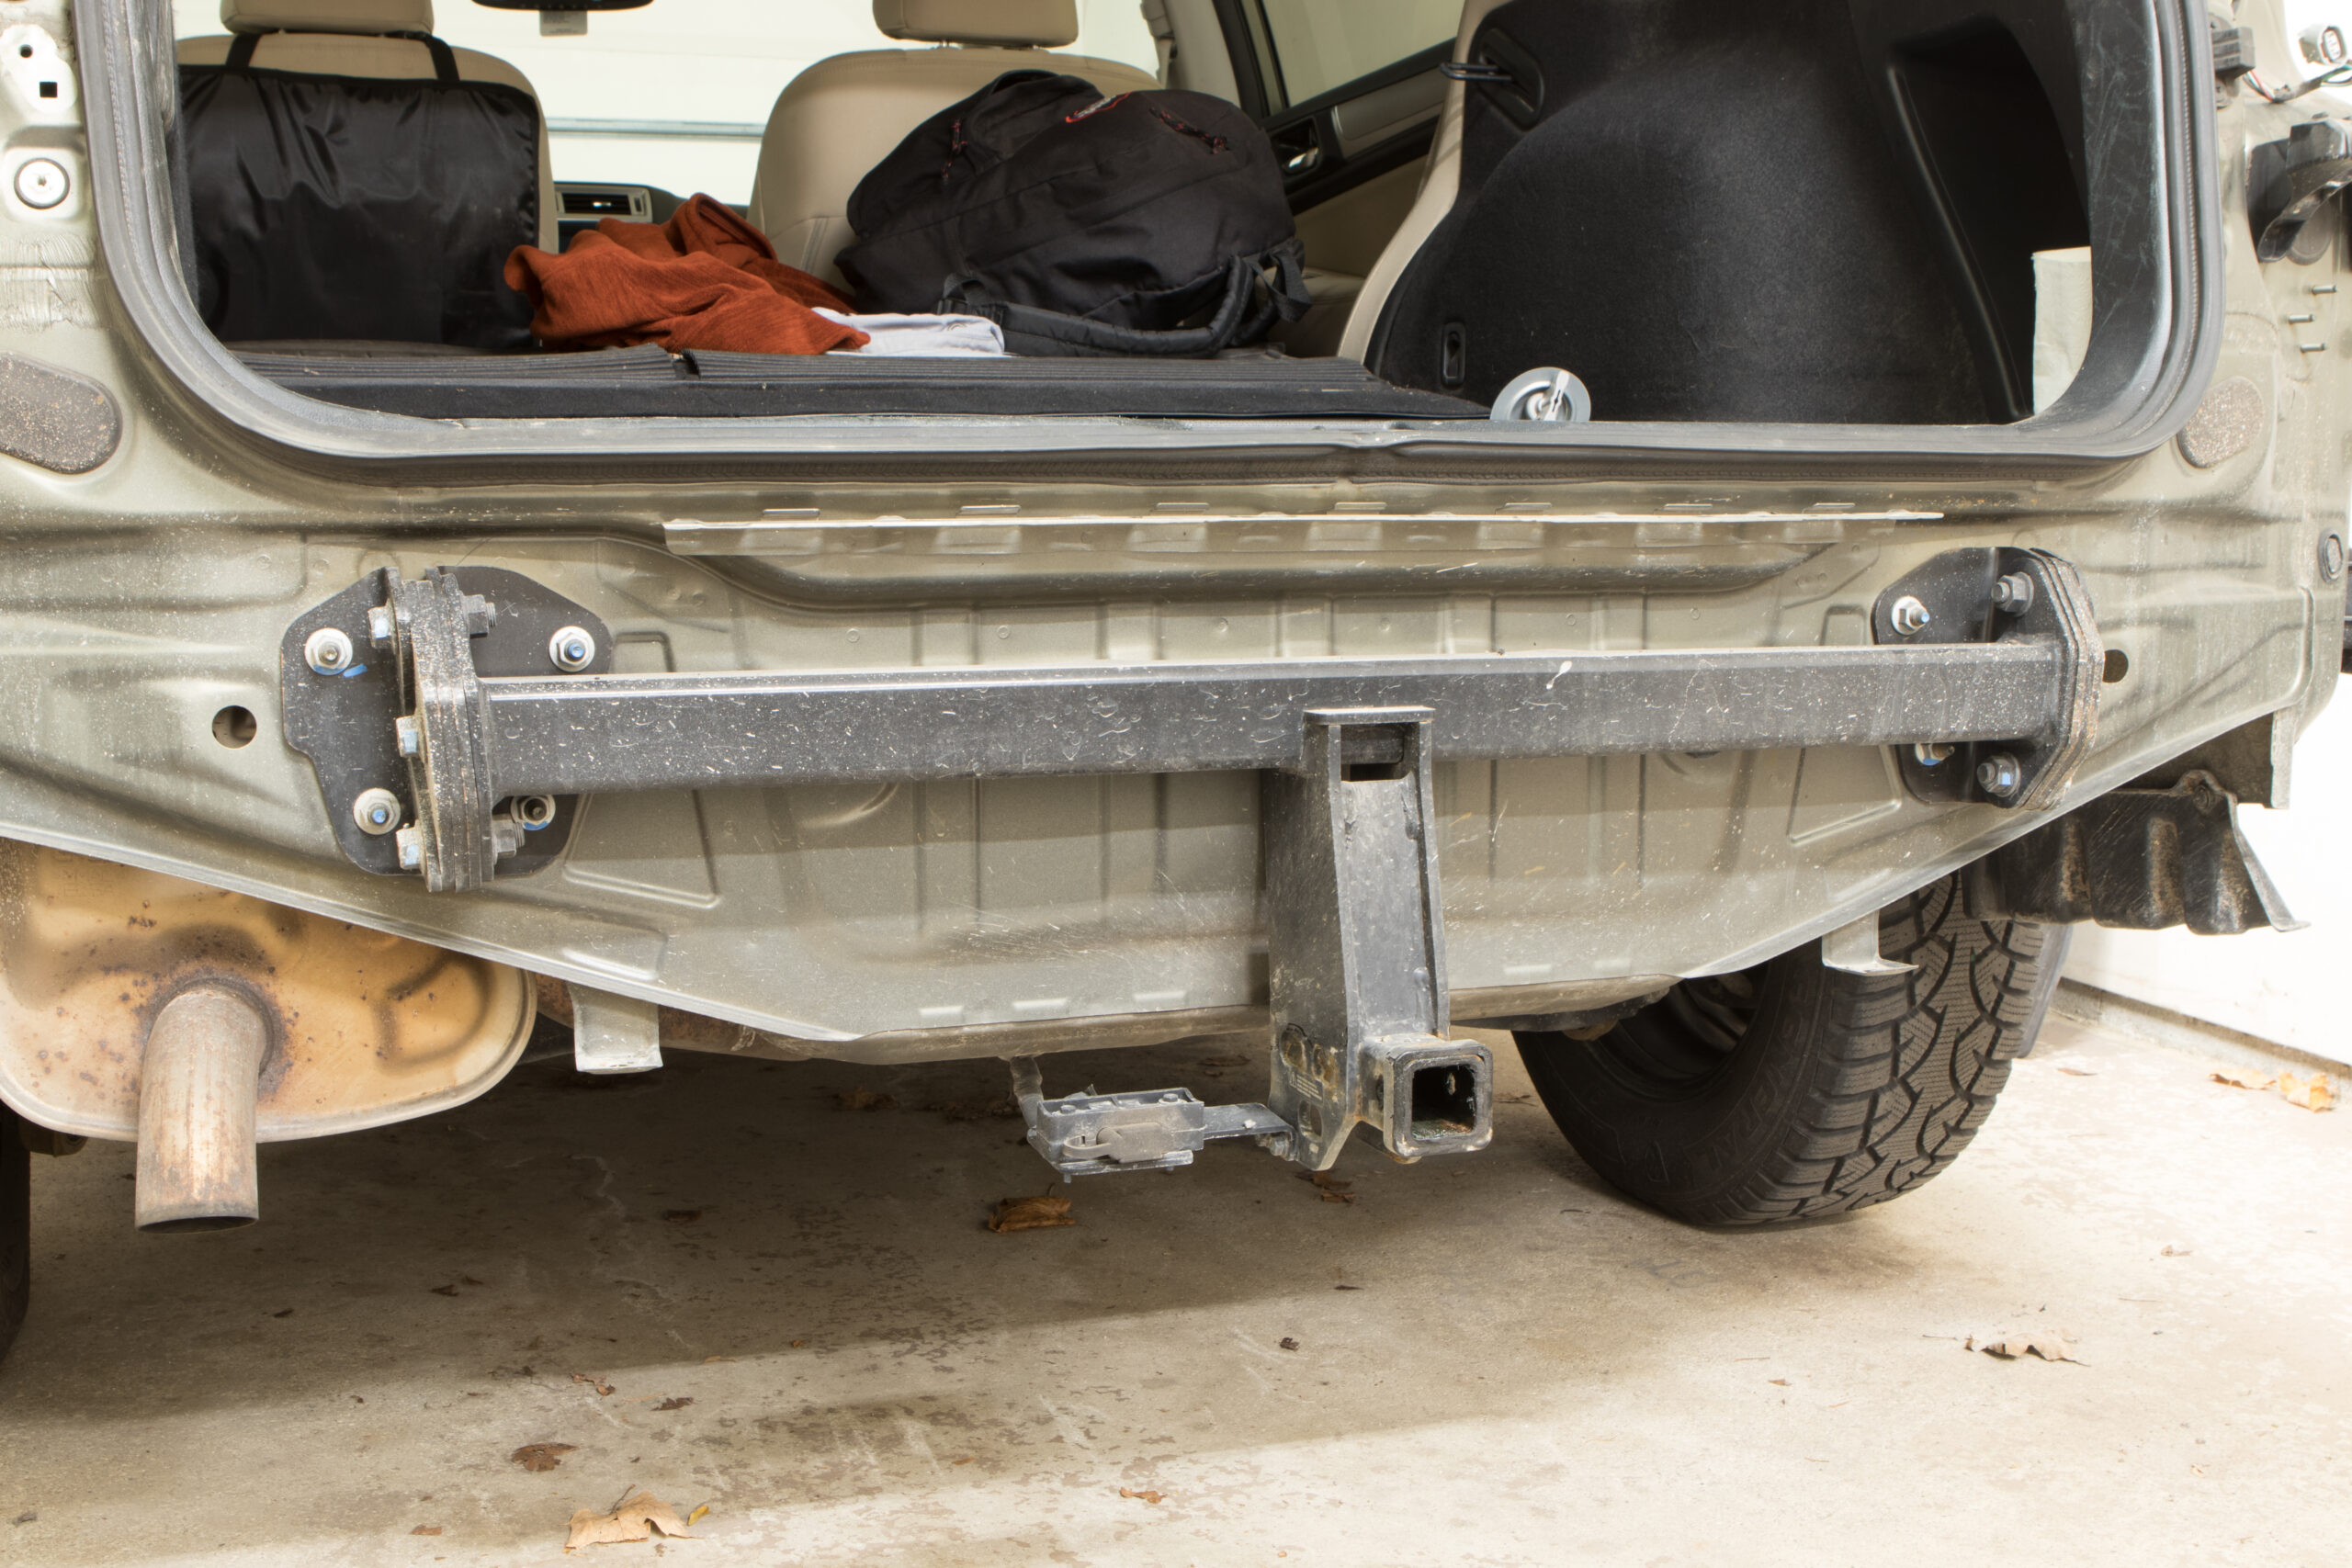
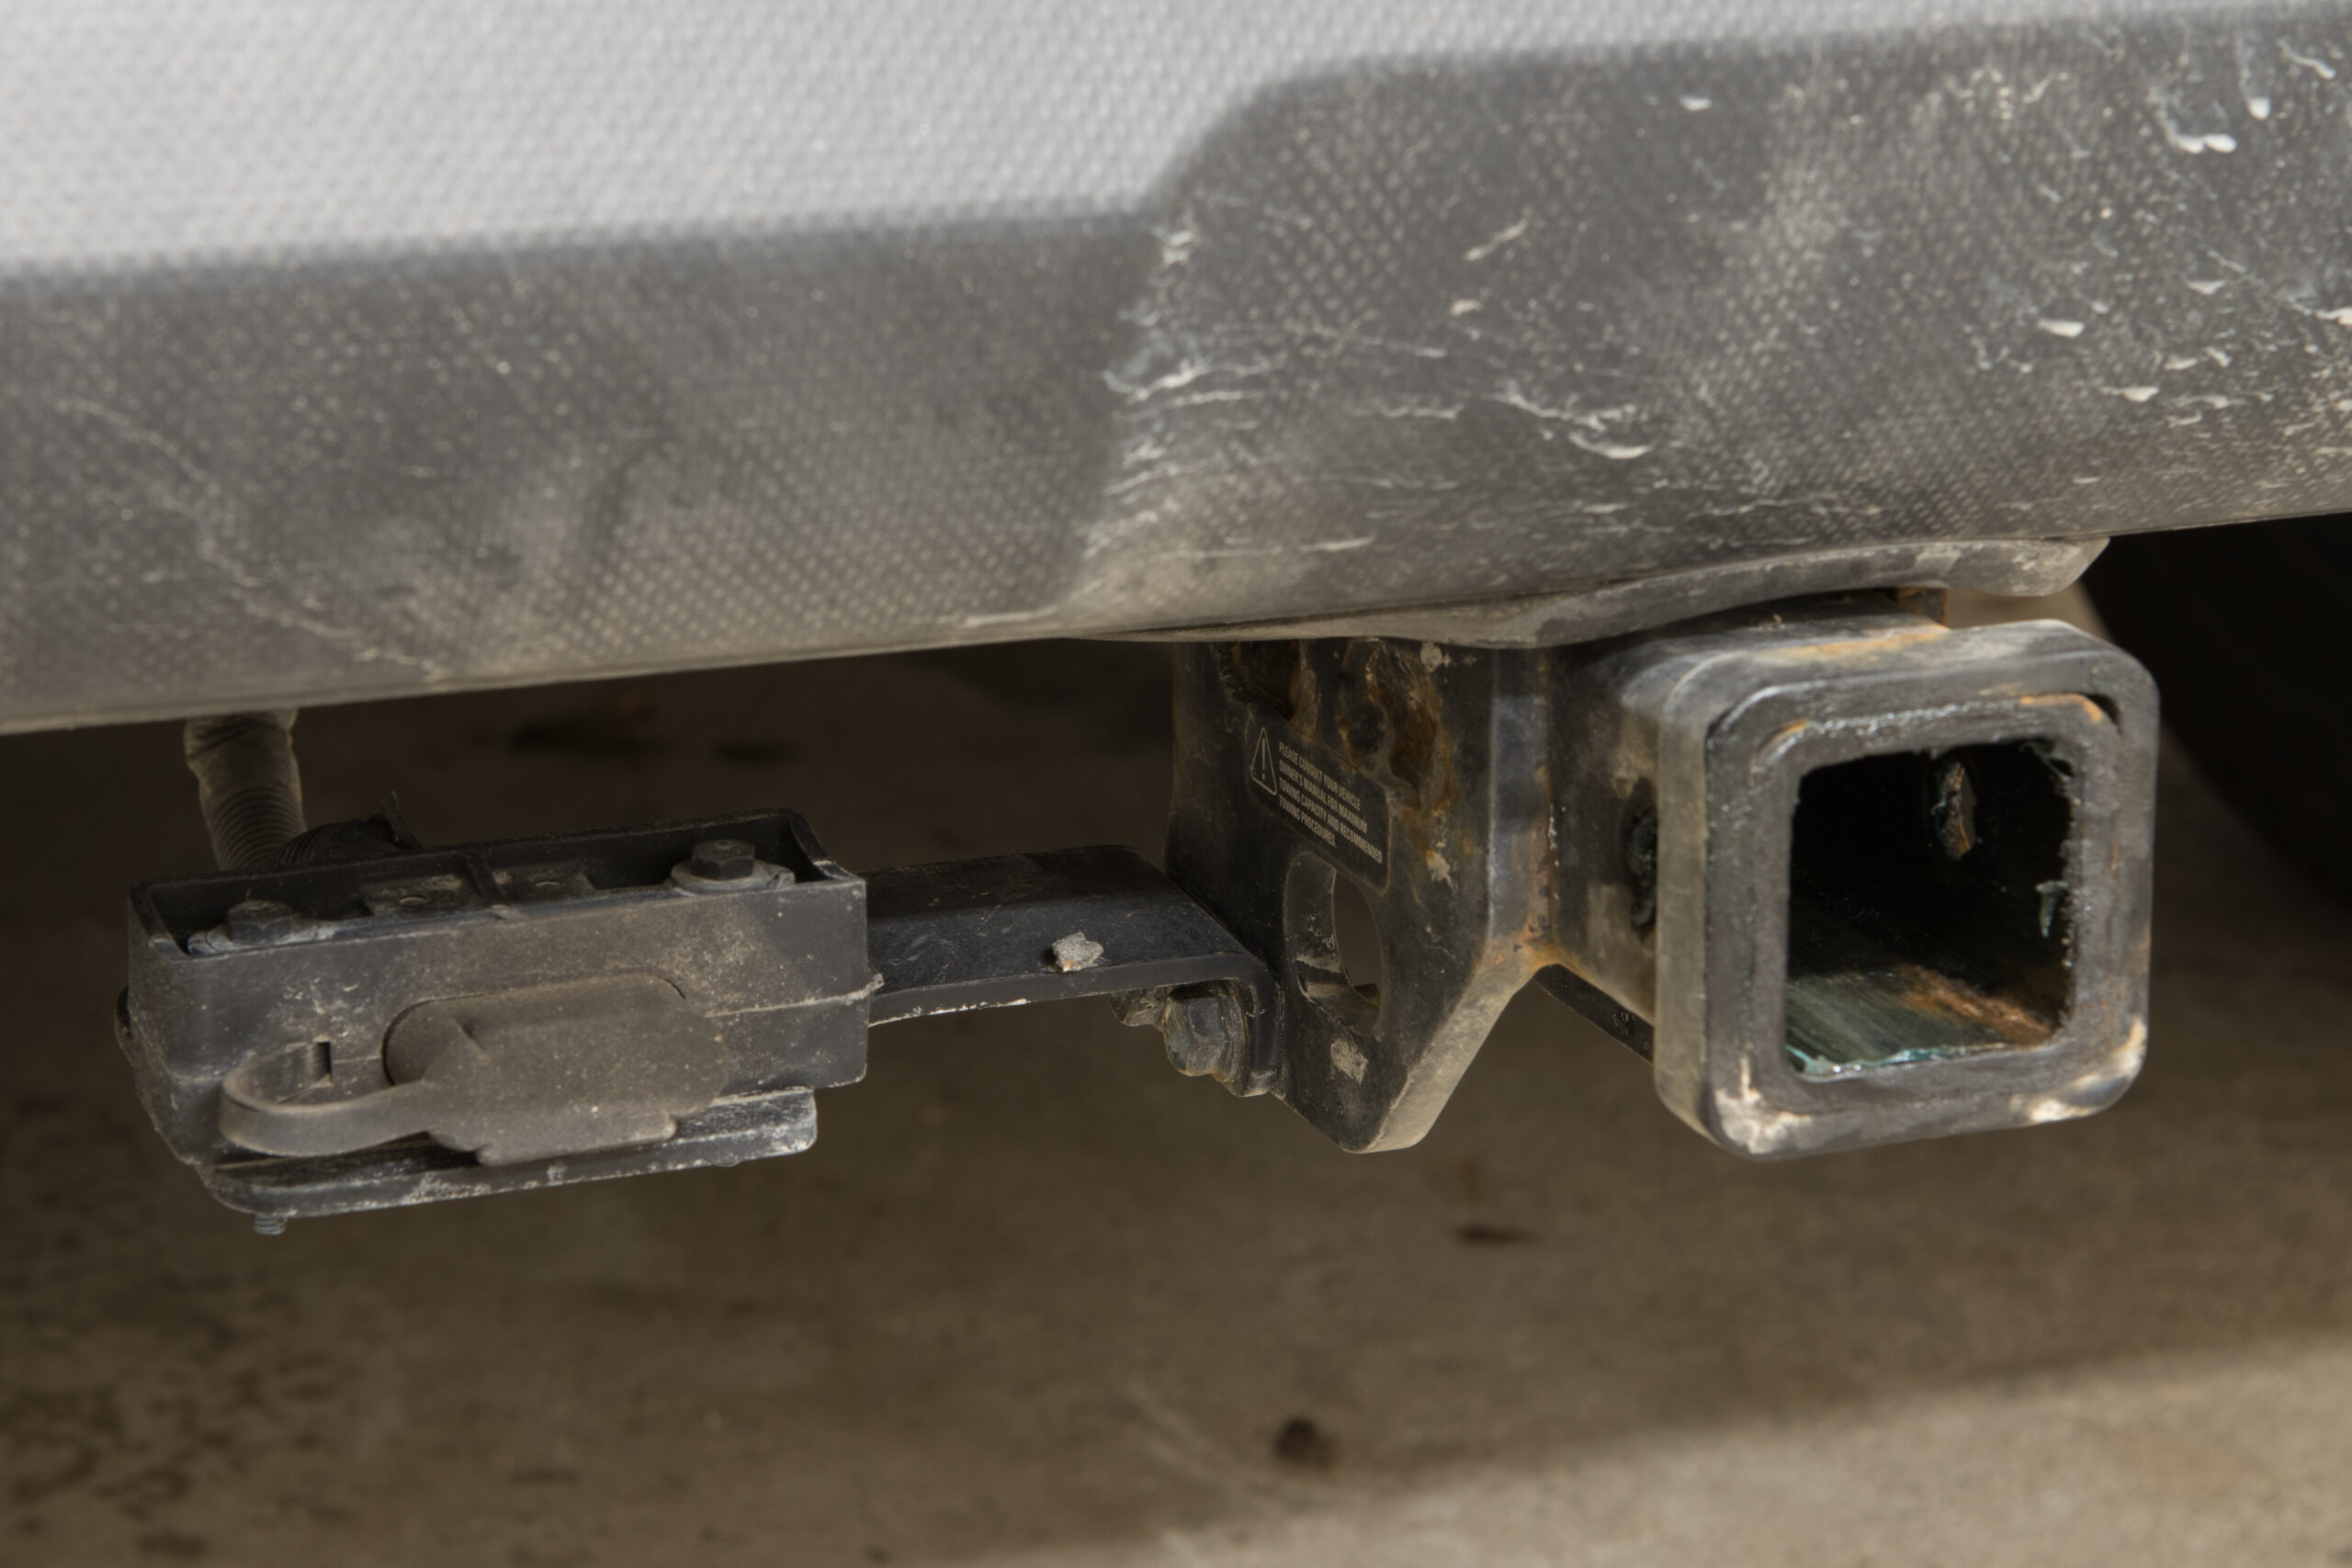
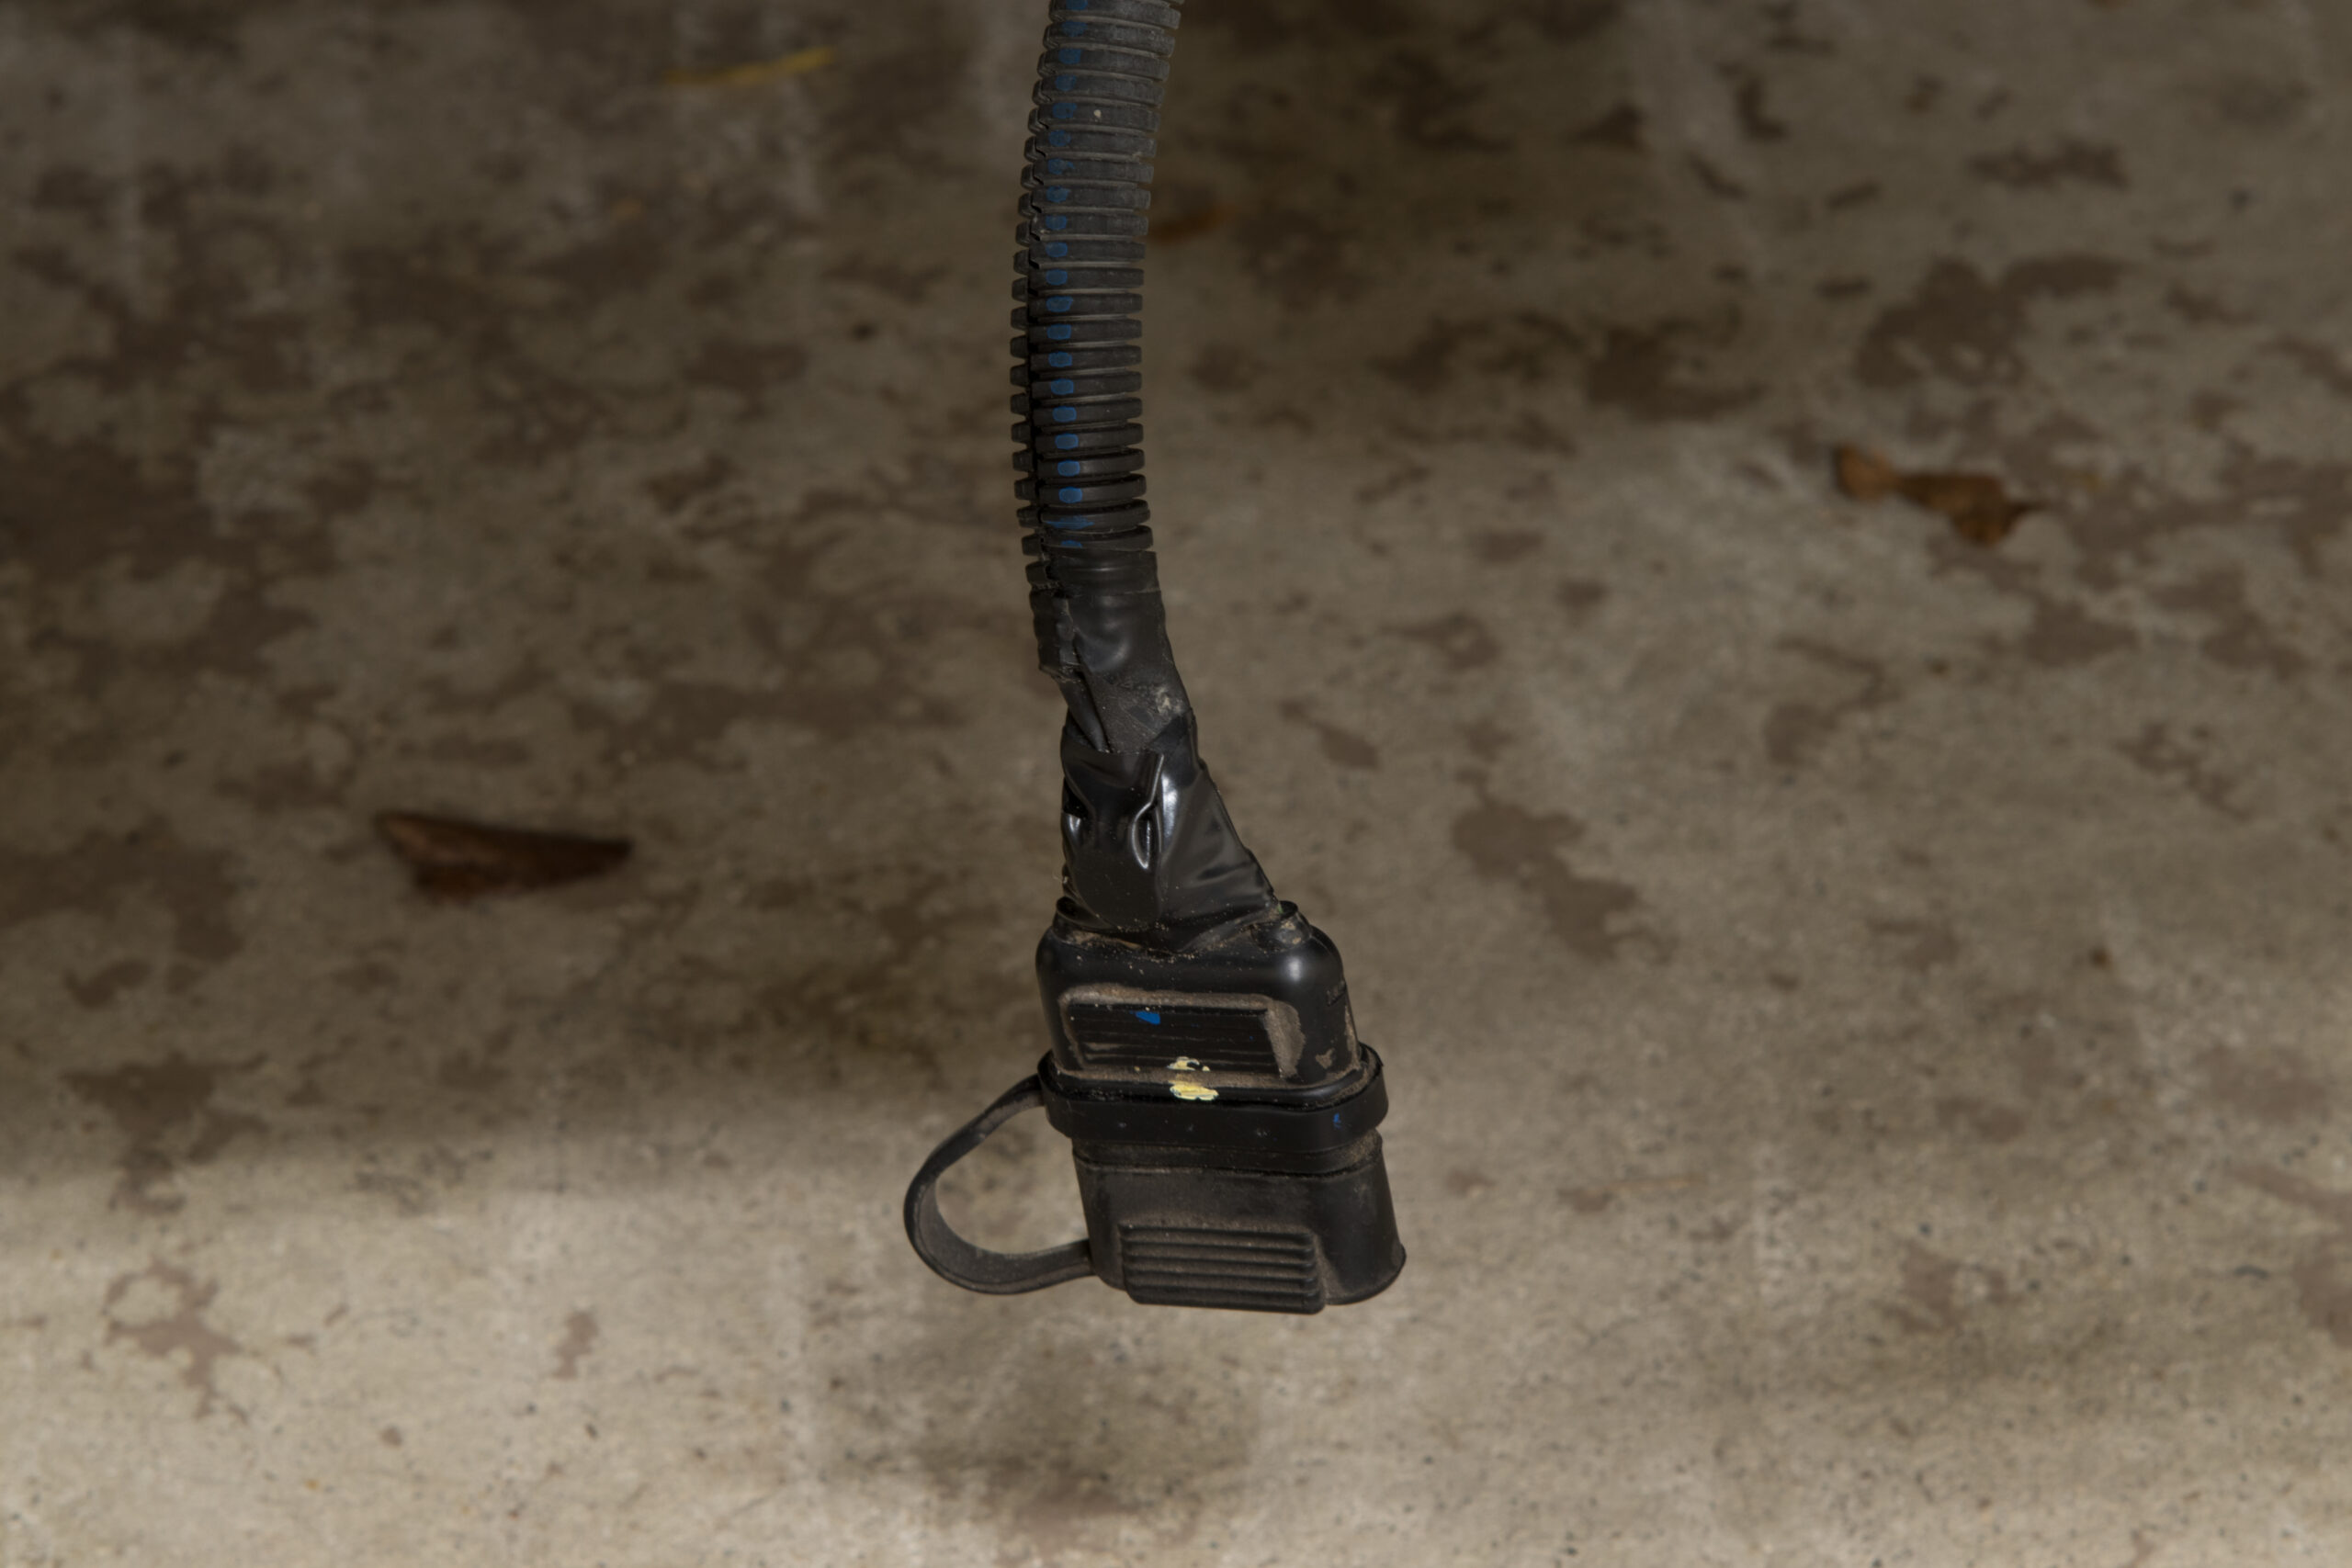
Beyond the 2″ receiver, the biggest difference between the EcoHitch and OE hitches is how they mount. While the EcoHitch sandwiches between the bumper beam and the chassis, held in place by the bumper’s eight fasteners (photo 1, 2), the OE hitch both replaces the bumper beam and mounts inside of the frame rails (photo). While it appears that the OE hitch may be a bit more resistant to very high tongue weights, the Torklift seems plenty solid and is made of thicker material, so I’ve got no concerns with the differences. The other significant difference is that the Torklift EcoHitch doesn’t come with a wiring harness, but only ever having bike racks on my car this doesn’t really affect my usage. When the OE hitch was installed on my Outback this included a wiring harness along with a nifty mount to hold it next to the receiver (photo). I considered adapting this mount to the EcoHitch, but instead took some inspiration from Torklift Central’s (frankly overpriced) Eclipse 4-Flat Plug and fit a neodymium magnet to the cable (photo), then stuck the magnet to the back side of the receiver.
Needing to remove the OE hitch my install was bound to be a bit more complicated than someone who is putting the EcoHitch on a new vehicle, but even this ended up being pretty straightforward.
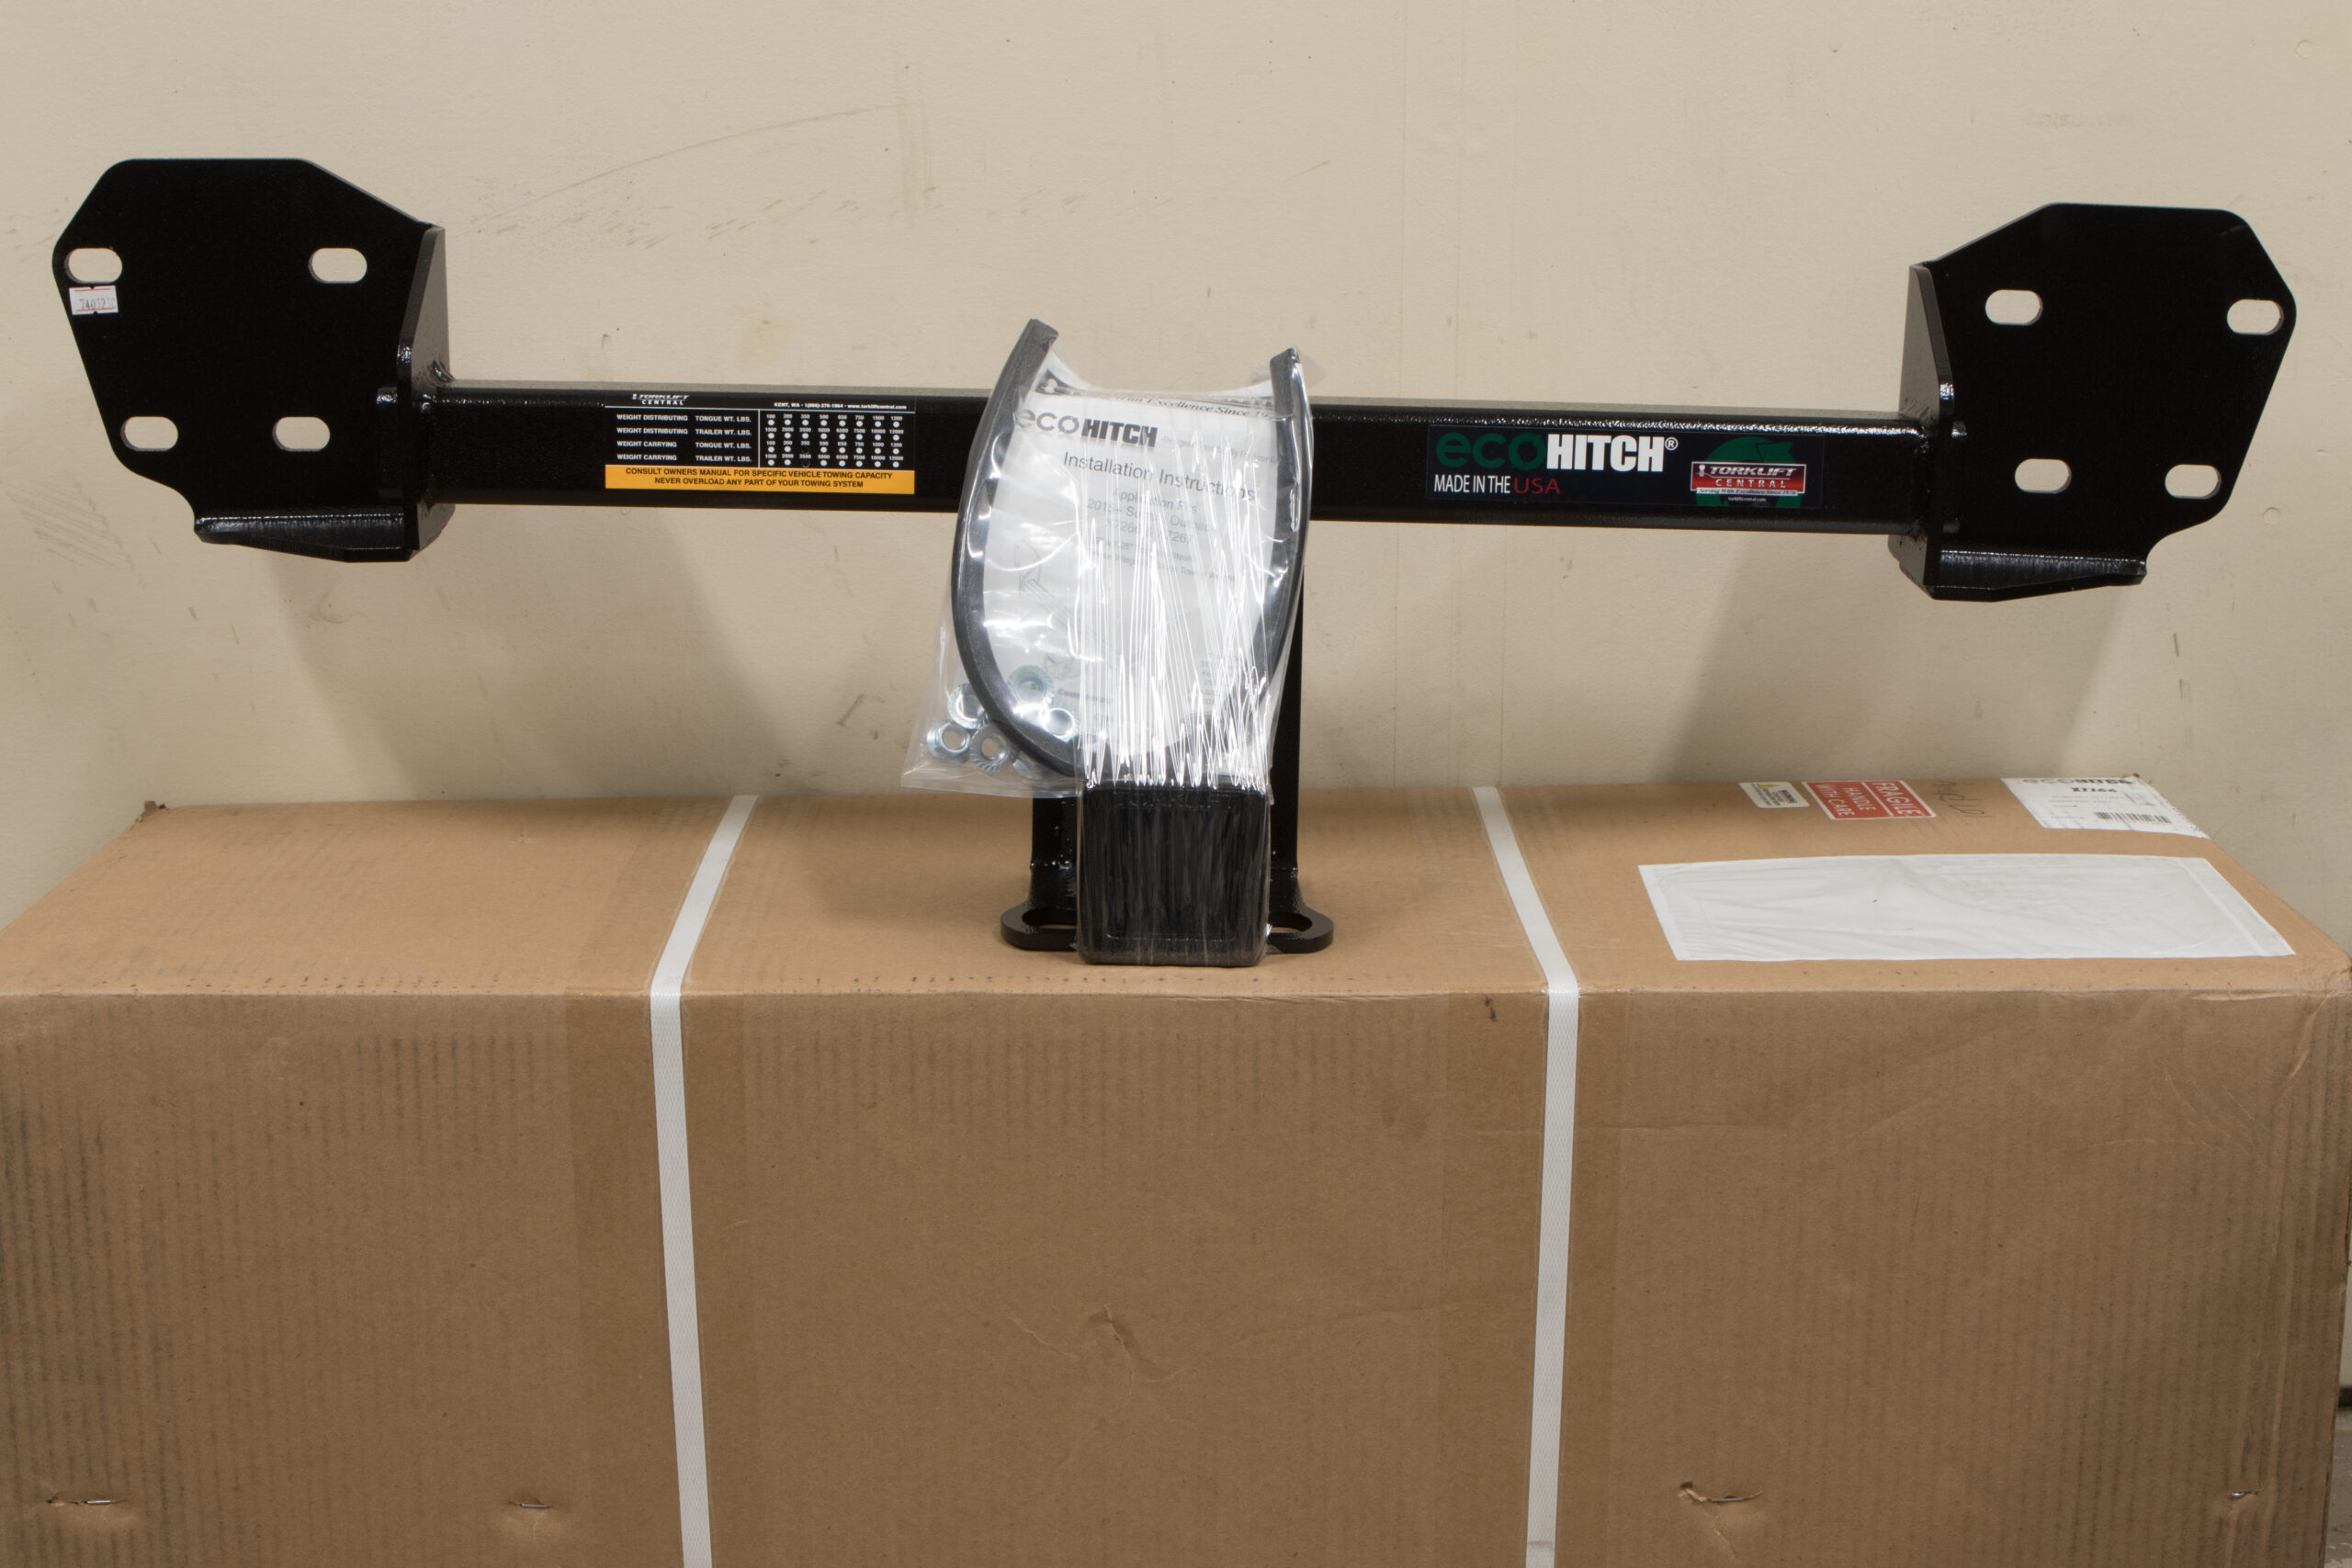
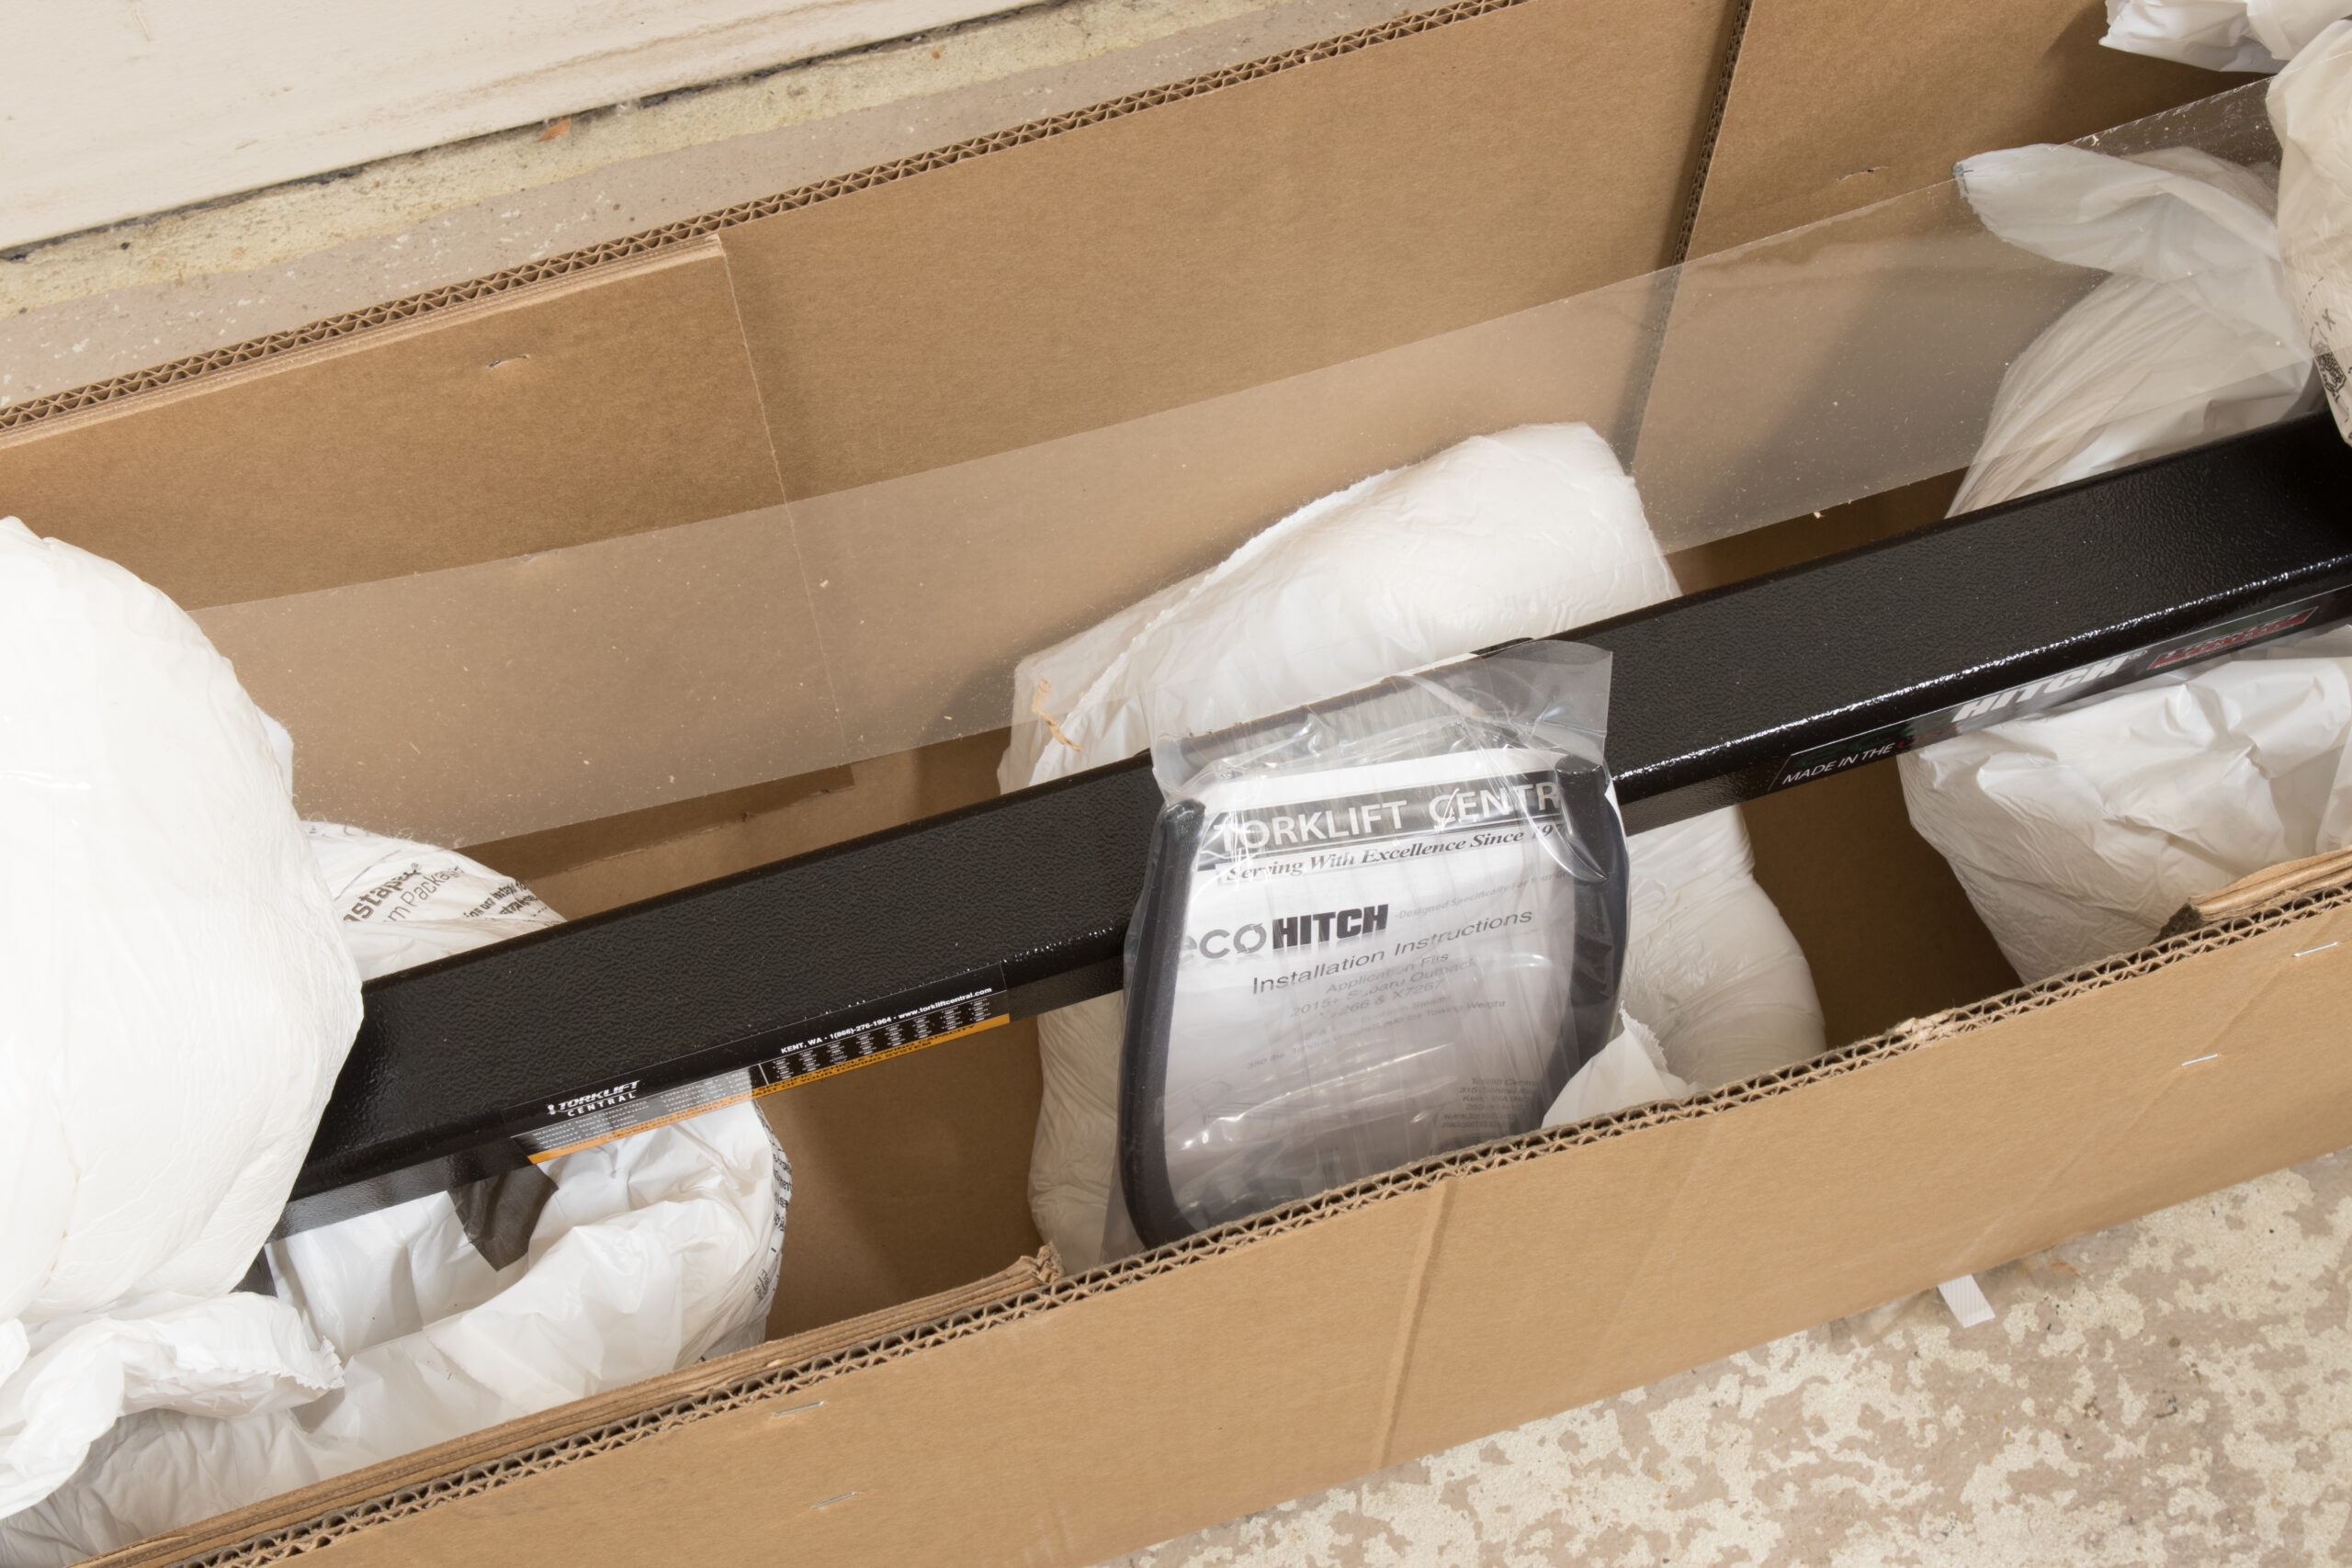
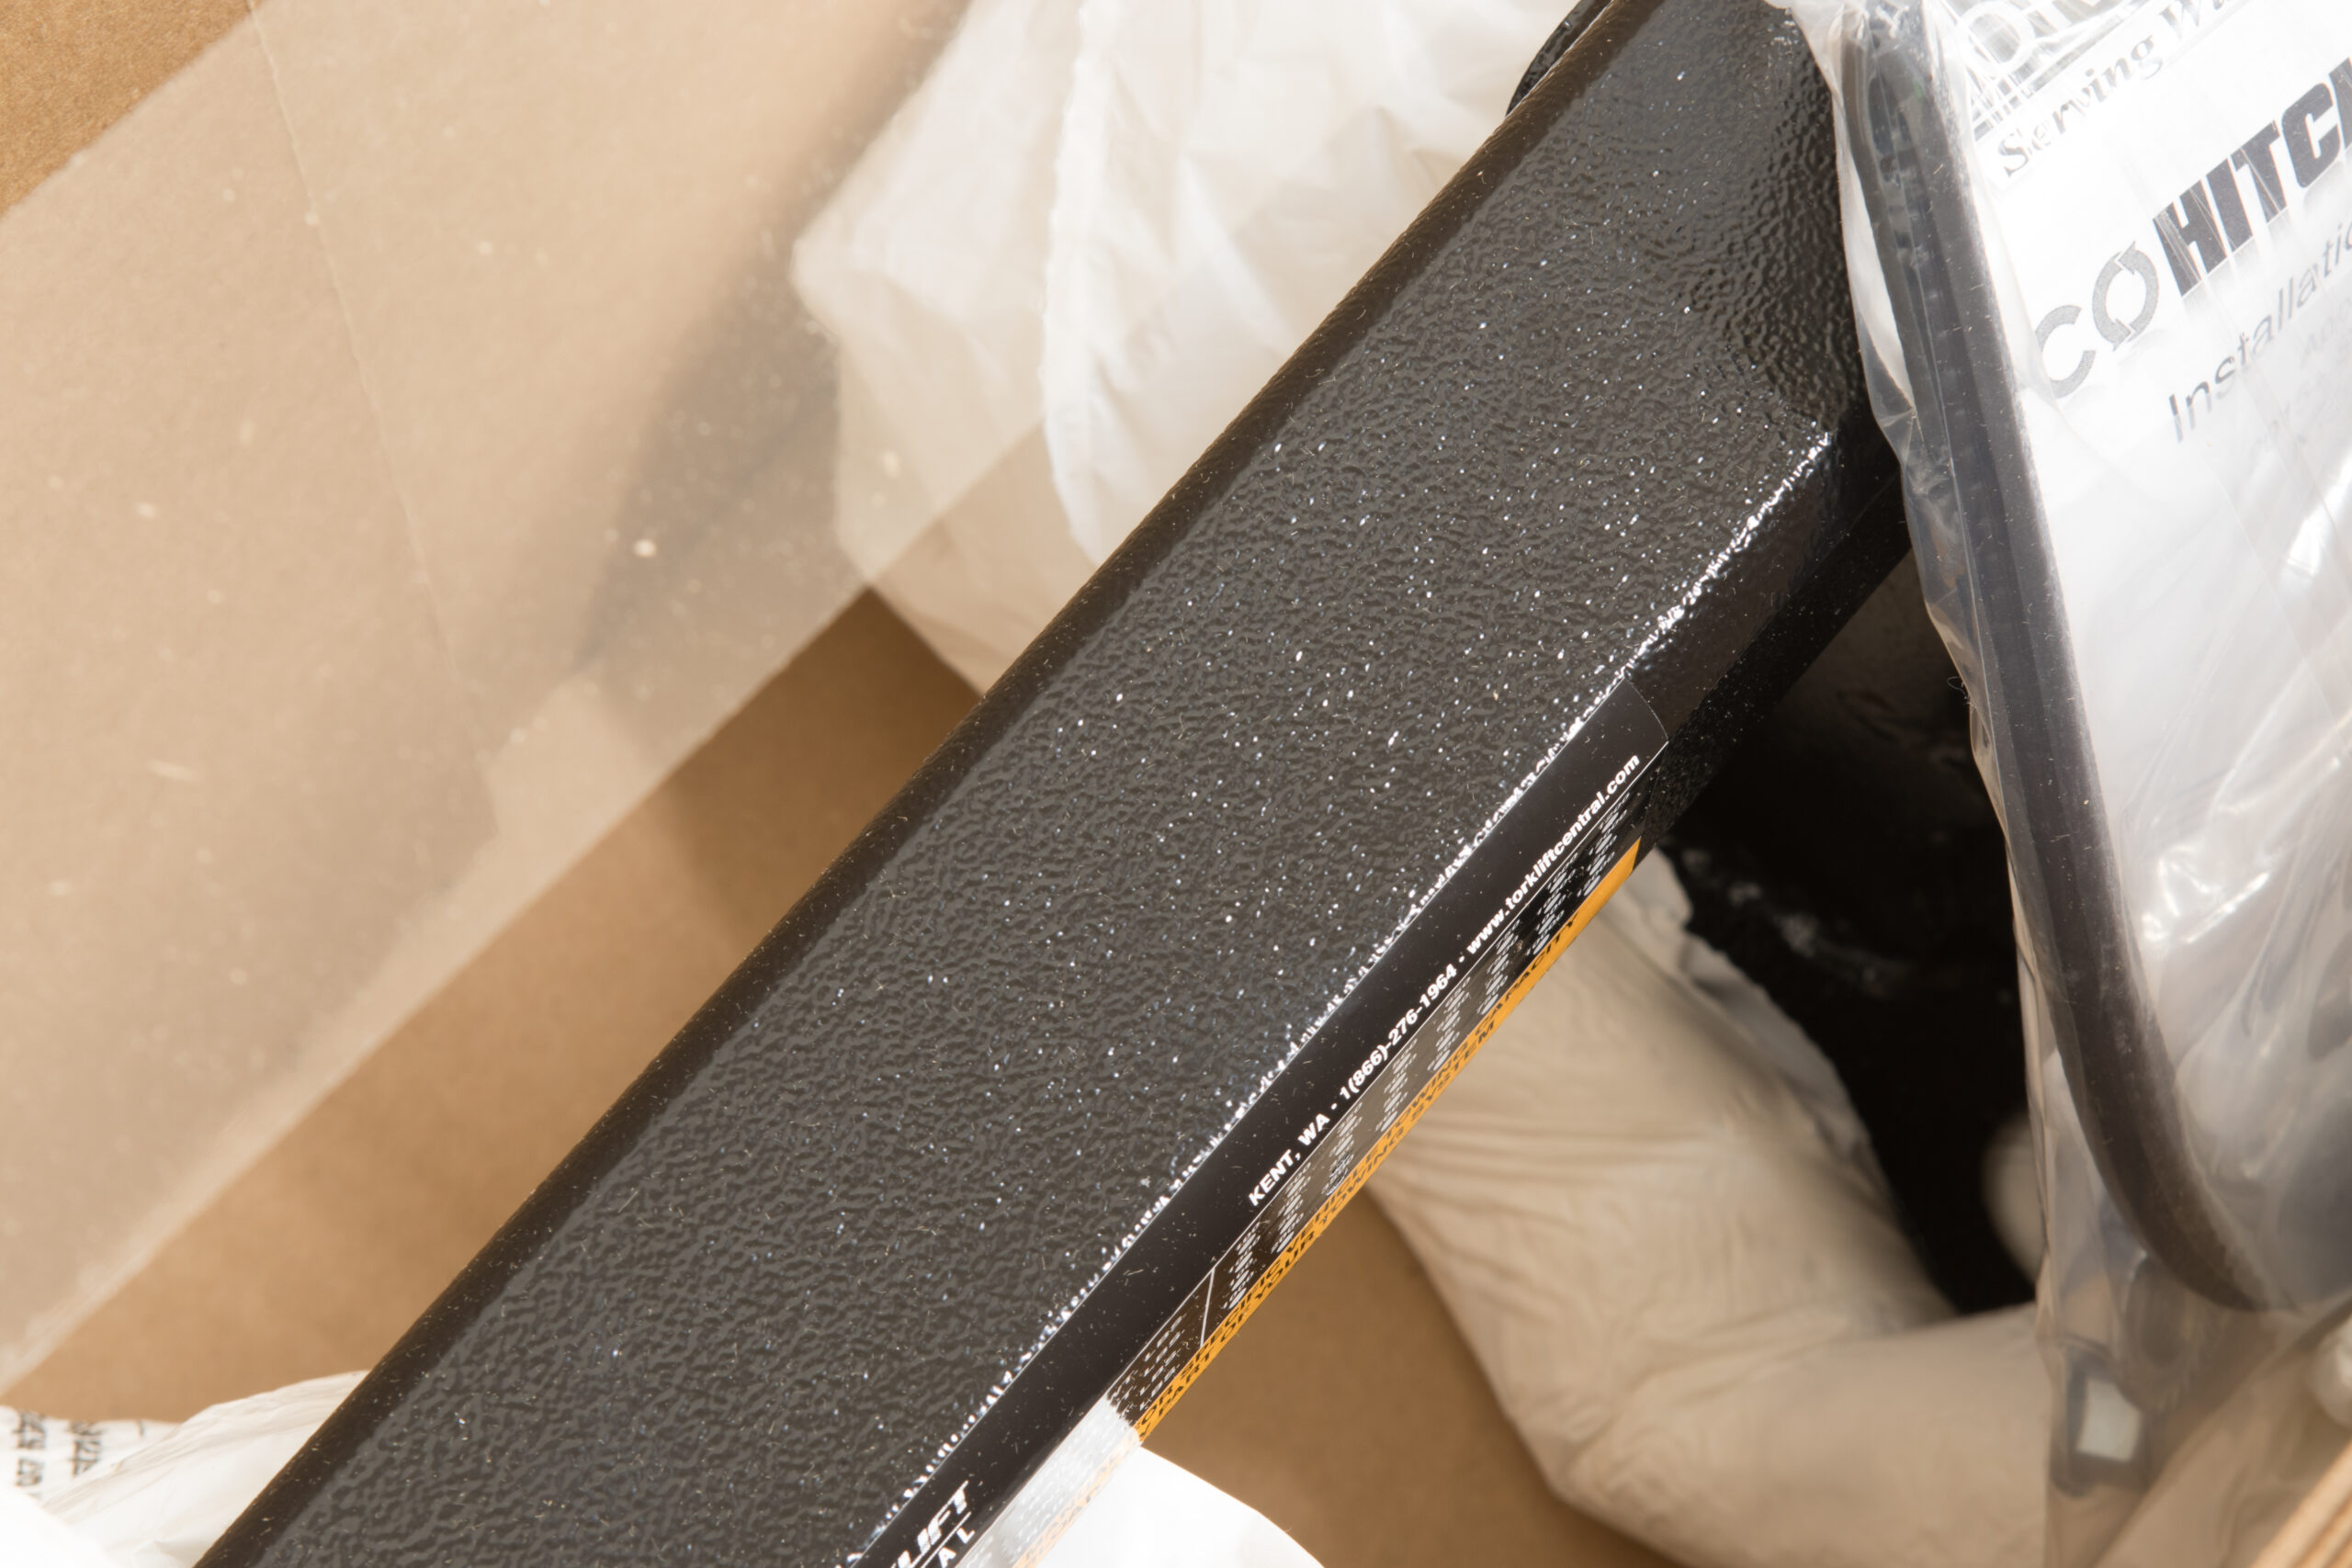
Whole rack, rear view, with installation instructions and parts bundled to the center.
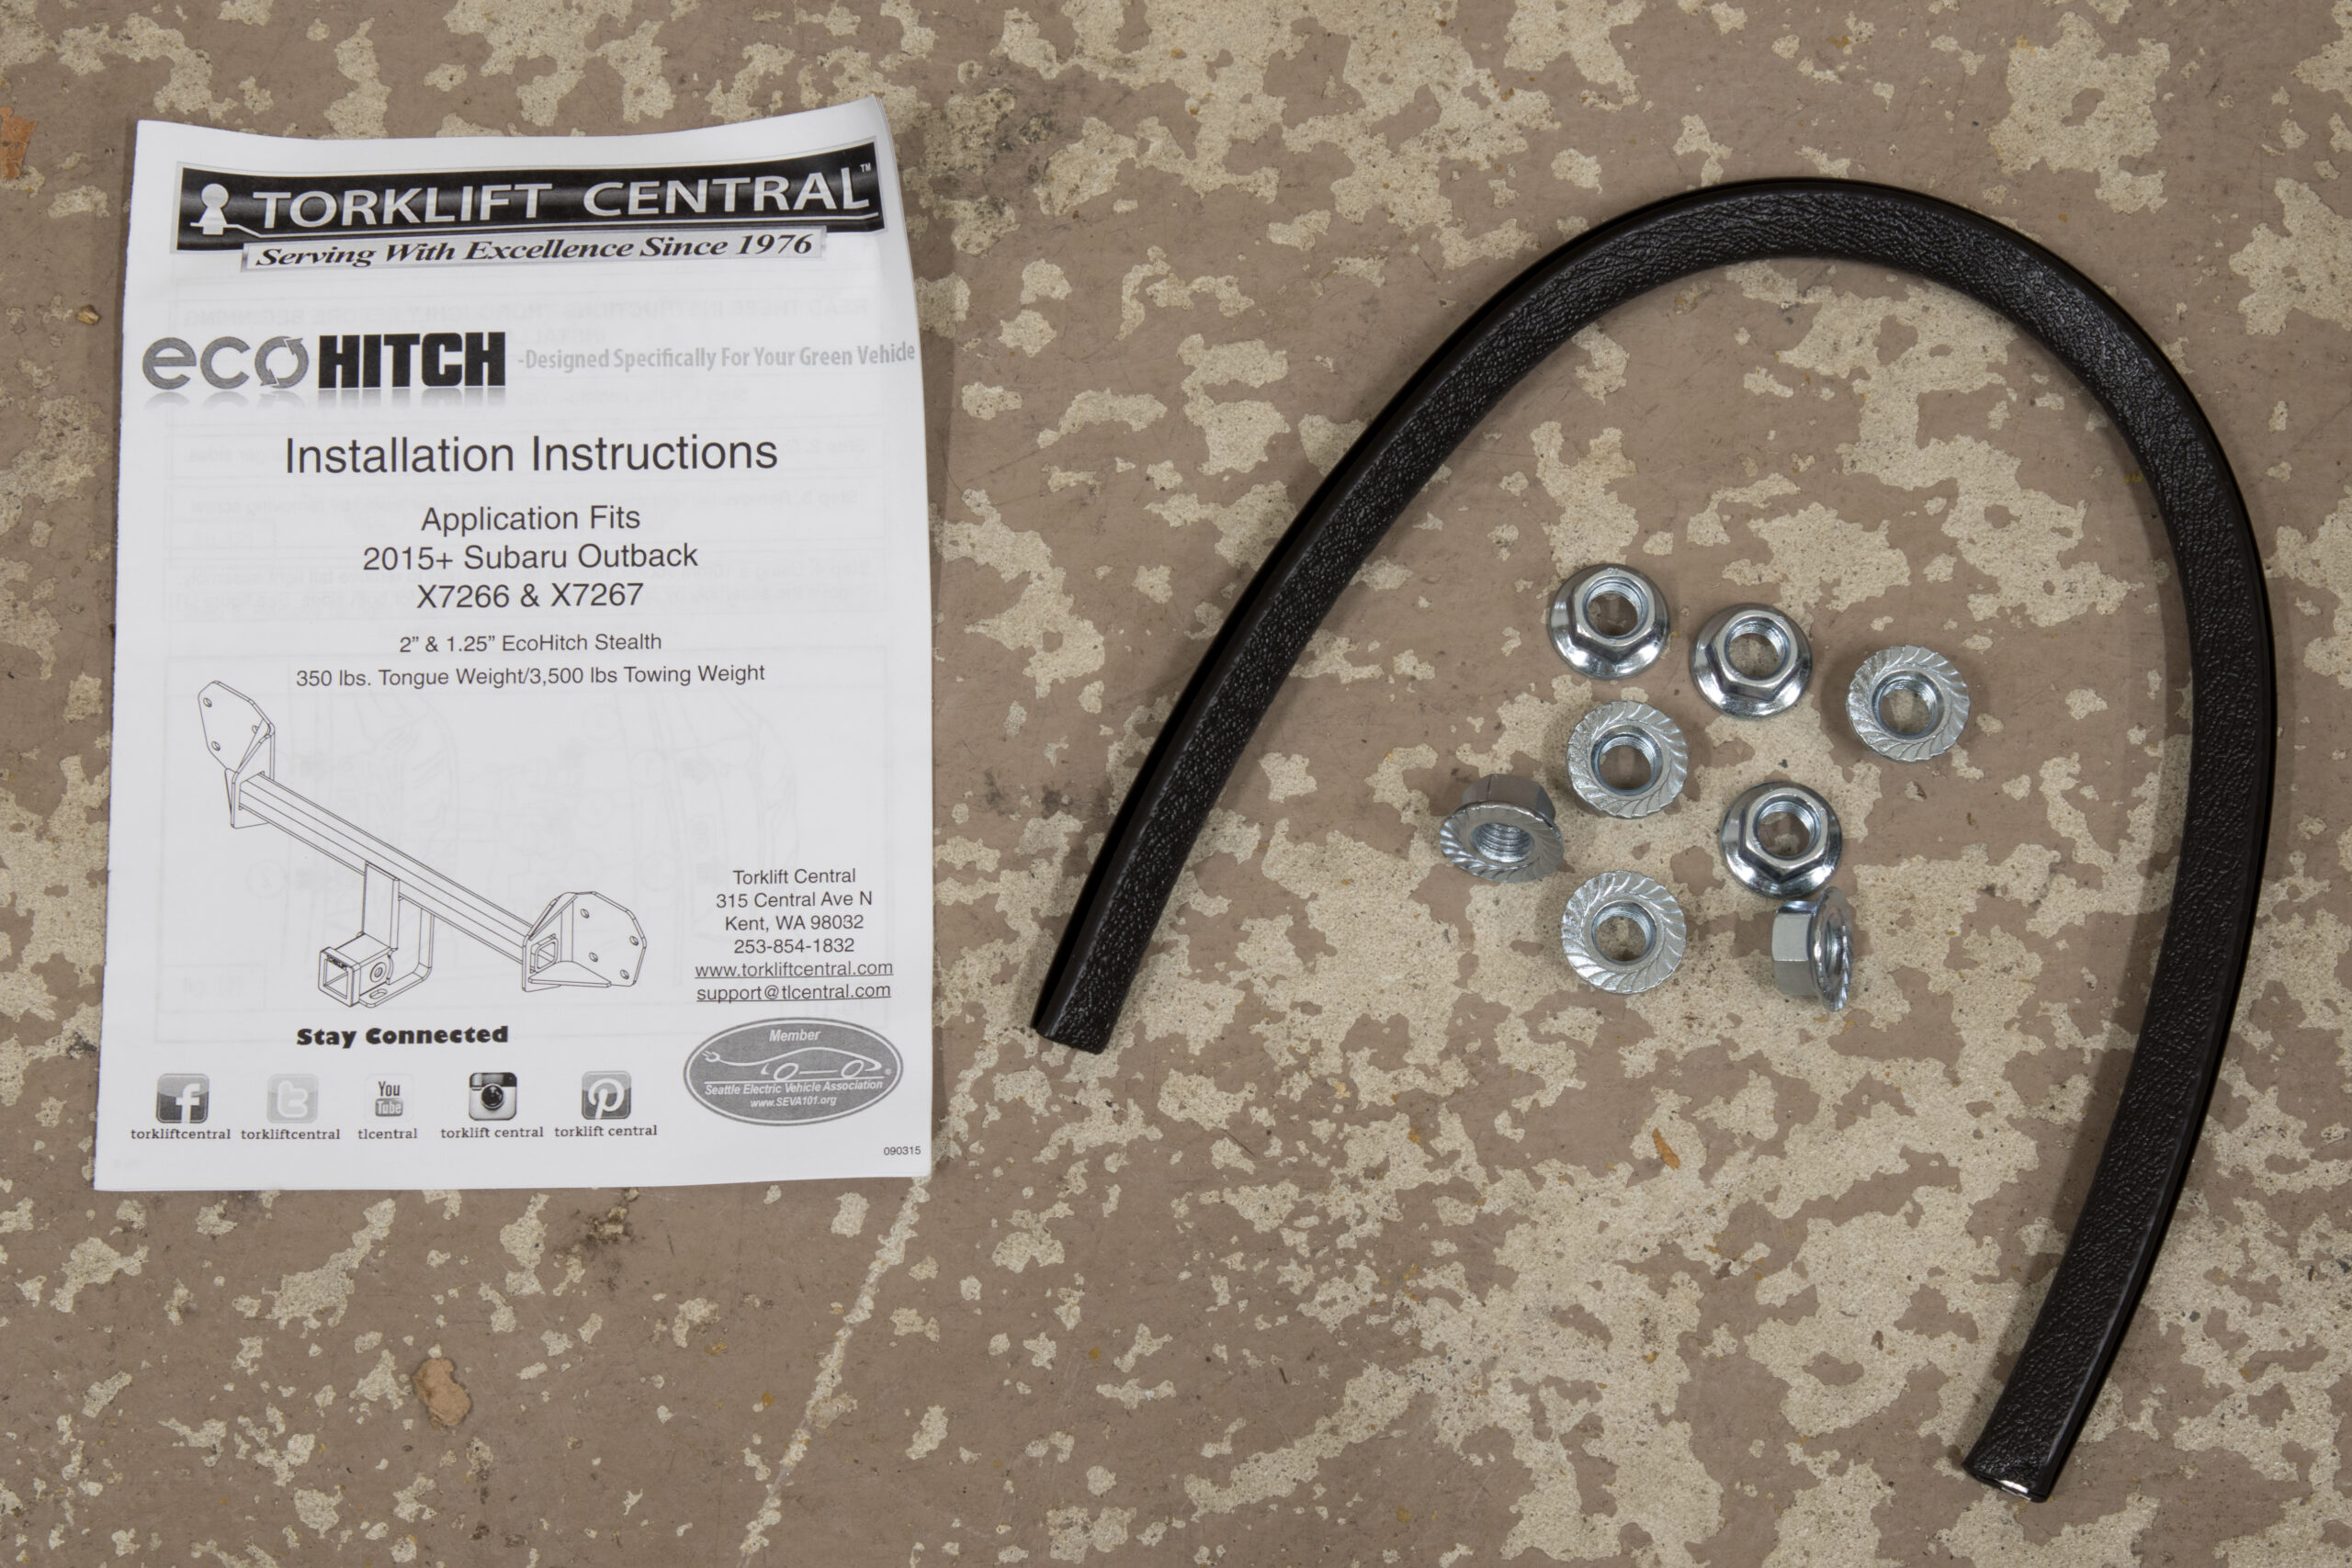
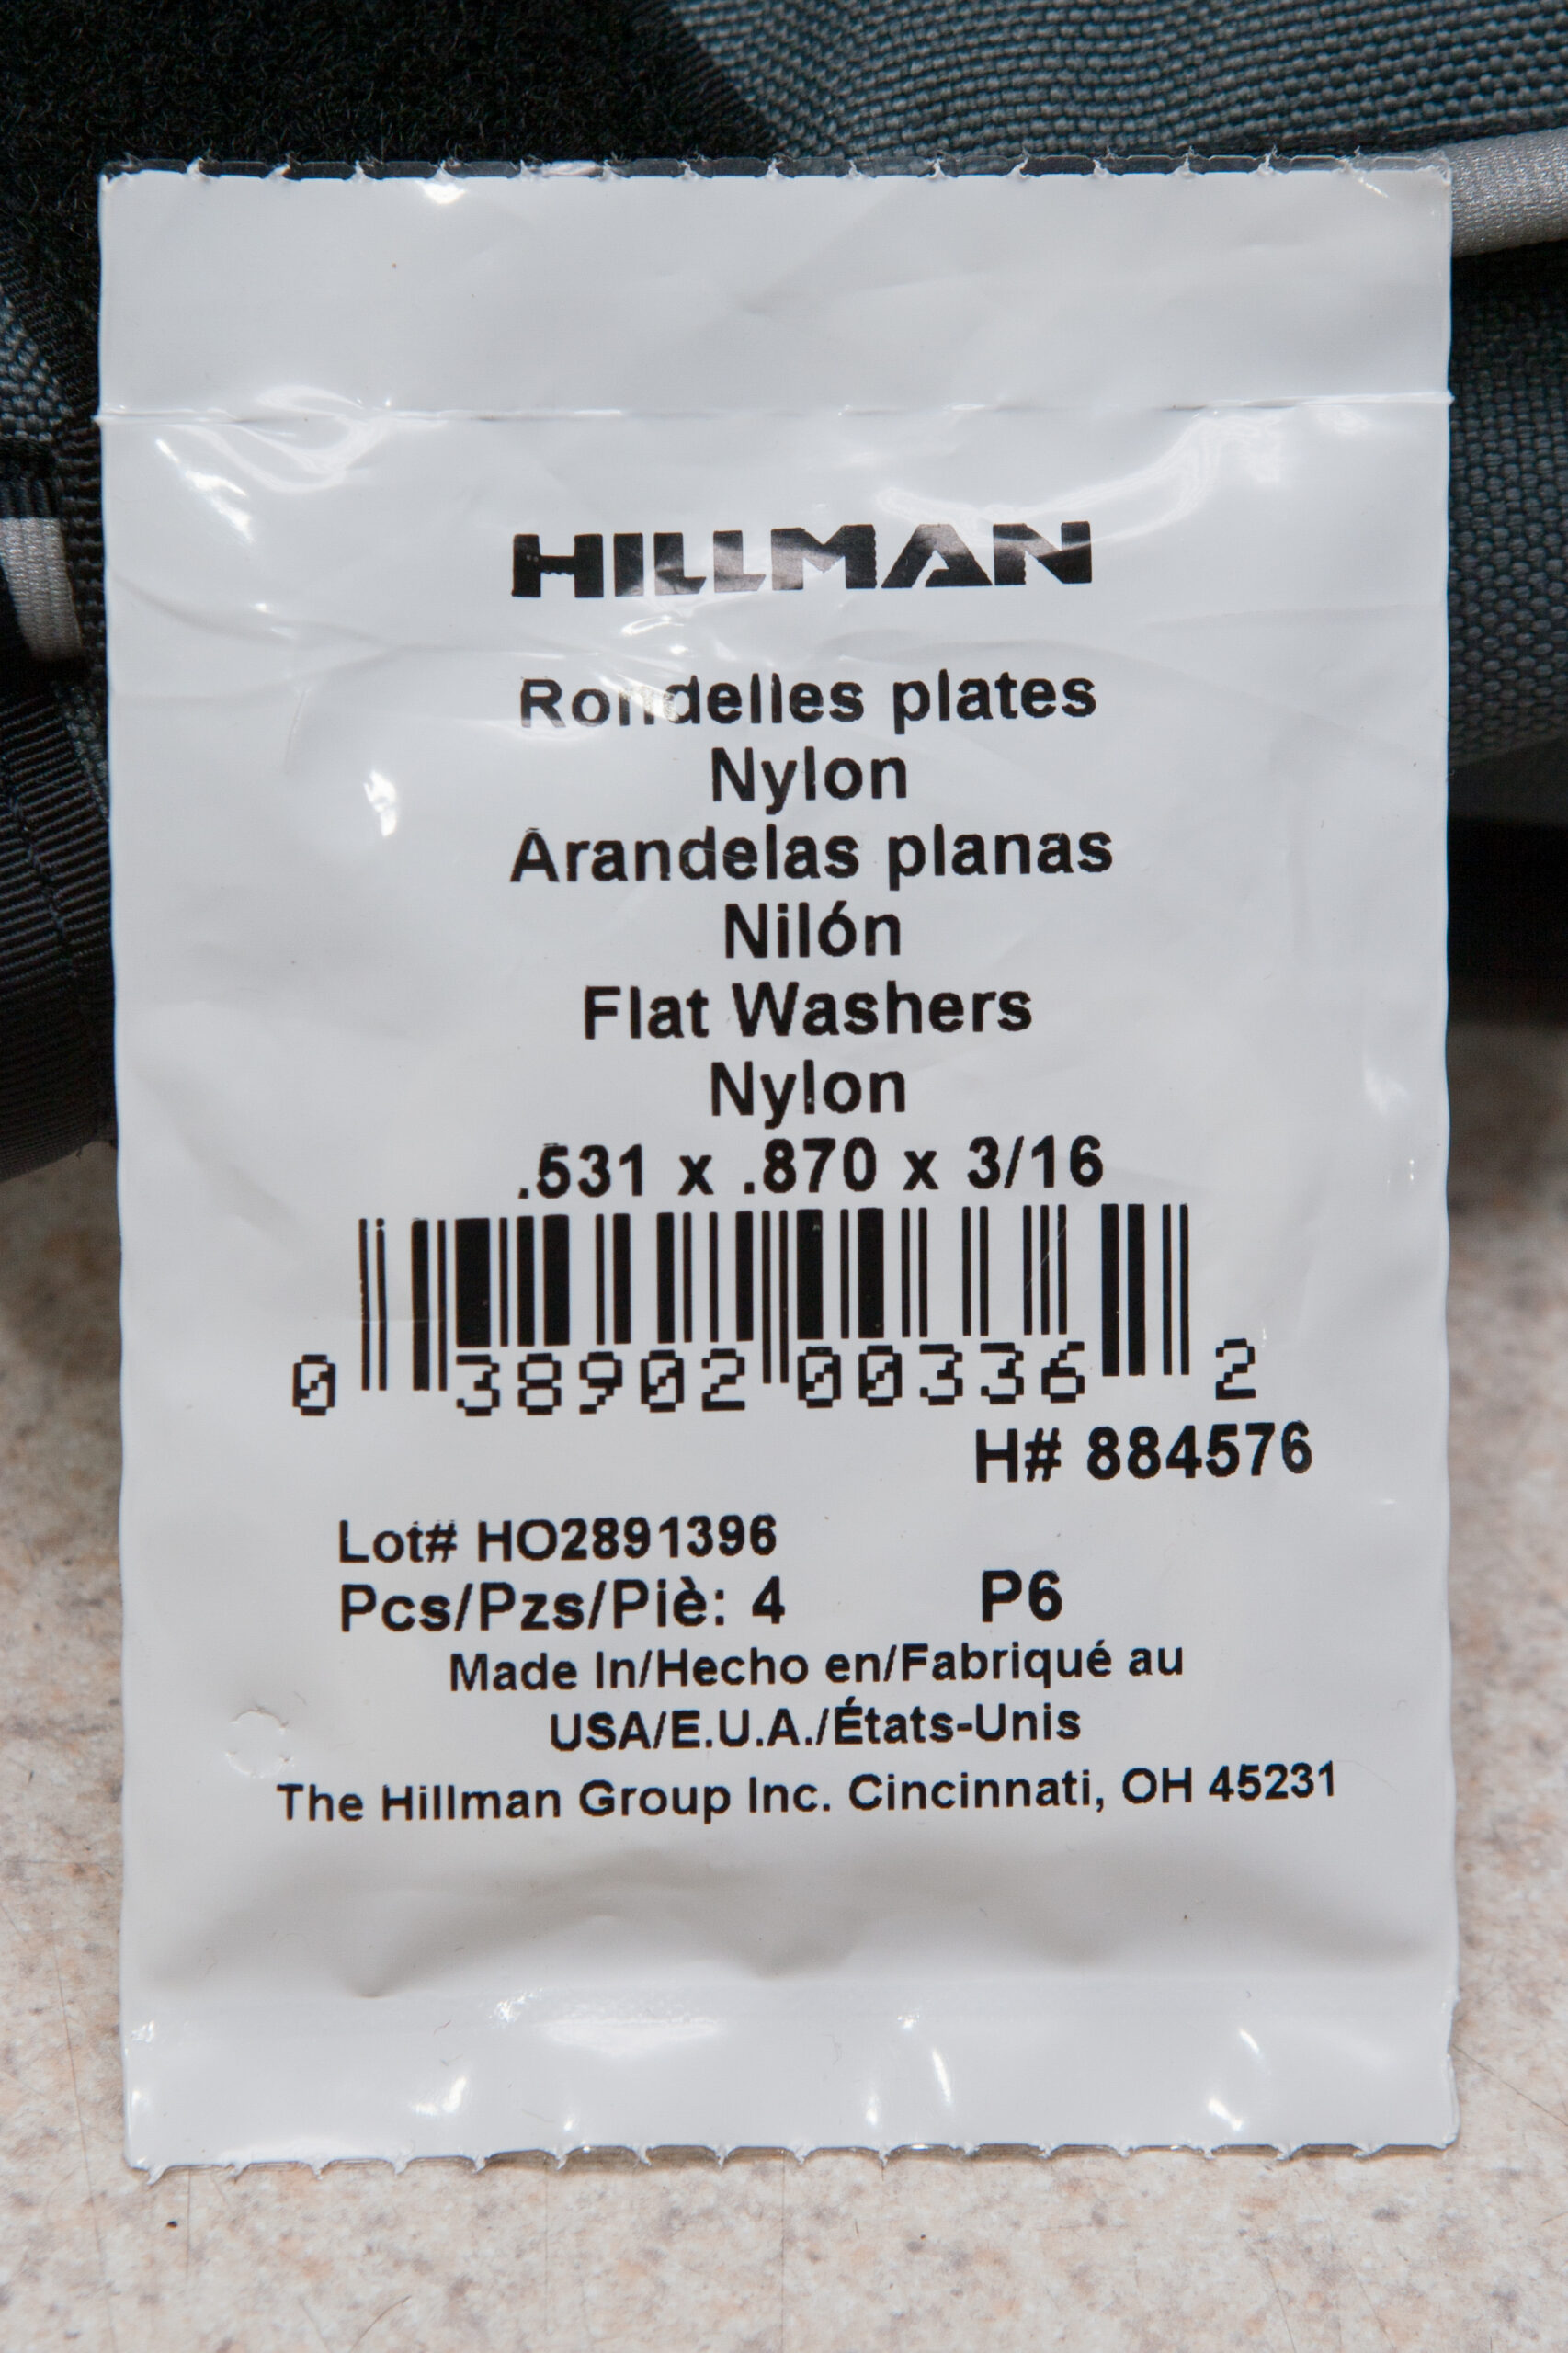
Unboxing the rack revealed a well-packed (photo), nicely powder coated (photo), solid rack that ships with an instruction manual, the eight nuts (for attaching it to the bumper mount bolts), and a piece of rubber trim gasket to cover the cut edges on the underside of the bumper cover (photo).
Besides the printed instructions (which I wish Torklift posted as a PDF on their website), there are two instructional videos (1, 2) which show the installation on everything from 2015 to 2018 models of the vehicle. These do a good job of showing the basics of the installation, but they gloss over what I think is the most difficult part; removing the bumper cover:
- Removing the bumper cover itself works best if you push up on the sides from the bottom, then pull out the at top. Going off of just Torklift’s instruction I first thought to pull straight outward, but this wasn’t working well and — per Subaru — can risk breaking retention clips. Thankfully I have access to Subaru’s service manual which described pushing up from the bottom, and with this technique the cover came off easily.
- My vehicle has splash guards installed, which had to be removed before all the bumper clips could be accessed. These guards came off via six screws and four push-lock plastic clips, but I had to use a right-angle screwdriver to fit around the tires. (There is a note in the Torklift instructions mentioning these may need to be removed.)
- Three out of the myriad push lock clips used to hold the bumper and splash guards on broke during removal. This is likely due to my Outback being nearly four years old. Thankfully replacements are readily available online and at dealerships and can easily be identified via Subaru Parts Online.
For this installation Torklift instructs that the hitch be fitted, then the bumper beam reinstalled. However, during the install of the OE hitch, the bumper beam and foam energy absorber is removed and discarded. Since my Outback came with the OE hitch installed, I didn’t have these pieces. After consulting with both Torklift and some auto engineer friends we concluded that the Torklift hitch will be fine without the bumper beam.
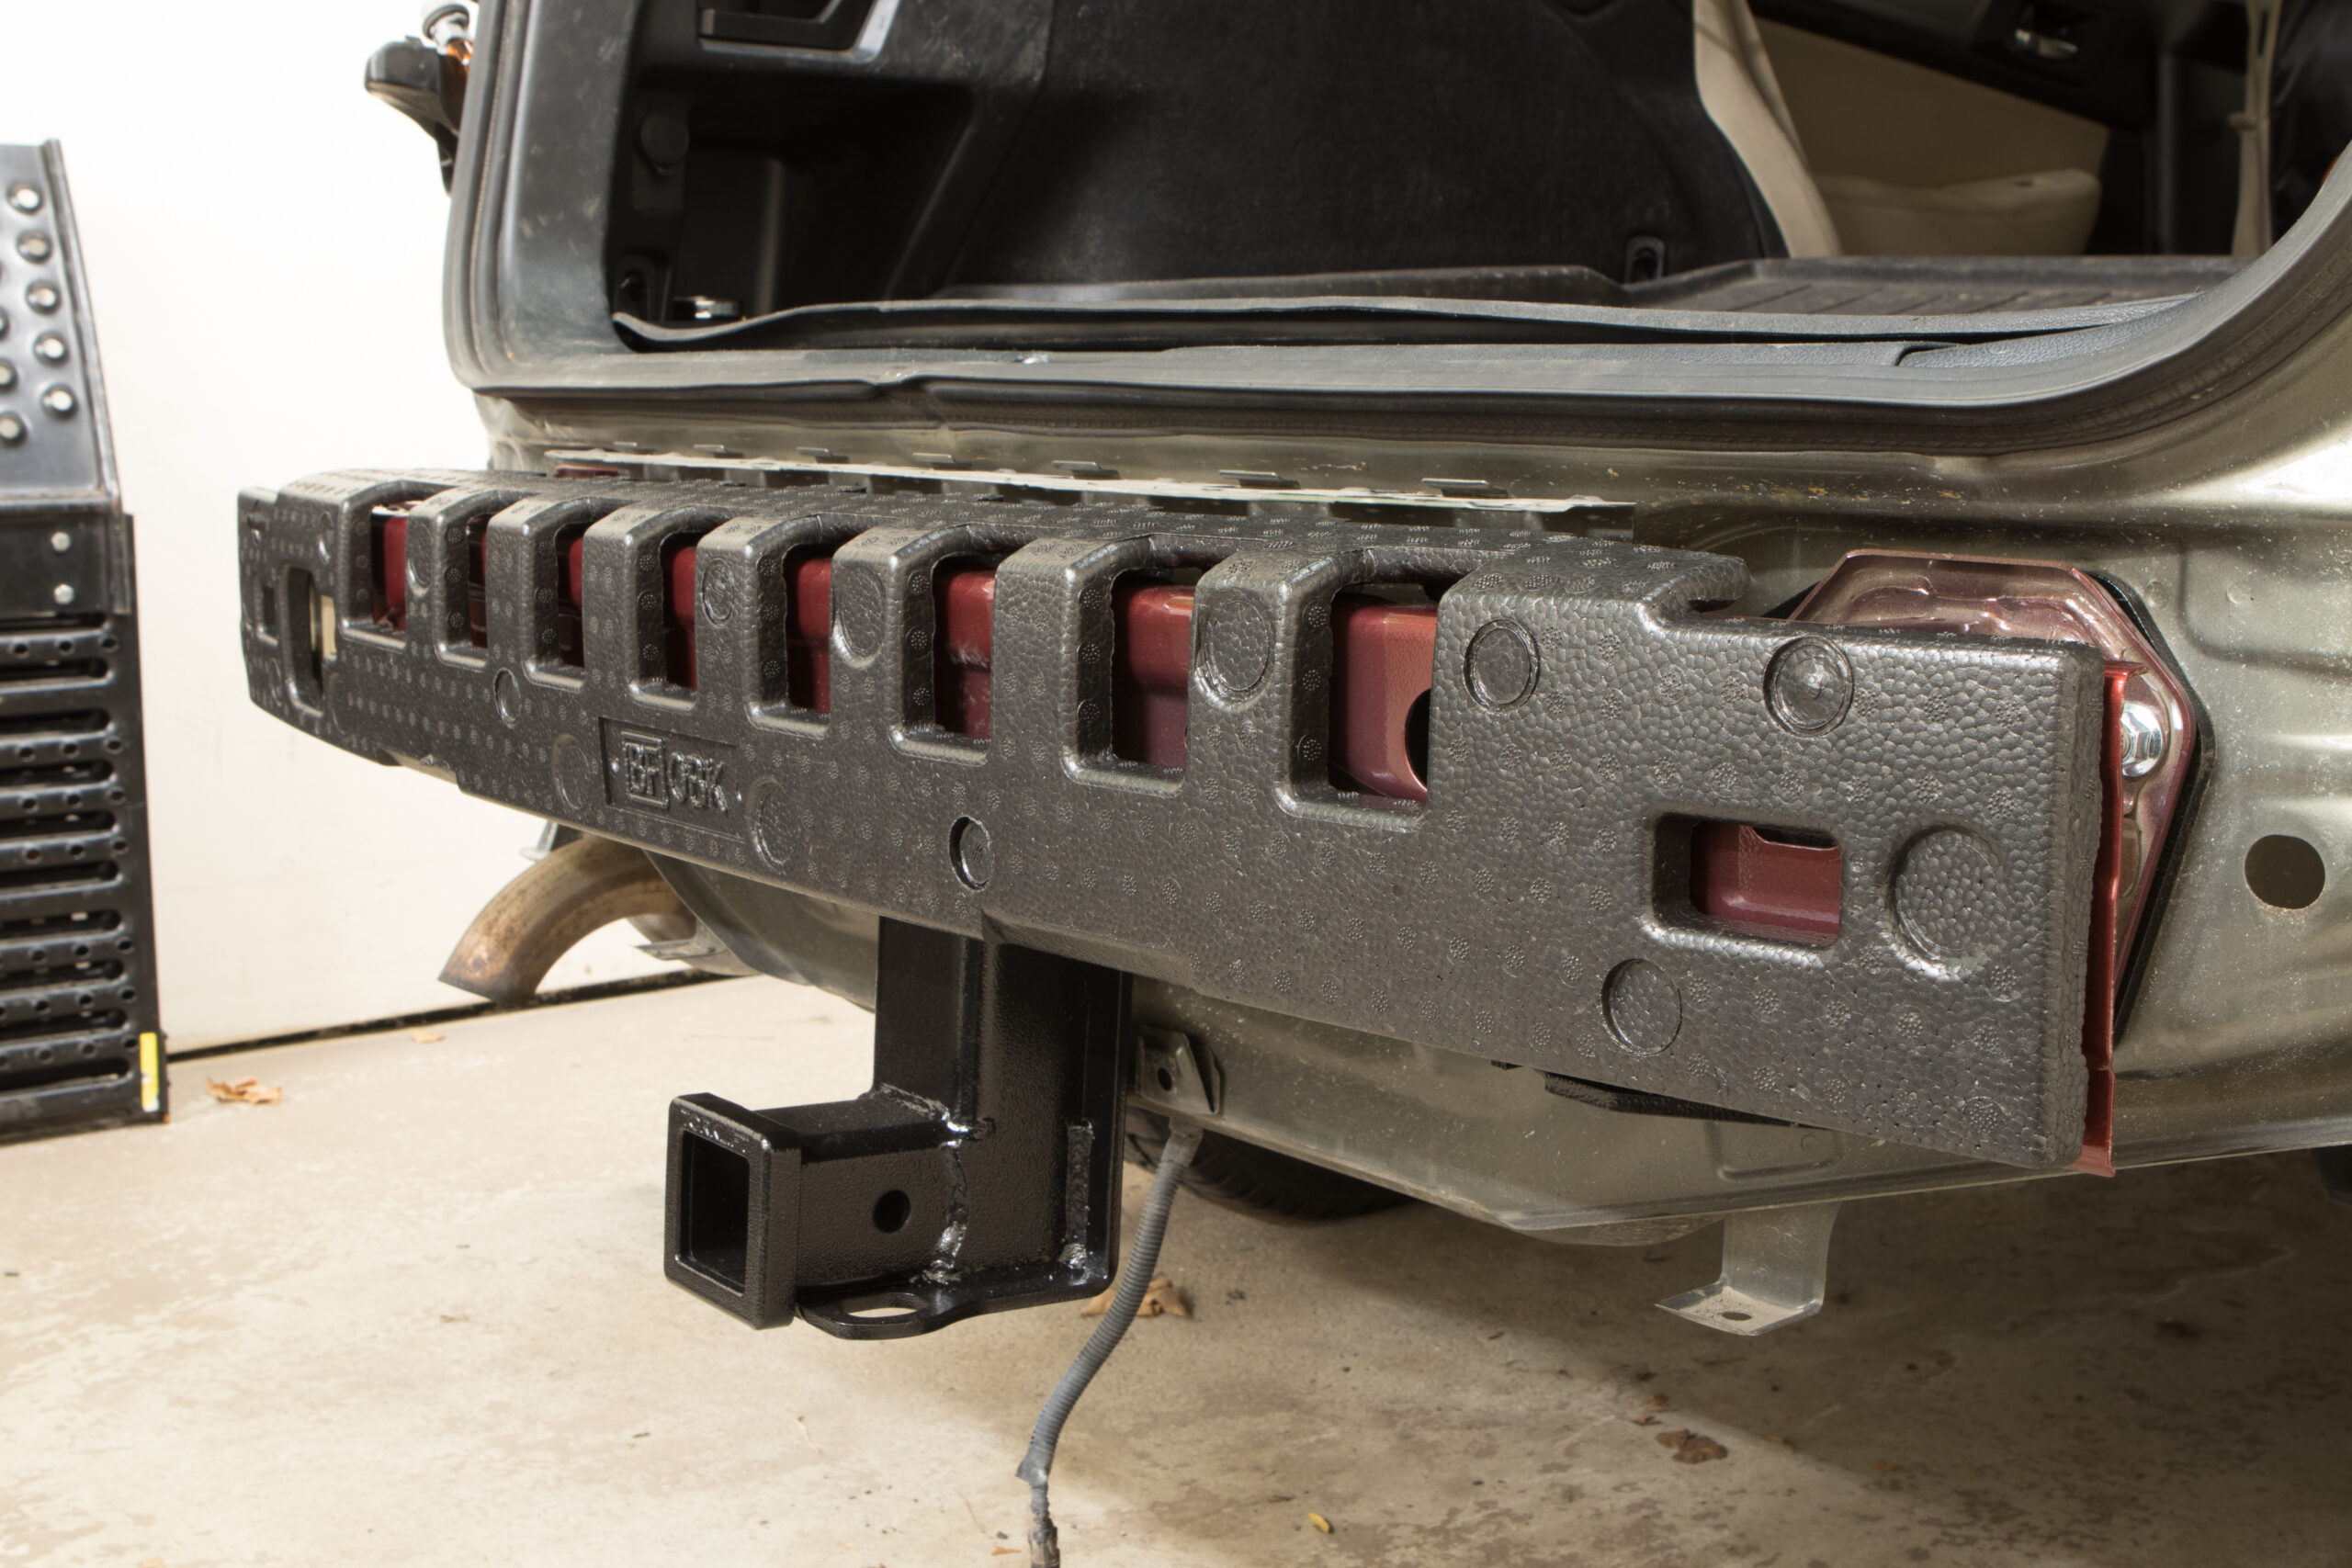
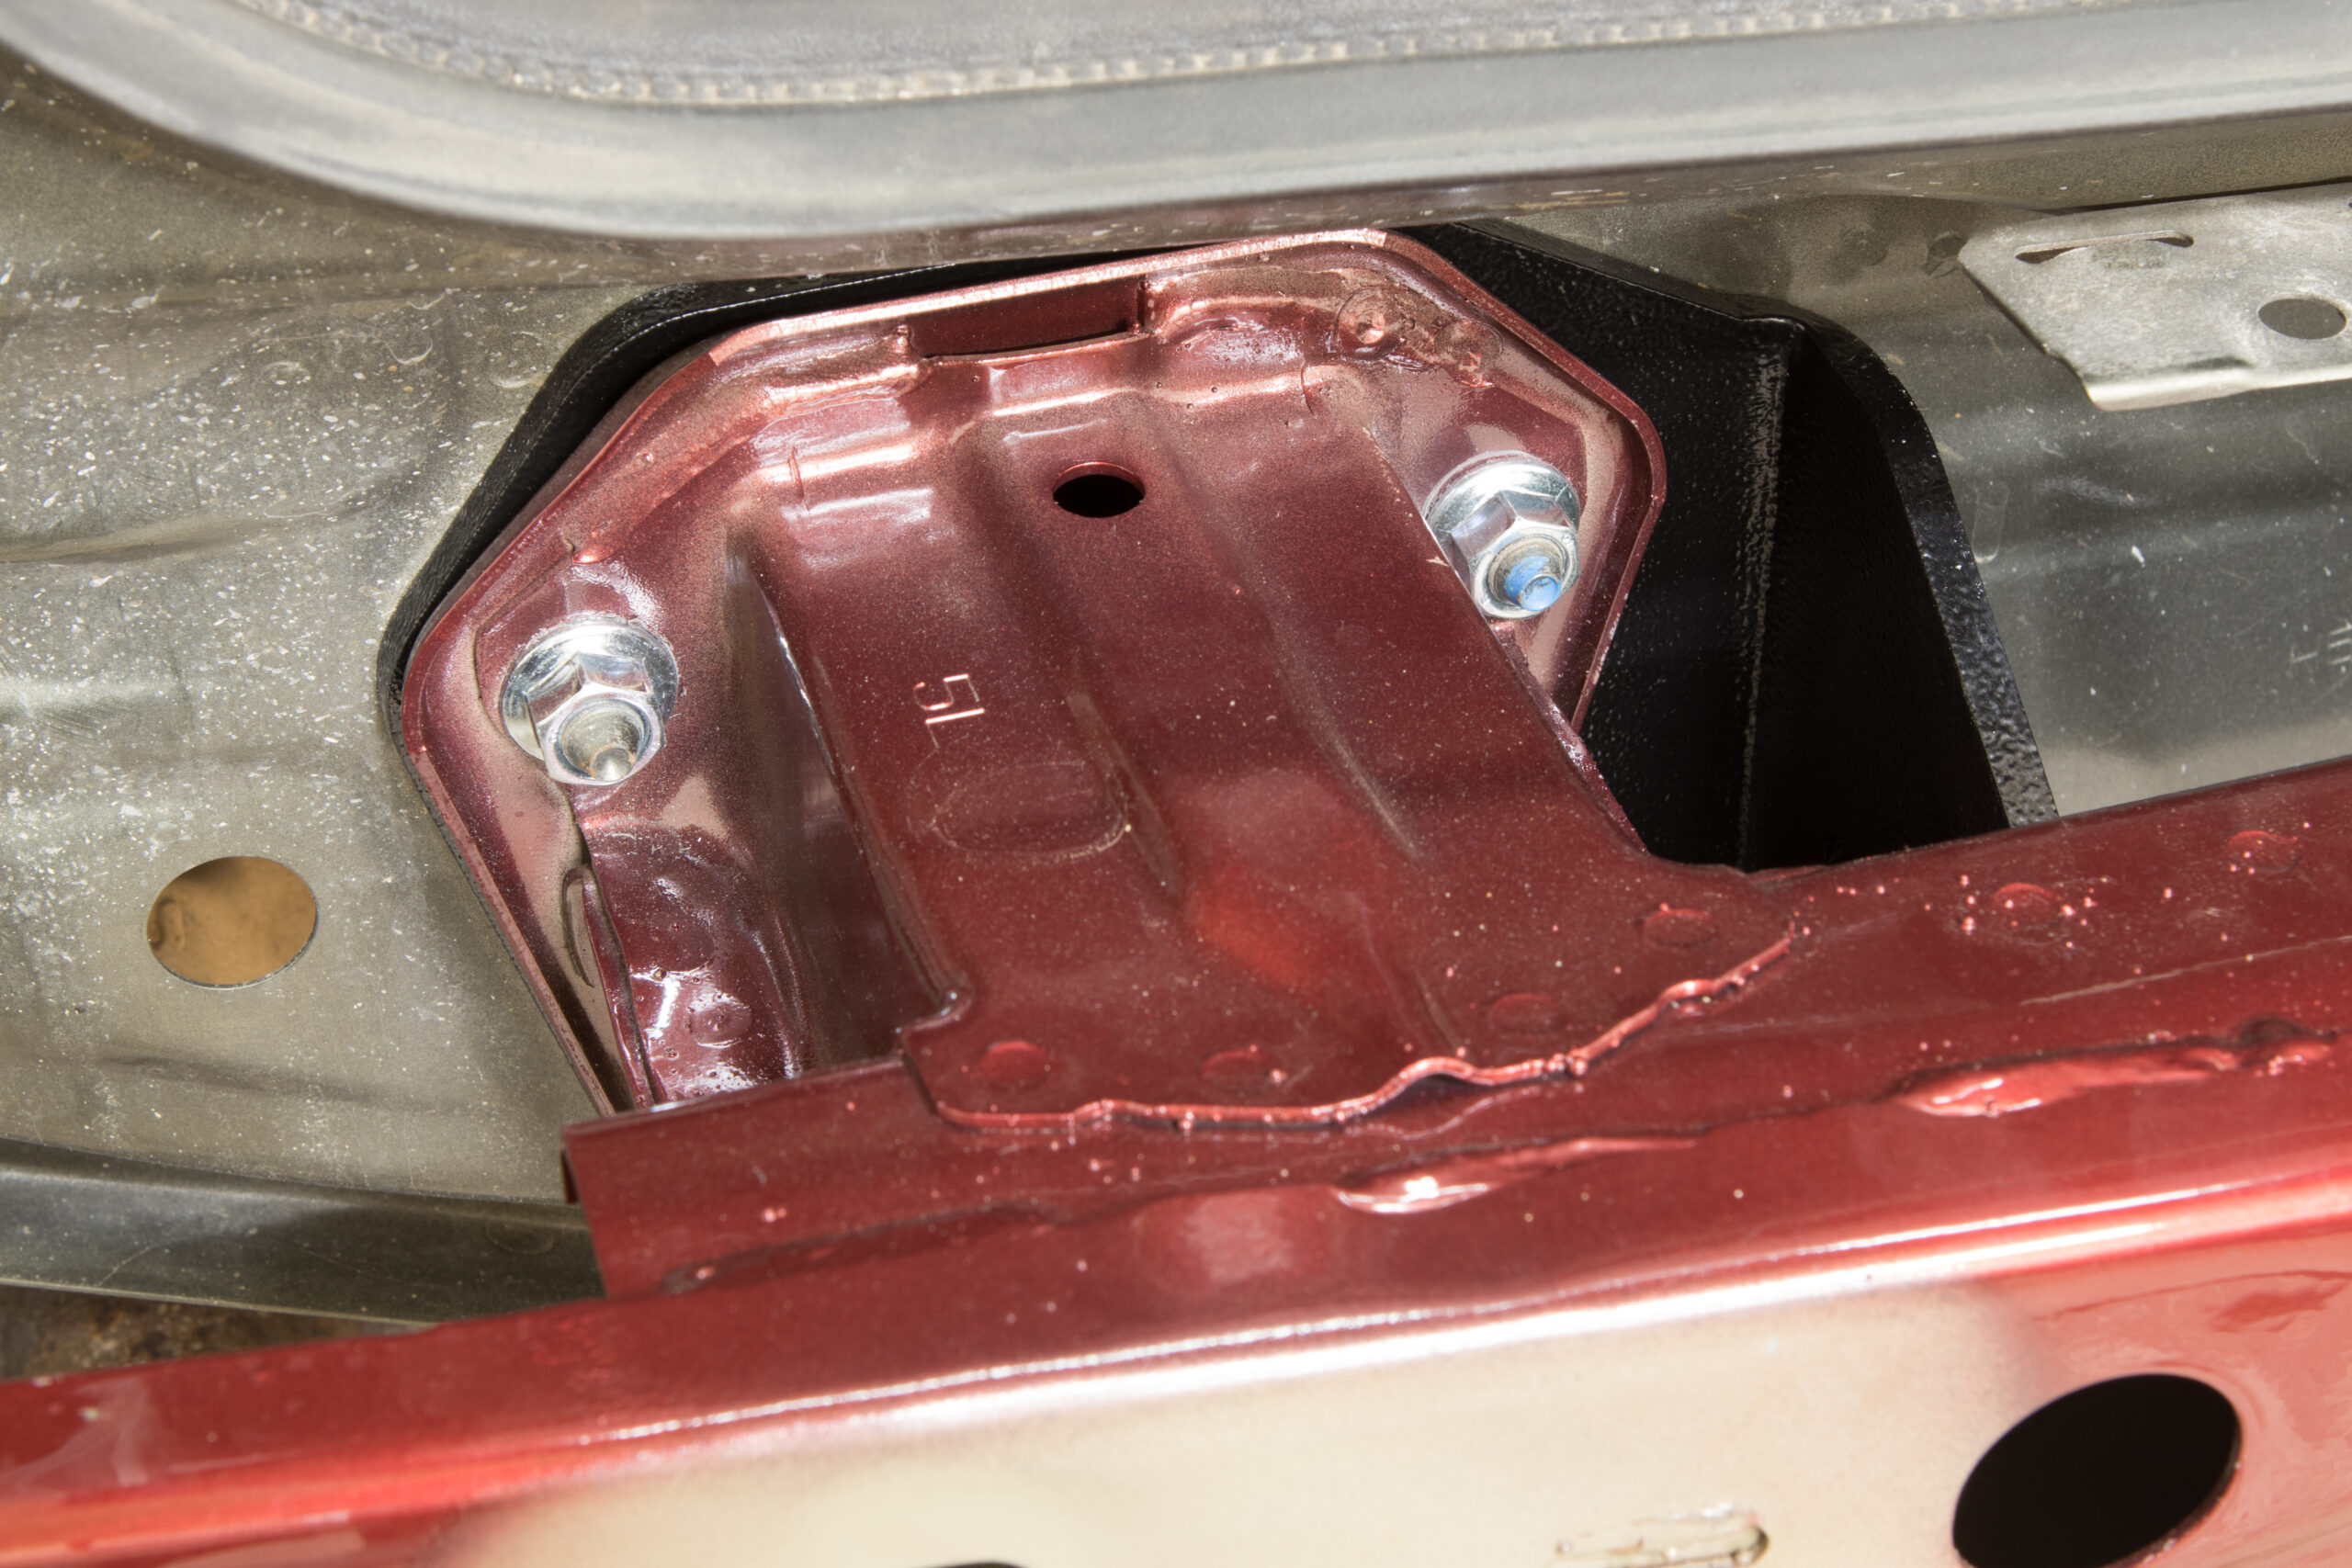
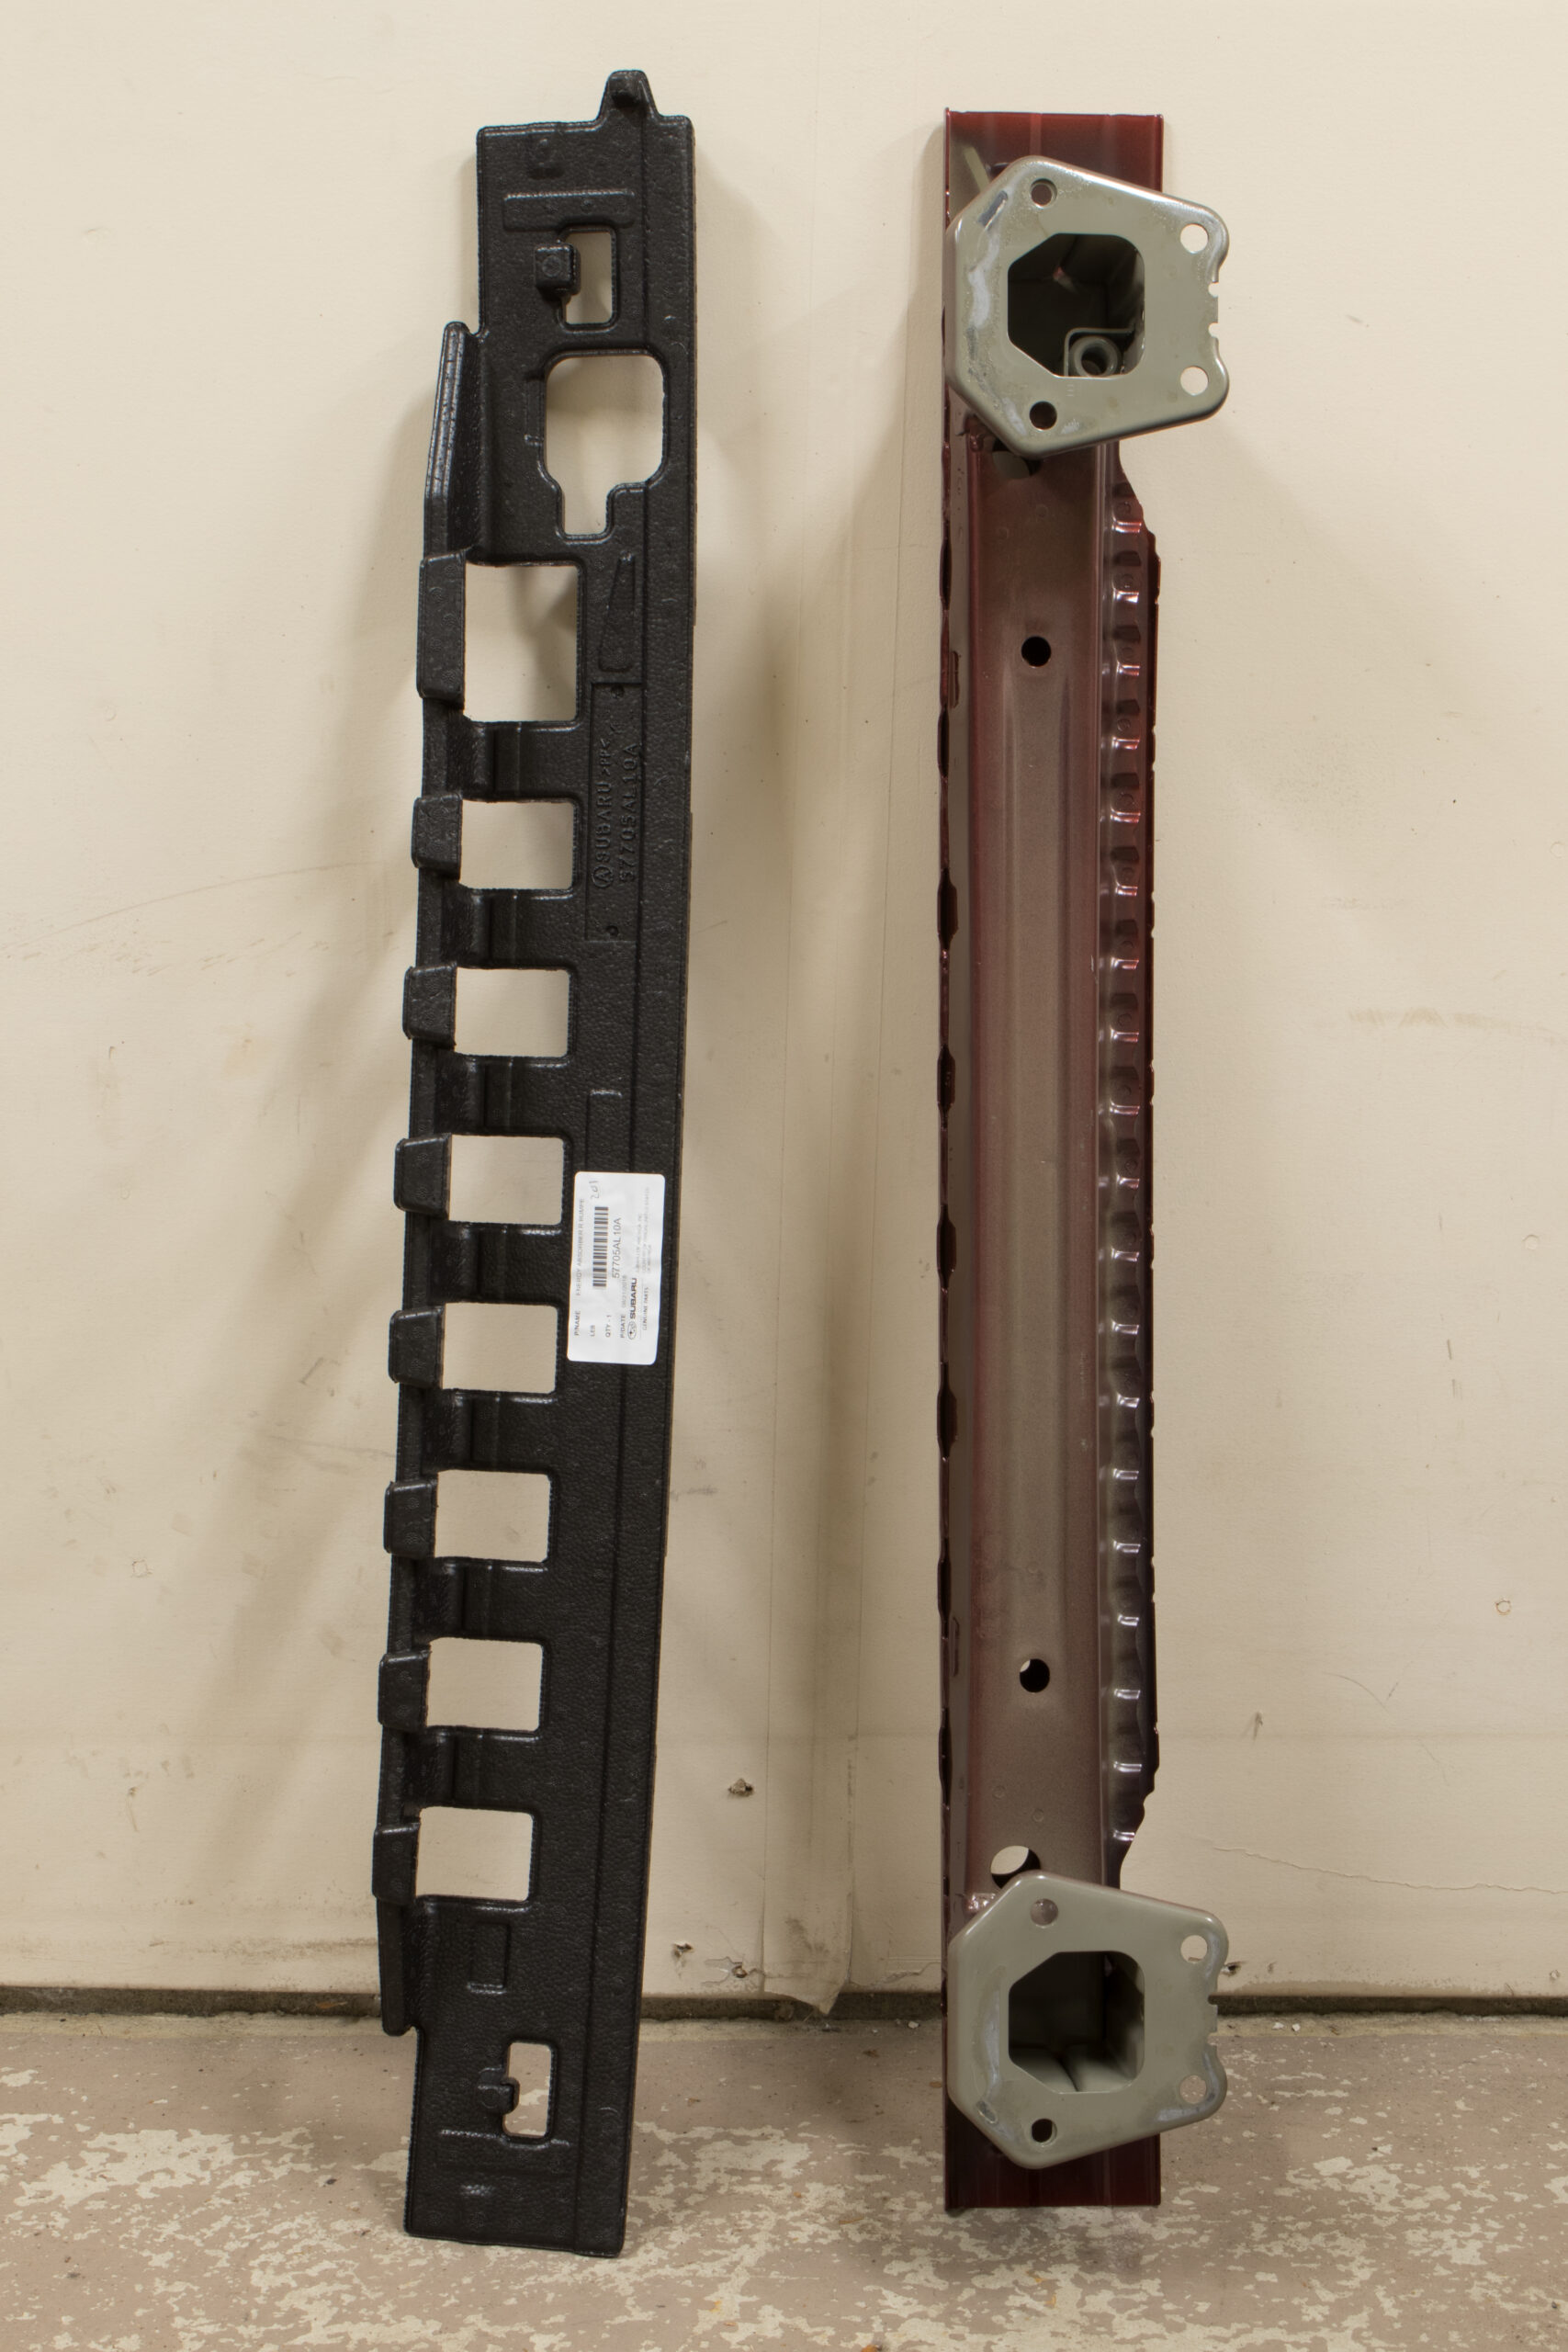
Despite this, I contacted my local dealer (Sellers Subaru) and to my surprise they gave me discarded/scrap bumper beam from an Outback where they’d recently installed a hitch. It’s maroon, but being hidden the color doesn’t matter. With the purchase of a replacement foam energy absorber ($79.95 MSRP) I was all set part-wise to remove the OE hitch and install the EcoHitch to spec. While this likely wasn’t needed, it makes me feel better about the overall install. (Photos 1, 2)
Removing the OE hitch was a bit of a hassle, as getting to two of the hitch bolts required removing the muffler and heat shield. (Another plus for the EcoHitch.) Thankfully none of the bolts were seized and removal this went smoothly. Before long I also had the OE rack completely removed, exhaust re-fitted, and it was time to install the EcoHitch.
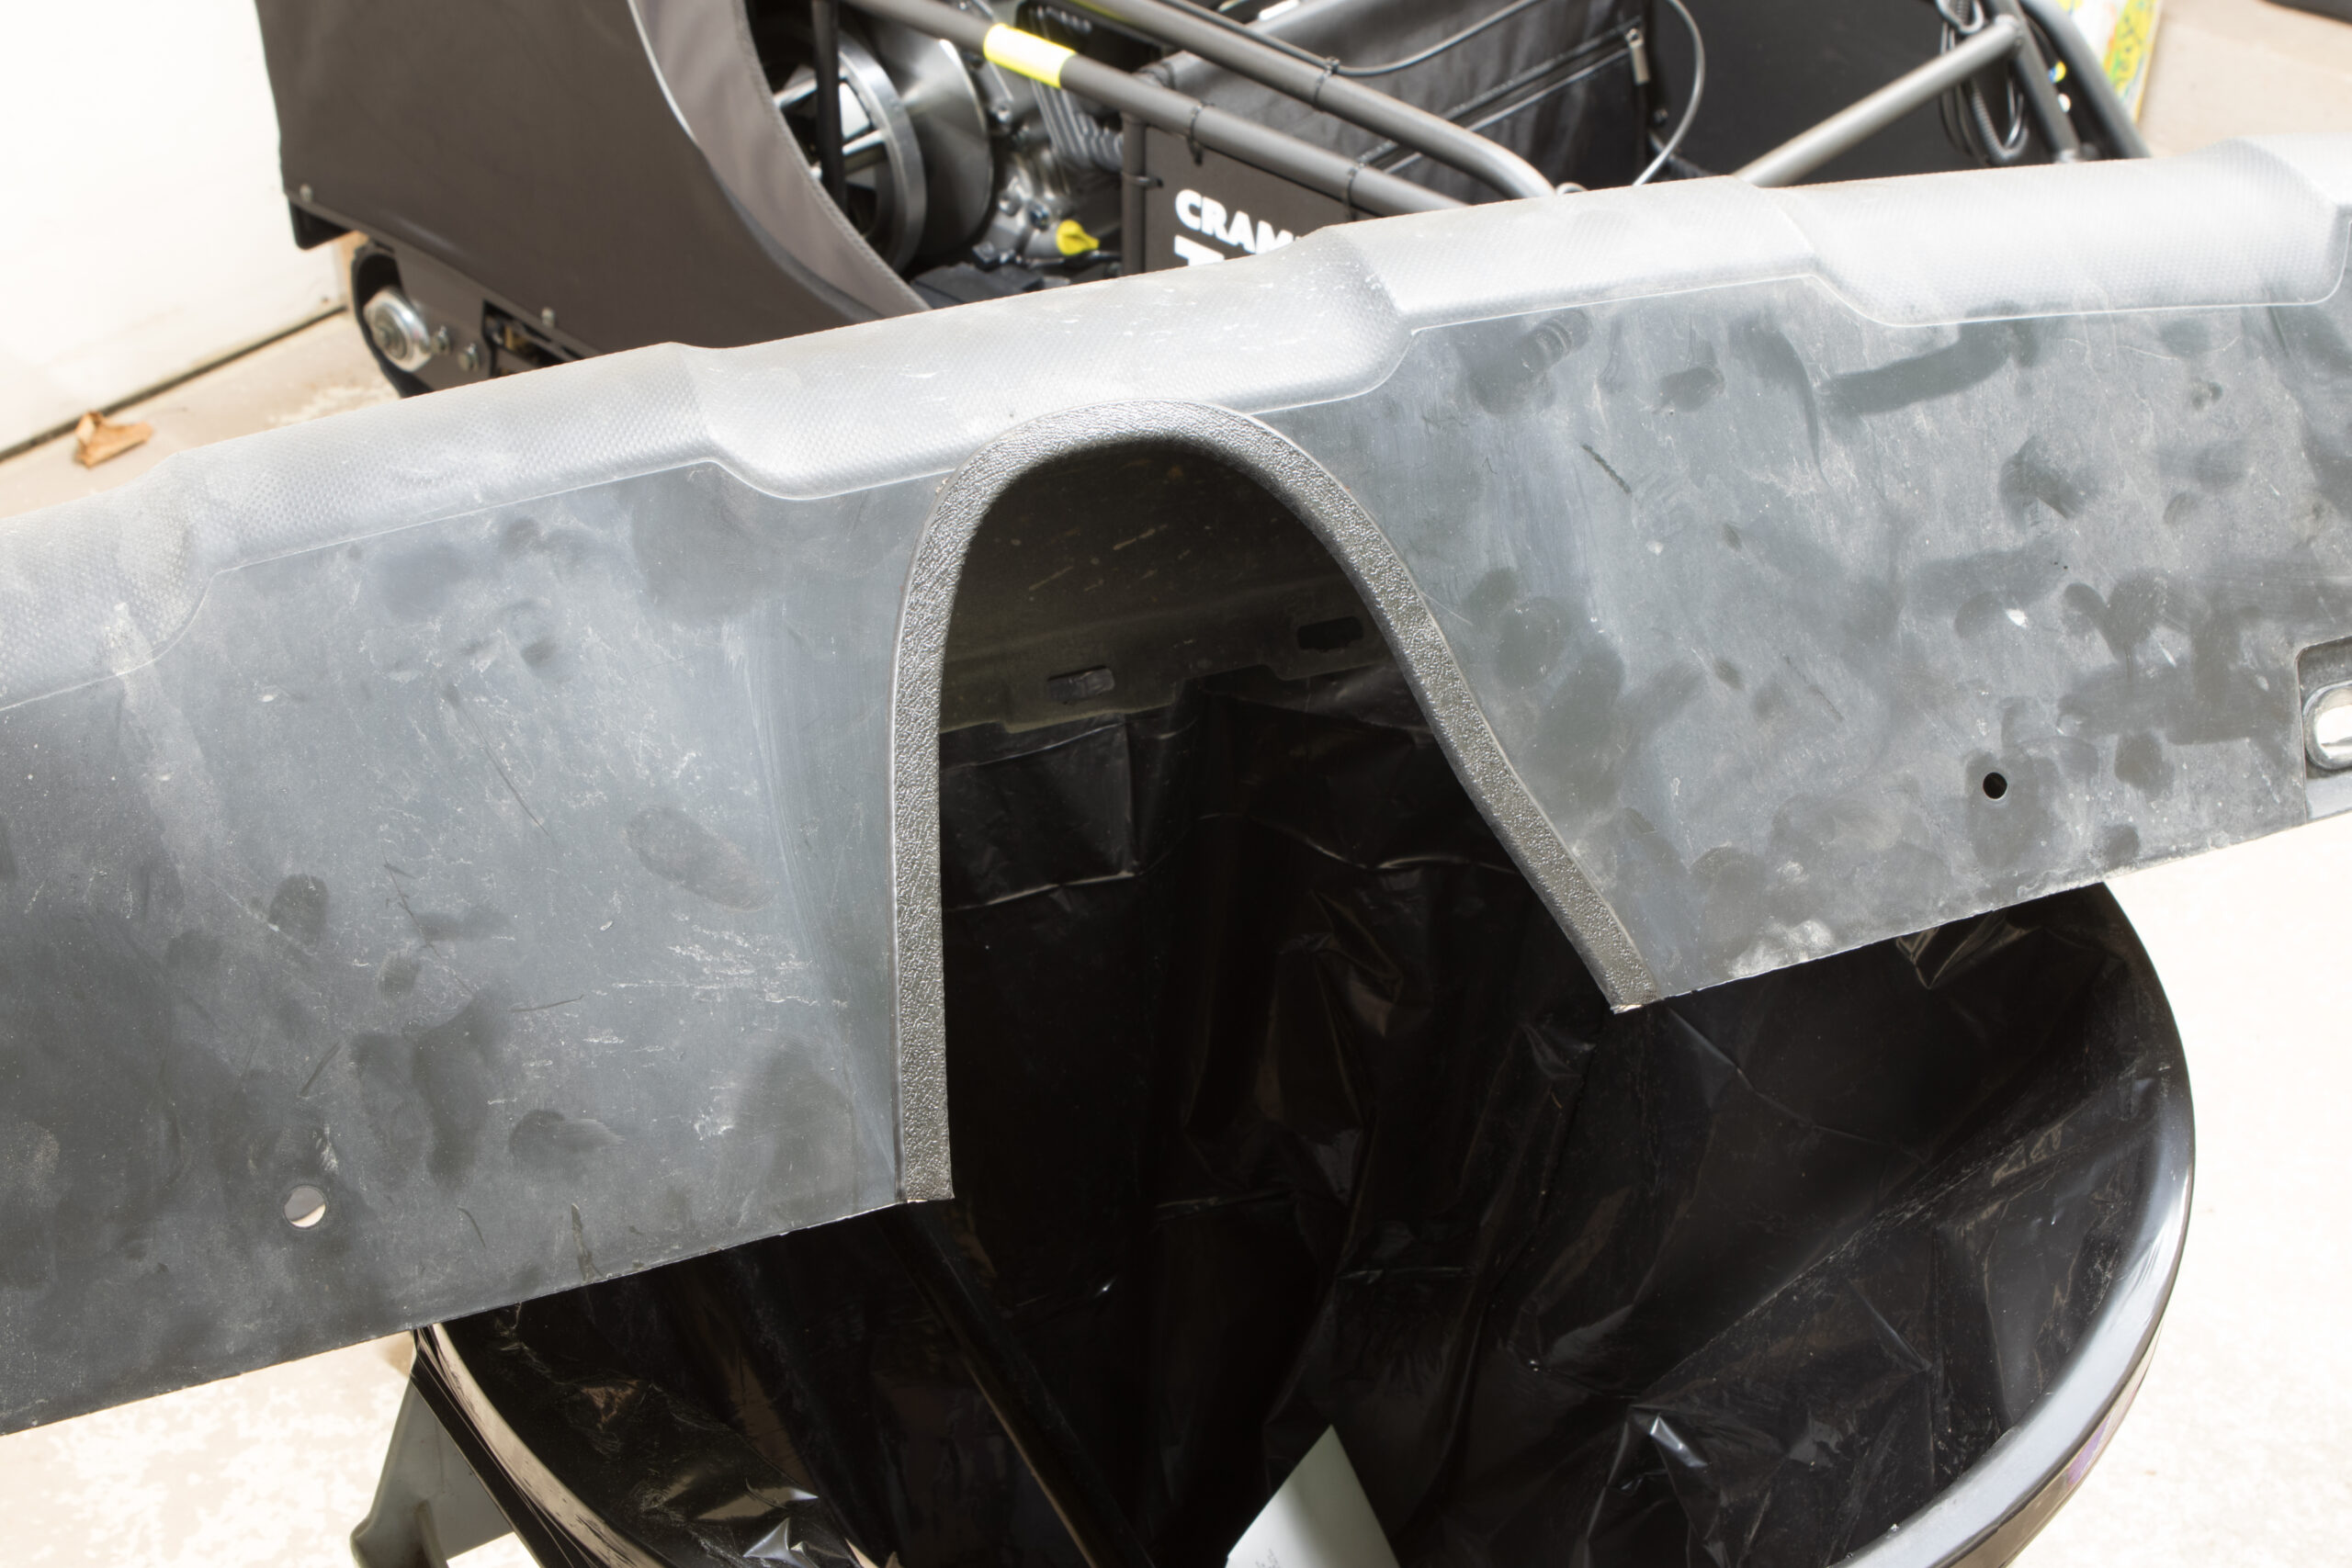
Foam cushion over the bumper beam, and hitch installed.
At this point — just after bumper cover removal on a normal install — installation is very straightforward: folding a thin metal bumper cover mounting tab up against the body, bolting the hitch and bumper back on, torquing some nuts, and cutting a notch out of the bumper cover. After this it’s just a matter of putting the the bumper cover, tail lights, splash guards, and some plastic covers back in place.
From the OE hitch I already had a notch cut in my bumper cover, but it was pretty easy to cut the wider notch required by the EcoHitch. The OE hitch uses a longer notch than the EcoHitch, and thankfully Torklift provides enough trim to cover the extra-large notch present after a bumper’s been cut for both (photo). The cutting itself went easily, as the plastic is pretty soft and can either be scored and folded or cut with anything from a rotary cutter to a jigsaw.
During installation one of the bumper cover mounting tabs is folded out of the way and the mounting hole cut out of the bumper cover during the notching, which eliminates one of the points where the bumper mounts to the chassis. While initially concerning, this part of the cover rests on the top of the receiver after everything’s put back together, so this lack of retention point isn’t a problem.
With everything put back together I’m currently quite happy. The TorkLift EcoHitch looks good and sits nice and close to the underside of the bumper; I don’t think it could go much higher. While the OE hitch had 14.5″ of ground clearance, this drops to 13.5″ with the EcoHitch, an acceptable change for adding 0.75″ to the receiver’s height. This hitch is a great choice for either new installs on an Outback or retrofitting an OE hitch to a 2″ receiver.
I particularly like how the powder coating has a thick, textured look to it, and the end of the receiver has a nice TORKLIFT logo. The whole unit looks like it’ll hold up nicely to Michigan winters (and road salt). Now to wait for a new, matching black 1UP USA 2″ Super Duty Single rack to arrive!
Click here (photo gallery retired) or on the large photo above to see a complete album of photos from the install.


")
 connected with an aluminum presta to schrader adapter, on the Vaya's rear wheel.")
 fit into a small Timbuk2 seat bag, along with a Crankbrothers M17 multi-tool.")
 compared to an Expo whiteboard marker.")


