Press "Enter" to skip to content

19 search results for "vaya"

Wahoo Cycling Speed/Candence Sensor for Salsa Vaya

The Salsa Vaya (and hopefully the forthcoming Motorless City bike) has the rear disc brake cable run along the top of the chain stay, which means the Garmin GSC-10 (Speed/Cadence Bike Sensor) cannot cleanly fit on the bike (photo). To work around this I picked up the Wahoo Cycling Speed/Cadence Sensor (a compatible ANT+ device) and thus far it seems like it’ll work just fine. I had no problems hanging both sensors below the chainstay, and my Garmin Edge 510 quickly picked up the sensor and was able to get both wheel rotation and cadence data from it.

This setup isn’t as attractive as Garmin’s single unit, and the need to double the cable back on itself looks a bit sloppy, but it does offer more flexibility and overall it should work out fine. I was also a bit disappointed that it doesn’t feature a Garmin unit-like test button/LED which makes setup super easy. It’s a bit higher priced than the Garmin sensor, so it’d be nice if it was at least identical feature-wise. It’s also a bit awkward how the entire sensor body needs to be pivoted in towards the spokes instead of a small/discrete arm, but I do think it’ll work out fine.

Since this was a test mounting I was a bit careless with the cable ties and didn’t peel the adhesive pads off of the cadence sensor, making for sloppy work. I intend to leave this (with its ugly, temporary fittings) in place for a month or so, and then hopefully after that it’ll be in place on the Motorless City bike.

Leave a Comment

Salsa Vaya 2 (2012): Ready To Go

After unboxing, some very detailed cleaning which let me get to know the bike thoroughly, fitting accessories, and transferring measurements from the Jamis Nova I’ve got the 2012 Salsa Vaya 2 mentioned previously (full bike photo) ready to go. While on its face this bike seems redundant and that the Nova would have met my needs, I think it’ll be a big improvement over the Nova for a couple reasons:

  1. The Nova with a 570mm ETT is a bit too large for me, evidenced by the 75mm stem needed to get the fit right.
  2. I prefer disc brakes on bicycles, even though the cantilever rim brakes on the Nova work well in most conditions.
  3. The Vaya has much longer head tube requiring far fewer spacers to get a comfortable position. This makes for an overall stronger/nicer setup.
  4. The Vaya comes with a crank that has 170mm arms. I’m not yet sure if this’ll work out for me, but I’m looking forward to trying it on long rides with lots of spinning.

Thus far I’ve only taken it on some short paved and trainer rides, but so it seems to fit well and I’m really looking forward to getting it out on some lengthy dirt road trips. With December and the first snows (and very cold headwinds on dirt roads) upon us I’m not sure this’ll be possible before spring, but I can hope…

In the mean time I spent a couple lazy hours over the past few days putting together my thoughts on the bike, mostly for my purposes a couple years from now. If you’re interested in that info and the full current build details, read on, or if you are interested in photos of this particular Vaya 2 click here

Leave a Comment

Used 2012 Salsa Vaya 2

Online wandering a week or so ago looking for an orange 54cm Salsa Vaya frame led me to this blog post from Colonel’s Bicycles in Fort Worth, Texas showing exactly the frame I was interested in, but posted 2.5 years ago. These are generally a bit hard to come by, and I’m not particularly fond of the current frame-only colors, so I didn’t want to get a new one, so on a whim I emailed asking if they still had any. The reply that I received surprised me: they had a used, but complete and in good shape 54cm bike in stock, and it was available for $900.

After some email back and forth where I had some pictures to look at (1, 2) and with the shop confirming that the fork recall (photo) didn’t apply to this one, I decided to go for it. Total after shipping was $1004, which strikes me as a good deal seeing as these bikes regularly go for $1300+ shipped via eBay. While the bike is definitely used and needed a drivetrain cleaning, the frame is in immaculate shape with only some slight cable rub along the head tube (which I’ll be covering with protective tape anyway), and slight marks on the rear brake mount from being bumped by the rotor during wheel insertion. All of this is typical wear that any bike would pick up in its first couple of months.

(The guy at the shop said the original owner was very good about caring for his bikes and this one likely has less than 2500 miles on it, and has never been crashed. If it has that many, those were definitely gentle miles…)

Dust in crevices of the frame and slight marks around the rack mounts indicated that it’d been used for touring / gravel road stuff, but it’s in otherwise great shape. The build seems to be pretty close to the original spec, but with different chainrings, a chain that’s in great shape, a like-new cassette, and an absolutely terrible saddle. The steerer has a lot of extra space on it, which is great for adjusting fit. The saddle is just a placeholder that’ll likely be given away (almost anyone buying a bike like this immediately replaced the saddle with one that they prefer), but I’m pretty impressed at how bad the molded plastic/rubber thing that came on the bike is. It’s even got an air vent hole on the bottom to let air with a whoosh out as its compressed. (Photos: 1, 2). Yes, that’s the stock seatpost.

The bike is now extremely clean and ridable, with a bunch of measuring and trainer / parking lot fit checks done to get it ready for me, and the initial feel is really promising. The saddle was replaced with the Specialized Avatar fromt the Jamis, fitted to the Salsa Pro Moto 3 seatpost originally from the Mukluk 2 (Photo). There’s likely some more fiddling needed and I have to cut a couple inches off of the steerer and finish fitting some accessories, but this far I’m really happy with it. Now to find a good day to ride it.

Leave a Comment

Soma Smoothie HP: Brake Safety Issue

Shift cable/brake interference on prototype Soma Smoothie HP Frame (Photo from Soma)

Originally this post was going to be about my new road bike, but instead I’m writing a warning about the new Soma Smoothie HP and a safety issue, recommending against buying it without fully understanding the possible downsides. While the specs of this frame promise to be an excellent modern steel road bike, it has a design problem that can lead to rear brake failure.

Specifically, the location of the brake housing mounts results in the front derailleur cable resting on the brake cable at a mount. Over time movement of this cable can cut into the brake hose/housing, cable clip/tie, etc. If not caught in time this can lead to brake failure.

I purchased one of these frames and have been excitedly building it up, finding this problem late into the build when preparing to run the shift cables and brake lines.

When I brought this up with Soma seeking for a solution, they dismissed the issue, saying they identified this interference during frame development, but that it’s not concerning to them. Stan, with Soma, instead suggested that I rely on the cable tie (as seen above) to mitigate the rub, that rubbing through a brake hose or housing will take a long time, and to add additional material (rubber cable donuts or tape) to the cable if I am worried about it.

I disagree, as any component that’s designed to move should not have unintentional rub, particularly not against a safety-critical system like a brake. A frame should be designed to avoid this; it should not be necessary to bodge in rub protection to stave off cables cutting into other housing.

The photo at the top of this post is of Soma’s prototype build and shows the interference and their reliance on the head of a cable tie for keeping the shift cable in place and away from the brake line. Beyond the safety issue of the front shift cable rubbing on the brake line, the cable does not have a clean path between the upper stop and lower guide, which can lead to shifting issues.

While it would be possible to build this frame up as a 1x (no front derailleur) system to avoid this interference, I want this to be a double-chainring road bike (Shimano 105 R7000) and thus is not an option for me. Or one could go with wireless shifting, but due to cost this isn’t an option for me either.

I really wish Soma had fixed this interference when they first identified it, or at least mentioned it in their documentation so I would have passed on buying the frame. All it would have taken is moving the brake routing to either the centerline (like on this Lynskey) or much further up the downtube (like on my Salsa Vaya) and it’d have been solved.

After I found this a good friend reached out to me, and I’ve since passed the frame on to him. He was looking to build an wireless shifting road bike with fenders, and this will work out perfectly for him. With the electronic shifting he won’t run into this cabling issue.

For those considering this frame, unless you are going with wireless shifting, a 1x setup, or are willing to deal with the compromises of a shift cable rubbing on a brake housing/hose, I suggest that you look elsewhere.

EDIT on 2024-Feb-20: This evening I received email from Stanley at Soma Fabrications about updates to the Smoothie HP frame. It sounds like this will alleviate the concern I mention, so I’m sharing it here:

I just want to update you that early 2023 we replaced the plastic BB mounted cable guide on all our HP frames with one of those guides with two mounting holes (similar to Shimano SP18) which moves the derailleur wire just enough to avoid any contact with the zip tie or brake housing. 

Though we maintain the opinion the possibility of the front derailleur wire cutting thru both the zip tie and housing in real world use is extremely remote with the old set-up, we chose to improve the routing. 

The new production that arrived this month moves the brake guides to the 6 o’clock area which will probably avoid contact no matter what plastic guide is used on the BB.

Stanley Pun, Soma Fabrications, via email on February 20, 2024

Here (PDF) is the full email thread with Soma.

Below are photos showing the interference on my frame. These were taken when the build was nearly complete, while I was planning cable routing. These photos are when I first realized the problem and reached out to Soma.

Comments closed

New Gravel Bike Day: 2019 Salsa Warbird Carbon 105 700

It feels like only yesterday, but five years ago I got my hands on a Salsa Vaya 2 which had an unexpected, but significant, impact on how I ride bikes. Prior to this (and despite brief flirtations with a CX bike that didn’t fit me well) whenever I would set out to do longer rides it’d be on a mountain bike. On dirt roads or local neighborhood streets, gravel road races or the Macomb Orchard Trail, I’d be on an MTB. This… worked… but after getting the Vaya things clicked and I found myself routinely doing things like 50+ mile paved rides after work in springtime, gravel road centuries, and fast-paced road rides with buddies. It really showed me how much fun a drop bar, skinnier tire bike—but one still with enough tire to ride off road—can be. By late 2018 I’d racked up over 10,000 miles on the Vaya.

As new gravel-optimized frames came about and components on the Vaya started to wear, I kept looking around for something new. Despite flirting with ideas for everything from a Trek Checkpoint to an ALLIED ALFA ALLROAD, from the Specialized Diverge to the Canyon Grail—all great bikes—nothing really clicked until Salsa announced the Warbird v4. Carbon and a very well designed dampening system, through axles, internal routing for everything, four bottle cage mounts, and overall standard parts it was just what I wanted. While I wasn’t too keen on the color patches on the white frame, the new R7000 105 group is perfect and I figured I could do something creative to change up the coloring.

After a boat load of geometry-checking, email back and forth with the ever-excellent Mike Wirth at Tree Fort Bikes, and some help and information from my friend and Salsa/QBP’s rep Jeff Buerman, a 2019 Warbird Carbon 105 700 was on order just for me. While driving up to Iceman this past weekend, where I raced my beloved Salsa El Mariachi Ti, I got an email notification that the Warbird was in, and I could pick it up! Kristen and I swung by Ypsilanti on the way home, and voilà, I’ve got a new gravel bike!

The stock build on the Warbird 105 is really well chosen, but like any bike there’s always some things to tweak or add. I added  the usuals like bottle cages, speed/cadence sensors, saddle, seatpost, and pedals, but I also had some spare parts sitting around home (eg: Thomson X4 stem, XT brake rotors) that were a bit nicer than stock so I swapped them on during the build.

I also unexpectedly got a too-good-to-pass-up deal on some DT Swiss wheels (CR 1600 SPLINE 23). While the CR 1600 wheelset has the same rims as the well-chosen stock C 1800 SPLINE 23 wheels, the CR 1600s have DT Swiss’ Star Ratchet in the hub. I prefer this freewheel design over all others, and switching to these wheels also let me upgrade to 54 points of engagement; right in line with all my other bikes. (High engagement is a luxury, sure, but this Warbird is a really nice bike already so why not.) It also doesn’t hurt that the silver and black hubs go wonderfully with the grey Salsa graphics on the frame. Finally, I’ve been wanting to try the well-regarded Panaracer GravelKing SK, so I set up a tubeless-ready 43mm pair of the blackwall tires on the new wheels.

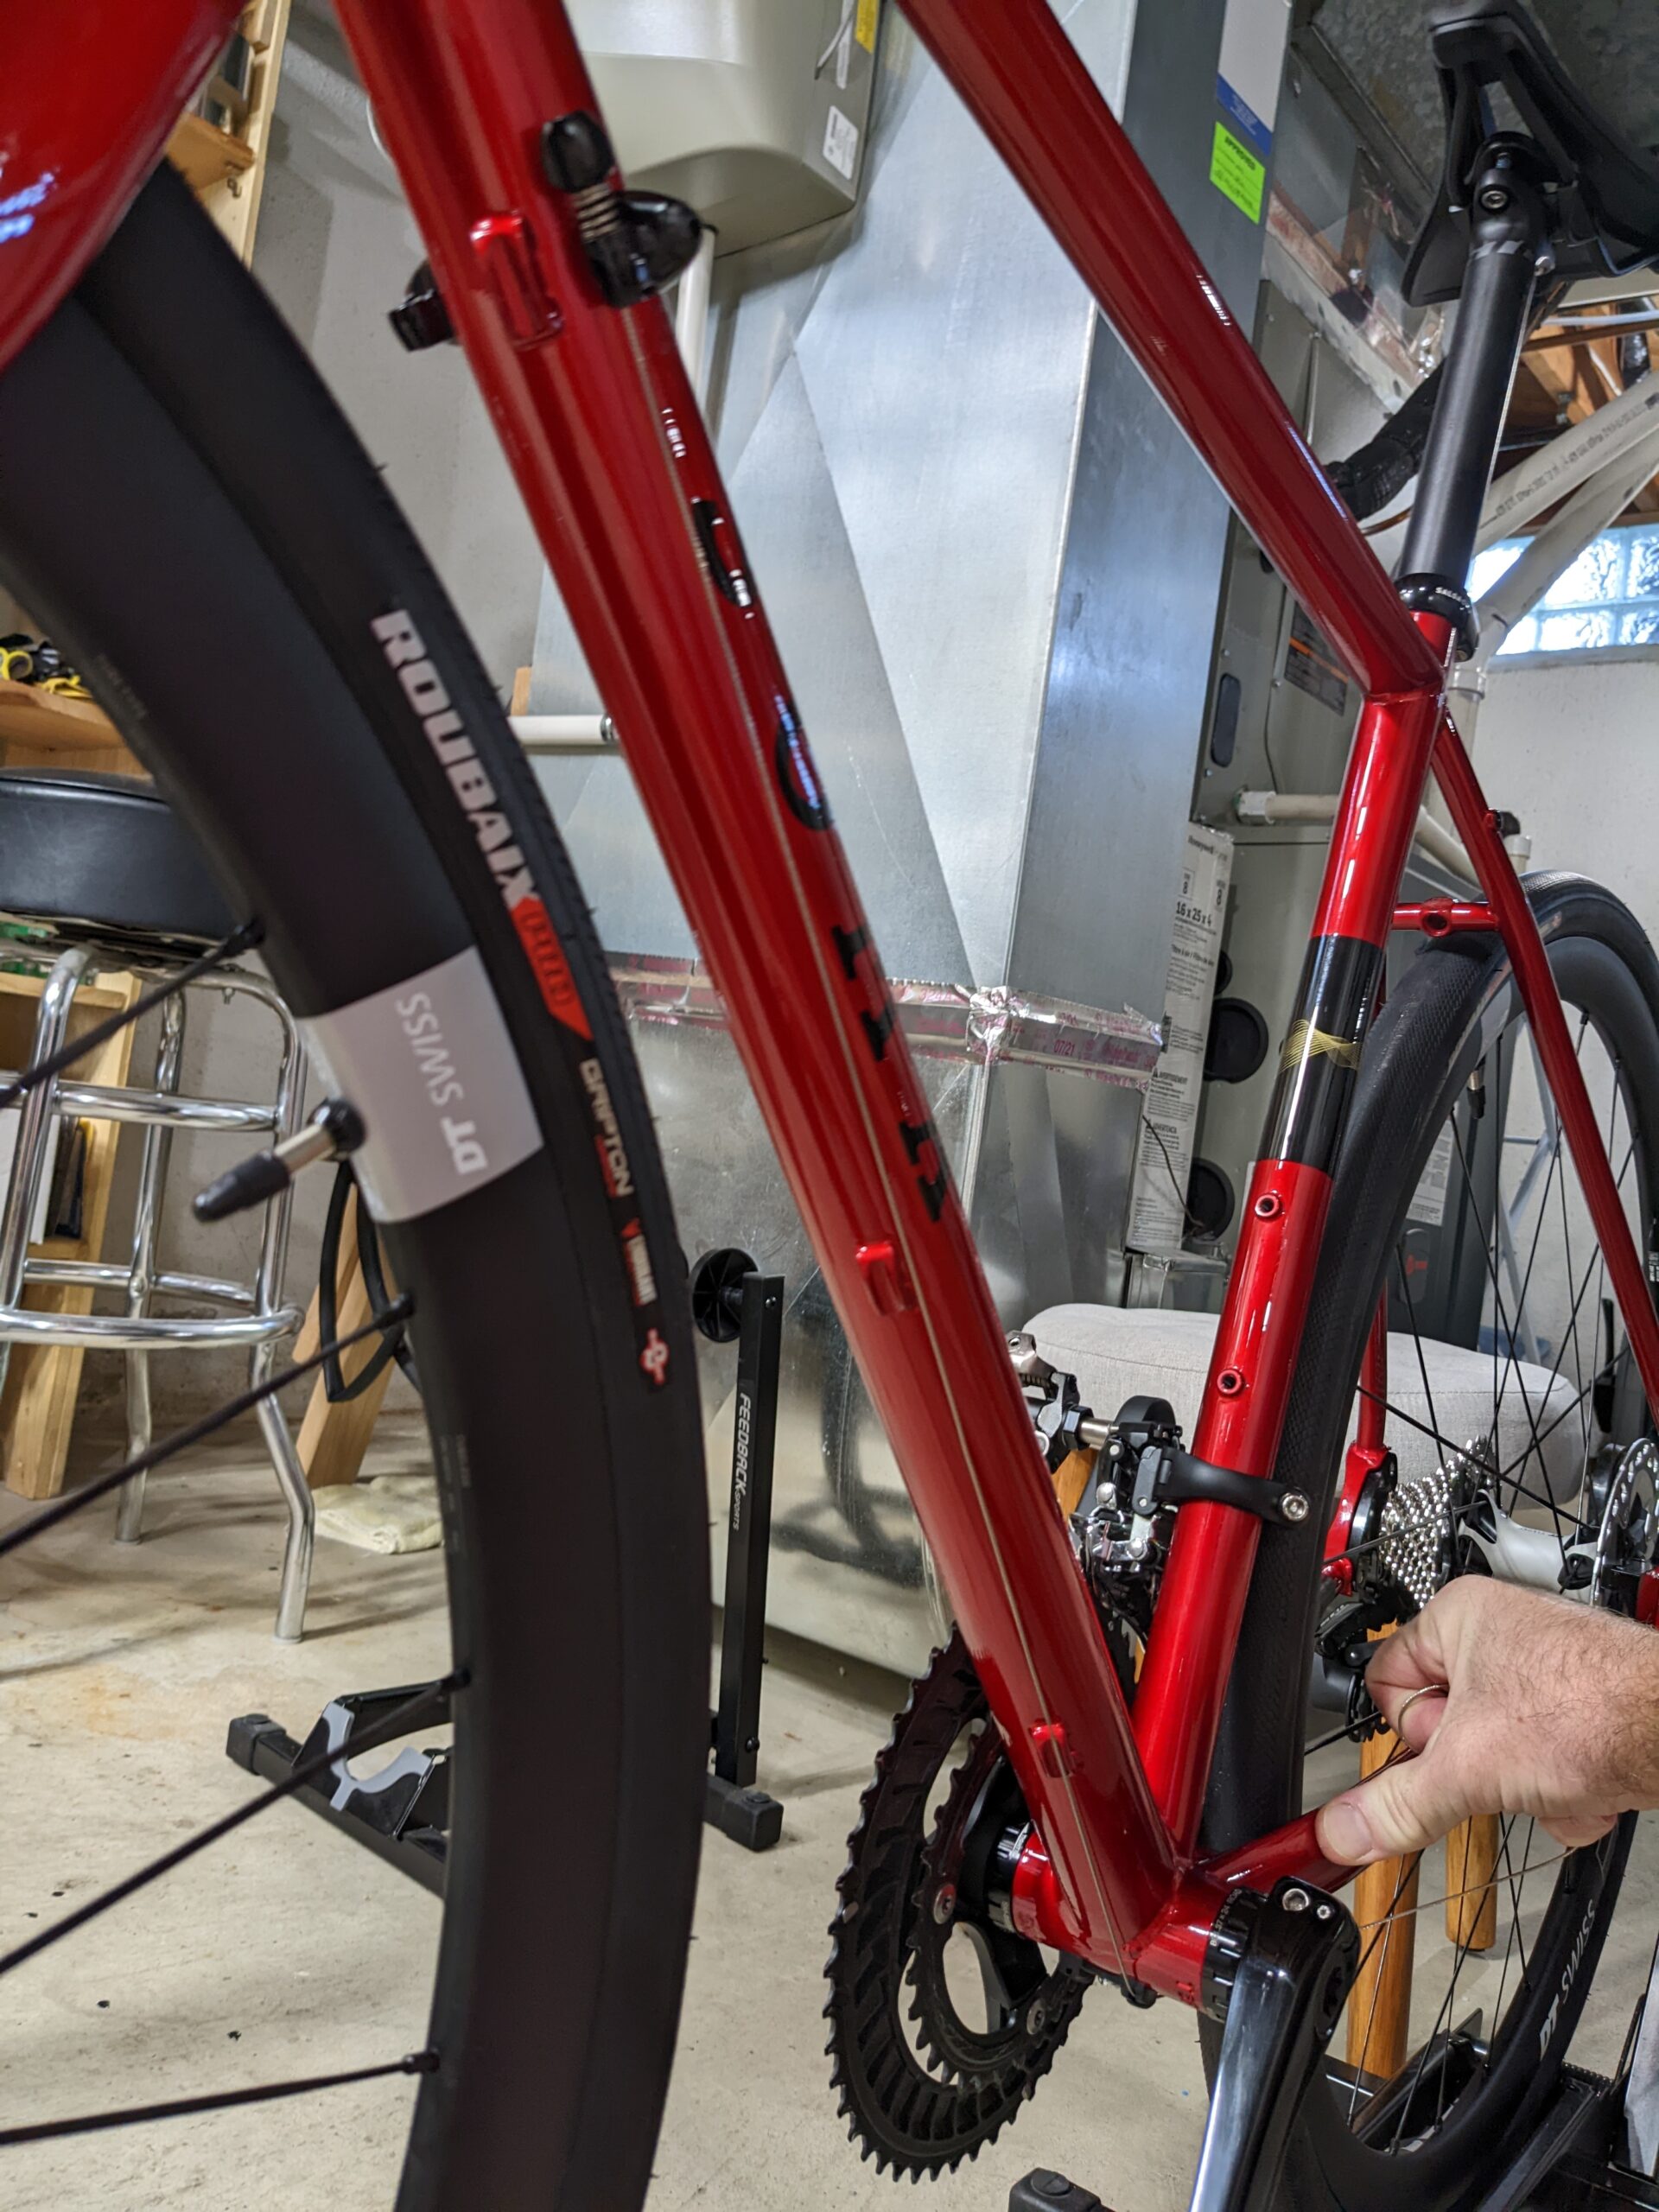
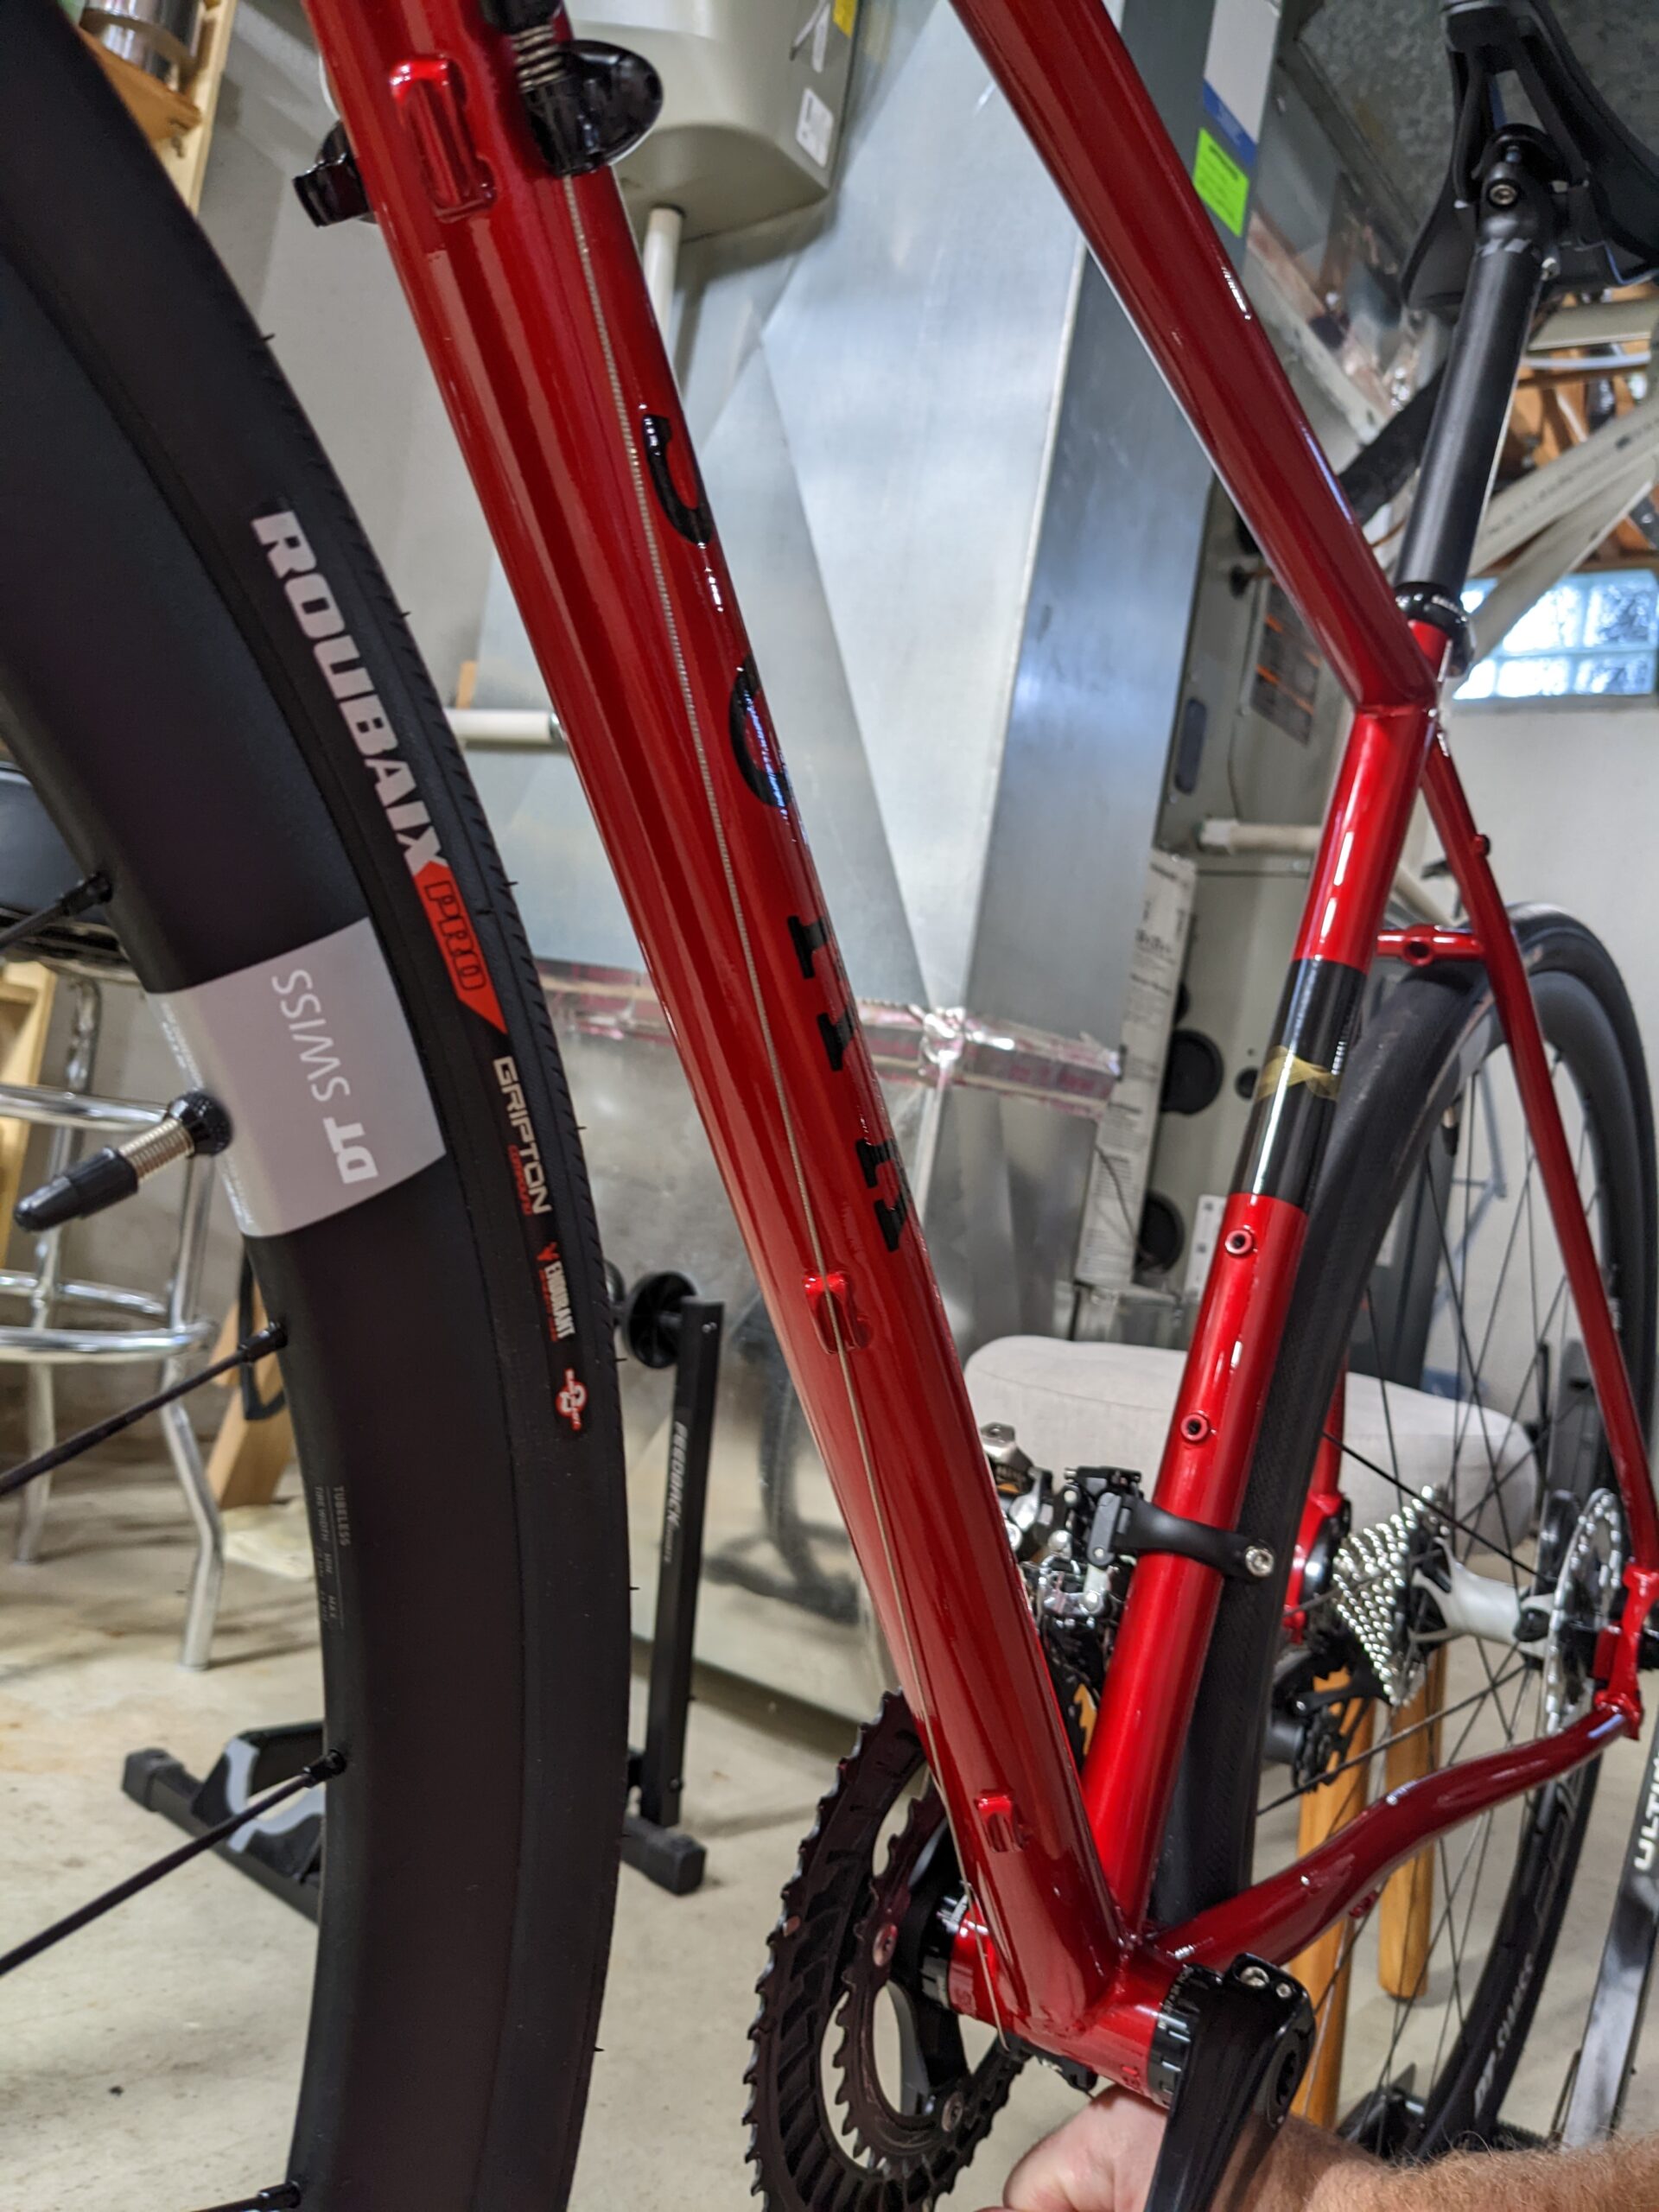
As an experiment I covered the purple/blue/red patches on the seat tube and fork with self-adhesive, black reflective Scotchlite tape. This both serves as a reflector and brings almost the entire bike together in shades of grey. While I’m not completely happy with the tape job, it’s smoothly applied and covers the colors, bringing the entire frame to a very sharp black/white/grey color scheme. It looks good.

The four water bottle cages are all usable, with the super-common 24oz Specialized 1st Generation Big Mouth Water Bottles fitting in three of the cages with a 21oz in the upper downtube cage, giving 93oz of on-bike fluid storage. Without a bottle in the upper downtube cage I can fit an even larger bottle in the lower one, giving plenty of options. Mounting a Revelate Designs Mag-Tank Bolt-On top tube bag behind the stem provides ~65 in3 of storage for food, roughly equal to what I can fit in one jersey pocket. Coupled with or in place of jersey pockets this should be good for carrying food and drink for quite-long rides; a nice upgrade over the Vaya. It’s a tight fit to stand over the bike with this bag attached, but as an optional accessory for longer rides it could work out real well.

I’ve yet to figure how I’ll carry for tools, but with the relatively low pressure tires I’ll put together another Mobo Pocket Air Pump-based setup fit into the Specialized seat bag.

Weight was not a primary concern with this build, but I’m quite happy with 21.08 pounds for the completely bike as pictured above. This includes a Garmin Edge 130, sensors, pedals, rear light, empty saddle bag, and bottle cages. Not bad for a bike capable of everything from pavement to single track. Not bad at all.

Here’s the details of the complete build:

Frame / Fork: 2019 Salsa Warbird Carbon / Salsa Waxwing (White)
Wheelset: DT Swiss CR 1600 SPLINE 23
Ratchets: DT Swiss HWTXXX00NSK54S (54T)
Tires: Panaracer GravelKing SK (RF743-GKSK-B, 700x43c, Black Sidewall)
Group: Shimano 105 (R7000)
Crank:
 Shimano FC-R7000 (50-34T, 172.5mm)
Bottom Bracket: Shimano SM-BB72-41
Cassette:
 Shimano CS-R7000 (11-32)
Shift/Brake Levers:
Shimano ST-R7020 (Left, Right)
Brake Calipers:
Shimano BR-R7070 (Front, Rear)
Brake Rotors: Shimano SM-RT81-S (160mm)
Brake Pads:
Shimano K02S (Resin)
Chain:
Shimano CN-HG601-11
Front Derailleur:
Shimano FD-R7000-F
Rear Derailleur:
Shimano RD-R7000-GS
Bar Tape:
MSW HBT-210 Anti-Slip Gel (Black)
Handlebar: Salsa Cowbell Deluxe (42cm)
Headset: Cane Creek 40 (IS41/28.6/H9 | IS52/40)
Stem: Thomson Elite X4 (SM-E139 10° X 100mm X 31.8 1-1/8 X4 Black)
Spacers: Generic Aluminum
Stem Cap: MASH Donut 2.0
Seatpost: Thomson Elite (SP-E101 27.2 X 330 Black, Straight)
Seatpost Clamp: Salsa Lip Lock
Saddle: Specialized Power Expert (143mm, Black)
Pedals: Crank Brothers Candy 3 (rev. C, Black)
Bottle Cages: Specialized Zee Cage II (2x Left, 2x Right)
Rear Light: Planet Bike Superflash Turbo
Bell: RockBros Bell (Black)
Sensors: Garmin Bike Speed Sensor (Front Wheel), Wahoo RPM Cadence Sensor (Crank)
Reflective Tape: 3m / Scotchlite Black
Mastic Tape: 3M 2228
Mounting Hole Plugs: Heyco 2590
Top Tube Bag: Revelate Designs Mag-Tank Bolt-On
Saddle Bag: Specialized Seat Pack (Medium, Black)
Derailleur Hanger: 465 / QBP FS2322

During assembly I encountered three wrinkles, none of which affected the final build:

Seat Tube Bottle Mount: When using the bottle mount on the seat tube, spacers are needed otherwise the center of the bottle cage will bottom out on the front derailleur mount. Problem Solvers SpaceOut Spacers, left over from the downtube mount on my original Mukluk 2, solved this.

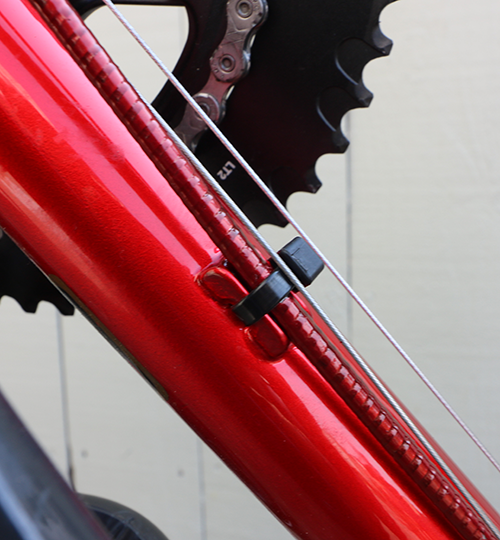
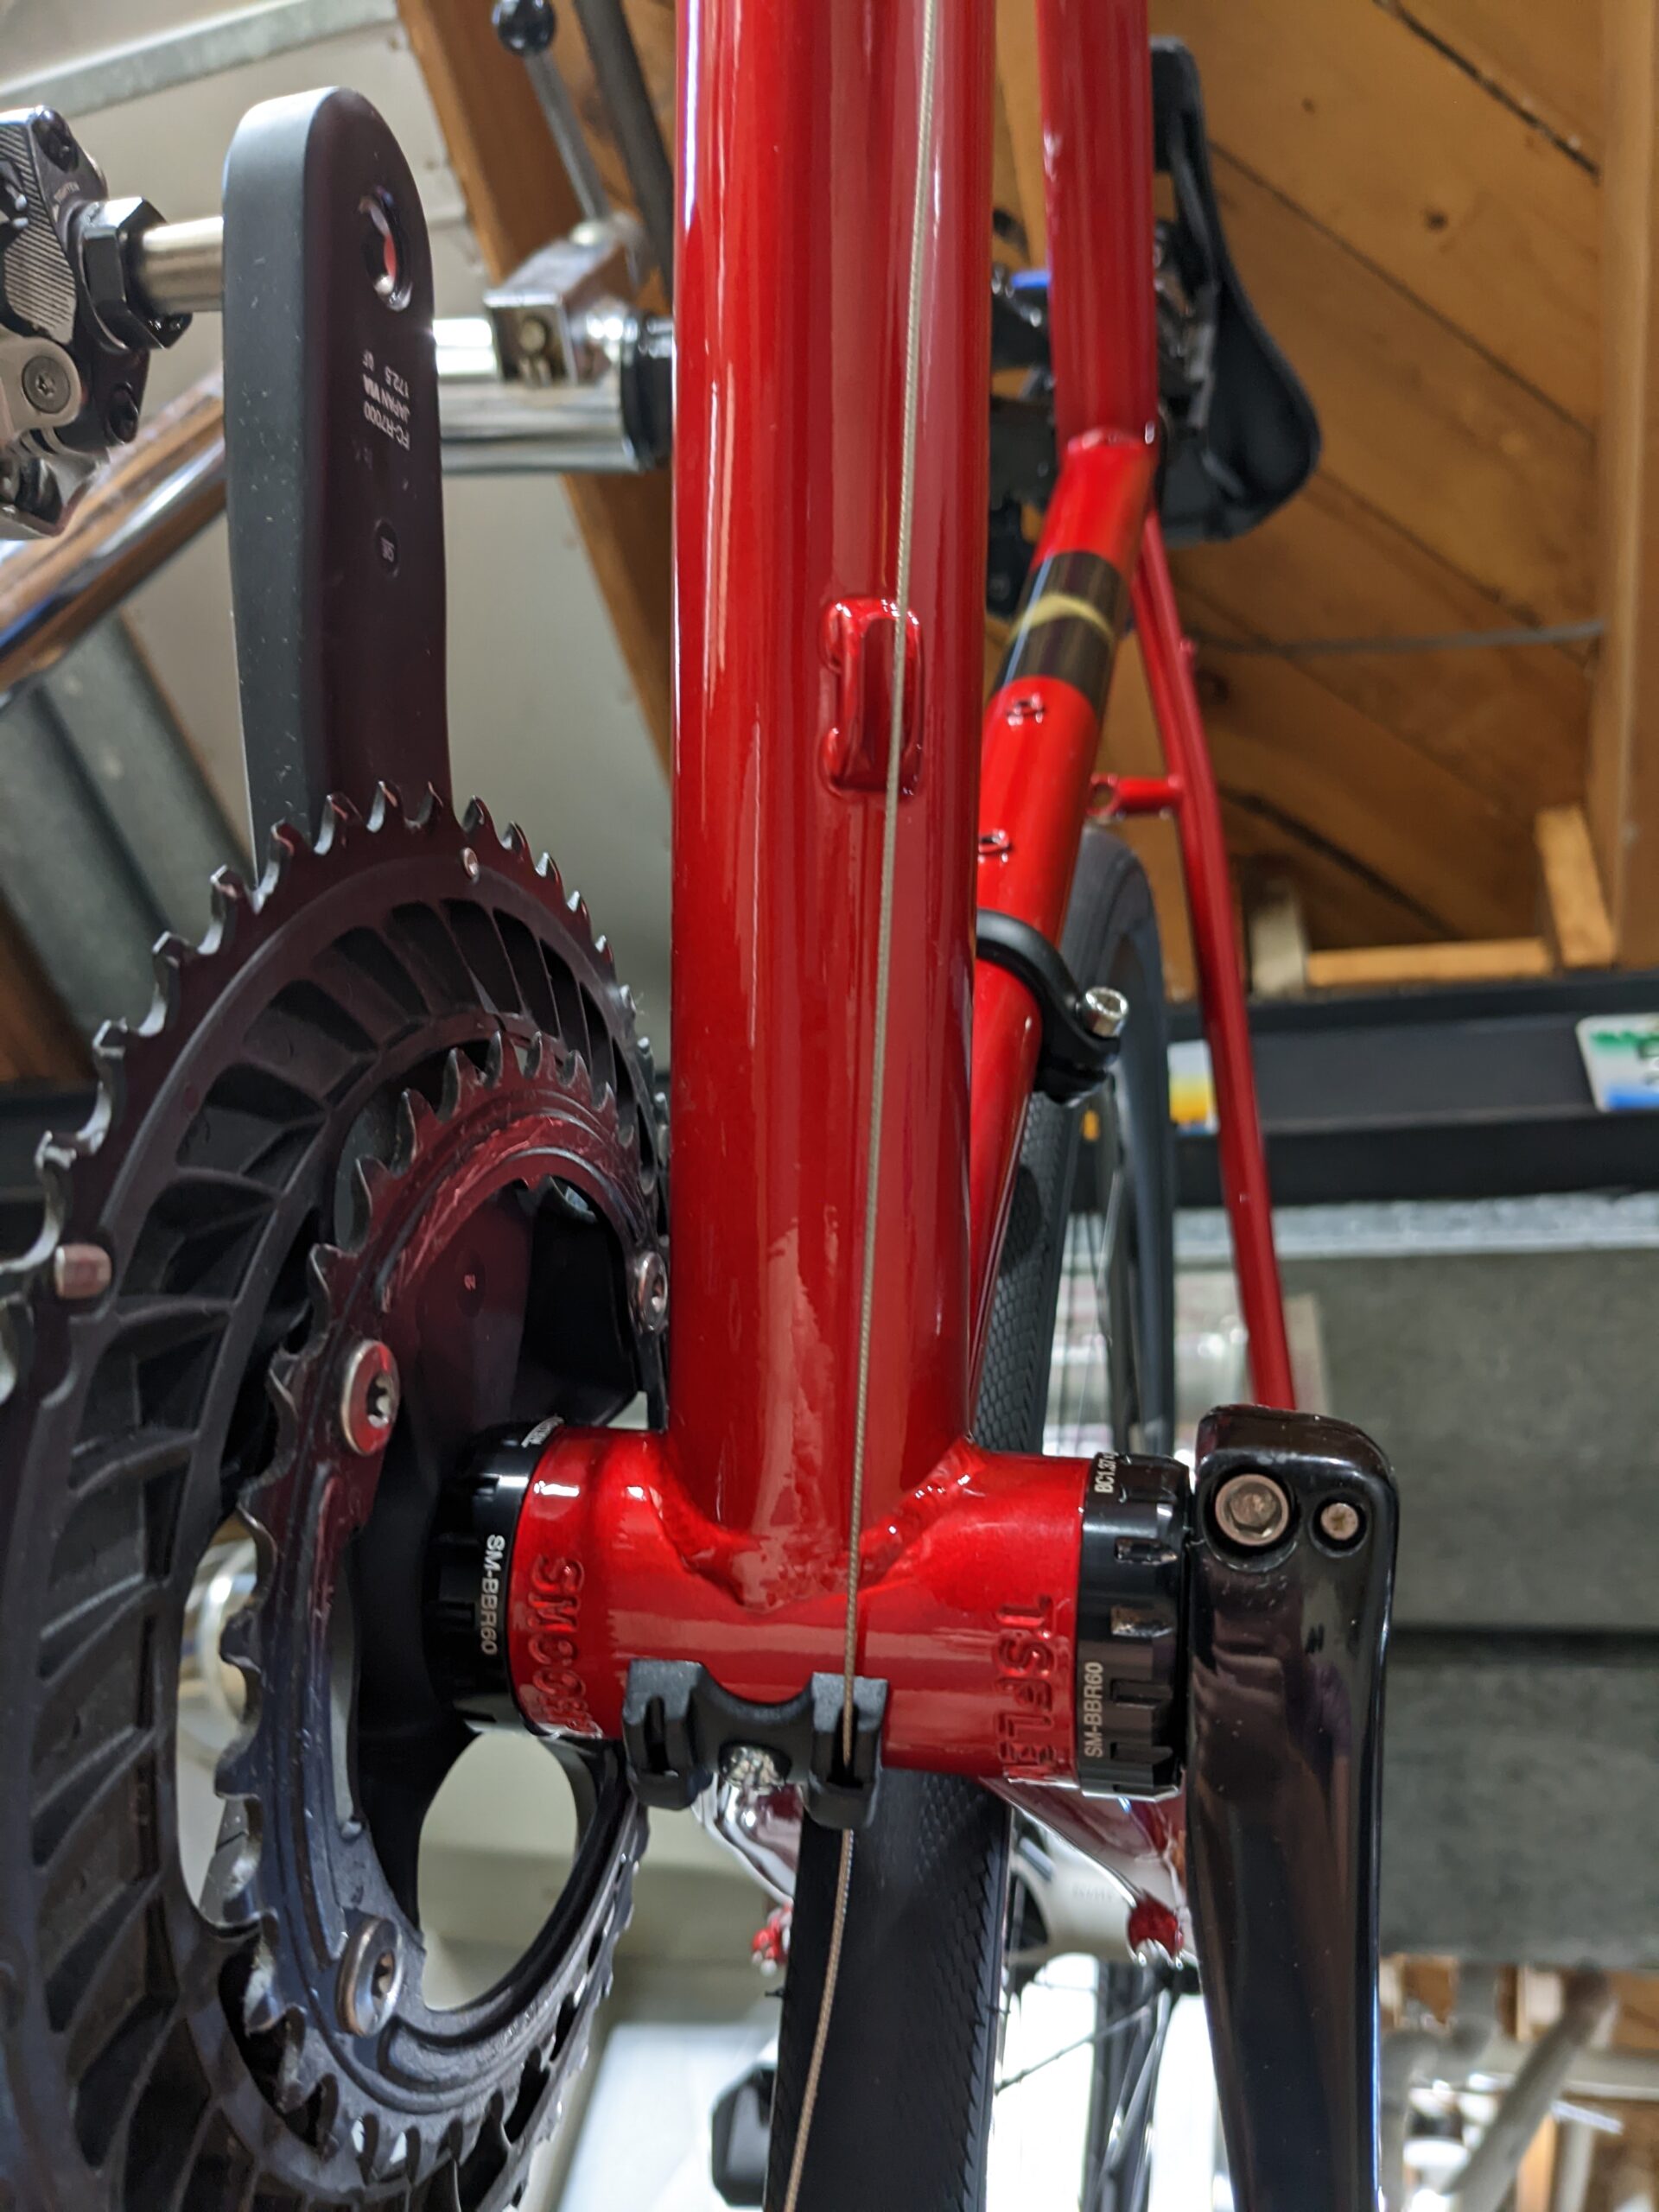
Cadence Sensor Fitment: A typical problem on modern gravel road bikes with large tire clearance and narrow Q factors; there is not much room between the crank arm and the chainstays. The Warbird v4 is no exception, and I was not able to fit the standard Garmin Cadence sensor safely. It fit, but left around 2mm of clearance. This tight clearance may also preclude the use of a Stages-type power meter on the Warbird.

To fit a cadence sensor on the bike I fashioned an aluminum plate which spans two chainring bolts opposite the crank arm, then sticking a self-adhesive Wahoo RPM Cadence Sensor to this plate. It has a look not unlike a power meter, allows for easy battery changes, and is tucked nicely out of the way. (Picture)

Fork Crown Light Mount Screw: I typically replace all unneeded mount screws on my bikes with Heyco 2590 plastic plugs. These small plastic plugs press snugly into M5 bottle/fender/accessory screw mounts, keeping out water and giving a smooth, finished look. At ~$0.10/each (via Mouser) they are much cheaper than bike-specific parts. Compared to aluminum screws this doesn’t save much weight, but I think it’s much more attractive and likely slightly safer than a protruding screw head.

When unscrewing the upper fork light mount screw the head came off, and the screw was stuck in the hole. As I was turning the screw it felt quite stiff, and I suspect it was either cross threaded, or the hole contaminated with paint which locked the soft aluminum screw in place. This was not an issue with any other screw on the bike.

I was unable to drill out the screw, so I carefully ground it flat and painted the remaining end black. I have no intention to use this light mount, but if this ever changes I’ll deal with the problem later. (Unfortunately while attempting to drill it out I slipped with a tool, bumped the fork crown, and put a small, 4mm chip in the paint. This got touched up with some white enamel paint and now blends in nicely, but it was a really frustrating way to get the first chip in the paint. Oops.)

UPDATE: Due to Tree Fort Bikes swapping the fork after a recall affecting a handful of the Waxwing forks, the problems with the crown light mount screw and the chipped paint are gone.

There’s still a few things left to do, and the inevitable tweaking of things like bar position, steerer length, and all those fun things. But after a lot of work to clone the Vaya’s fit I think it’s good, so hopefully not too much work be needed. That which is probably won’t happen until spring when the weather turns nice and is a bit more conducive to long rides… Exactly what this bike is made for.

Pictures from the unboxing, assembly, and of the complete bike can be found here in my photo gallery: Salsa Warbird 105 (2019)

4 Comments

Titanium Frame Caused Garmin Speed Sensor Issues?

IMG_8944.jpg

For a couple of years my main XC bike (2014 Salsa El Mariachi Ti) has had issues with my Garmin bike computers (Edge 510, 520, and 130) pausing mid-ride when I wasn’t actually stopped. This shows up as the head unit briefly flipping to a paused symbol (⏸), before returning to recording. Post-ride, when reviewing data in rubiTrack, the red callouts on the route indicate the pause locations and show they’d last for a couple of seconds. While I couldn’t reliably reproduce the pauses, they seemed to happen whenever I’d stop pedaling. It seemed to be more common when on tight/twisty trails where GPS positioning is spotty, but it’d also happen while moving at 10-20 MPH on straight, clear-sky areas. It almost seemed like the Garmin was choosing to pause when I stopped pedaling, an indicator that maybe the computer wasn’t aware the speed sensor was still moving.

On all of my bikes I have the Garmin Bike Speed Sensor fit around the rear hub and computer set to autopause when stopped, but the problem only happened on the El Mariachi Ti. It did not happen when using the older Garmin GSC 10 magnet/reed switch speed sensor which mounts to a chainstay. It also doesn’t happen on either of the steel (El Mariachi SS or Vaya) or carbon fiber (Mukluk or Camber) bikes, so I accepted it and figured the problem to be the wheel speed sensor. After acquiring an Edge 130 bundle I tried the new wheel speed sensor, but the problem persisted and got me thinking…

The solution ended up being simple: move the speed sensor to the front wheel. On an A/B test at River Bends Park where I did one lap with the sensor on the rear wheel, then another two with it on the front, the issue didn’t stopped appearing when the sensor was on the front.

Thinking it through I can only conclude that the problem was caused by the frame material. The sensor is detected by the head unit and seems to work fine the time, but perhaps the signal is sufficiently degraded that connectivity is sometimes lost. I suspect that then the unit falls back to pausing based on GPS signal + pedaling.

garmin_speed_sensor_el_mariachi_ti_rear_wheel.png
Sensor on Rear Wheel (Problems)

garmin_speed_sensor_el_mariachi_ti_front_wheel.png
Sensor on Front Wheel (Problem Solved)

Leave a Comment

A Surprising Little Pump

Wanting to reduce the size of the tools carried on the Vaya I went looking for a new pump, and what I found surprised me: the diminutive Mobo Pocket Air Pump (4″). Despite being marketed by a company that seems otherwise known for low-cost and kid-branded recumbents, this seems to be a quality pump for MTB and gravel road emergency use.

Looking for a small emergency pump my primary requirements were functionality and size, followed by the amount of time it’d take to inflate a tire. I have tubeless setups on all my bikes, which tends to be pretty reliable. Flats are pretty rare, so when they do happen I’m okay with taking my time installing and inflating a tube. Being something that’ll be packed away for non-routine use I’d prefer the emergency gear to be small and reasonably light. The Mobo pump seemed like it might be too cheap to work well, but just about $20 (via Amazon) I figured I’d give it a go.

Ideally I’d like to be able to fit a tube, multi-tool (including chain tool), pump, and a car key inside of a small seat bag. With this pump I think I’m on the way, as it had no problems fitting into a slightly-older, small-sized Timbuk2 saddle bag along side a Crankbrothers M17 multi-tool, with plenty of room to spare. Along with a bottle cage mount it ships with a nice brass Presta to Schrader adapter and sports ball inflation needle. The inclusion of an adapter is good, because the pump itself is Schrader-only. Thankfully packing either the stock adapter or an aluminum one into the bag isn’t a big deal.

Inside the expectedly cheesy (but well packed) box is a solid-feeling pump that measures in at 3-7/8″ long, 7/8″ diameter at the body, and 1-1/2″ across the pump head. At 56g it’s lighter than a 16g CO2 cartridge, and right about the same size as a cartridge + valve head. Somewhat to my surprise it has a very nice, light, smooth pumping action and check valve sound. Basic tests in my basement showed to work reasonably well.

My first test was inflating a 700 x 35-43c Kenda tube from flat to shape, as one would do before fitting it into a tire. This took 42 pumps — none of which required any notable effort — and took well under a minute. The second test was inflating the front wheel from my Specialized Camber, a 30mm internal width rim fitted with a 29 x 2.3 Specialized Purgatory tire, from atmospheric pressure. After pumping for four minutes the tire had 22 PSI, which is my normal front tire pressure for rocky trails. Finally, the third test was re-inflating the Vaya’s front wheel — a WTB KOM i23 rim and 700 x 38c Specialized Trigger tire set up tubeless — from atmospheric pressure to 43 PSI. This took a total of around six minutes, with some pauses sprinkled in as my arm got tired. Nearing the final pressure the pump got fairly hard to press, leading me to believe that the claimed 100 PSI maximum is probably more a technical than functional limit. Getting a wheel to 100 PSI with this pump would be… a challenge.

Sure, four minutes for an MTB wheel and six minutes for my road bike is a while, and the low volume won’t be re-seating any tubeless tires, but as an emergency pump this should be fine to get one rolling again. While some folks prefer CO2, as a one-shot item I’d want to carry a pump as a backup… Being small enough to tuck in a saddle bag with other parts, and right about the same size and weight as a CO2 cartridge, but multi-use. It’s what I plan to pack into a seat bag on future rides. While I hope it works when I need it — and seems like it will — needing to use a pump in the middle of a ride is something no one wants.

1 Comment

TrainerRoad PowerMatch: Disabled

After getting the CycleOps Hammer smart trainer I’ve been experimenting with how it, my Stages power meter on the Salsa Vaya, and the TrainerRoad PowerMatch function work together. In short, PowerMatch is designed for those who have a power meter on their bike and want to ensure that the resistance and workouts are consistent indoors (with the smart trainer) and out (with just the power meter). While I only use power data for training indoors during the winter (never for outdoor training), I do like to look it over after outdoors rides and thus want to be sure the two are as in line as possible.

To automatically handle differences in power meters, TrainerRoad’s PowerMatch calculates the offset between the power meter and smart trainer, then adjusts the resistance every 10 seconds to accommodate the difference. On its face this makes sense to me, but whenever I’d enable it the resistance would get bit surge-y feeling during harder efforts leading me to think something wasn’t quite right. I suspect this is because of the Stages being single-leg, I likely have a bit of an imbalance between legs, and my recent rides in TrainerRoad have shorter efforts than the sustained stuff that single-leg meters are best at. So, I started to think about if something else was right for me.

In TrainerRoad, on the Power Meter settings, there is a toggle to use the meter for cadence only. In the Smart Trainer setting the options for PowerMatch are Auto, Disabled, or a Manual offset. This results in the following scenarios:

Power Meter Normal, PowerMatch Auto: Displayed power is from meter, with this data used by PowerMatch to determine resistance. Occasional surging feeling, but overall good. While riding it appeared that power data jumped around.

Power Meter Normal, PowerMatch Disabled: Displayed power is from meter, resistance set by trainer’s internal meter. Displayed power data appeared low (5-10W) when holding an interval steady.

Power Meter Cadence Only, Power Match Disabled: Displayed power is from trainer, resistance set by trainer’s internal meter. Feels smooth (no surging) but seemed marginally easier than with PowerMatch.

Power Meter Normal, Power Match Manual: Displayed power is from meter, resistance set by trainer offset adding/subtracting manual value; no automatic adjustment of offset done.

With Power Meter Normal, Power Match Manual looking most like what I wanted, I set out to determine the offset between my Stages meter and the CycleOps Hammer. To do this I first ensured the Stages and Hammer were calibrated. TrainerRoad was set to have PowerMatch disabled and the Stages meter to Use Cadence Only. My Garmin Edge 520 recorded power from the Stages meter and TrainerRoad recorded the Hammer’s data. I then rode a custom TrainerRoad workout that has a warmup, then a series of 1 minute intervals at 60%, 70%, 80%, 90%, 100%, and 110% of FTP with 30 second 50% rests between in Erg mode so  trainer resistance adjusted automatically. After this I did a 30 minute Free Ride where I shifted to adjust speed (and thus power), trying to get a good mix of steady state and short/hard intervals, under different situations, to get sane date to compare. To cut down on data misalignment both of these rides were non-stop spins without pausing, doing my best to start and stop the Garmin along with the TrainerRoad workout.

Both of these sets of data were then compared in DC Rainmaker‘s Analyzer tool, with the results visible here:

Comparing the two, I see two notable things, both most visible in the 30 Minute Freeride:

  1. Sudden transitions decreasing power show 0 values when measured by the Hammer, but still some power with the Stages.
  2. Hammer seemed to measure higher, with the variance becoming greater as power output became higher.

I don’t believe the sudden transitions are a concern nor really something that can be accommodated for, and I don’t think they’ll be a problem for the normal Erg mode workouts where the main desire is to have the trainer providing resistance. This is likely a simple side effect of the large flywheel in the trainer taking a while to slow.

For the scaling disparity between the Stages and Hammer, maybe there’s something there… I’m tending to think that the Stages is reading higher on very hard efforts because with these I’m more apt to be standing and shoving down on the pedals versus a smooth spin. Perhaps this is throwing off the strain gauge? Let’s see…

Here’s how the average powers worked out:

Workout Meter Average Power Weighted Average Power
Custom Test Stages 173.50 191.70
Hammer 174.77 194.20
Free Ride 30 Stages 209.87 228.25
Hammer 211.03 234.05


Since I’m trying to compare power meters themselves, I’m looking at Average Power. (I don’t want to use Weighted Average, because this gives increasing priority to greater power outputs, since they are harder on one’s body. For example, it’s a way of reflecting how 300 W feels more than 2x as hard as 150 W.)

Across these two rides the two meters are within ~1 W of each other. While I originally went into this investigation looking to see how much of an offset I’d have to set up in Power Match Manual, I’m now thinking that the Hammer is close enough to the Stages to simply use Power Meter Cadence Only, PowerMatch Disabled. It’s possible this could skew a bit more as I do higher power efforts, but I think this will probably still be within sane ranges. It’s rare that I’ll see the 100W difference like in the high power effort of the Free Ride 30 test (700-800 W range), most things will be in the 200W-300W steady state range where alignment seems sane.

This will cut down on the surging that seems to be coming from the single-leg power meter, still provide sufficient correlation between indoor and outdoor efforts, all while having the benefits of an Erg mode smart trainer.

It’d be nice if TrainerRoad offered some sort of percentage correction, but perhaps this is why PowerMatch instead does a frequent reassessment and is turned on my default; better to check the offset and correct vs. attempting to figure out a scale. Being able to see how PowerMatch is working internally would be nice, but I’m not sure this would add any real value to the product.

2 Comments

2017-2018 Trainer Setup: CycleOps Hammer

For winter 2017-2018 I’ve put together a revamped, and much improved, trainer setup in my basement. Since the last setup with a Kurt Kinetic Road Machine things have been changed pretty significantly. I had previously set things up in front of a CRT HDTV which I’d previously used as a gaming / home theater setup but over the years I didn’t really use it for anything other than movies while on the trainer and basement music; just kind of a waste. This fall I sold the CRT HDTV and stands, picked up a cheap LCD TV (with built-in Netflix and Amazon apps), and put the whole setup on a metal stand in front of the trainer.

The result is a nice setup where a movie plays at eyes-on-the-road level and TrainerRoad is just a glance below. A CycleOps Hammer smart trainer provides resistance when riding, a nice step up from using a power meter, fluid trainer, and shifting to reach power targets. Four speakers (plus two over the workbench) are connected to a home theater receiver / amp, making for great audio from movies, or music via the AppleTV (and iTunes), although I tend to have subtitles on while watching movies to keep the audio at a reasonable level. A squirrel cage fan blows from a distance to keep me cool while riding. To ensure good ANT+ connectivity I’ve located the Garmin USB adaptor to a table next to the bike where it has a short path to the trainer, power meter, and my heart rate strap.

Since I have a Stages power meter on the Vaya, I have the option of using TrainerRoad’s PowerMatch. This uses the on-bike power meter and adjusts the smart trainer so that everything matches. I understand how this will benefit those wanting the same power numbers indoors and out (since no two units match exactly), but I’m still undecided if it’s a good setup for me. I’ll be working that out over the next few rides.

So far this setup is working out very nicely. While expensive initially (almost the cost of a bike) I vastly prefer the feel of a direct drive smart trainer to the fluid trainer with power meter. Both are effective, but I’m really enjoying not having to shift and chase power targets. Both Kristen (she also bought a Hammer) and I are following TrainerRoad plans over the winter, and as it moves into more over-under workouts, especially those with very short high intensity intervals, having a smart trainer is a huge bonus. It’s very difficult to effect radical changes in power and stay on target when shifting and matching speed to a power target. A smart trainer eliminates that need.

Leave a Comment

Broken American Classic Disc 101 Rim

This morning, when removing the tires from the American Classic Disc 101 wheels that I built for the Vaya (so I could redo the tubeless tape) I found a crack near a spoke hole on the rear wheel. With only 2441 miles and 140 hours on the wheelset, I’m a bit disappointed. The wheels were built to very even tension and are still very true, but it may be time for a new (or another) rim…

November 2016 Update: After some back and forth with American Classic where they offered to give me a discount replacement they stopped replying. I replaced these with some WTB KOM i23 rims. Same ERD made it a cheap replacement and they built up quite nicely. I’m going to avoid American Classic products in the future.

Leave a Comment

Can't find what you're looking for? Try refining your search: