Press "Enter" to skip to content

Category: around the house

Easy Carpet Spikes for iMovR Freedom Base

I recently purchased an iMovR Energize corner standing desk which came with the Freedom base. It works well, but had a bit of a wobble when placed on the relatively-thick carpet in my office. Because the leveling legs are relatively wide (35mm) they’d sit on top of the carpet and the desk didn’t have great support.

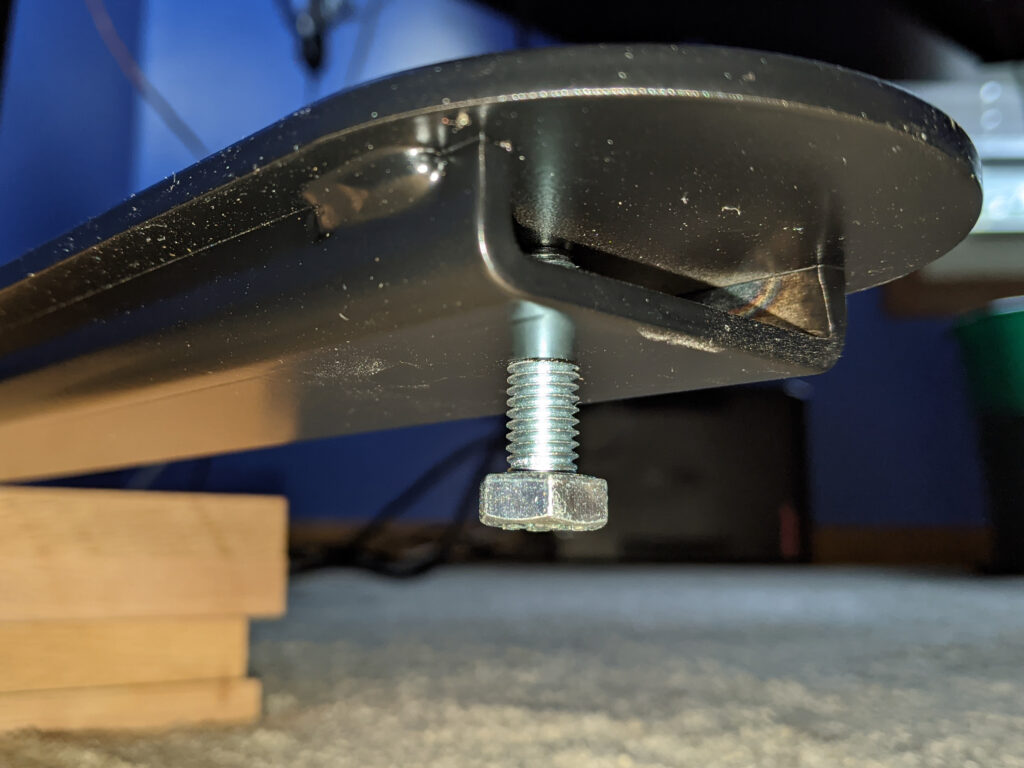
To solve this I picked up four M8-1.25 x 25mm hex head screws from Home Depot and fitted them in place of the leveling feet. This resulted in ~20mm tall, narrow feet sticking down off the legs, pressing firmly through the carpet to the wood floor below, and no more wobble.

This is the same principle as carpet spikes, used to for speakers and other tall/narrow cabinets, to make them more stable on soft carpet by pressing through the carpet to the hard floor below. (Carpet spikes, for speakers, have all sorts of other acoustic isolating purposes which sometimes border on audiophile woo, but increased physical stability is an easily demonstrated effect.)

Comments closed

2017-2018 Trainer Setup: CycleOps Hammer

For winter 2017-2018 I’ve put together a revamped, and much improved, trainer setup in my basement. Since the last setup with a Kurt Kinetic Road Machine things have been changed pretty significantly. I had previously set things up in front of a CRT HDTV which I’d previously used as a gaming / home theater setup but over the years I didn’t really use it for anything other than movies while on the trainer and basement music; just kind of a waste. This fall I sold the CRT HDTV and stands, picked up a cheap LCD TV (with built-in Netflix and Amazon apps), and put the whole setup on a metal stand in front of the trainer.

The result is a nice setup where a movie plays at eyes-on-the-road level and TrainerRoad is just a glance below. A CycleOps Hammer smart trainer provides resistance when riding, a nice step up from using a power meter, fluid trainer, and shifting to reach power targets. Four speakers (plus two over the workbench) are connected to a home theater receiver / amp, making for great audio from movies, or music via the AppleTV (and iTunes), although I tend to have subtitles on while watching movies to keep the audio at a reasonable level. A squirrel cage fan blows from a distance to keep me cool while riding. To ensure good ANT+ connectivity I’ve located the Garmin USB adaptor to a table next to the bike where it has a short path to the trainer, power meter, and my heart rate strap.

Since I have a Stages power meter on the Vaya, I have the option of using TrainerRoad’s PowerMatch. This uses the on-bike power meter and adjusts the smart trainer so that everything matches. I understand how this will benefit those wanting the same power numbers indoors and out (since no two units match exactly), but I’m still undecided if it’s a good setup for me. I’ll be working that out over the next few rides.

So far this setup is working out very nicely. While expensive initially (almost the cost of a bike) I vastly prefer the feel of a direct drive smart trainer to the fluid trainer with power meter. Both are effective, but I’m really enjoying not having to shift and chase power targets. Both Kristen (she also bought a Hammer) and I are following TrainerRoad plans over the winter, and as it moves into more over-under workouts, especially those with very short high intensity intervals, having a smart trainer is a huge bonus. It’s very difficult to effect radical changes in power and stay on target when shifting and matching speed to a power target. A smart trainer eliminates that need.

Leave a Comment

Goodbye, 2013 El Mariachi Ti

Today it was time to say goodbye to the 2013 Salsa El Mariachi Ti. After getting a warranty replacement for the broken frame then buying and selling and shuffling parts to rebuild it into the beautiful blue 2014 bike, the call tag to have the frame sent back to Salsa still hadn’t arrived… until this week.

Prior to today I’d been storing the frame at my house, hoping against a return, hung on the wall of my office (alternate view) where I’d see it every day. Sure, this is just a bike frame, a mostly-static piece of metal that held together more complicated bits to form a bicycle, but it was also the focal point of a machine on which I experienced an entire range of emotions and adventures.

From finally completing Lumberjack 100 to getting in over my head on the NTN Singletrack in Marquette, from the first trip to Brown County State Park to getting caught in straight-line winds at Stony Creek, from hard and long rides at Poto to all-day adventures from home simply enjoying the local trails… This frame was a big part of what I’ve experienced on a bike. Every time I looked down between my legs or up after a crash, there it was.

183 rides…
5200 miles…
459 hours of glorious movement.

No longer ridable the frame had become art to me. A piece of material embodying memories; a memento. Something to look at every day and remember past good times and think about those coming in the future.

Still, I understand why Salsa doesn’t want broken frames out in the wild, so tomorrow morning I’ll be dropping it off at Rochester Bike Shop where into a box and off to the scrap heap it’ll go. I’ll still have all the great memories, it’ll just be time to find new art for that wall…

…and keep riding.

Leave a Comment

Aluminum Polishing Disappointment

A while back I stupidly put my Bialetti Moka in the dishwasher. Due to the alkaline detergent it discolored and pitted, no longer looking bright and shiny. In an effort to restore its look I researched restoring aluminum cookware that’d been washed in a similar manner and found that polishing with potassium bitartate (cream of tartar) should work well.

In the image above the left panel was the post-dishwasher state, and the right is after a few minutes of polishing with a mixture of equal parts water and potassium bitartate. While a bit of yellowing was removed the aluminum was not returned to its previous shiny state. The appearance change was actually minimal enough that I didn’t bother polishing the rest of the Moka.

I imagine I could remove more of the discoloration and pitting by using some proper metal polish and maybe a buffing wheel, but I’m not going to bother. While the Moka still works fine I was hoping for an easy return to the original shiny appearance. It looks like the recommendation of using cream of tartar didn’t do this.

Leave a Comment

T8 Fluorescent Lamp Retrofit

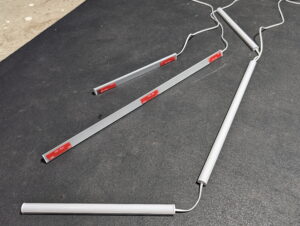
The fluorescent light fixture in the laundry room had issues, with only two bulbs reliably lighting and a persistent buzzing sound. This is the telltale sign of a failing ballast, and with the bulbs being fairly old (last replaced in 2005) it was time for some work.

The fixture had been fitted with F40 / T12 bulbs and a pair of two-lamp magnetic ballasts. Since these bulbs aren’t being manufactured anymore (this was stopped in mid-2012) I had to move to T8 bulbs. This wasn’t a problem, as I’d been keen to try the Philips F32T8/TL950 high-CRI (98!!!) / 5000K bulbs. Outside of very specialized full spectrum bulbs these seem like the holy grail of daylight lamps. They aren’t readily available in shops in less than 25 packs, but some Amazon sellers have them individually for reasonable prices.

Four bulbs were ordered ($13.32/ea) via Amazon, along with an ICN-4P32-N electronic ballast ($15.60), and this evening I put it all together. Wiring was surprisingly simple, with everything being relatively color-coded and easy to fit. Two old magnetic ballasts were removed, the replacement electronic ballast was fitted / capped / taped, and it was ready to go.

These lamps look great, and the laundry room is now brighter than ever. These lamps look so good that I’m now considering them for over my workbench and trying to find a way to use them in the office. With such a high CRI and daylight-like temperature these should be good for dealing with seasonal affective disorder or just general blue feelings in winter. (Yes, getting out and riding in daylight helps, but that’s not really possible on weekdays…)

1 Comment

Another TrainerRoad Setup

For the past two years I’ve been using TrainerRoad in the basement while riding on a bicycle trainer during the winter months. I’m normally not too keen on getting exercise for its own sake, but I’ve found that sometimes I get feeling grumpy and a bit of exercise, such as riding on a trainer, helps. Along with fatbiking it also helped keep up my fitness over winter, making bike riding in springtime a good bit more fun.

The setup that worked really well for me last year can be seen here, where an old Asus Eee PC (netbook) handled the job of running TrainerRoad and logging data. This worked, but the machine is slow enough that it’d get in my way whenever I needed to update, fiddle with settings, etc. Having some time off work this week and wanting to improve a bit, I decided to see what I could do using spare hardware from around the house.

Using a slightly-more-powerful-than-the-Eee PC Asus EeeBox EB1501 that I’d purchased in an ill-fated attempt to use it as an HTPC I connected it to an old Dell Ultrasharp 2005FPW display that was originally purchased for use with a PowerMac. It was first positioned directly in front of the bicycle — just as the netbook was — but this felt really awkward so I went looking for other options. What I’ve settled on thus far is seen above; the 20″ LCD display placed above the television, showing the relevant data and workout graph. A single computer speaker is placed next to the computer so I can hear the end-of-interval countdown beeps, and the ANT+ USB receiver is placed to be pointed directly at the bicycle.

The mouse and keyboard are wireless, so I should be able to set them near the bicycle and pull them out as needed, but as individual workouts in TrainerRoad are started and paused by pedaling (or stopping) they likely won’t be needed very often. No longer having the laptop and stand in front of the bicycle should allow different positions for the blower fan which helps keep me cool. I’ll probably try straight-on first, since that’d be closest to actually riding outdoors.

My biggest fear with this setup is that there’s some on-screen detail that I’ll miss (overall time, parts of the graph) or I’ll find myself getting off of the bike regularly to adjust something in the application itself. If this doesn’t work out, I might look at something like an older iPad, seeing as TrainerRoad has an iOS app under way now… Or maybe my Nexus 7 tablet, if the Android version is ever released. Either would work nicely on a small handlebar mount and probably be quite efficient to use.

Now if I could only find the irritating tick in the bike when pedaling under load… Maybe that’s a project for tomorrow.

Leave a Comment

Bad Capacitors in Oven Controls

The oven at home was purchased around the same time this place was built, back in 1991. Ever since I purchased it in 2001 the temperature has skewed a bit from the chosen setting, but within the past couple of years it’s become noticably worse, with a ~100°F offset at the high end of the scale. This made things difficult when Danielle would want to bake bread or other things which required high temperatures.

This morning I finally got around to taking the oven apart and looking at the controller. On the board I found four failed electrolytic capacitors, all of which tested bad (infinite reading on a multimeter). Using spares from the pile of parts gathered during previous electronics projects and a lucky purchase at Radio Shack I was able to replace all four of these and get the oven going again. Initial testing shows that things are working better. With the oven set to 375°F I’m seeing the oven (measured with a Fluke multimeter and temperature probe in the air) fluctuating between ~350°F and ~380°F, which seems about right.

The failed parts are as follows: 2x 47μF 25V (C3, C13), 2x 4.7μF 35V (C9, C10). These were originally Nichicon parts, but I failed to write down the replacement brands. The 47μF replacements are Radio Shack generics, and the 4.7μF are something cheap but decent that I’d picked up from Mouser a few years ago.

Total out of pocket cost was $3.16, which is very high for two capacitors, but ordering two capacitors online isn’t worth the shipping cost, and these were available immediately. The only other cost was 4-5 hours of work disassembling the stove, the PCB stack, finding the bad capacitors, and getting replacements.

I’m glad this was fixable myself. Paying someone to fix it would have involved replacing the entire failed control module ($200+ if still available + labor). Or, if I could even find one myself, replacing the whole control module itself would have been an expensive crapshoot: what if it was something else? Simply replacing the stove would have cost near-$1k for something comparably nice.

Leave a Comment

Defective REI Venturi Shorts (2014)

A few days back I picked up a pair of the REI Venturi shorts, as I needed more shorts and these were quite comfortable when tried on. I wore them for much of the day today and they were comfortable, but poorly engineered pockets is causing me to return them.

Upon arriving home from my parents’ Easter dinner, when reaching into my left pocket with my right hand to get my keys, I heard a tearing sound. It turns out that the thread used to stitch along the pockets is not as stretchy as the short material itself, and stretching the edge of the pocket causes the stitching to burst, as seen above. At $69.50/pair I expected better, and I’ll be returning these tomorrow. I’m disappointed in this because they are comfortable and met a need.

Leave a Comment

A Project Unfinished

Thirteen years ago, back when I moved into my apartment, I started building what was to be a solid oak mission style queen size bed. I got a fair ways into the project, finishing the posts and horizontal pieces for the head and foot boards, but I never went any further because mid-way through the project I bought the condo where Danielle and I now live. Most of my time was directed into fixing the place up, and then after that I found different hobbies; from beer brewing to electronics, traveling to cycling.

Finishing this bed is one of those projects I’ve kept meaning to do, but at this point Danielle and I are looking to purchase a king size mattress, which wouldn’t fit into this bed, rendering it somewhat useless. This is something I never got around to finishing, and found myself at the point where it was time to abandon it.

Last week I offered the wood to my dad as a project that he could finish up and today he picked it up. I’m really glad to that he wants to work on it, and thus I hope it’ll serve as an enjoyable project and end up as something my parents can use.

Leave a Comment