Press "Enter" to skip to content

nuxx.net Posts

2017-2018 Trainer Setup: CycleOps Hammer

For winter 2017-2018 I’ve put together a revamped, and much improved, trainer setup in my basement. Since the last setup with a Kurt Kinetic Road Machine things have been changed pretty significantly. I had previously set things up in front of a CRT HDTV which I’d previously used as a gaming / home theater setup but over the years I didn’t really use it for anything other than movies while on the trainer and basement music; just kind of a waste. This fall I sold the CRT HDTV and stands, picked up a cheap LCD TV (with built-in Netflix and Amazon apps), and put the whole setup on a metal stand in front of the trainer.

The result is a nice setup where a movie plays at eyes-on-the-road level and TrainerRoad is just a glance below. A CycleOps Hammer smart trainer provides resistance when riding, a nice step up from using a power meter, fluid trainer, and shifting to reach power targets. Four speakers (plus two over the workbench) are connected to a home theater receiver / amp, making for great audio from movies, or music via the AppleTV (and iTunes), although I tend to have subtitles on while watching movies to keep the audio at a reasonable level. A squirrel cage fan blows from a distance to keep me cool while riding. To ensure good ANT+ connectivity I’ve located the Garmin USB adaptor to a table next to the bike where it has a short path to the trainer, power meter, and my heart rate strap.

Since I have a Stages power meter on the Vaya, I have the option of using TrainerRoad’s PowerMatch. This uses the on-bike power meter and adjusts the smart trainer so that everything matches. I understand how this will benefit those wanting the same power numbers indoors and out (since no two units match exactly), but I’m still undecided if it’s a good setup for me. I’ll be working that out over the next few rides.

So far this setup is working out very nicely. While expensive initially (almost the cost of a bike) I vastly prefer the feel of a direct drive smart trainer to the fluid trainer with power meter. Both are effective, but I’m really enjoying not having to shift and chase power targets. Both Kristen (she also bought a Hammer) and I are following TrainerRoad plans over the winter, and as it moves into more over-under workouts, especially those with very short high intensity intervals, having a smart trainer is a huge bonus. It’s very difficult to effect radical changes in power and stay on target when shifting and matching speed to a power target. A smart trainer eliminates that need.

Leave a Comment

Wahoo KICKR Customer Service Disappointment

Planning to follow a TrainerRoad plan with Kristen all winter, and a little irked at the quirkyness of shifting to hit power targets on my current setup, I became interested in a smart trainer. My buddy Mike let me borrow his Wahoo KICKR, something I’d been itching to try after hearing so many good reviews of them. In short, I really liked the experience and was quite impressed by how much easier it made riding indoors. I focused more on putting out effort and selecting my cadence and less on staying on target, and large swings (say, over/unders) were MUCH easier to do when I didn’t have to seek the moving power target. I really wanted one. A few days later I noticed that Wahoo was selling NOS (new old stock) 2016 model for $899, which seemed perfect! The $1199 retail price is a bit more than I can afford, but this was doable for both Kristen and I. Orders were placed and we got ready to sell our fluid trainers.

Not hearing anything on the order after four days we sent notes to Wahoo’s customer service department. The responses indicated the units had accidentally been oversold, so we were offered refurbished 2016 units for $100 less. Having the same warranty and being even cheaper, that sounded great! We both accepted the offer and waited. A day later we were informed that the warehouse had found more stock of the new 2016 units and those were on the way, with the refurb offer rescinded. Not as good of a deal, but still, great! Because of this back and forth Melinda, the customer service person, tossed in a 142×12 Thru Axle Adapter for me and a TICKR X Heart Rate Monitor for Kristen; both things we could use and a really nice gesture.

Unfortunately, when the KICKRs arrived, we found that Wahoo had screwed up. These were not new units, nor refurbished, but instead returns which likely hadn’t been opened since the customers packed them up. Mine was scraped and the end caps were chewed up as if the previous owner didn’t clamp it down properly and had the bike come off while riding. The cassette was slightly greasy, it had a bunch of non-Wahoo stuff (Garmin manual and packaging, Monoprice packaging) in the box, and fine plastic dust from the expanded foam packaging was spread all over, including in the resistance unit. Kristen’s was arguably worse, with a heavily scuffed flywheel area (as if the owner had it resting against something), an empty through axle adapter box, and the previous owner’s personal info: the RMA from Clever Training and — inexplicably — a copy of his vehicle inspection report from Volkswagen Credit.

My KICKR:


Kristen’s KICKR:

IMG_4727.JPG IMG_4728.JPG IMG_4742.JPG
IMG_4730.JPG IMG_4743.JPG IMG_E4729.JPG

Separately we both immediately contacted Wahoo, but being Saturday didn’t hear back until Monday afternoon. (They’re open M-F, 10am – 7pm, and email responses seem to take about a day.) The first responses offered $100 refunds claiming the units were refurbished. After pushing back indicating that they are simply used and don’t seem like it’d be up to their standards, the refund offer was upped to $200 with the opportunity to test them out before accepting. While $699 is an even better price, neither of us were keen on paying so much for used trainers with plastic dust in sensitive electronics.

Since it’s often easier to work things out over the phone I decided to call Wahoo. I spoke with Micah, who explained that the original customer service person I’d contacted via email, Melinda, was best suited to help me. (I got the impression she’s a lead or manager.) Indicating that what I really wanted was a new trainer, and that I was hoping they could sort this all out, he informed me that the 2016 units are gone, so that’s no longer possible, but he’d get in touch with Melinda and let her know that we had talked. A short while later I heard back from Melinda, offering to return the used trainer and give a 10% discount on a new 2017 KICKR. I replied asking for the RMA, declining to purchase the 2017 model. (In the mean time Kristen had called and set up an RMA for hers, but did not receive a discount offer.)

I understand that things go wrong with warehousing and shipping, especially when winter (trainer time!) is coupled with the busy holiday season, but I can’t help but be left quite soured by this experience. Almost two weeks after making the purchase, with time sunk into a back and forth via email and visiting FedEx, we’re both back where we started… without smart trainers. And waiting on refunds.

Good thing we’ve still got fluid trainers to ride… Because the CycleOps Hammers that we ordered are still en route.

Leave a Comment

(SOLD!) For Sale: 2014 Trek Cali Carbon SLX

After going back and forth on it for a year, Kristen has decided to sell her very-upgraded 2014 Trek Cali Carbon SLX. It’s an outstanding bike, perfect for Michigan XC single track, but it’s just not being ridden, so it’s time to let it go. It was originally listed for sale in 2016, but after pulling it off the market and fitting a carbon fiber fork and 34t chainring it was only ridden a handful of times, so now it’s back up for sale.

This bike is a 2014 Trek Cali Carbon SLX (details on Trek’s site here), but it’s had quite a few upgrades from when she originally bought it new. Size small, the bike has been fitted with a 170mm SRAM X9 (direct mount capable) crank, converted to a SRAM 1×11 setup (34t x 10-42) w/XD driver, and now sports the matching Trek carbon fiber fork. It comes with the original Fox suspension fork, with crown races installed on both, so swapping between forks takes just a couple of minutes with 4mm and 5mm hex wrenches.

Frame: 2014 Trek Cali Carbon SLX, Small
Suspension Fork: Fox F29 RLC, G2 Offset (Only a handful of rides since being rebuilt by RBS.)
Rigid Fork: Bontrager Bowie, Matching Colors and G2 Offset
Brakes: Shimano XT M785
Crankset: SRAM X9 (Hollow, Direct Mount Capable)
Shifter/Derailleur: SRAM GX (1×11)
Cassette: SRAM XG-1150 (10-42)
Chain: SRAM PC-X1
Wheels: DT Swiss X1800 (DT350 Hubs, Straightpull Spokes, tubeless ready, upgraded to XD driver, decals removed.)
Tires: Schwalbe Racing Ralph Snakeskin 2.35″ (Front), Specialized Fast Trak GRID 2.25″ (Rear), Set Up Tubeless
Bar/Stem/Seatpost: Bontrager Racelite
Saddle: Specialized Henge

The complete bike as pictured above — without the cheap demo platform pedals — weighs a light 20.74 pounds.

Click here for photos both from 2016 when it was originally listed for sale, and now. Here’s the current photos (high res):

Asking price is US$2000 US$1600 SOLD with both forks. (MSRP, as 2×10 without carbon fork was $3870.)

Bike is located in the Warren / Troy / Shelby Township / Rochester / Utica area and is available for demo rides at any local trails, including River Bends and Stony Creek.

Please email steve@nuxx.net if you are interested.

Leave a Comment

Exploring Modular Audio Synthesis

For pretty much as long as I can remember I’ve been interested in experimenting with sound. While I love great music, sounds themselves are most interesting to me. I remember using the shaft of spinning electric motor pressed against the mic of a cheap cassette recorder to simulate chainsaw sounds, putting my ear against different parts of my sister’s Casio SK-1 (where I also learned about ADSR) as the case vibrated and tone changed, and intently listening to The Downward Spiral picking out samples (puffing a drinking straw, fingers brushing over metal grating).

Over the years I’ve ended up owning, and in many case building, a number of piece of music equipment. This ranged from the Electrix suite of effects, some drum and synth modules (Yamaha TX81Z, Alesis D4), self-built x0xb0xes, some MIDIbox SID-NUXXs (where I learned the basics of PCB layout), but they all seemed too oriented around song composition and didn’t work well when I simply wanted to play with sound.

With some self-built gear sitting around on the shelf and a newfound empty space in my closet, I decided to put much of it back together, but this time acquiring something that’s much more hospitable to experimentation: a eurorack-format modular synthesizer. As of now I’ve mostly settled on a suite of modules, with just enough stuff that I’ve still got loads of learning to do and lots to explore. This setup also allowed me to connect some of my older DIY gear; stuff that I’d been longing to hear for a while. Conveniently I had an old analog oscilloscope and quality multimeter, things which are surprisingly useful when troubleshooting why a patch isn’t doing what was hoped.

All set up, it’s as seen above.

When expanding I started out with the basic (but fantastic) Moog Mother-32 and the cost effective Arturia BeatStep Pro, but soon after realized that for the kind of experimenting I wanted to do a few discrete modules would be really nice. While fairly low end (especially the speakers) it’s a good setup for experimenting and deciding how much further I want to take things. I believe I’m pretty well set up and have a lot to learn before I make any additional significant purchases. This setup gives me option for everything from triggering drums and playing with sequencing music from synths to setting up drones and seeing how sound can be tweaked:

Non-Eurorack:

Eurorack:

Leave a Comment

Easy Web Page Load Timing Comparison via Bookmarklet

I needed to get rough metrics of web page load times across different browsers. While the built in development tools are good for fine-grained timing, outside of pay tools (eg: HttpWatch) or browser-specific (Page load time Chrome extension) I couldn’t find anything easily available for general page load time.

It turns out that the time between performance.timing.navigationStart and performance.timing.loadEventEnd does a good job of this, as it shows the time elapsed between when the browser starts navigating to the new page and when it feels the page is done loading (the load event handler is terminated).

A bookmarklet containing the following can be used to do this:

javascript:(function(){ var loadtime = (performance.timing.loadEventEnd - performance.timing.navigationStart) / 1000; alert("Page Load Time: " + loadtime + " sec"); })();

This link can be dragged and dropped to your Favorites / Bookmarks bar to easily create a bookmarklet with this content: Page Load Time

Leave a Comment

2015 Salsa El Mariachi Single Speed w/ Upgrades

A couple years ago I had an older Bomb Pop Blue colored El Mariachi that I used in a bunch of different setups, including rigid SS and rigid 1×9, but mostly it saw use as a hard tail SS with wide wheels. A fun all-around XC bike; I loved it. After building up the Jones Plus (as a single speed) I sold the El Mariachi, but missed it, especially after selling off the Jones. (While nice, I couldn’t justify such a high end single speed like the Jones, and my buddy Bob was really keen on it…)

For everything from might-get-wet rides to trips to Ray’s (where a derailleur can be a liability) I liked having a cheaper, familiar, single speed bike and kept an eye out for something that’d meet the want…

Suddenly, one dreary spring day in 2016, I found what I was looking for: a second hand (but practically new condition) 2015 Salsa El Mariachi Single Speed, in it’s wonderfully weird grey-green color which occasionally looks to my deuteranomalous eyes as brown. Even better, with a 44mm straight head tube and kinked seatpost it features Salsa’s newer El Mariachi geometry; the same as is found on my beloved El Mariachi Ti, a perfect single speed for me. Unfortunately, while I love the frame and its color, I was was never really happy with the anodized orange accents.

After riding it for a year, tweaking some things, reusing spare parts, and finding some mid-winter deals it’s had quite an upgrade. While the stock wheels were nice I wanted higher engagement hubs and wider rims with higher volume tires. A suspension fork, bought used from a buddy in late spring 2016, took the edge off of rough trails. New wheels, a black handlebar (from the Blackborow), and a new seatpost collar did away with the remaining orange. Swapping on 180mm/160mm rotors (also from the Blackborow) brings stopping in line with my other XC bikes. The end result is monochrome parts on a colorful frame, my preferred style of bike.

Topping it all off are Schwalbe’s giant, aggressively knobbed 29″ x 2.6″ Nobby Nic tires which — even on the wide-for-XC WTB KOM i29 rims — fit nicely in the El Mariachi’s frame, getting it close to 29+ territory. While I’m not normally fond of such an aggressive tread for XC use it’s the only tire of its size available that appealed to me. The stock bike build featured 2.25″ Nobby Nic tires and while they felt squirmy on hard pack, they were quite enjoyable when conditions are soft or loose; precisely one of the times when I opt to ride single speed. So, I opted to give them a go. I may eventually switch to something lower knob, but for now they are staying.

More photos, including wheel build numbers, can be seen here, and the complete bike is built as follows:

Frame / Rigid Fork: 2015 El Mariachi Single Speed (Medium)
Suspension Fork: Fox Racing Shox OE, CTD w/ Open Bath Damper (Grey Decals)
Rigid Fork: Salsa CroMoto Grande, tapered, 15mm thru-axle (Matched to Frame)
Hubs: Hope Pro 4 (front), Pro 4 Trials / Single Speed (Rear)
Rims: WTB KOM i29
Spokes: Sapim D-Light (Black, 292mm and 290mm)
Nipples: Sapim (Black)
Tires: Schwalbe Nobby Nic HS 463 (29 x 2.60, SnakeSkin, TL-Easy, PaceStar)
Tubeless Setup: Stan’s NoTubes Sealant and Valves (35mm), WTB TCS Rim Tape (34mm)
Brakes: Shimano Deore M615
Brake Rotors: TRP-14 Standard Rotor (180mm, 160mm)
Front Brake Adapter: Shimano SM-MA-F180P/P2 (Suspension Fork), SM-MA-F180P/S (Rigid Fork)
Handlebar: Salsa Salt Flat 2 (700mm, cut from 750mm)
Grips: Ergon GP1 BioKork (Large)
Headset: Cane Creek 40 ZS44/EC44
Stem: Thomson Elite X4 (SM-E133 0° X 100mm X 31.8 1-1/8 X4 Black)
Spacers: Generic Aluminum
Stem Cap: Niner YAWYD w/ Evil Twin Cap
Seatpost: Thomson Elite (SP-E113 27.2 X 410 Black)
Seatpost Clamp: Thomson Seatpost Collar (SC-E102 29.8 Black)
Saddle: Specialized Phenom Expert (143mm)
Crankset: Generic (Salsa OE)
Bottom Bracket: Generic (Salsa OE)
Pedals: Crank Brothers Eggbeater Sl
Chainring: Generic 32t (Salsa OE)
Cog: Surly Cassette Cog (17t)
Cog Spacers/Lockring: Surly Spacer Kit
Chain: SRAM PC-850
Bottle Cages: Specialized Zee Cage II (Left and Right)
Rear Light: Planet Bike Superflash Stealth
Bell: Mirrycle Original Incredibell
Sensors: Garmin Bike Speed Sensor

Post upgrade, tubeless, with suspension fork, without Garmin Edge 520 or rear light, it weighs 26.12 pounds. This is pretty nice for what’s effectively a steel 29+ single speed, with super-grippy tires, in a geometry that I’m very comfortable riding. I have less than $1500 into the bike, which I’m pretty happy with considering how well equipped it is.

Leave a Comment

(SOLD) For Sale: MAME Cabinet

Up for sale is my MAME Cabinet. As documented on this wiki article I built this cabinet from a pile of lumber in the style of a late 1980s Data East cabinet, then outfitted it to be an extremely solid, quality MAME cabinet. Over the past few years I haven’t found the interest to keep working on it and now it’s time to sell.

Price is US$700, to be picked up at my house in Shelby Township.

Purchasing just the keyboard encoder, controls, coin door, and supplies for finishing the control panel would cost nearly this much.

Click on the photo above (or here) for more photos of the cabinet taken in early 2017. Please take a look at this article for information on exactly what went into the cabinet, and this photo gallery for some photos of it throughout the years.

This cabinet currently does not have a monitor installed, and the PC is a bit outdated (it was last powered on ~3 years ago), but all of the arcade-specific parts of the cabinet are in great shape. All controls feel good and are connected to a Hagstrom KE72-T encoder (no ghosting), the control panel can quickly disconnect from the main cabinet for ease of transport, and the monitor support bracket will make it easy to install a new display. Prior to listing this for sale I was planning to install a ~24″ widescreen LCD. Proper arcade game-type T-molding is installed along all edges and the cabinet has numerous handles, leveling feet, and roller wheels to make moving it easy.

Part specifics can be found on the wiki article; almost everything was purchased from Happ Controls and thus is full arcade quality. The control panel is topped with Formica and features eight buttons per player, some MAME-specific buttons for adjusting in-game controls (DIP switches, volume, etc), and there are three hidden buttons on the sides to act as coin inputs. The Millipede-sized real-arcade trackball serves as a normal mouse, and a wireless Logitech keyboard is included.

The cabinet features a temperature-controlled vent fan, internal power strip, speaker amplifier, remote bezel light switch, remote power and reset buttons, and quick-disconnects for all internal connections. PC-mounting points inside are ATX-spec to make installing a bare motherboard easy. The control panel is removable, held in place with thumb screws making transportation even easier.

Please contact me at steve@nuxx.net if you are interested in buying my MAME Cabinet. It was built with extreme care and well loved, but it’s time for me to let it go.

EDIT: This has been sold. Thanks, Luke!

Leave a Comment

Where I Rode in 2016

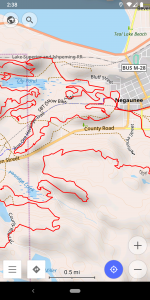
I’m not normally one to do a list on all the places I’ve ridden in a given year, but this map from RubiTrack — my preferred offline ride tracking application — changed my mind for this year. In my personal life it’s been quite an interesting year or so, and I took advantage of of that to travel a bit more. Some of these were with my amazing girlfriend Kristen, some with friends, and some by myself. Whatever way, it made for some great riding.

Calculated via Strava, I ended up with 261 rides totaling 5928 miles over 503 hours 22 minutes and climbing 234,394 feet.

Here’s all the different places/trails that I was fortunate enough to ride, broken down by state:

Michigan

  • Addison Oaks County Park
  • Aspen Park
  • Bald Mountain Recreation Area
  • Bear Creek
  • Big M Ski Area
  • Bloomer Park
  • Brighton
  • Bruno’s Run
  • Churning Rapids
  • Clinton River Park Trails
  • Clinton River Trail
  • Copper Harbor
  • DTE Energy Foundation Trail
  • Fort Custer
  • Glacial Hills
  • Hanson Hills
  • Harlow Lake
  • Hewen’s Creek
  • Hickory Glen Park
  • Highland Recreation Area
  • Hillside Trails (Munising)
  • Hines Park
  • Holly-Holdridge Mountain Bike Trail
  • Iron Ore Heritage Trail
  • Island Lake Recreation Area
  • Kensington to Proud Lake Connector
  • Lake Orion High School
  • Lakeshore Park
  • Maaso Hiihto
  • Macomb Orchard Trail
  • NTN Trails (Marquette)
  • Maybury State Park
  • Merrell Trail
  • Michawyé
  • Milford Trail
  • Morton – Taylor
  • Munson Park
  • North Country Trail
  • Oakland, Macomb, and Wayne Counties
  • Olson Park
  • Orion Oaks County Park
  • Ortonville Recreation Area
  • Owasippe
  • Paint Creek Trail
  • Pontiac Lake Recreation Area
  • Potawatomi
  • Proud Lake Recreation Area
  • RAMBA Trails (Ishpeming and Negaunee)
  • River Bends Park
  • Rolling Hills
  • Rouge Park
  • Ruby Campground
  • Seven Lakes State Park
  • Sharon Mills
  • Stony Creek Metropark
  • Stony Creek Ravine
  • Swedetown
  • Valley Spur
  • VASA

Ohio

  • Mohican State Park
  • Ray’s Indoor MTB Park

Indiana

  • Brown County State Park
  • Nebo Ridge

North Carolina

  • Bent Creek Experimental Forest
  • DuPont State Forest
  • Pisgah National Forest

Missouri

  • Berryman Trail
  • Greensfelder County Park

Arkansas

  • Back 40
  • Blowing Springs
  • Coler
  • Hobbs State Park
  • Lake Atalanta
  • Lake Leatherwood
  • Park Springs
  • Razorback Regional Greenway
  • Slaughter Pen

Here’s to 2017!

Leave a Comment

Fat Bike Upgrade: 2017 Salsa Mukluk Carbon

I’ve had my Salsa Blackborow for a year and loved riding it in all seasons, but thanks to Tree Fort Bikes I got a line on the brand-new 2017 Salsa Mukluk Carbon frame and decided it was time to upgrade. I love how the Blackborow rides, but a carbon frame with a 100mm threaded bottom bracket is what I’ve really wanted and until now it wasn’t practically available. In designing the 2017 Mukluk Salsa made some slight tweaks to the outstanding Blackborow geometry, named it the Mukluk, added some nice options (dropper post routing, new style Alternators), and built it out of carbon. All parts (except crank and headset) will swap over from my Blackborow, so there was no way I could say no.

Complete, with pedals, bottle cages, Garmin Edge 520, rear blinky light mount, bell, all sensors, and 4.8″ Schwalbe Jumbo Jim tires set up tubeless the complete bike weighs in at 26.48 pounds.

Almost all the parts are the same as the Blackborow build, save for the wheels (upgraded at the end of my time with the Blackborow), stem, crankset, bar, and headset. The crankset on the Mukluk ended up being a unicorn SRAM XO1 fat bike crank which I fortuitously found as a brand new take-off from a Bucksaw Carbon XO1. Fitted with the non-standard 0mm offset chainring (intended for Boost 148 spec bikes), two non-drive side spacers (none on the drive side), the chainline moves to 71.5mm, which is just about right for a 190/197mm rear end fat bike. It was necessary to put both spacers on the non-drive side to get even spacing between the crank arms and chainstays.

On the first couple rides there was occasional heel rub, so I fitted a set of extended spindles for Eggbeater pedals. This is minor and only seems to happen with larger shoes on technical corners, so the extra 5mm Q-factor should help.

Due to a slightly different geometry on the bike and a wider bar (carbon, to hopefully keep my hands warmer in winter) I went with a 90mm stem, which results in the same saddle-grip reach and feels good.

Full photo gallery can be found here: 2017 Salsa Mukluk Carbon

Here’s how the build ended up:

Frame / Fork: 2017 Salsa Mukluk Carbon Frame (Medium) / Bearpaw Carbon Fork
Wheelset: Hubs: DT Swiss 350 Big Ride (Front, Rear, Center Lock, XD Driver) / Rims: Hed B.A.D / Spokes: DT super comp / Nipples: DT Pro Lock (built by Mike Curiak)
Freehub Ratchets: Bontrager HUB51312614R (54-point for DT Swiss)
Summer Tires: Schwalbe Jumbo Jim HS466 26 x 4.8 (Snakeskin, TL-Easy)
Winter Tires: 45NRTH Flowbeist / Dunderbeist
Brake Calipers: TRP Spyke
Brake Rotors: Shimano SM-RT70 (180mm front, 160mm rear)
Front Brake Spacer: Shimano SM-MA90-F180P/P2
Brake Levers: Avid FR-5 (Black)
Brake Lever Insulation: 18mm 3:1 Heat Shrink (Generic)
Handlebar: Salsa Salt Flat Carbon (750mm)
Grips: Ergon GP1 (Large)
Headset: Cane Creek 40 Tapered IS41/IS52/40 Short Top Cover
Stem: Thomson Elite X4 (SM-E132 0° X 90mm X 31.8 1-1/8 X4)
Spacers: Generic Aluminum
Stem Cap: Niner YAWYD w/ Ore Dock Brewing Company Bottle Cap
Seatpost: Thomson Elite (SP-E116SB 31.6 X 410 Setback Black)
Seatpost Clamp: Salsa Lip Lock
Saddle: Specialized Phenom Expert (143mm)
Crankset: SRAM XO1 Fat Bike, SRAM Carbon Crank Boots
Bottom Bracket: SRAM GXP (100mm)
Pedals: Crank Brothers Eggbeater 3 (Blue) w/ Long Spindle Kit
Chainring: SRAM X-SYNC Direct Mount (30t and 28t, 0mm offset)
Cassette: SRAM XG-1150 FULL PIN Cassette
Derailleur: SRAM GX 1×11 X-HORIZON Rear Derailleur
Shifter: SRAM GX 11-speed X-ACTUATION Trigger Shifter
Chain: SRAM PC-X1
Cables/Housing: Jagwire LEX (4mm shift, 5mm shift for brakes)
Chainslap Protection: Scotch 2228 Rubber Mastic Tape
Bottle Cages: Specialized Zee Cage II (Left and Right)
Rear Light: Planet Bike Superflash Stealth
Bell: Mirrycle Original Incredibell
Sensors: Garmin Bike Speed Sensor and Cadence Sensor

1 Comment

For Sale: 2016 Salsa Blackborow Frame + Fork + Headset + Crankset

Up for sale is my year-old 2016 Salsa Blackborow Frame + Fork + Headset + Crankset + Extra Chainring. Everything is set up and ready to go.

The Salsa Blackborow is an outstanding fatbike platform with clearance for 5″ tires, and this package is the perfect way to build yourself an outstanding bike. All you need to get this rolling is a set of fatbike wheels (150mm front, 197mm rear — current through axle standards) and brakes/shifting bits/cockpit. Outside of the wheels nothing needed is fatbike specific, so this is a perfect project platform. If you want a suspension fork this frame is designed to accept a 100mm Rockshox Bluto; a drop-in replacement for the rigid fork.

Here’s what is included in the sale:

Everything is in great shape. Protective tape has been applied to everywhere routine rub could occur, and there are no cable rub, chain slap, or chainsuck. Small plastic plugs were installed into the non-used mounting holes for a smooth look and to help keep water out of the frame. There are a few small scuffs from usual riding wear, but so minor they don’t really show up in photos. There are no scratches, dents, etc.

Click here to see high-res photos of everything for sale: Take My Stuff: 2016 Salsa Blackborow.

The crankset spins smooth and the bottom bracket has plenty of life left (no roughness nor slop). Crank boots are installed to protect the ends of the cranks and crank washers were always used. Chainrings are in great shape with plenty of life left. Both the 28t and 30t rings are included, as I swapped between these for winter and summer. The 28t ring is currently installed, perfect for building up the bike as we roll into winter. The headset is smooth and works as it should, and being a Cane Creek 40 will have a very long life.

Price for the whole package is $900. Pacakge is now sold!

I’m the original owner of this frame and purchased it from Tree Fort Bikes in October 2015. Original retail price for this package was about $1461 + tax (Frame + Fork: $999 / Headset: $65 / Crankset + Bottom Bracket + Spacer Kit: $268 / Chainring: $60 + $60 / Crank Boots: $9). You can save a bunch by buying slightly-used and also avoid the hassle of pressing in a headset and bottom bracket. (All these parts match perfectly and are already set up, so I’m not interested in splitting up the package.)

Being only a year old you’re probably asking why I’m selling this. I came into a new frame (2017 Salsa Mukluk Carbon) and swapped over all compatible parts. Had the Mukluk not made it into my hands I would have been riding this Blackborow for the foreseeable future. It really is a great bike, fit me well, and is perfect for year-round riding here in Michigan. But, I don’t need two fat bikes, so this frame is for sale.

For sizing reference, I find that Salsa frames tend to run a bit big. For cross reference I ride a large in Specialized MTB frames and medium in all other Salsa stuff. Reach on this medium 2016 Salsa Blackborow frame is 420.2mm and stack is 604.4mm. Check out the geometry specifics here.

I live in Shelby Township, work in Warren, and am planning to take some trips to the Gaylord and Grand Rapids areas this month, so I’d be willing to meet a number of places in Michigan to complete this sale. I’m glad to ship this, so long as the buyer pays for shipping + insurance (actual price via UPS Ground). All parts will be packed in a Salsa frame box.

Leave a Comment