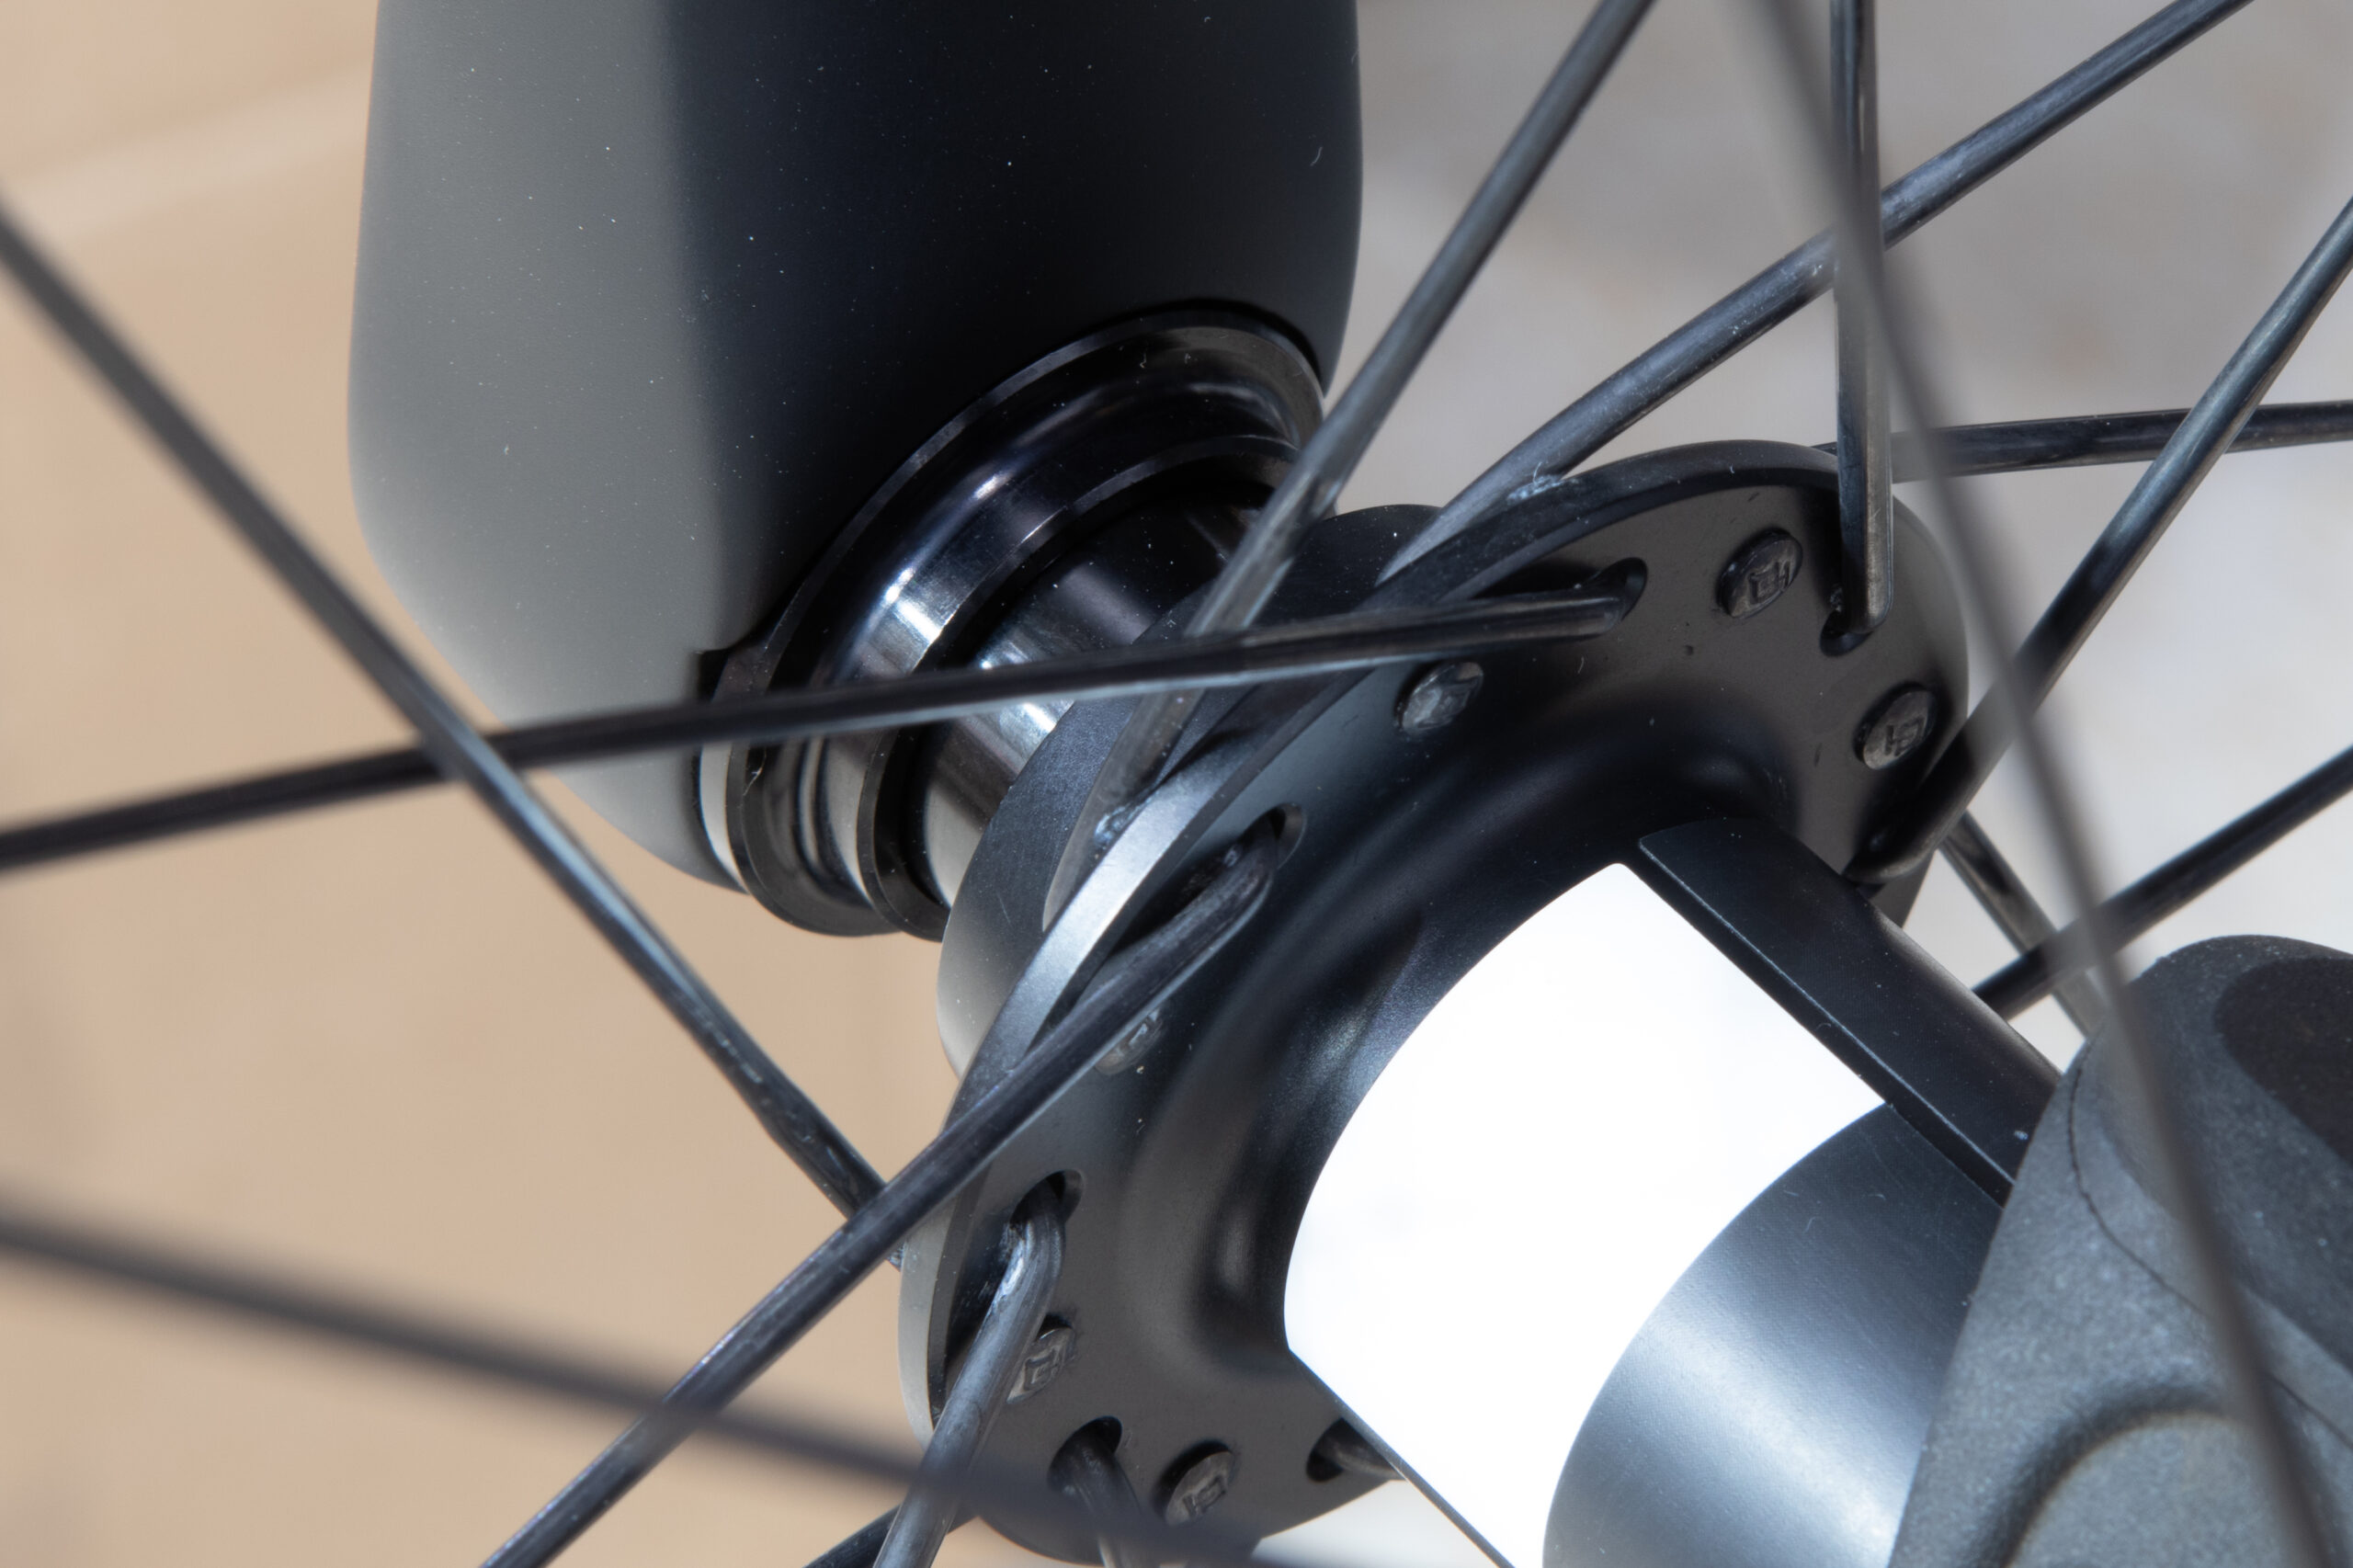
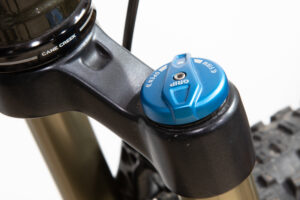
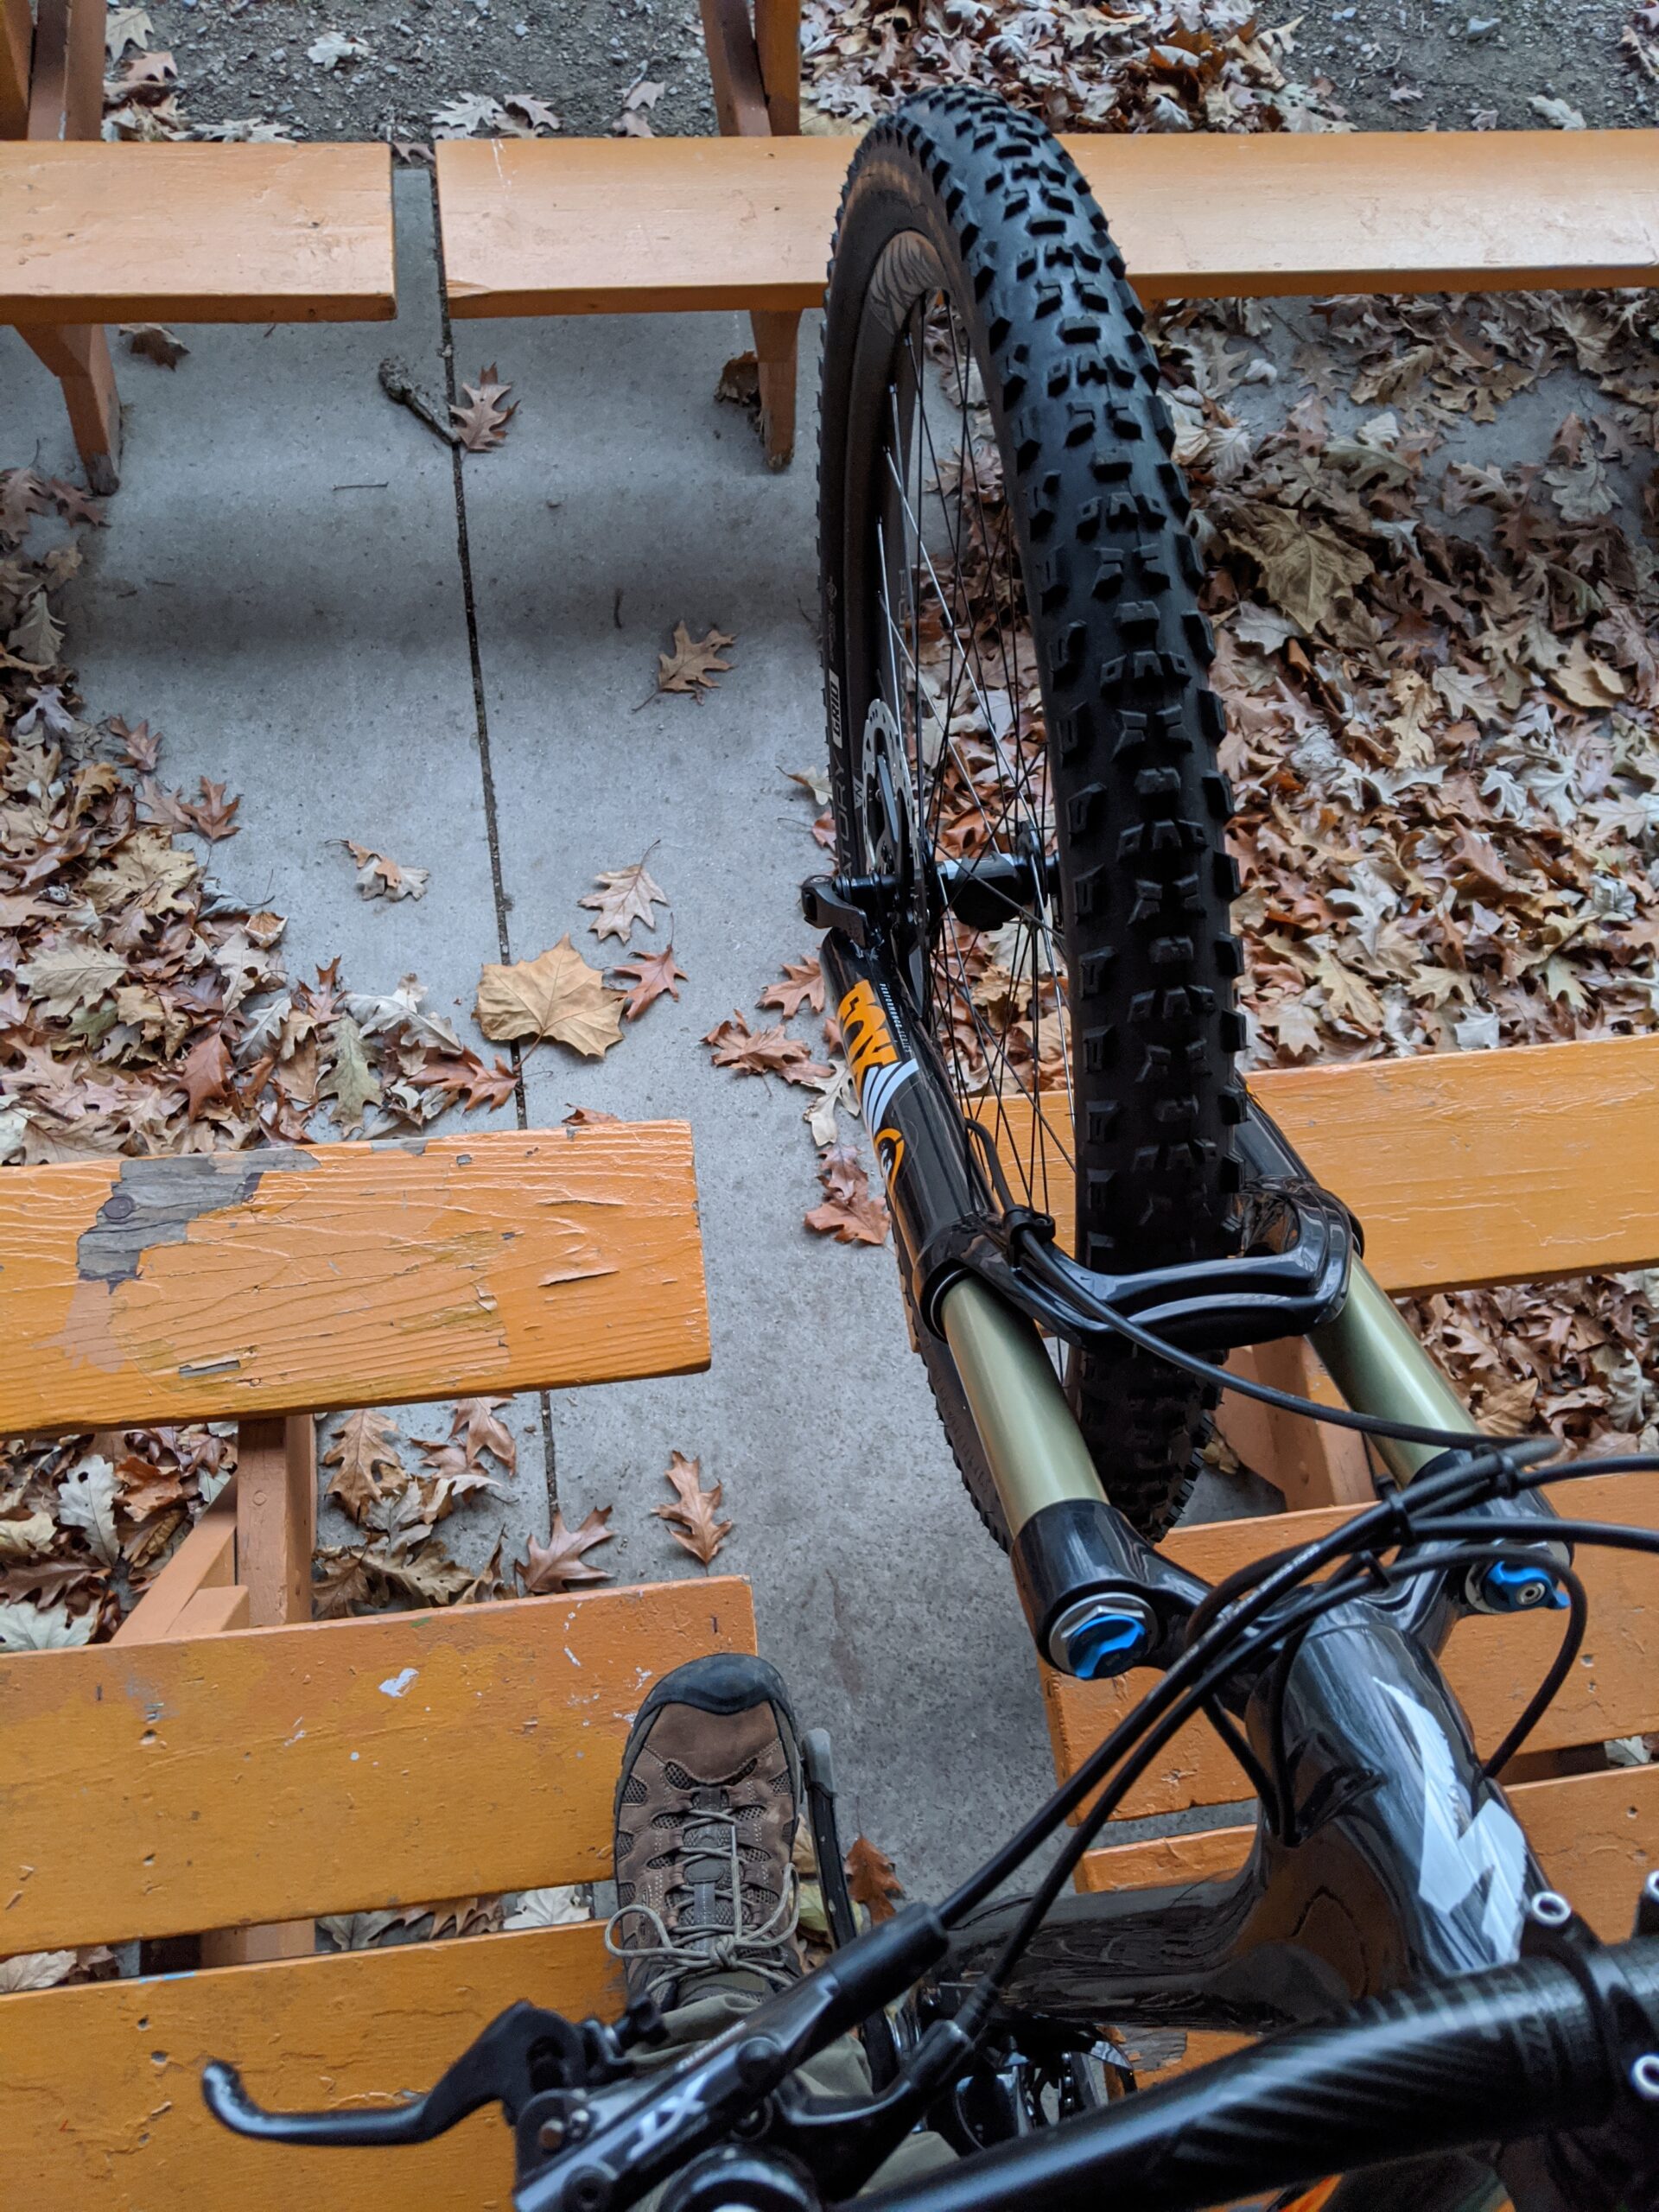
31mm dropout for Torque Caps on the Salsa Kingpin Deluxe fork.
In looking at photos of the fork, test fitting with end caps, and as confirmed by Salsa directly, the Kingpin Deluxe has 31mm dropouts designed to fit the SRAM-developed Torque Cap end caps. Originally intended to make suspension forks less prone to twisting, the larger 31mm OD end caps, instead of the standard 21mm OD, strengthen the wheel/axle interface. This is well documented elsewhere, and end caps are available for most higher end wheel sets (I9, DT Swiss, etc), but it only appeared on non-fatbike RockShox suspension forks… until now.
It’s not clear to me why Salsa chose to put 31mm dropouts on the already-stiff, rigid, carbon Kingpin Deluxe fork, but they did. My guess is they saw potential for dynamo hubs — which generate power via forces between the still axle and moving hub shell — to use Torque Caps so they have a larger interface with the hub. After all, one of the new features of the Kingpin Deluxe fork is internal routing for dynamo hubs.
Parts from two DT Swiss HWGXXX0009100S kits for converting the 350 Big Ride hubs to Torque Caps.
The only downside to including 31mm dropouts is that without Torque Cap end caps on the hub the wheel won’t self-center on the axle making wheel installation a little bit fiddly. In practice this isn’t a problem, and Newmen made stick-on Torque Cap Fork Reducers to mitigate it, but I wanted to see if I could get some actual Torque Caps for my DT Swiss 350 Big Ride Center Lock hubs (H350DCIXR32SA6259S) to do it right.
After a bit of email with Logan, one of the ever-helpful folks at DT Swiss, I learned that unlike all their other hubs, these have equal-length end caps and until now there weren’t any fat bike forks with 31mm dropouts, so DT doesn’t have a Torque Cap kit for these hubs. Logan suggested that I pick up two of the HWGXXX0009100S kits for regular 350 hubs, then use the longer pieces on each side of the hub, figuring this should fit. While this was a bit pricey (~$65), it felt like the right choice so the wheel would match the fork.
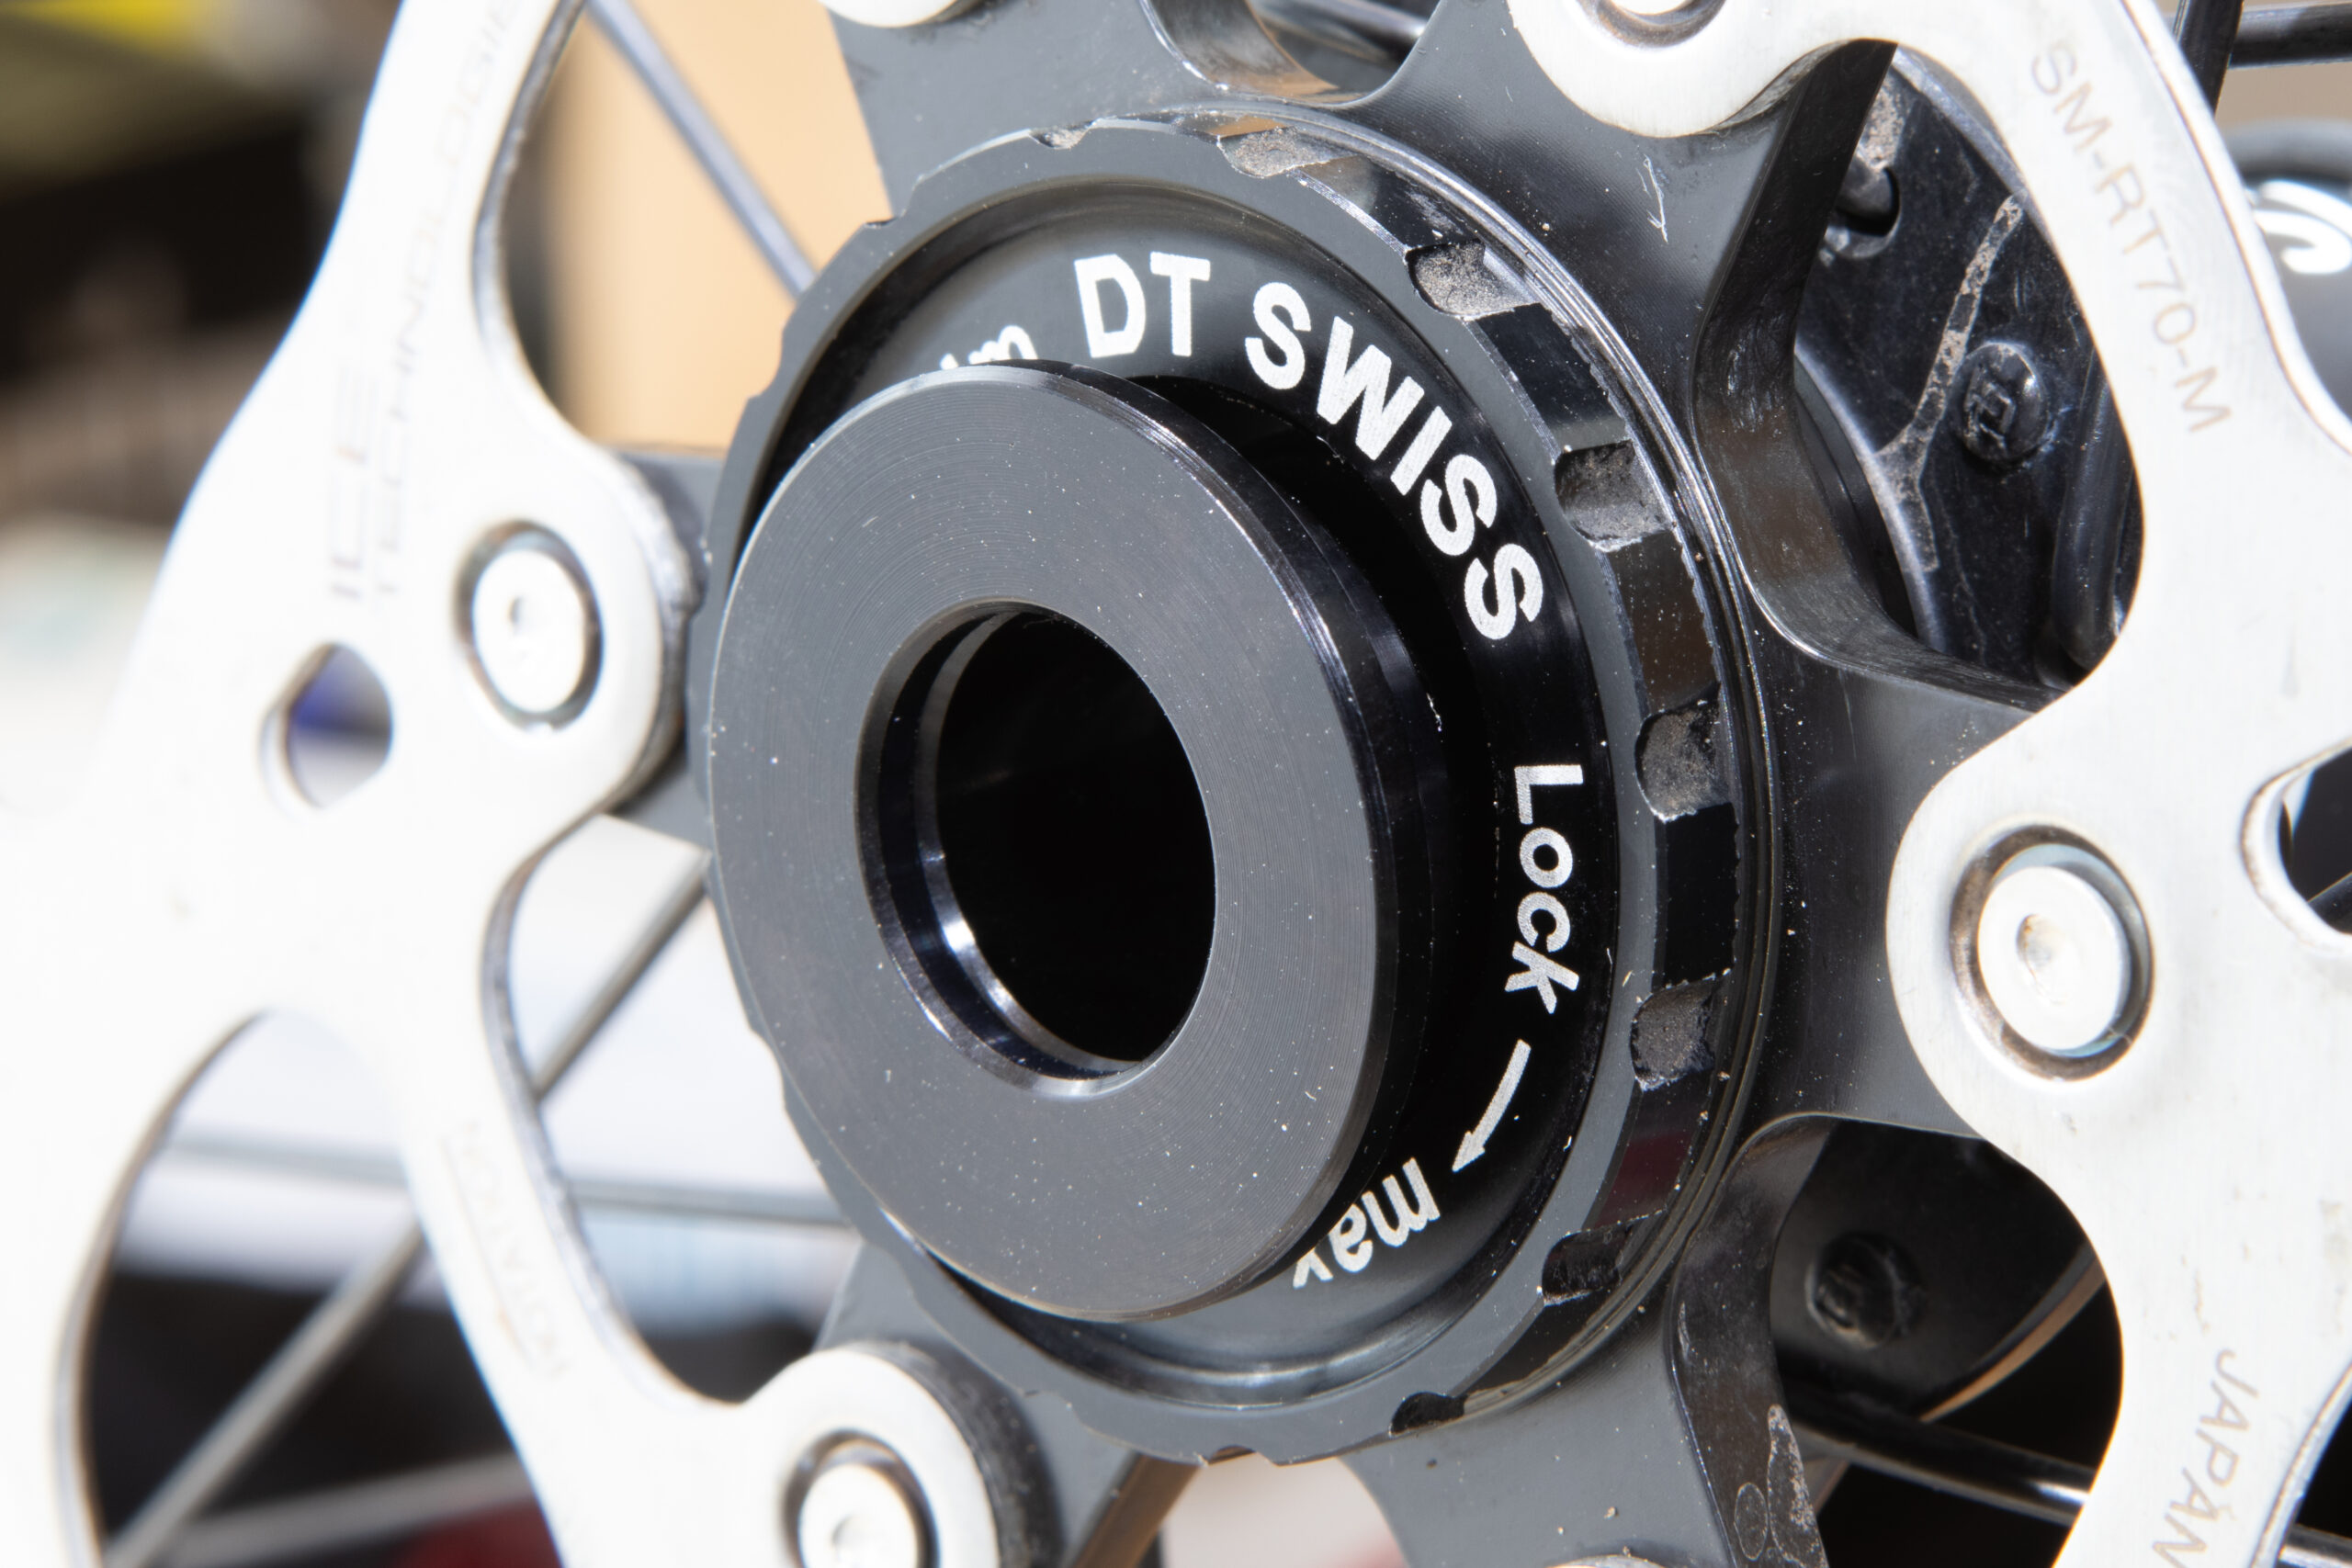
Torque Cap end caps fitted to a DT Swiss 350 Big Ride front hub.
The kits arrived and just as Logan had calculated these caps dropped right in and now the end caps and fork match. Hopefully in the future DT Swiss will offer a kit that has just the necessary parts so others won’t have to buy two as well.
With consolidating and upgrading my home network I’m moving Pi-hole from a stand-alone Raspberry Pi to running under Docker on my Synology DS1019+ running DiskStation Manager (DSM) v6.2.3.
This was a little bit confusing at first as the web management UI would work, but DNS queries weren’t getting answered. This ended up being caused by the bonded network interface, which is ovs_bond0 instead of the normal default of eth0.
Using the official Pi-hole Docker image, set to run with Host networking (Use the same network as Docker host in the Synology UI), setting or changing the following variables will set up Pi-hole work from first boot, configured to:
Listen on ovs_bond0 (instead of the default eth0).
Answer DNS queries on the same IP as DSM (192.168.0.2).
Run the with the web-based management interface on port 8081 with password piholepassword.
Send internal name resolutions to the internal DNS/DHCP server at 192.168.0.1 for clients *.internal.example.com within 192.168.0.0/24.
Set the displayed temperature to Farenheit and time zone to America/Detroit.
Listen for HTTP requests on http://diskstation.internal.example.com:8081 along side the default pi.hole hostname.
Additionally, setting up volumes for /etc/dnsmasq.d/ and /etc/pihole/ will ensure changes to the UI persist across restarts and container upgrades. I do this as shown here:
Note: If you stop the Pi-hole container, clear out the contents of these directories, and then restart the container, Pi-hole will set itself up again from the environment variables. This allows tweaking the variables without recreating the container each time.
UPDATE: With the update to Synology DSM 7.0 the interface is now called bond0.
Consider the following: You are attempting to update OpenStreetMap (OSM) trail routes using JOSM and find that the previous way is very detailed, but fairly wrong, meaning that a lot of nodes will need to be moved.
Even with the Improve Way Accuracy tool this’ll be a pain. So what can you do? First decrease the number of nodes using Simplify Way and then move the remaining nodes, adding new ones as needed in the gaps. This will keep the original way intact, keep most of the route present, but allow for easy cleanup. It also reduces the number of nodes, making for simpler routes that take up less space on GPS devices. (I find that a maximum error setting of 0.5m or 1m works well.)
In 2016 I used the official GIS data from the Noquemanon Trails Network (NTN) to add the singletrack trails to OSM. This worked pretty well, but since then it’s become possible to trace the Strava Global Heatmap high-resolution data when mapping. When doing some routine updates and using this layer for assistance I noticed how many trails originally entered using the NTN’s official data aren’t quite correct. So along with adding changes, I’m tweaking the trail routes using the Strava data.
The primary issue is that the official data would often have a large number of points very close together — in some cases just inches apart — particularly around curves. These points were much closer than needed for accurate mapping, and yet these curves would be the main things that needed adjusting. Moving all of these points would be a hassle and the resolution wasn’t necessary, so by simplifying the route, correcting the nodes that remain, and adding in more as needed, cleanup of the route is much faster. It also reduces the number of nodes along each way, saving space.
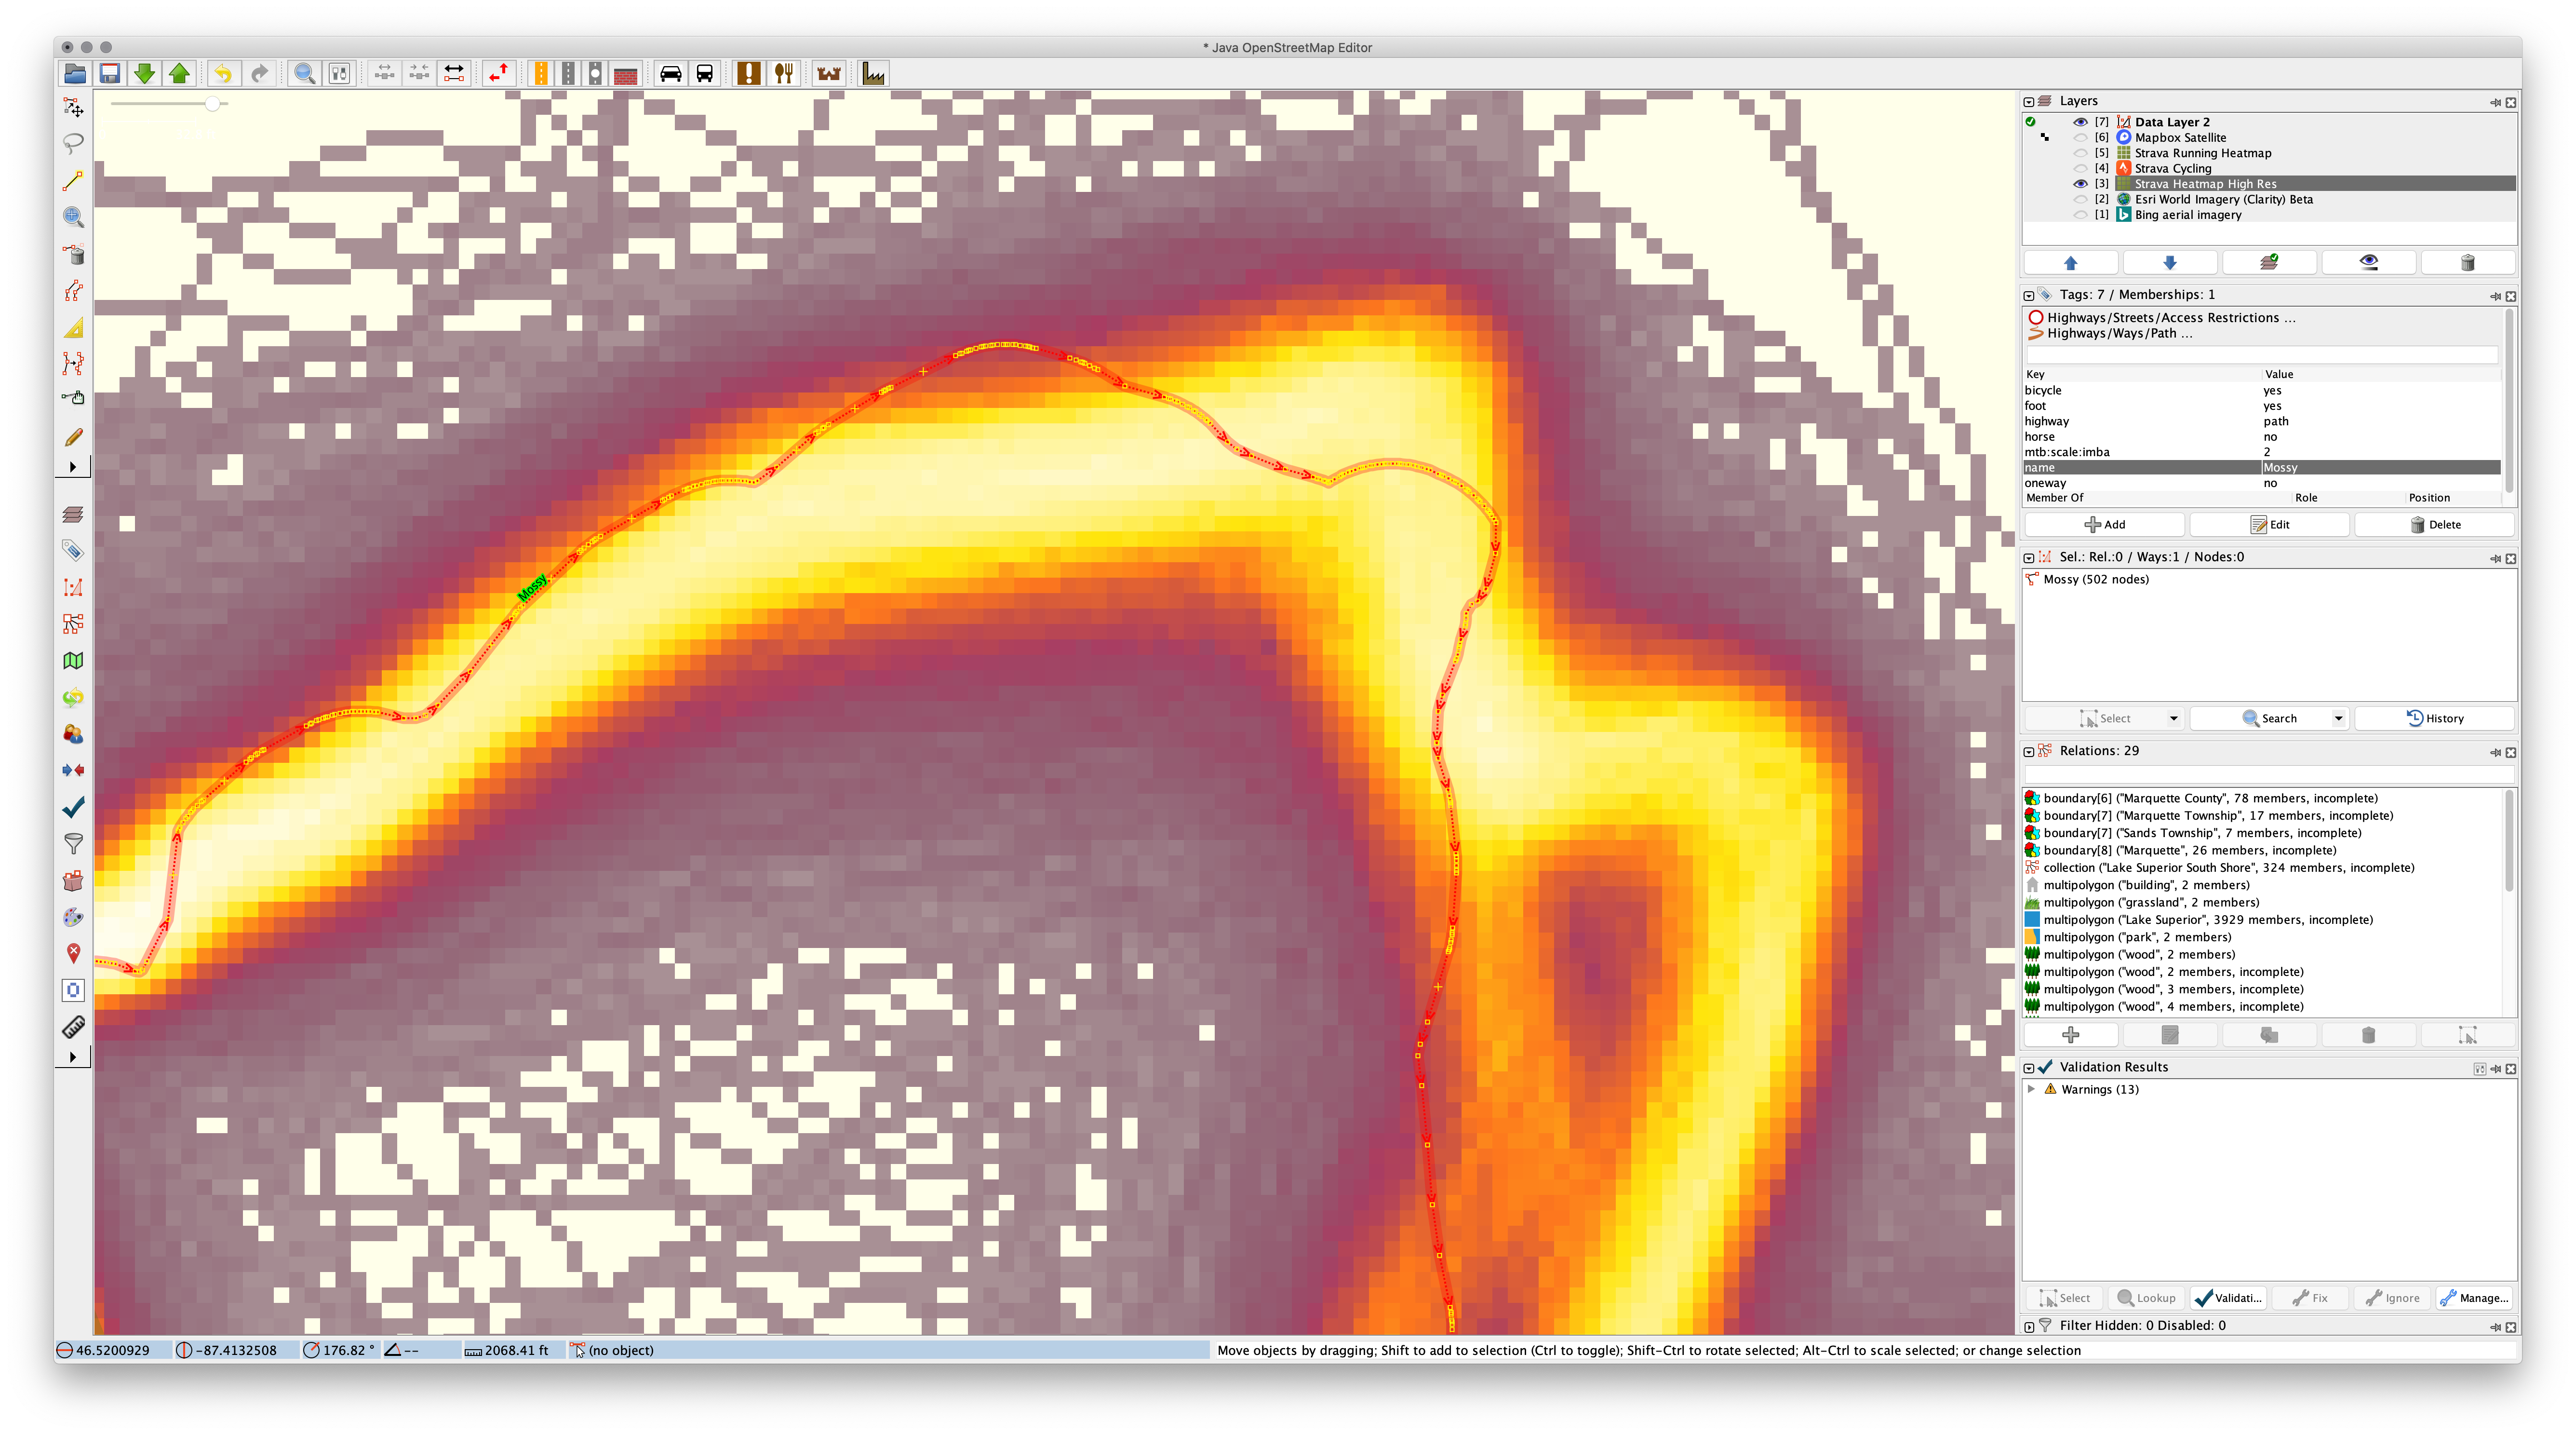
The following images show a great example of this problem along Mossy (way 40781586), the last piece of single track in Pioneer Loop (relation 6109593) when ridden clockwise from the trailhead:
Detail of original data for Mossy in JOSM. Note the very detailed, yet inaccurate, curves.Mossy after simplifying the way with 1m maximum error.After manual cleanup of the simplified Mossy using the Improve Way Accuracy tool
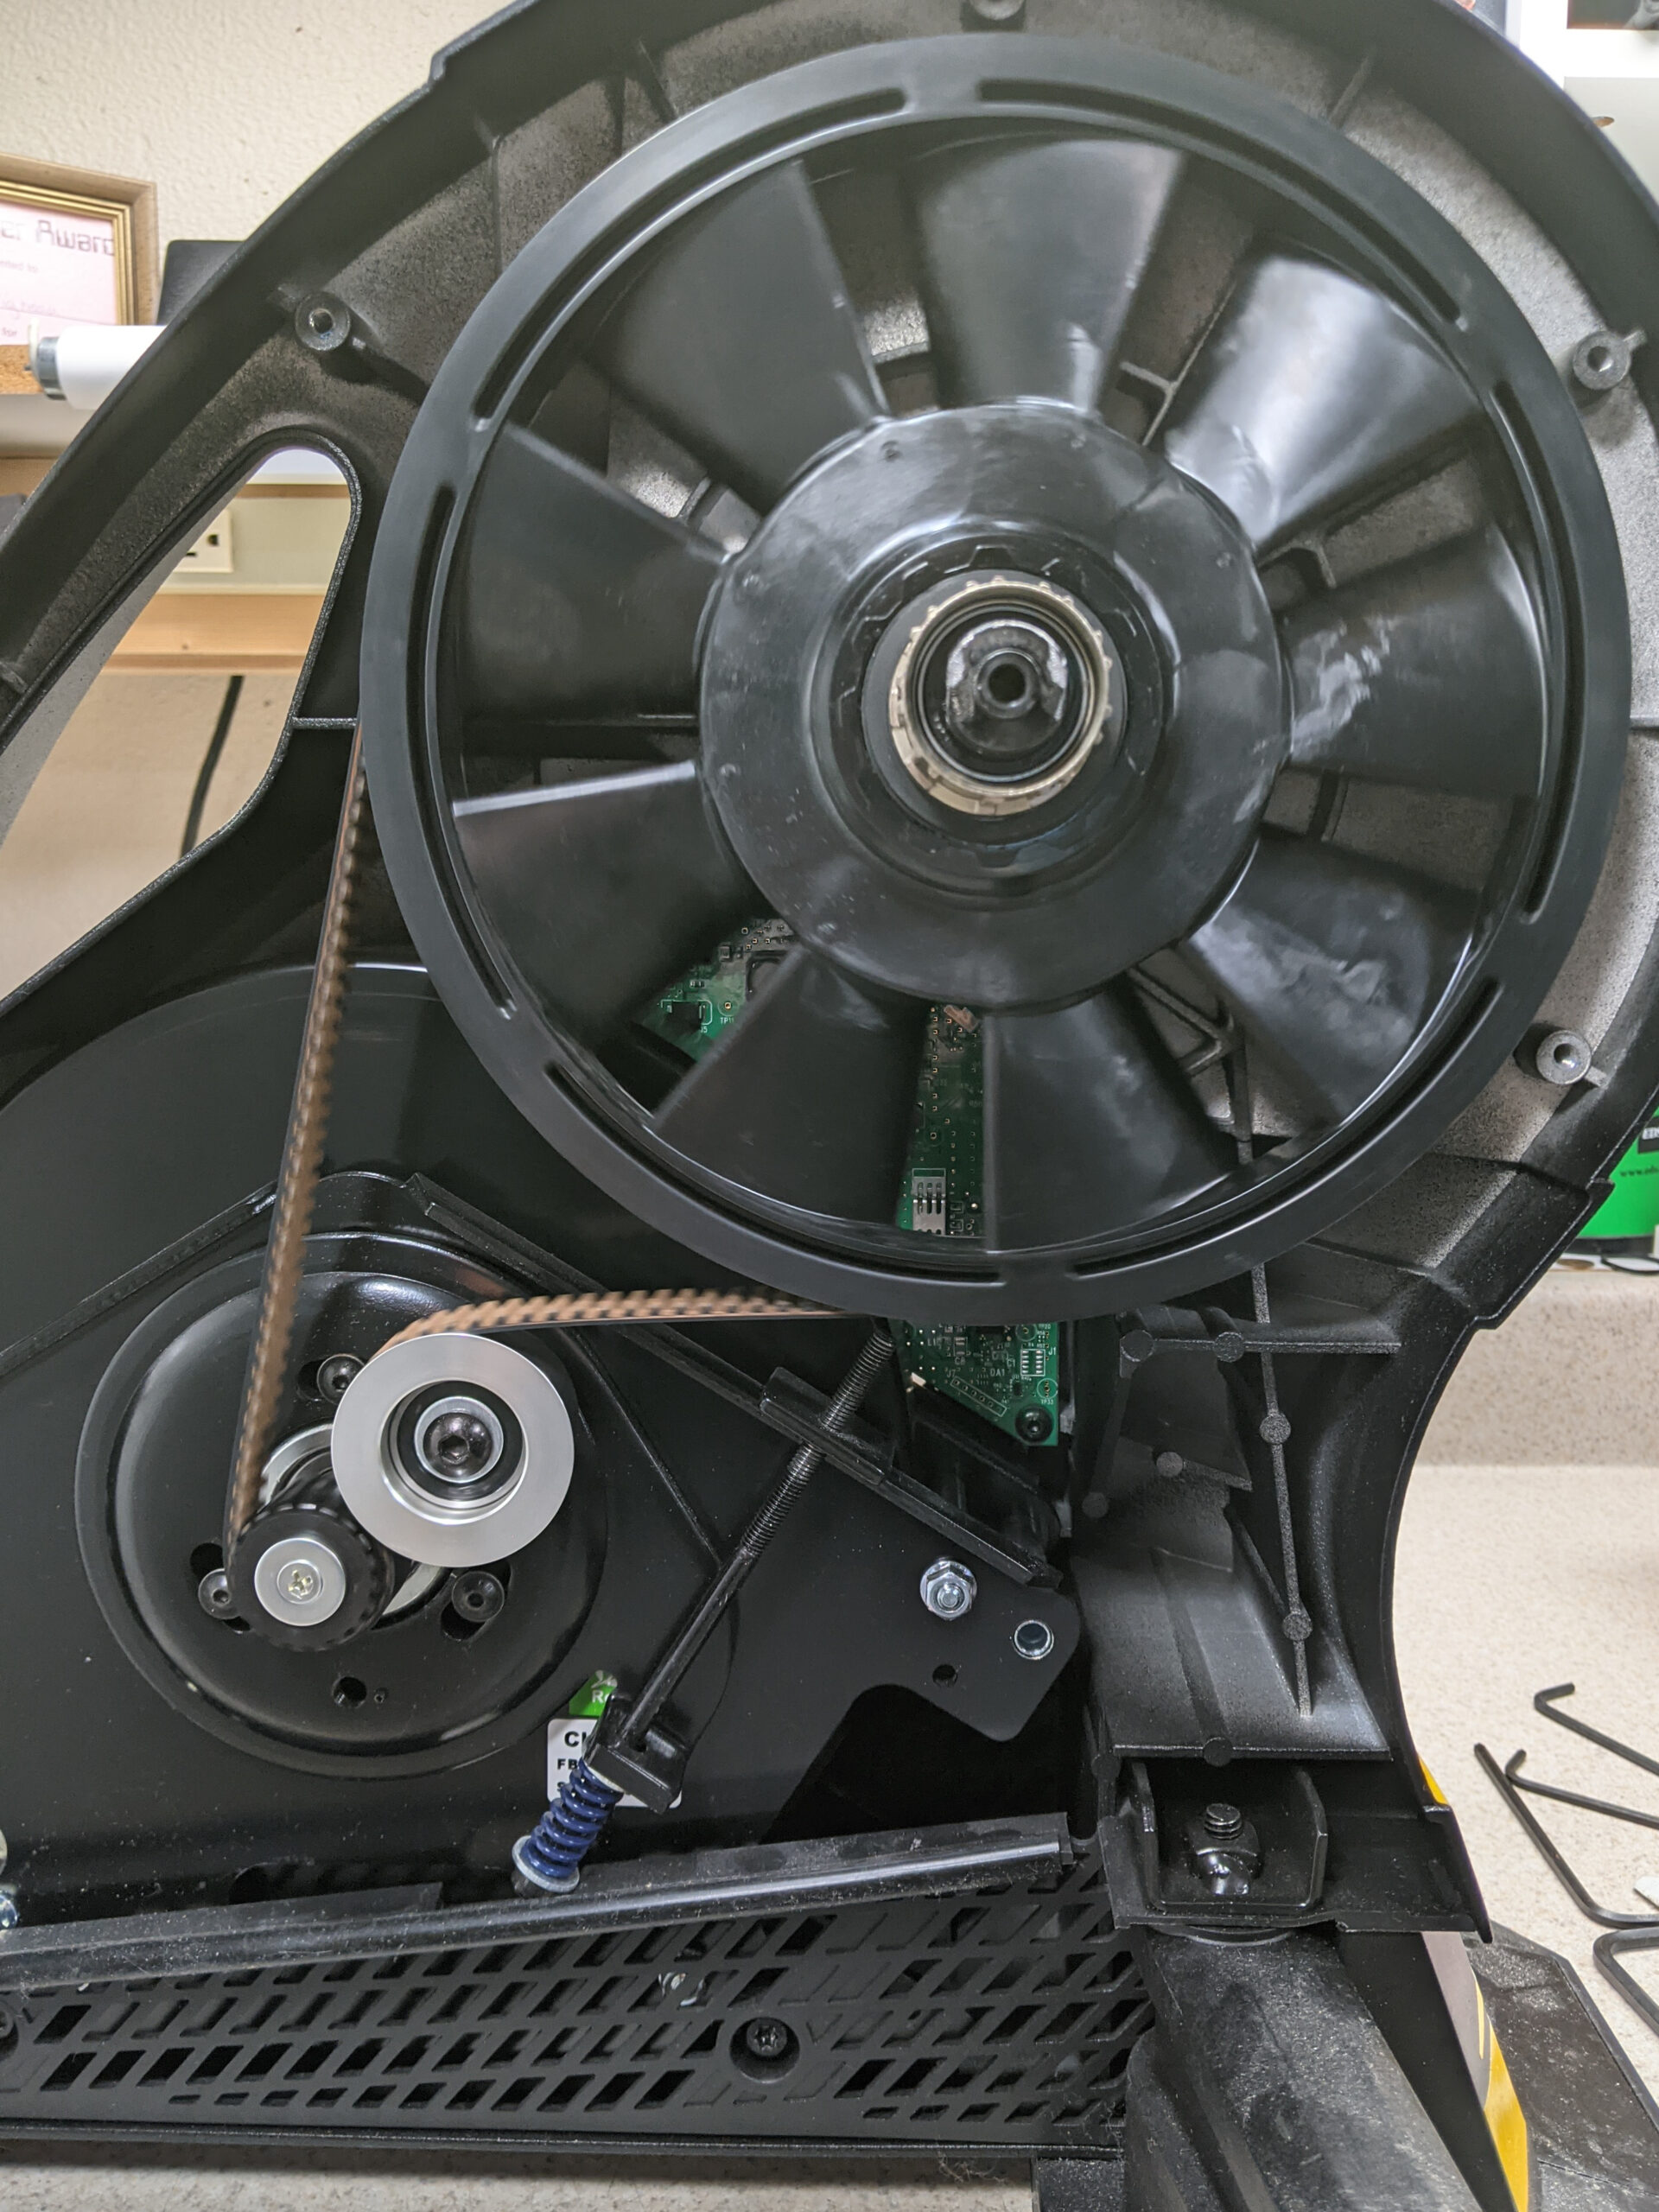
I’ve had a CycleOps (now Saris) Hammer smart trainer since late 2017 and it’s been working great, but lately has been making a slight rattling sound during post-ride spindown just before the flywheel stopped. It felt fine during use so I kept riding, but then when putting out a couple hard, short efforts during high resistance periods (in slope mode via Zwift) it made a loud clank/bang sound. I would also sometimes get a rumbling feeling as if the notches on the belt weren’t smoothly engaging with the notched pulleys. Various posts online attribute this to a worn belt, so I opened up the trainer to take a look.
What I found led me to believe the issue is with the belt tensioner coming loose, not a worn belt. I suspect for many the belt replacement fixes the problem because the replacement process includes re-tensioning the belt.
Inside the trainer there is an idler pully whose tension is adjusted via a threaded rod on a spring. This rod is turned via a 5mm hex head accessible from the bottom of the trainer (without opening it). The threads on this rod seemed a bit worn, it seemed loose, and shaking it made a similar metal-on-metal sound to the rattling and clank that I’ve been hearing.
As the belt is a motor-type timing belt, it’s pretty unlikely that human-level output in clean conditions will stretch it much. Removing and inspecting the belt and all pulleys showed that everything was clean and free of damage, so I reassembled it, tightened the tensioner to compress the spring a bit and tension the belt, and rode the trainer a few times. After this there was no more rattle and I was unable to reproduce the clank/bang during hard efforts.
It seems the cause of the noise was the lack of tension on the threaded rod, spring, and idler and it likely came loose over time. The rattle was from the tension rod rattling as the as the heavy flywheel and main fan wheel and belt came to rest. The bang noise was from the sudden heavy pedal load vs. the strong resistance unit removing all belt pressure on the idler and it all slamming back together when my pedal stroke dropped off.
So, if you’re hearing this same sort of noise and rumbling, try using a long 5mm wrench to tighten up the tensioner a couple turns. If this works for you it’s much quicker (and cheaper) than replacing a belt.
To open a Hammer (H1) trainer you need a 1/18″ hex tool for the small screws, a T-30 Torx for the large screws. The cassette must first be removed, and after removing the screws the snug-fitting side panel pulls away. Belt tension can be adjusted with a 5mm hex and the fastener is accessible without opening the trainer. The stock belt is an MBL 150S5M930 and available for under $10 online. (Saris sells the replacement belt with the three required tools for $59.99 + shipping.)
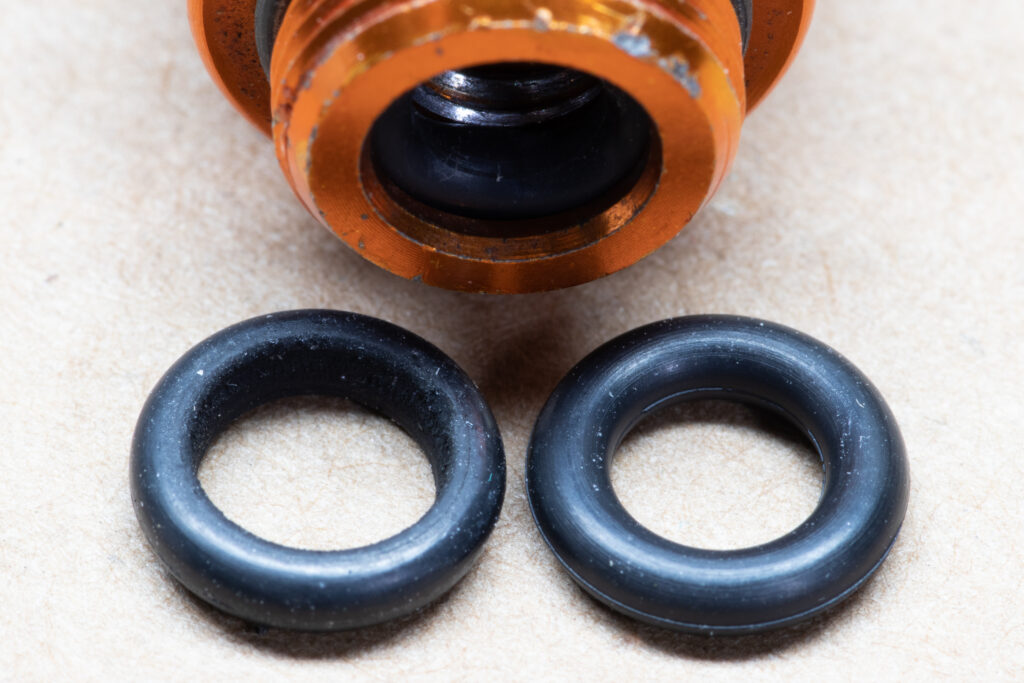
I have an older Lezyne Digital Overdrive floor pump which has generally worked great, except when the original slide-lock chuck failed. Nicely, Lezyne sent me a new chuck — ABS-1 PRO HV — and this worked great until earlier this year when the Presta side began leaking unless I held the hose just-right.
It turns out the o-ring on the presta valve side of the flip chuck, which seals against the valve body, had worn to the point where it no longer sealed well. The photo above shows the worn o-ring on the left and a new one on the right.
I emailed Lezyne asking for the o-ring spec so I could get some, and they instead sent me two of the parts. Popping out the old o-ring and fitting in a new one sorted everything out.
When fitting the o-ring I measured it, figuring it’d be nice to know the size in case I want a quicker replacement of this wear part next time:
ID: 5.2mm OD: 9mm Profile: 1.9mm
This is the kind of customer service I really like. Getting exactly the small part that I needed to fix the pump is perfect. Repairing something is always better than replacing, and this was a very simple repair.
Consider the following situation: You have a web app from a vendor and during a security scan it crashes. The web app is running over HTTPS with your certificates, but neither the scanning tool nor web app offer sufficient logging to see exactly which request caused the crash.
Because you can’t decrypt HTTPS without access to a client key log file (or making a bunch of TLS changes), and the client is a security scanning tool, Wireshark is not an option to see the triggering request. Fiddler is also likely out, as that’d require the security scanner to trust a new root cert. So what can you do? Stick something else in the way to proxy the connection, logging all the requests!
Having access to the private certificates for the server this is quite easy: set up nginx as a proxy. The only wrinkle is that getting access to all of the request headers requires Lua, so you’ll need to ensure your nginx install supports this. On macOS this was easy using Homebrew to install nginx from denji’s GitHub repository (the default nginx doesn’t support Lua):
brew tap denji/nginx
brew install nginx-full --with-lua-module --with-set-misc-module
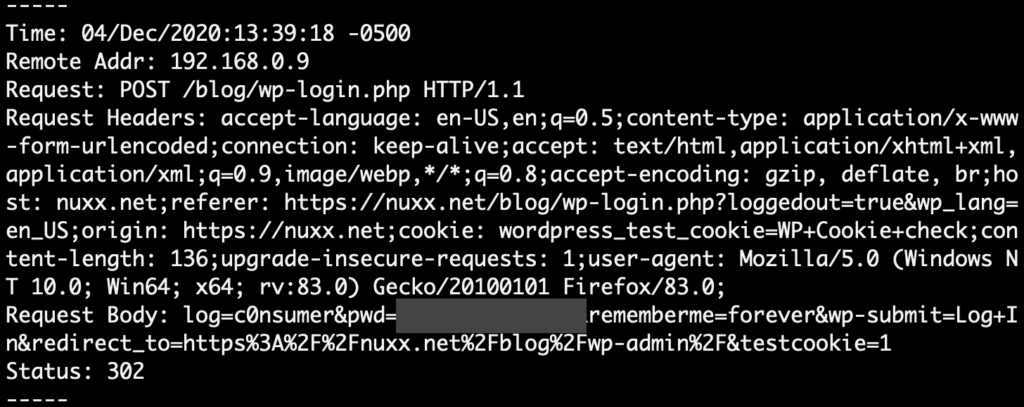
This configuration uses the web app’s certificates in nginx to proxy requests it receives to your main site, logging the client IP, request, headers, body, and request status to intercept.log. Requests are broken out by line to make for easy visual reading. You may wish to move this all on to one line to make parsing easy:
events {
}

http {
    log_format custom 'Time: $time_local'
                      '
'
                      'Remote Addr: $remote_addr'
                      '
'
                      'Request: $request'
                      '
'
                      'Request Headers: $request_headers'
                      '
'
                      'Body: $request_body'
                      '
'
                      'Status: $status'
                      '
'
                      '-----';

    server {
        listen 443 ssl;
        server_name example.com;
        access_log /path/to/intercept.log custom;
        ssl_certificate /path/to/cert.pem;
        ssl_certificate_key /path/to/privkey.pem;

        location / {
            proxy_pass https://example.com;
            proxy_set_header Accept-Encoding '';
            set_by_lua_block $request_headers {
                local h = ngx.req.get_headers()
                local request_headers_all = ""
                for k, v in pairs(h) do
                    request_headers_all = request_headers_all .. ""..k..": "..v..";"
                end
                return request_headers_all
            }
        }
    }
}
To put this in place, ensure that requests from the scanner go to nginx instead of the web app and then nginx will forward and log the requests. There are a few ways you could do this:
Run nginx on the same server as the web app, move the web app to listen to another port for HTTPS, and set proxy_pass to the other port: proxy_pass https://example.com:4430
Run nginx on a new server, change the DNS records for the site to point to the new server, and point nginx to the old server by IP: proxy_pass https://192.168.10.10
If the scanner tool’s name resolution can be adjusted, such as via a HOSTS file or custom configuration, point it to the nginx proxy for the site name.
To test you can use a web browser on a client computer and a HOSTS file to point the original hostname nginx. To get the screenshot above I ran nginx on iMac running macOS, then in a Windows VM I changed the HOSTS file to map nuxx.net to the iMac’s IP. Firefox on the Windows VM then sent requests for nuxx.net to nginx on macOS which logged and proxied the requests out to the real nuxx.net.
With the following settings you can have the two working well together with UniFi doing DHCP and Pi-hole doing DNS. Internal forward and reverse resolution will work, which means hostnames will appear properly for internal devices on both consoles while requests are still appropriately Pi-hole’d.
Here’s how:
Set up the Pi-hole and put it on the network at a static IP.
In Pi-hole, under Settings → DNS turn on:
Never forward non-FQDNs
Never forward reverse lookups for private IP ranges
Conditional forwarding with IP address of your DHCP server (router) as the USG
Local domain name (optional) as your internal DNS suffix
In the USG, set DHCP to hand out the Pi-hole’s IP for DHCP Name Server.
In USG, under Services → DHCP → DHCP Server, set Register client hostname from DHCP requests in USG DNS forwarder to On.
Leave the WAN interface’s DNS set to something public, such as what the ISP provides or Google’s 8.8.8.8/8.8.4.4 or whatever. This ensures that if the Pi-hole goes down then the USG can still resolve DNS.
After setting this up clients will use Pi-hole for DNS, as configured via DHCP. Requests for hostnames and addresses on the local network (shortnames or local suffix) will get forwarded to the USG, ensuring ensures that internal requests work properly.
PiVPN
Taking this a step further, I also have PiVPN running on the same Pi, to provide an endpoint for connecting into my home network via Wireguard. Pi-hole and PiVPN integrate very nicely and are designed to work together, making the setup very smooth.
By default, PiVPN sets the Pi-hole as the DNS via a DNS option in the [Interface] section of the config. To ensure appropriately geolocated search results when connected to VPN, use a DNS which supports Extended Client Subnet (ECS) (under Settings → DNS) on the Pi-hole.
(For reference, I’m running Pi-hole on a Raspberry Pi 4 Model B with 2GB of RAM and it has plenty of overhead for both Pi-hole for ~20 devices and sustaining 50 MByte/sec via Wireguard. The Pi-hole section of this was originally written up here on Reddit.)
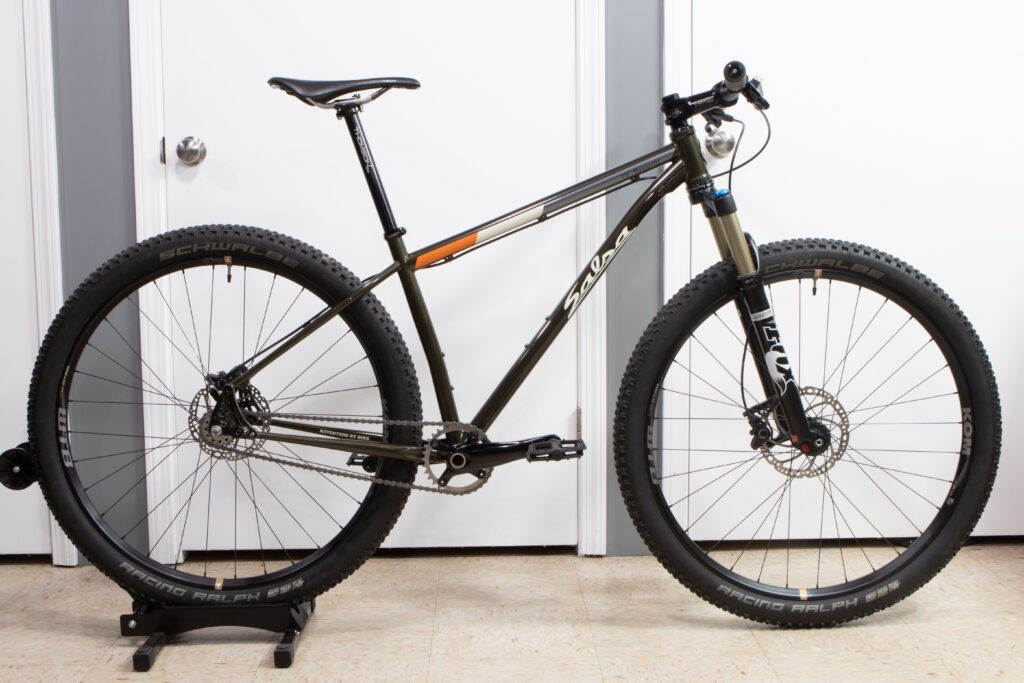
After a lot of thought I’ve decided to sell my beloved steel Salsa El Mariachi Single Speed. This is an amazing cross-country (XC) single speed, and I love riding it, but it’s time for it to go.
This is a custom build, based around the final year of the beloved Salsa El Mariachi Single Speed frame and rigid fork. While the frame, headset, crank, and bottom bracket are original, everything else has been upgraded to make one of the best single speed builds you’ll find. This is the updated El Mariachi geometry with kinked seat tube and shorter chainstays to improve handling on single track. And yes, it rides wonderfully.
Originally shipping with only a rigid fork, this bike has both the original fork and a Fox 32 (with GRIP damper). Crown races and brake adapters are fitted to both, so switching between forks can be done in a couple minutes with a multi-tool. The fork was rebuilt by Fox in early 2020 when the GRIP damper upgrade happened, so it’s in great shape and ready to ride.
Cosmetically the frame is in great shape. There’s a couple small rub marks from heels and kicked up sticks, and one small scratch on the top tube just behind the headset, but no dents or serious marks. The wheels are solid and true and the tubeless sealant was refreshed on November 30th. Tires are in good shape, with plenty of life left.
Appropriate for a single speed, the wheels are built around a Hope Pro 4 Trials/Single Speed rear hub, and matching front. With 88 points of engagement there’s never any slop when ratcheting over stuff or spinning at high RPMs. A single speed-specific rear hub means a more symmetric (and strong) wheel build. These wheels are built around WTB KOM i29 rims to keep the tires nice and wide, and Sapim D-Light spokes to keep things light but strong. Spoke tension is spot on and the wheels have never needed any truing, but spare spokes and nipples (from when the wheels were built) will be included.
The drivetrain is built around Surly stainless steel cog and chainring and the Surly spacer kit. Gearing is currently at 32:17 — perfect for everything from River Bends to Stony Creek to Pontiac Lake — but if you’re wanting something a little taller I’d be glad to swap to a 16t. With Salsa’s Alternator dropouts adjusting chain tension is simply a matter of loosening a couple bolts, turning a couple set screws, and snugging things back down. Included is a large bottle of Squirt chain lube, same as has been used on the chain to date (it works well for single speeds). Also included are the original colored chainring bolts, which I replaced for black when I removed the other orange bits from the bike.
Finishing it all off are a Thomson seatpost clamp, Thomson X4 stem, Salsa bar, and super-durable Cane Creek 40 headset. Grips are the super-comfortable ESI Extra Chunkies with BMX-sized aluminum bar plugs for appropriate fit with foam grips.
I’m ~5’10” with a 30″ inseam and the bike fits me perfect. For reference, I also can ride a Large in Salsa bikes with a short stem, a stock large in Specialized stuff, and either 54cm or 56cm ETT road bikes with appropriate length stems.
Price is US $1300 (Sold!), detailed high-res photos can be found here.
(MSRP on the original bike was $1499, and between the wheels, Thomson components, and everything else there’s over $1000 in upgrades in the bike.)
Specifics of the build are as follows. If you’re interested, please email steve@nuxx.net. I’m glad to ship the bike at the buyer’s expense, or I can meet up outdoors in the Shelby Township area.
Frame: Salsa El Mariachi SS (Medium, Gray Green, 2015) Suspension Fork: Fox 32, 100mm Travel, Tapered, 15mm TA, Upgraded to GRIP Damper in 2020 Rigid Fork: Salsa CroMoto Grande, Tapered, 15mm TA, With Maxle Headset: Cane Creek 44 (Black, ZS44/EC44) Crankset: Stock Single Speed Bottom Bracket: Stock (Great Condition) Chainring: Surly 32t (Stainless) Cog: Surly 17t (Stainless) SS Spacer Kit: Surly Chain: SRAM 8 Speed Brakes: Shimano Deore M615 Brake Rotors: TRP, 180mm front, 160mm Rear Stem: Thomson X4, 100mm x 0° Bar: Salsa Salt Flat (710mm) Seatpost: Thomson Elite, 410mm x 27.2mm Seatpost Clamp: Thomson Hubs: Hope Pro 4 Trials/Single Speed, Black Rims: WTB KOM i29 Spokes: Sapim D-Light Tires: Schwalbe Racing Ralph 2.35″ (Tubeless) Tubeless Valves: Stan’s Tubeless Sealant: Stan’s Saddle: Specialized Phenom (143mm) Grips: ESI Extra Chunky (Black) Bar Plugs: Black Aluminum Pedals: VP Components VP Grind (VPE-535 / Composite)
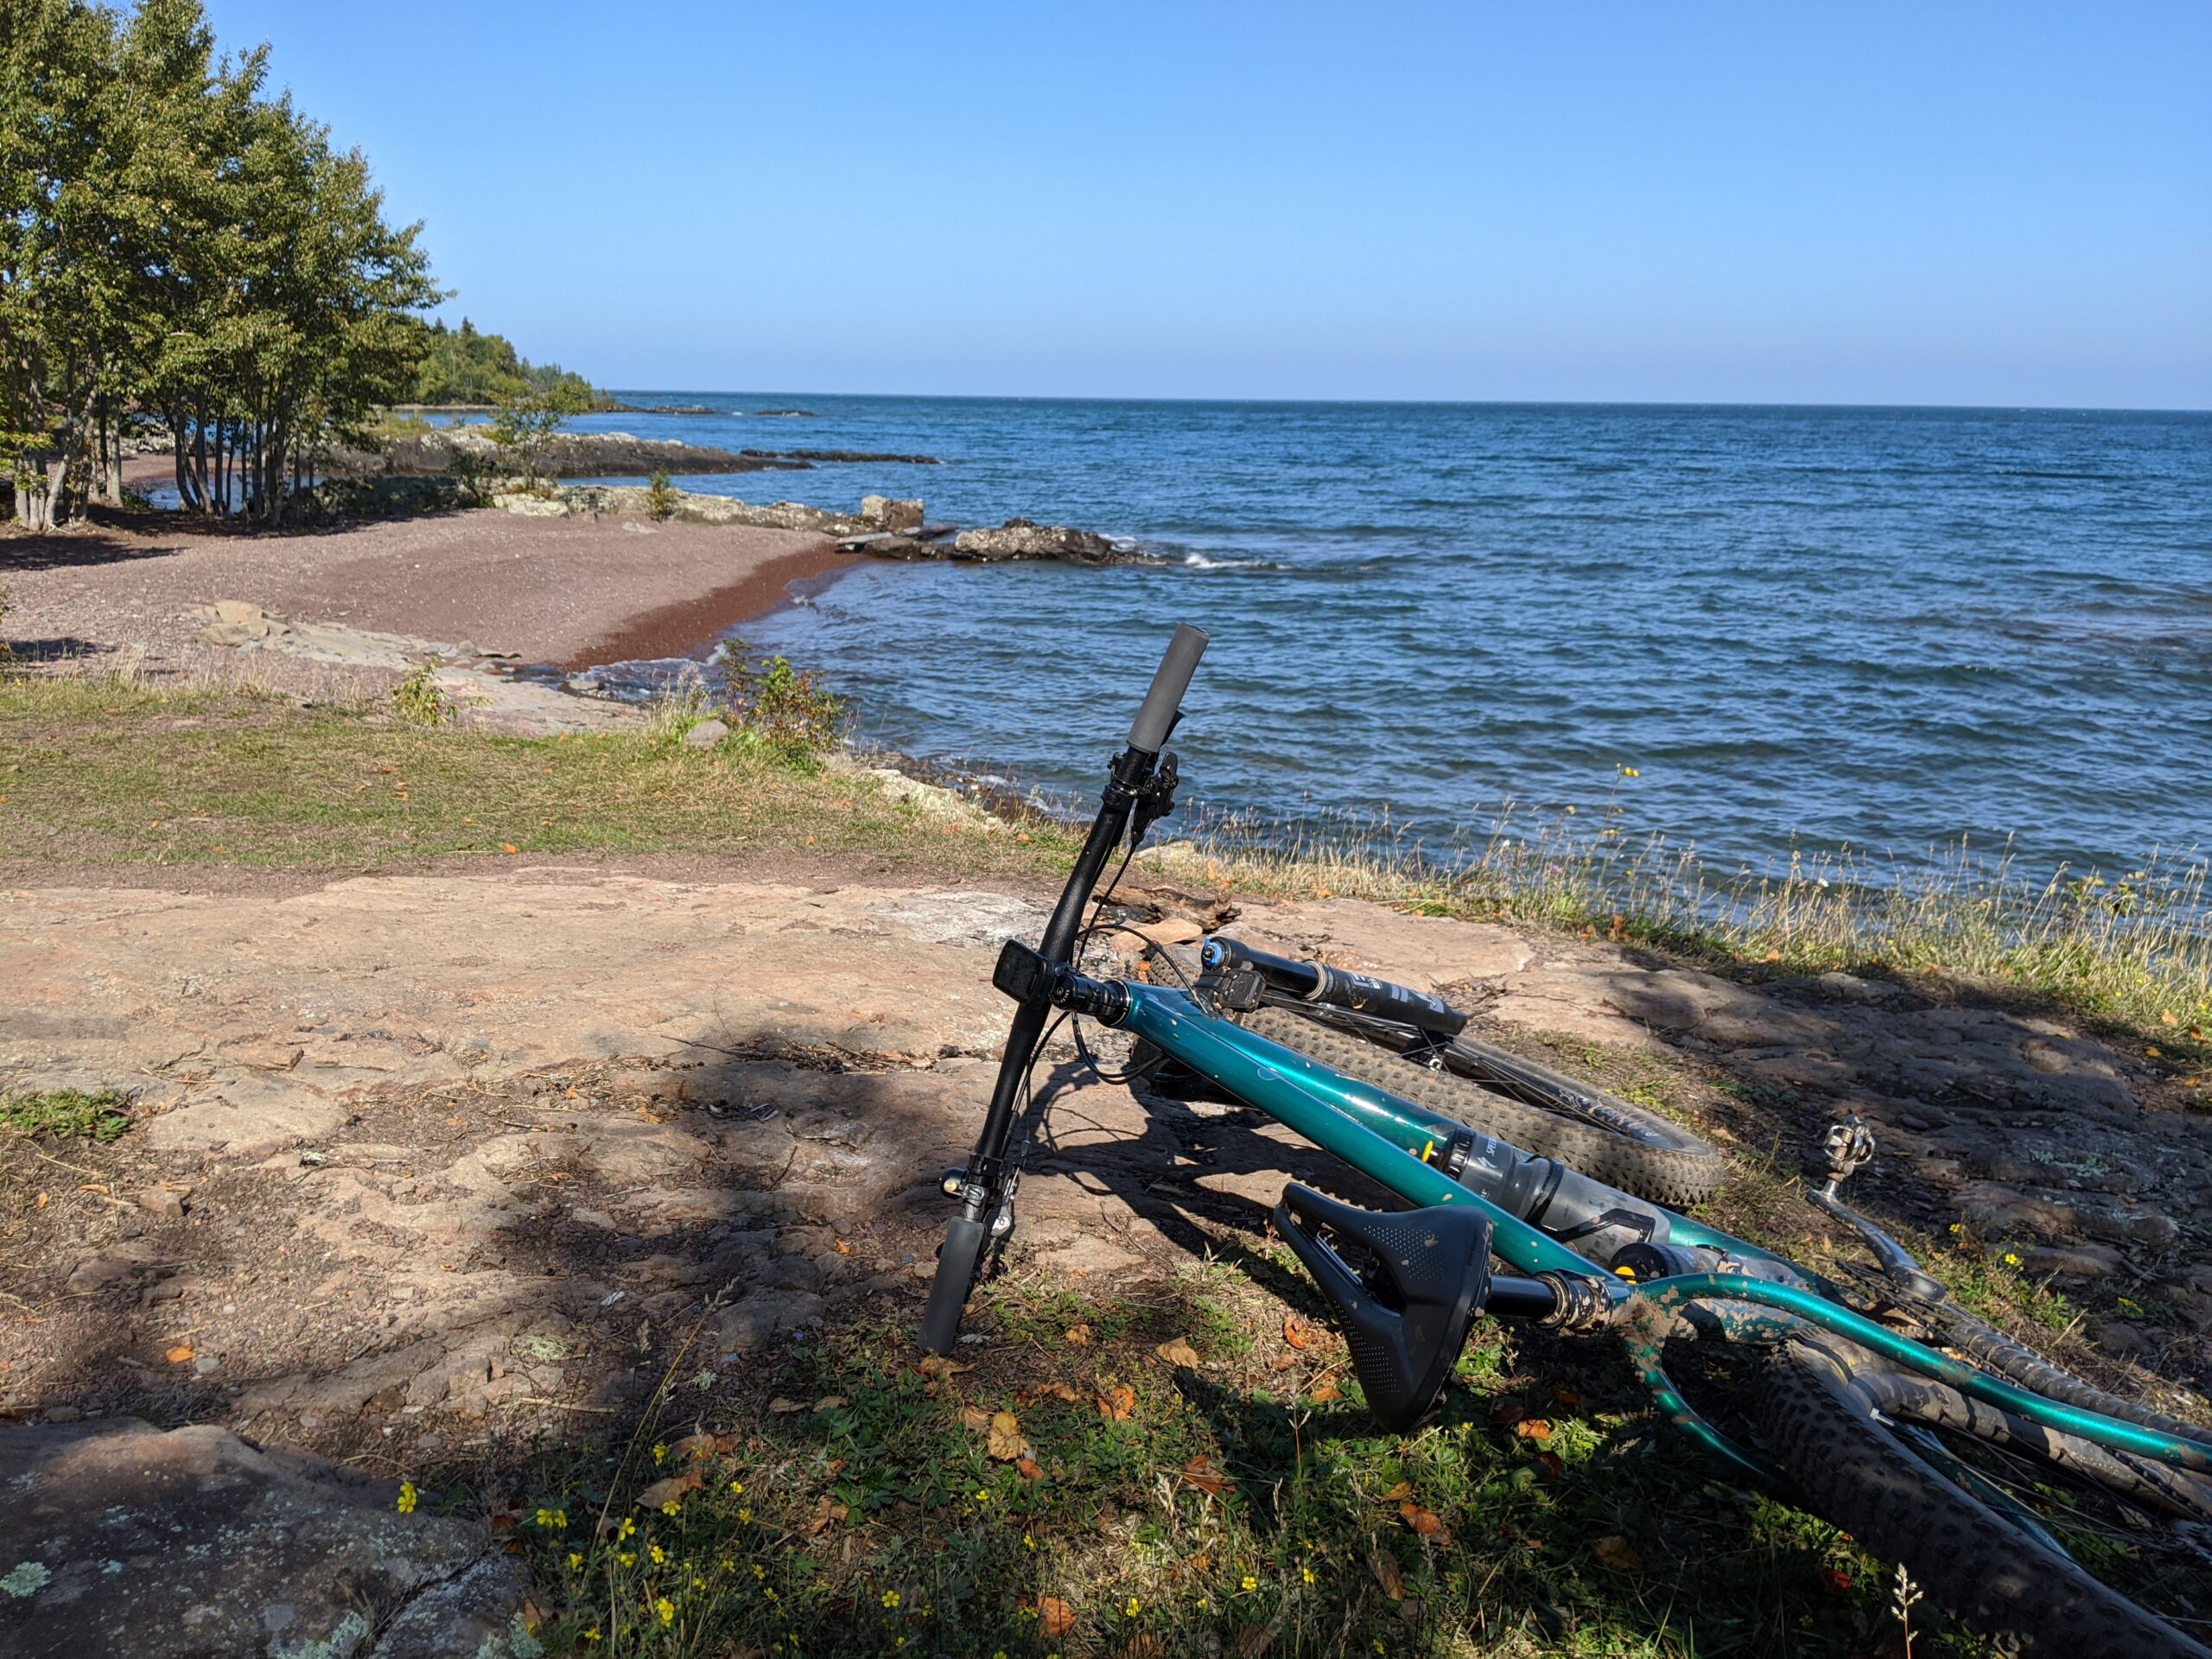
High Rock Bay, Keewenaw Peninsula, Michigan (East End of Point Trail Phase II)
How I Confused Myself
I’ve been riding mountain bikes for around 13 years, drop bar bikes for for seven on gravel and occasional road stuff, and spend a few hours a week on a trainer in winter. During all of this I’ve had a particular interest in ensuring my bikes fit well, so when I switch between bikes the contact points (pedals, saddle, grips, brakes, shifters, etc) are consistent and the bikes’ other characteristics (geometry, travel, tire size, etc) are the difference in how they ride. I like knowing that I can hop on any of my bikes and the fit won’t feel weird or limit what I can do or how long I can ride for.
In pursuing a good fit I’ve had a total of two full bike fits (Ryan Katulic at Apto Cycling and Jessica Bratus at fitmi!), two small/adjustment fits (Ernie Dell at Cycletherapy and Chris Goddard at Fraser Bicycle). I’ve read a ton of articles and papers on bike fit and spent countless hours measuring my bikes and building and using spreadsheets to compare and calculate geometry, tweaking everything from stem length and bar sweep to saddle height and setback.
Between these fits and my research everything coalesced into a spreadsheet of measurements (crank length, saddle setback from crank spindle, bar distance from saddle nose, bar drop from saddle, etc) that worked very well and I could copy to all my bikes. Switching between, say, my hard tail Salsa El Mariachi XC bike, my Salsa Mukluk fatbike, and my Specialized Camber trail bike all felt the same fit-wise; the bikes’ geometries and suspension made them ride differently. As the 2016 Camber is a “modern” geometry mountain bike, to make the fit match I had to place the saddle as far rearward as possible and use a relatively long (75mm) stem. At the time I figured this was just what needed to be done.
The saddle height and setback was the same across all my bikes — road and mountain — and in general it seemed to work well. My back might get a little sore when doing a lot of hard seated climbing, but isn’t that just what happens when leaned way over and pushing on the pedals?
As time moved on and my technical mountain biking abilities advanced I began looking at new bikes. I found that what’s called “modern” mountain bike geometry — steeper seat tubes, dropper posts, longer reach, shorter stems, and wider bars — was present on all new bikes. This was a step beyond the Camber, which had already pushed what I could do with my chosen bike fit. Seat tubes are getting steep enough that I’d need a setback post to match my current setup, but there’s very few setback droppers available and they are rarely seen. Wider bars and shorter stems, touted for handling and stability, seemed like they would compromise handling on twisty trails.
Clearly the bike manufacturers weren’t all screwing things up, so I figured something had to be off with my thinking about bike fit as it relates to modern mountain bike geometry, so I set out to understand the changes.
What I came to realize was that much of the traditional mountain bike geometry and fit was based around effectively do-all bikes; hard tail XC (cross-country) geometry frames that were great when pedaled hard on relatively smooth surfaces, handled well in tight and twisty trees, and were manageable over rough sections. They climbed fine, descended fine, cornered fine, but still had roots in staying seated, pedaling hard, standing to eek out short/steep pitches; going fast while putting out power and dealing with rough spots along the way. Sure, they could be ridden very capably on serious, rough mountain bike trails, but they are more at home on smooth trails with slow corners.
As mountain bikes evolved the “modern” geometry made leaps and bounds with off-road handling with minimal compromises from the classic do-all XC bikes. With these modern geometry bikes, attempts at copying a classic mountain bike’s fit using the classic saddle setback and saddle-to-bar distance will be frustrating and result in an awkward-steering bike. And it’ll throw away many of the modern geometry’s benefits.
What I realized is that my fit was for a classic mountain bike geometry, thus for a modern bike I needed to learn more about bike fit.
Steep Seat Tubes and Dropper Posts
I feel that a dropper post is practically essential equipment for a mountain bike. The ability to get the saddle down and out of the way opens up possibilities for handling that outweigh added mechanical complexity and weight. For everything from moving the saddle away to float through blown out gravely downhills and allowing the bike to move around under me on rough stuff, from moving the saddle for leaning, balancing, and railing berms and flat corners to jumping something along a trail, dropper posts have significantly enhanced my mountain bike riding. Like any bike control dropper posts have a learning curve, but once understood it make riding more fun.
Modern geometry frames tend to have fairly steep seat tubes, and copying my classic saddle position was going to require a setback seatpost. Nearly every dropper post out there (except for the Command Post IRcc) has no setback, which meant I couldn’t have a modern frame, a dropper, and the saddle setback I’d previously used; this seemed like a problem.
It’s often claimed that a steeper seat tube angle makes climbing easier, but…. how? At first this seemed silly, because wouldn’t you want efficient pedaling via an optimized saddle-crank position? Which, for me, required more setback than a modern frame and seatpost would allow?
Climbing is typically where one puts out maximum power on a mountain bike. Looking at how just a couple of degrees of seat tube angle can move the saddle too far behind the crank, it turns out that even a moderate climb effectively moves the saddle far enough back to be a problem. For example, with a 725mm saddle height on a 75° seat tube, a basic 5% climb changes the effective seat tube angle by ~3°, moving the saddle ~35mm rearward. (These are rough numbers that presume the bike rotates around the bottom bracket.)
Think of how uncomfortable and inefficient it would be to ride with your saddle an inch and a half behind where it should be… This is why steeper seat tubes are said to climb better: they tend to result in an optimised-for-power position when the bike is tilted up and climbing. Even better, being centered on the bike instead of hanging over the rear wheel enhances control when climbing; chunky roots and rocks are easier, with the front end less likely to lift and wander around.
When on flat ground or descents the saddle is a bit forward for optimal pedaling, but that’s okay. It feels fine, it’s still possible to put out plenty of power, and it’s a great trade-off for improved climbing.
Sometimes when riding hard and doing a lot of seated pedaling, particularly when climbing on a full suspension, my lower back would start to hurt. While strengthening my core helped, it turned out that modern geometry did the most to sort this out, because moving the seat forward meant that when climbing my hip angle is more open and thus pulling less on my lower back. Now when climbing hard on trails while seated my lower back feels better, the same as when I’m really hammering on the road.
While this steeper seat tube angle makes a slight compromise in that it’s not quite as efficient when pedaling on dirt road type stuff, it’s fine. I’ve done long rides linking up trails using dirt roads, and even long dirt road rides (eg: The Crusher 40-mile) and the different position when pedaling on flat ground isn’t noticeable… The improvements in off-road climbing more than than make up for it.
Long Frame Reach / Short Stem / Wide Bar
When I first tried out a wider bar (760mm, from my usual 710mm) with what I thought was a short 75mm stem on a nearly straight bar I felt the bike steered slowly. Pedaling seated and weaving through the tightest sections I knew of, it felt like I was constantly wrestling the bike and dumping it into corners to stay on the trail. It didn’t feel in control.
When I began looking at modern geometry mountain bikes, I was amazed at just how long the frame reach (the distance forward from the bottom bracket to the center of the top of the head tube) was. Going purely off of frame numbers it looked like unless I went to a short stem — which seemed awkward — I should be riding smaller size frames than in the past.
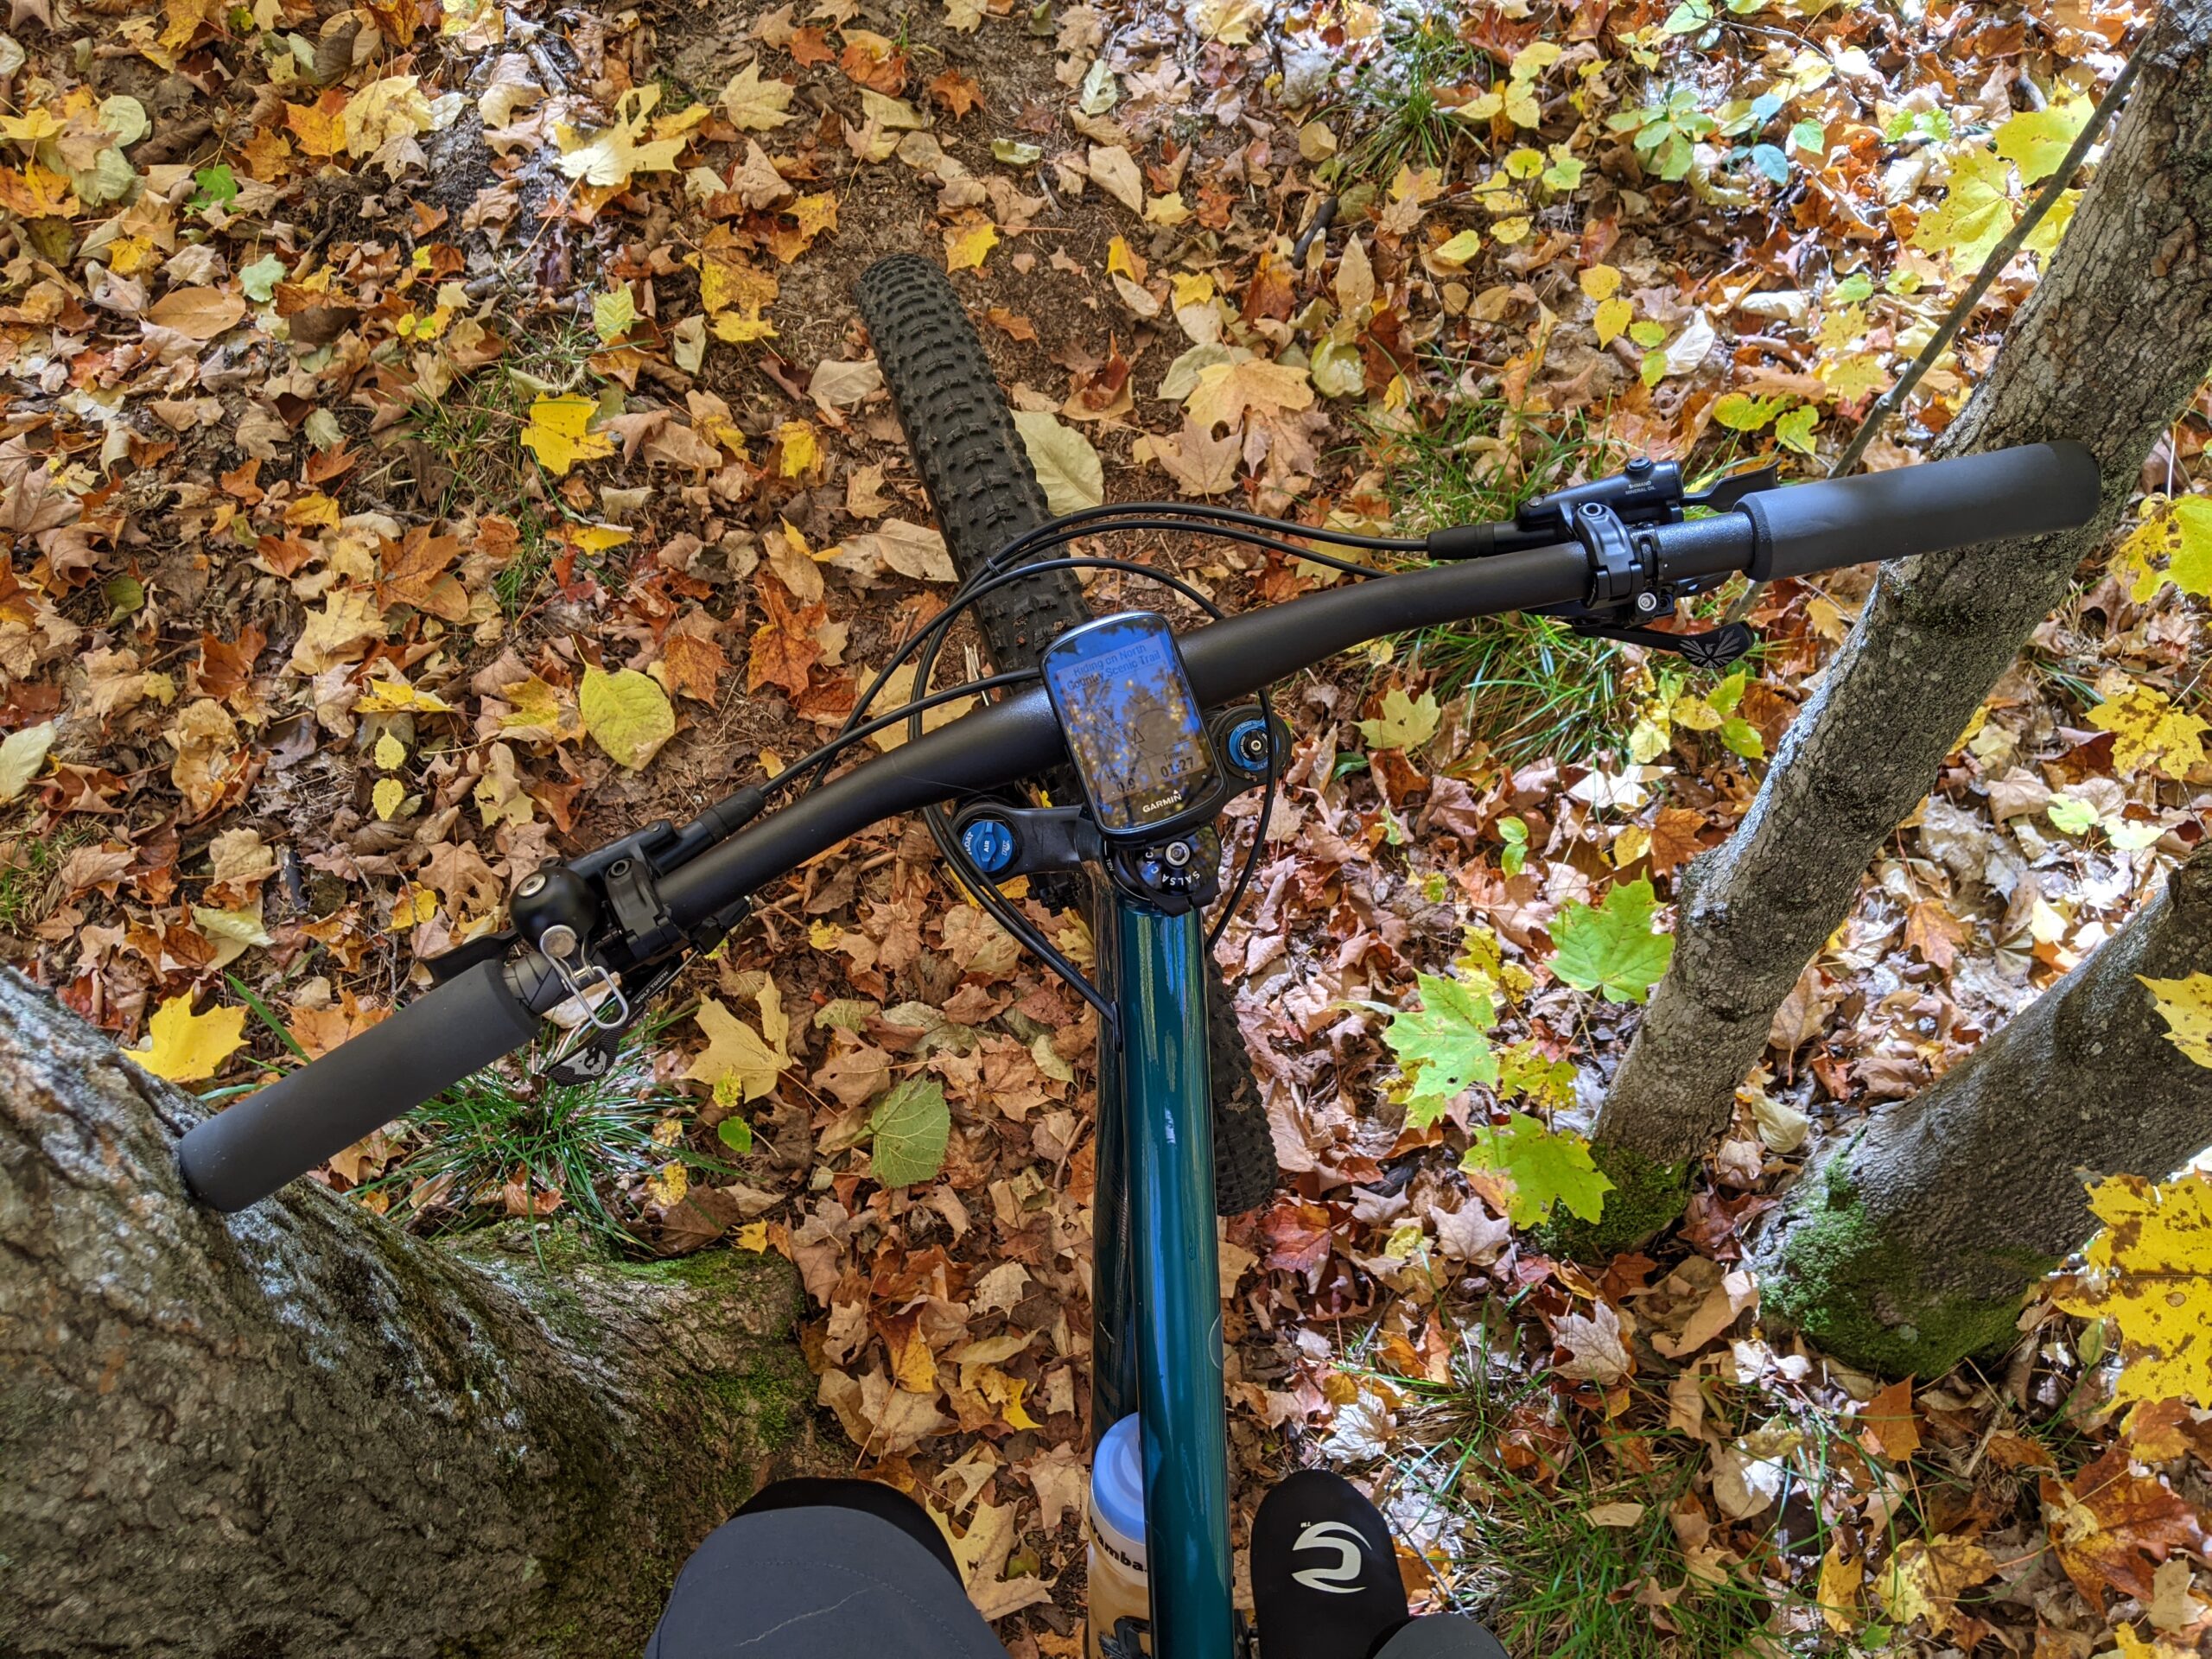
Narrow trees on the North Country Trail near Mile 682.
It turns out that what I thought was a shorter stem really wasn’t, and I needed an even shorter stem (60mm) for the bike to fit me properly. With the wide bar spreading my arms out more, and with the longer reach of the frame, the stem I had was too long. The awkward feeling came from riding what was effectively too large of a bike and needing to steer with my shoulders instead of my arms. By moving to an appropriate length stem the distance from my feet to my hands (more on this later) became appropriate and steering once again felt under control.
For a given size frame, modern mountain bike geometry will have a longer reach, so the overall distance forward from the bottom bracket to the grips ends up being the same when paired with a shorter stem. The shorter stem better positions the body over the center of the bike, making for a more stable ride.
Wider bars offer greater leverage, which makes everything from countersteering around fast corners to staying on a desired line in rough terrain easier. As wider bars spread out one’s arms, the stem needs to be even shorter to keep from being leaned over too far reaching for bars that are too far away. By having the bars an appropriate distance from the body steering is done with the arms, eliminating that whole-body wrestling feeling just to get around corners.
While a modern geometry bike does steer a bit slower at low speeds due to the shorter stem, wider bars, and slacker head tube angles, getting the right length stem keeps steering in the arms, mitigating most of this. For the sluggishness that remains, the benefits strongly outweigh the negatives; a well-fit bike has well balanced handling whether technical or not at low or high speeds.
Dialed Brought It All Together
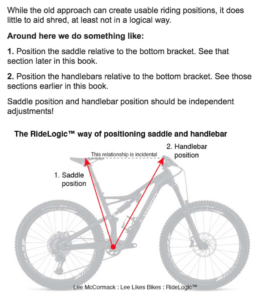
The RideLogic basics of fitting a bike.
In researching fit to modern geometry mountain bikes, I came across Lee McCormack’s book Dialed: The secret math of a perfect mountain bike setup about his RideLogic bike fit. While some parts are a bit prescriptive and didn’t give me the understanding I wanted, the ideas and results seemed interesting, so as an experiment I went about fitting all my bikes using this method.
For the basics of this method, check out Lee McCormack’s Guide to Bike Set-Up on Pinkbike. For specifics, buy a copy of Dialed here and read it. (Neither this post nor the Pinkbike article are a replacement for the book. I suggest getting the PDF as it’s cheaper than print, and having it in print doesn’t add much value.)
In Dialed and the RideLogic fit the focus is a measurement called RAD (Rider Area Distance); the distance from the bottom bracket spindle to where your hands sit on the bars along the centerline of the bike. This is how well your bike fits your body, and unless your frame is way too large or small, can mostly be handled by changing the length of your stem.
Dialed then focuses on RAAD (Rider Area Angle in Degrees), or the angle of that line between the bottom bracket/grip and the ground. The shallower the angle the more flat/XC-friendly the bike is, the steeper the more downhill/trail-ish it is. Recommendations for RAAD range from ~55° for XC race to ~57° for XC/trail all the way to ~62° for downhill.
Finally, SHO (Steering/Hands Offset), or the distance your hands are forward of the steerer tube axis. This should be set up for the type of bike and riding you do, which per Dialed close to 0mm is ideal for trail / DH riding, but XC racers will often find themselves with something much longer. Changing stem length is the easiest way to change SHO, but needs to be balanced with RAD being more important. For example, I currently have a ~27mm SHO on my trail bike, but can’t get this much shorter without decreasing the RAD too far.
(Dialed goes into far more, like how to measure your body to determine your RAD needs, how to choose a frame based on your measurements, bar width, crank length, and saddle positioning specifics, so read the book and watch the referenced videos.)
Once you know your RAD and the RAAD and SHO for your type of bike and riding, you can swap around stem length/rise, spacers, and handlebar rise and sweep to get it right for you. Position the saddle for appropriate leg extension and generally pretty centered on the seatpost, and for most people you’ll be fine. (Remember: All that matters is hand position relative to your feet and the bike’s steerer axis. Whether you use a riser bar or stem or add spacers, all that matters is where your hands end up.)
Thus, so long as your bike is in the right size range, doing a really good setup of a new bike is only a matter of measure, adjust, and ride.
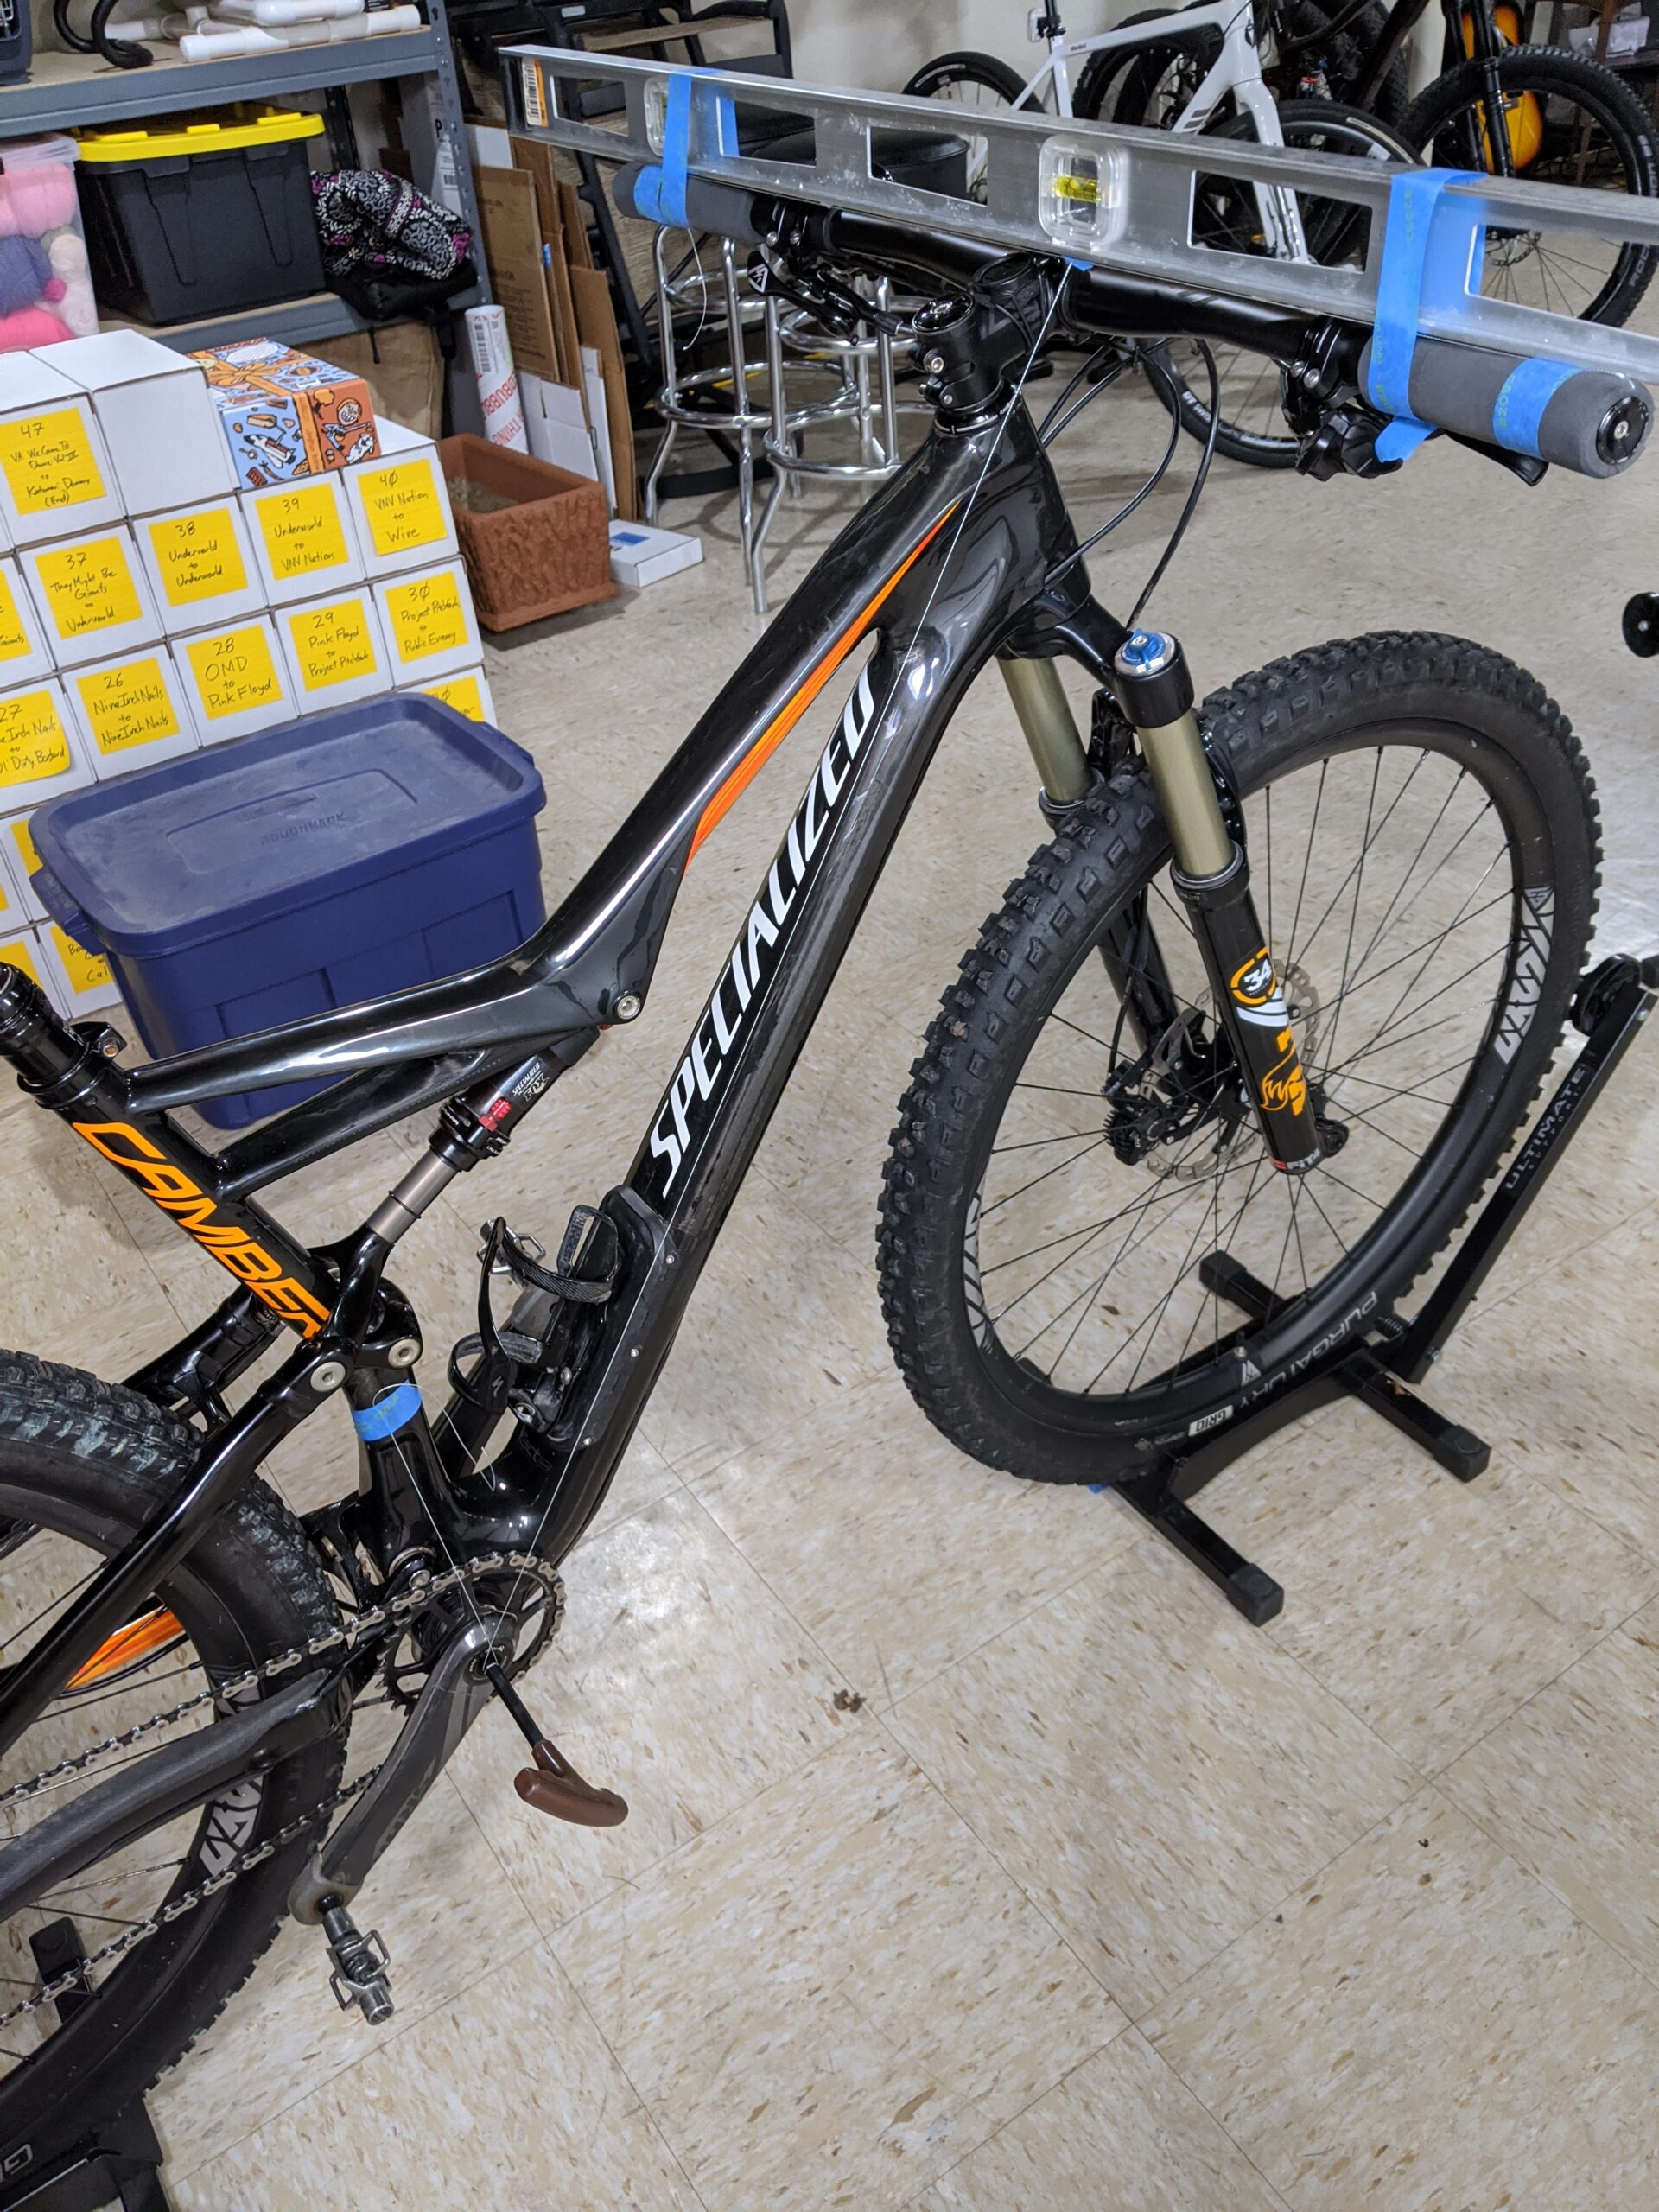
Standing over my bike, with pedals resting on two picnic tables, to check RAD.
Dialed suggests placing your bike in a gap, such as between two picnic tables, with pedals balanced on each side to see how your current bike’s RAD matches your body. In November 2019 I visited a local park, pushed some picnic tables together, and checked out my RAAD, just like Lee does in his demonstration videos. I found my Salsa El Mariachi SS and Mukluk were already perfect RAD, but the Camber’s was too long.
Fitting on a 15mm shorter stem on the Camber fixed the RAD problem and I moved the saddle forward from my road-like slammed-back previous position to something centered and average. I then rode the it all spring and summer on everything I could in Michigan, but from the first test ride it felt right. I’d been riding it for three full years thinking it felt fine, like a big trail bike that I sometimes had to throw around; I thought this was normal for that kind of bike. After going through the Dialed fit, mostly to adjust RAD (and consequently with a shorter SHO) and putting the saddle into a standard modern geometry position, it all came together. Whether flat/twisty trails, long climbs and descents, techy/steep rock, loose gravely sand — pretty much everything I could find in the Lower and Upper Peninsulas of Michigan — the bike felt great.
Specialized Camber set up for measuring RAD, RAAD, and SHO.
So why did it work? If the bar is too far away, and especially with a long stem, steering is mostly done by leaning the body and slightly turning the arms. This isn’t good for handling a mountain bike, as good bike-body separation (a cornerstone of handling a bike) requires steering without needing to move the torso too much. The shorter the stem, and the closer the bar is to the optimal distance from your body, the more you steer with just your arms.
When RAD is set up right, leaning and countersteering on fast stuff works well, turning the bars in slow stuff is comfortable without feeling like a wrestling match, and lifting the front end of the bike and navigating rough stuff is comfortable. And all of this good handling requires both a short SHO (to support steering with the arms) and having the appropriate RAAD (to keep properly balanced on the bike).
That’s when it all made sense: Modern mountain bike geometry, with a longer reach, shorter stem, and wider bars, allows for a shorter SHO with appropriate RAD and RAAD. This allows steering more with the arms resulting in better handling on all surfaces where mountain bikes get ridden. This is why modern mountain bikes have these (modern) geometries.
How I Fit Myself to a Modern Mountain Bike
After finally realizing how modern mountain bike geometry and the Dialed method of fitting a mountain bike work in tandem, I set out to use it when building up the All-City Electric Queen and the Salsa Timberjack which replaced it. Starting with my desired RAD (~835mm) and RAAD (~57°) I did the following:
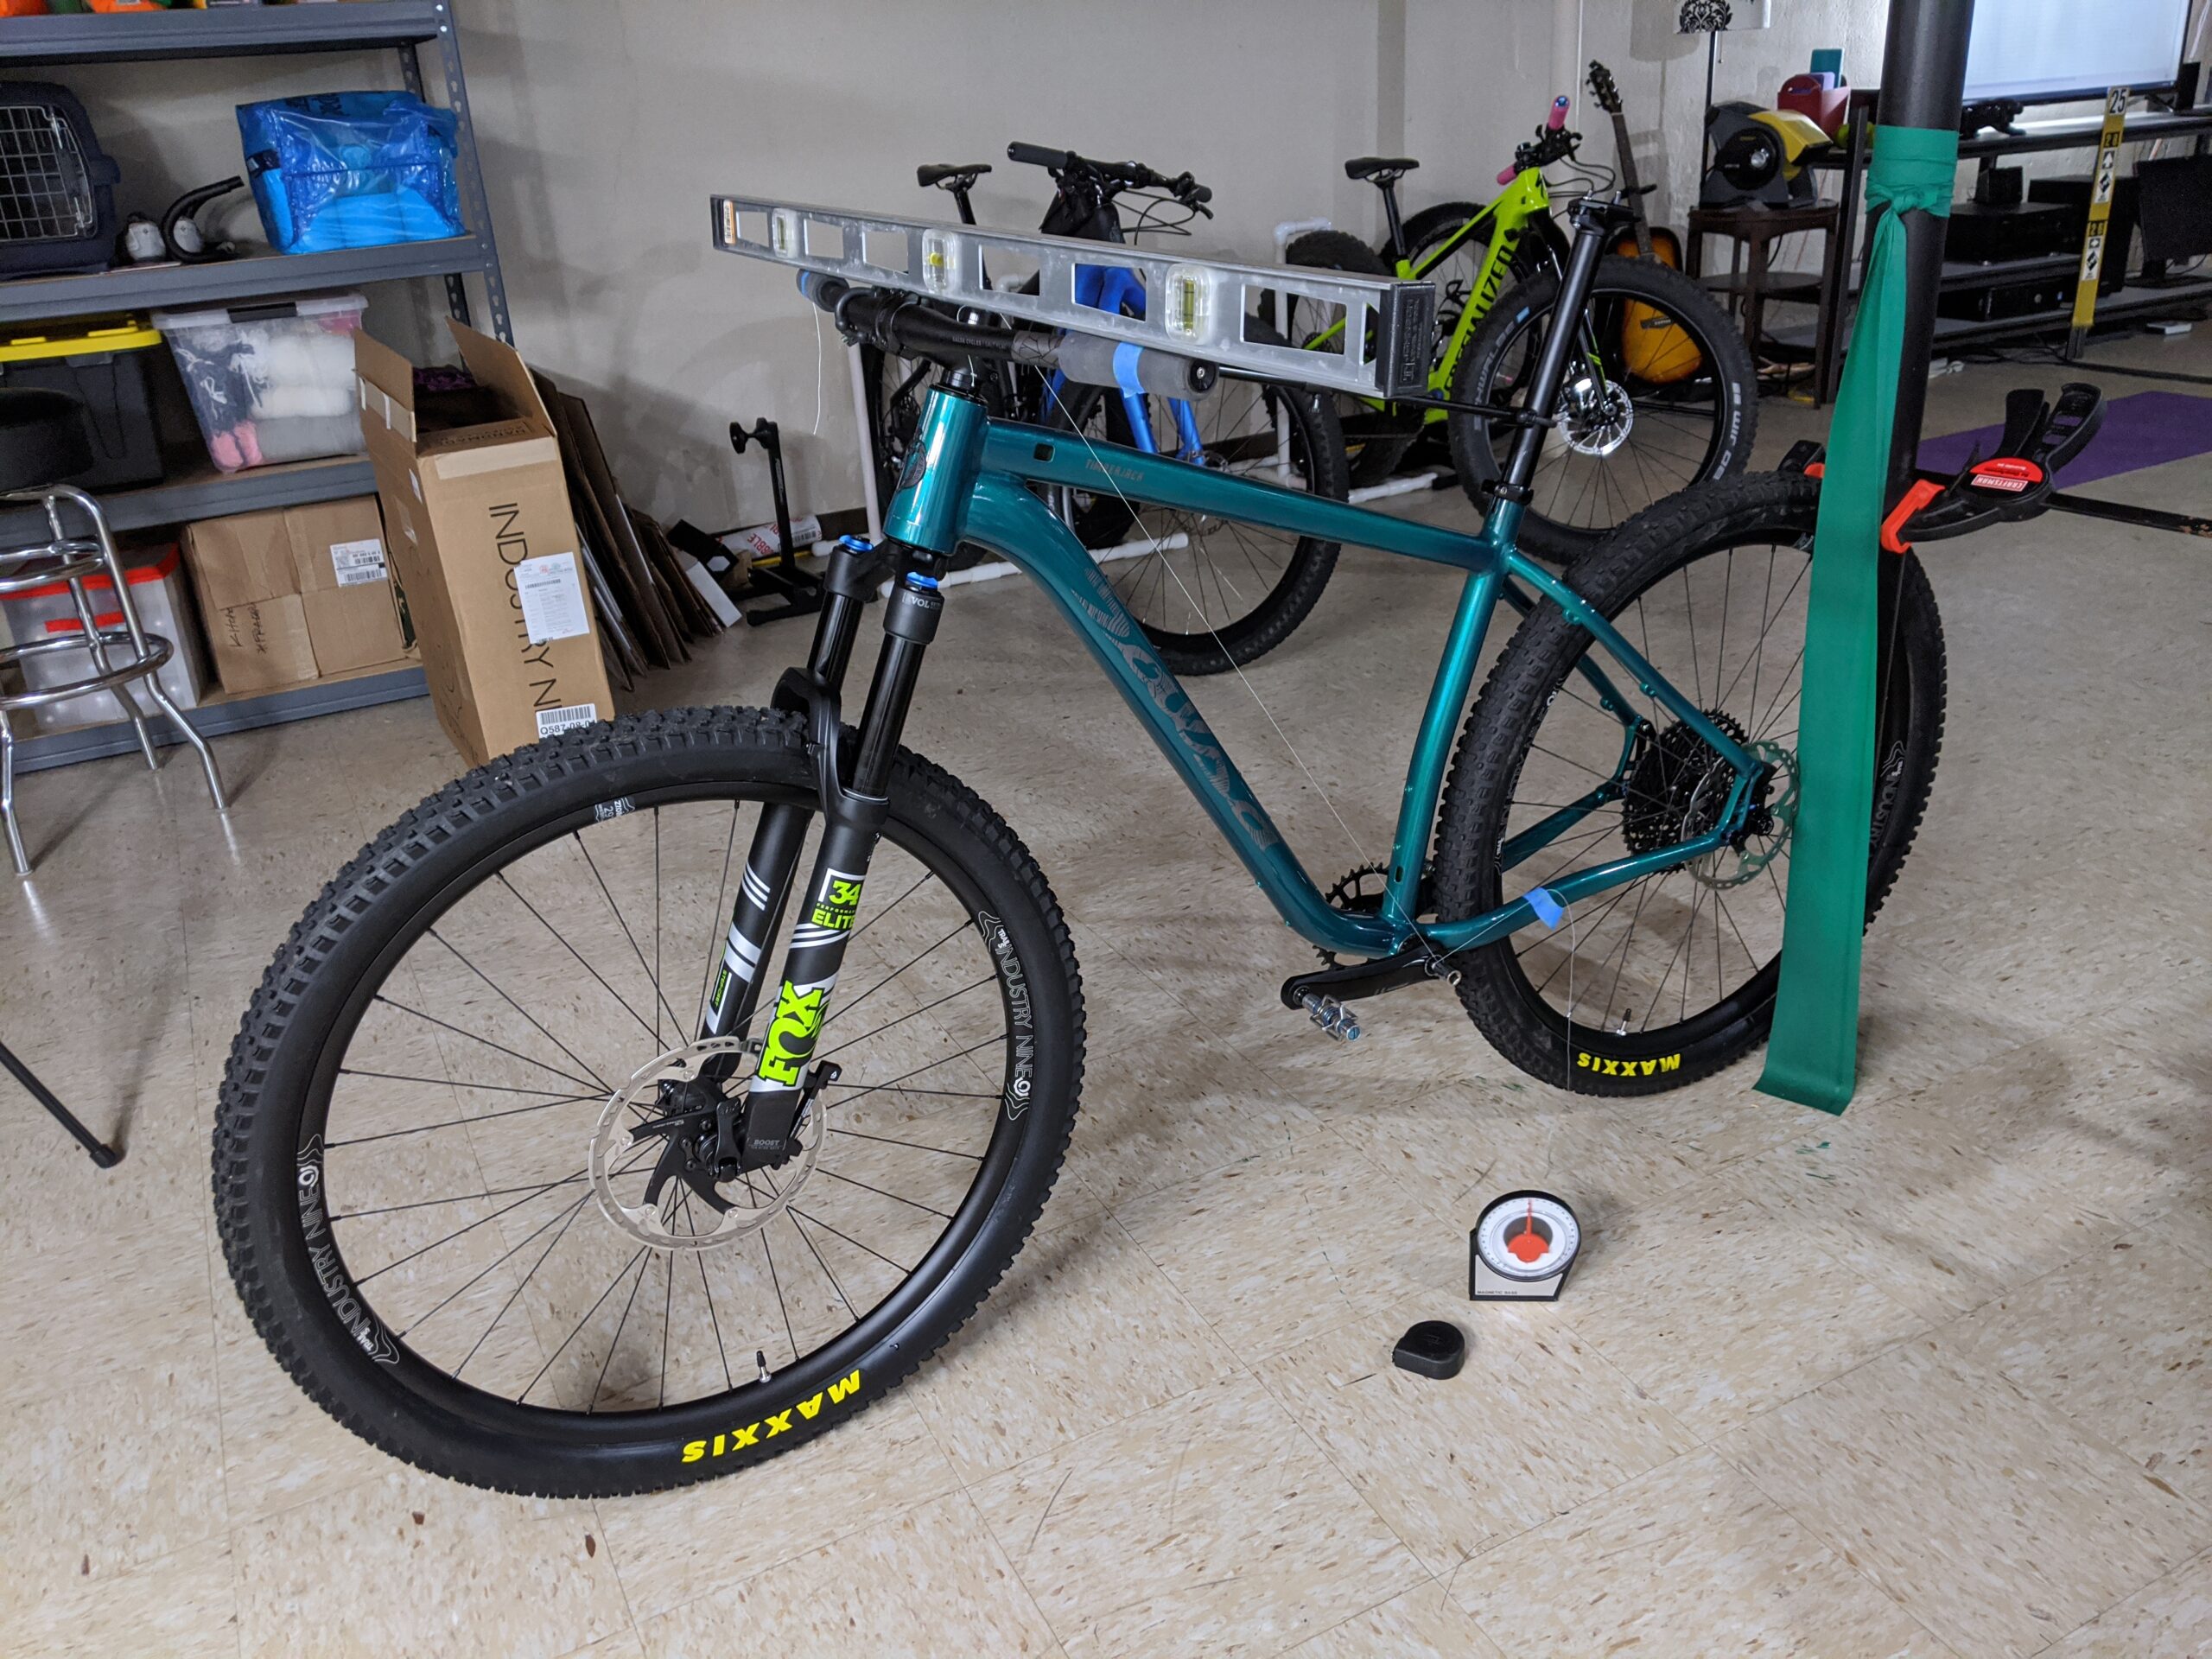
Measuring RAD and RAAD on the Timberjack.
Use the stack and reach of the frame, coupled with the headset and bar dimensions to estimate stem and spacer requirements to reach desired RAD and RAAD. I typically check a couple size frames and pick one that’ll work best. (yojimg.net’s Stem Comparison Tool is very helpful for this.)
Assemble the bike with a placeholder stem, then set it on level ground. (I clamp the rear wheel to a post in the basement, then use a Flop Stop Handlebar Holder to hold the front wheel straight.)
Tape a piece of string, taut, between the center of each hand position.
Place a long straightedge along the string, using masking tape to hold it in place.
Insert a hex tool in the bottom bracket bolt, wrap a string around the hex tool, and secure the other end to the straightedge.
With a tape measure, dial gauge angle finder, and a hex tool to fit in the top cap I can get all the necessary measurements:
RAD: Distance along the string from BB to hand position.
RAAD: Angle of string from BB to grip.
SHO: Distance from string between grips to steerer axis. (Inserting a hex tool into the top cap to extend the steerer axis makes this easier.)
Then, based on the measurements of the bike’s current RAD, RAAD, and SHO, the stem, spacers, and bar can be adjusted or swapped to get my desired setup.
On my Timberjack I was able to get a 835mm RAD, 58° RAAD, and 27mm SHO during assembly; from the first ride it handled perfectly. Setting the saddle to 735mm height (top/center of saddle to BB spindle) is spot-on for 175mm cranks, and just slightly behind centered in the rails has been great for everything from pedaling on flat ground to grinding up 20% slopes.
With all of this together I now have a bike that fits me well, is comfortable when pedaling hard either on flat ground or when climbing very steep stuff, is easy to handle at low or high speeds, and handles great on technical trails. And thanks to this process I have a set of numbers, which I understand the reasoning behind, that can be used to set up a new bike to fit me properly and thus ride well.
The Obligatory Summary
A modern geometry mountain bike, properly set up with modern fit, comes together into a great package that is incredibly capable and fun to ride. Trying to force a classic fit and stem length on a modern frame doesn’t work well, and will result in a weird-handling less-capable bike.
By adopting modern geometry and using the methodology spelled out in Dialed it’s straightforward to get a good fitting mountain bike that makes riding easier and more enjoyable. Even if you think your fit is fine, it’s worth checking RAD, RAAD, and SHO and experimenting with suggested changes. You may be as surprised as I was with how a few small changes that make riding even better.
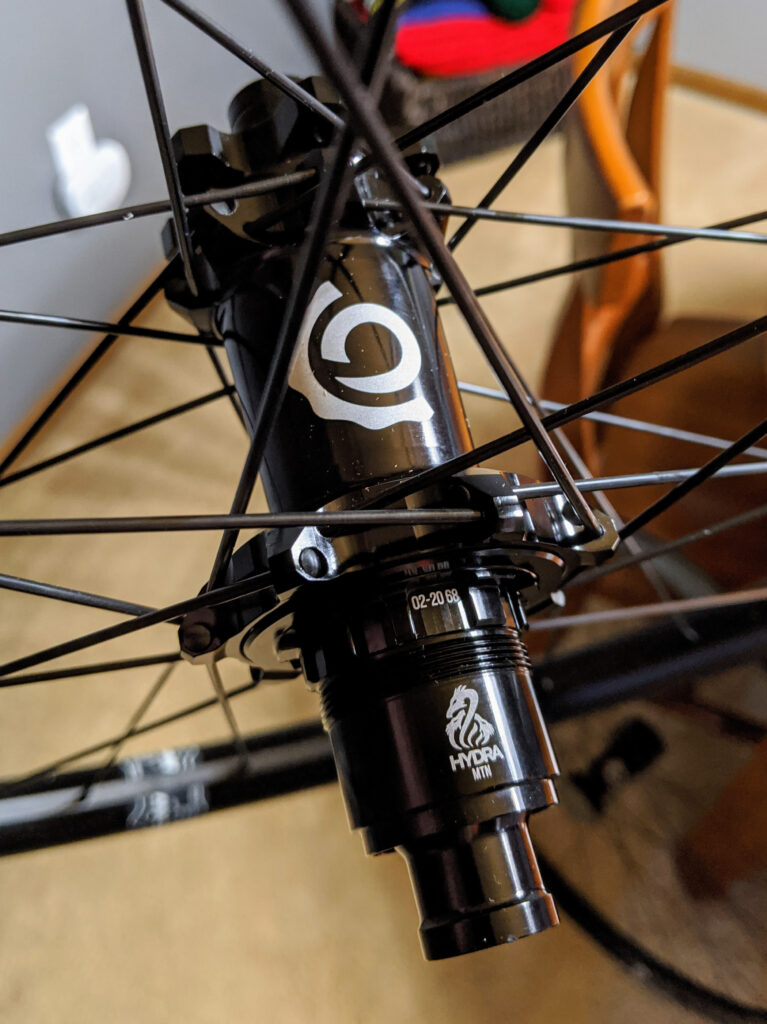
On my Salsa Timberjack I have a set of Industry Nine (I9) Trail S Hydra 28h wheels. These have been a great high-end yet thrifty wheelset, combining a relatively low cost and high quality 27mm internal width aluminum rim and straight-pull steel spokes with high-end Hydra hubs.
This wheelset uses a straight-pull hub that is not sold separately or listed on the website, which makes finding specifications a little difficult if one wants to rebuild the wheels with different rims, replace spokes, etc. I’m considering replacing the aluminum rims with some carbon fiber rims over the winter, so I set about gathering all the specs so I could look into options.
Thankfully I9’s customer service is top notch, and the folks there told me everything I wanted to know about the wheelset. Since this info is otherwise difficult to find, and to maybe save the support folks some hassle, I figured I’d share them here: