ATI Radeon 4870 Flashed For Mac Pro (MacPro1,1)

I’d occasionally been considering picking up a new video card for my Mac Pro (MacPro1,1) to replace my NVIDIA GeForce 7300 GT, but the new ones are very expensive. Typically there are ways to flash PC video cards with Mac-compatible (OF or EFI) firmware, but reliable methods and card versions aren’t always the easiest to find. However, last week I was looking into it and all the pieces came into place, with good flashing instructions and firmware available and a relatively cheap, compatible card appearing on eBay.
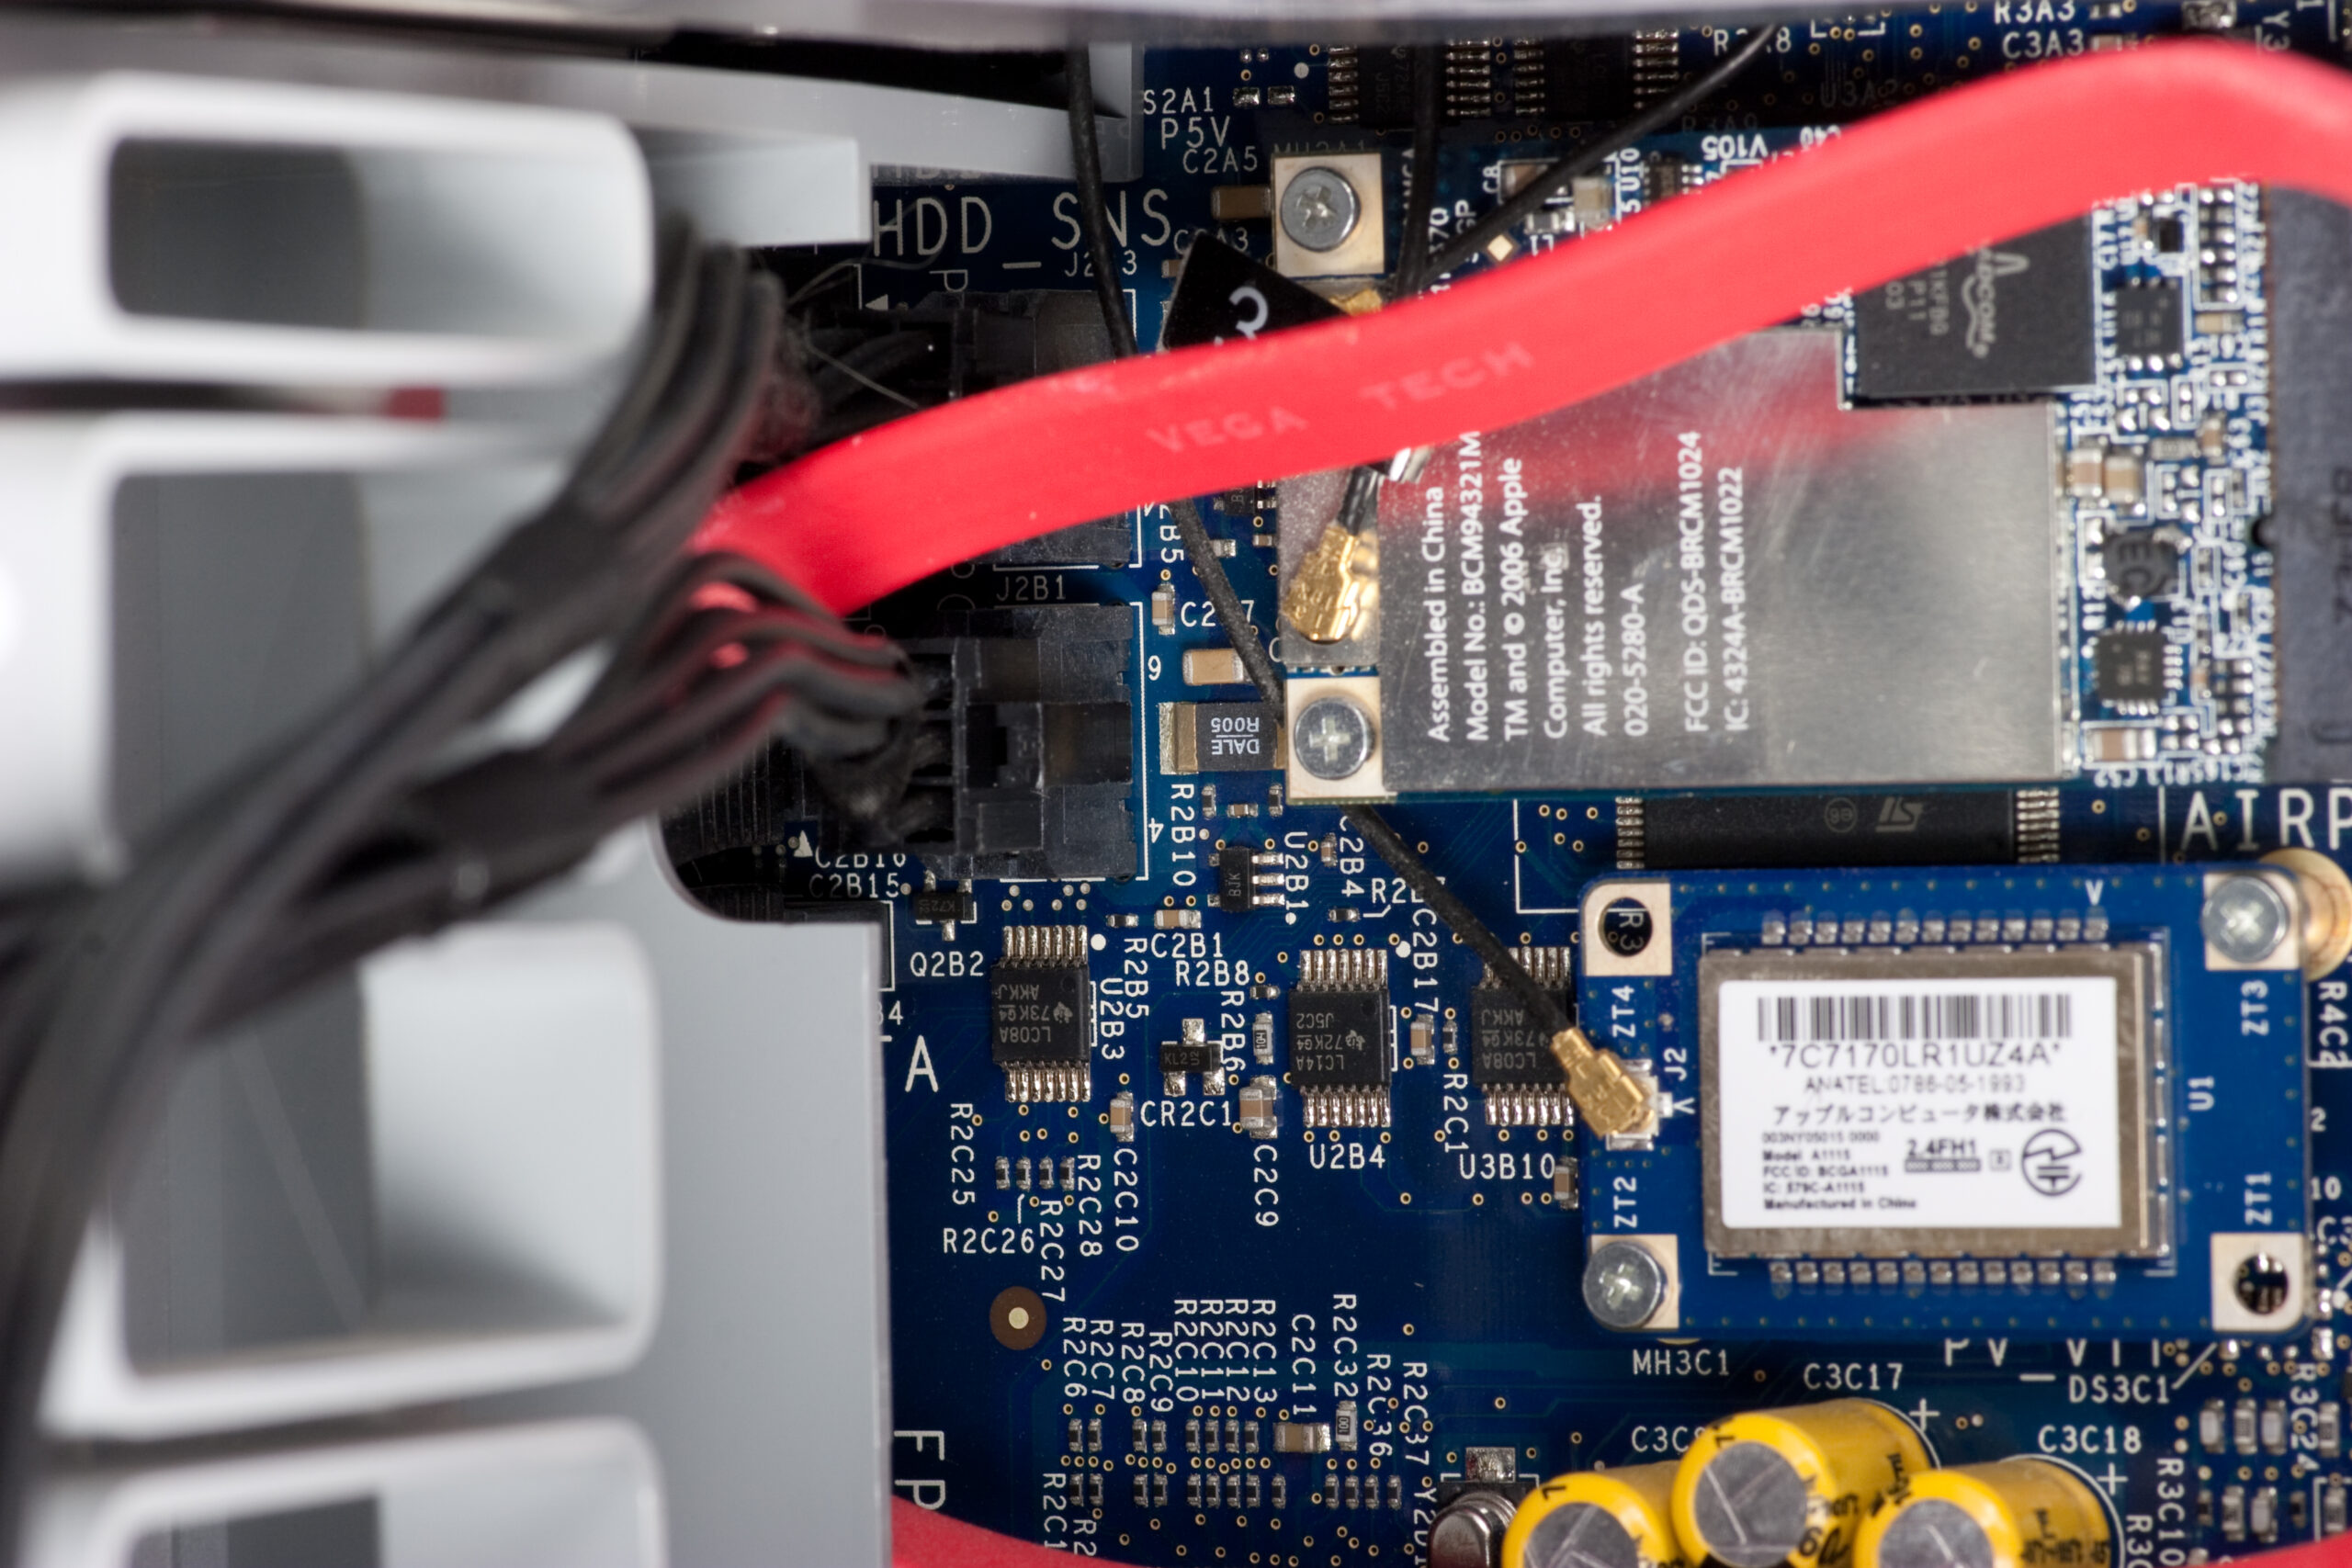
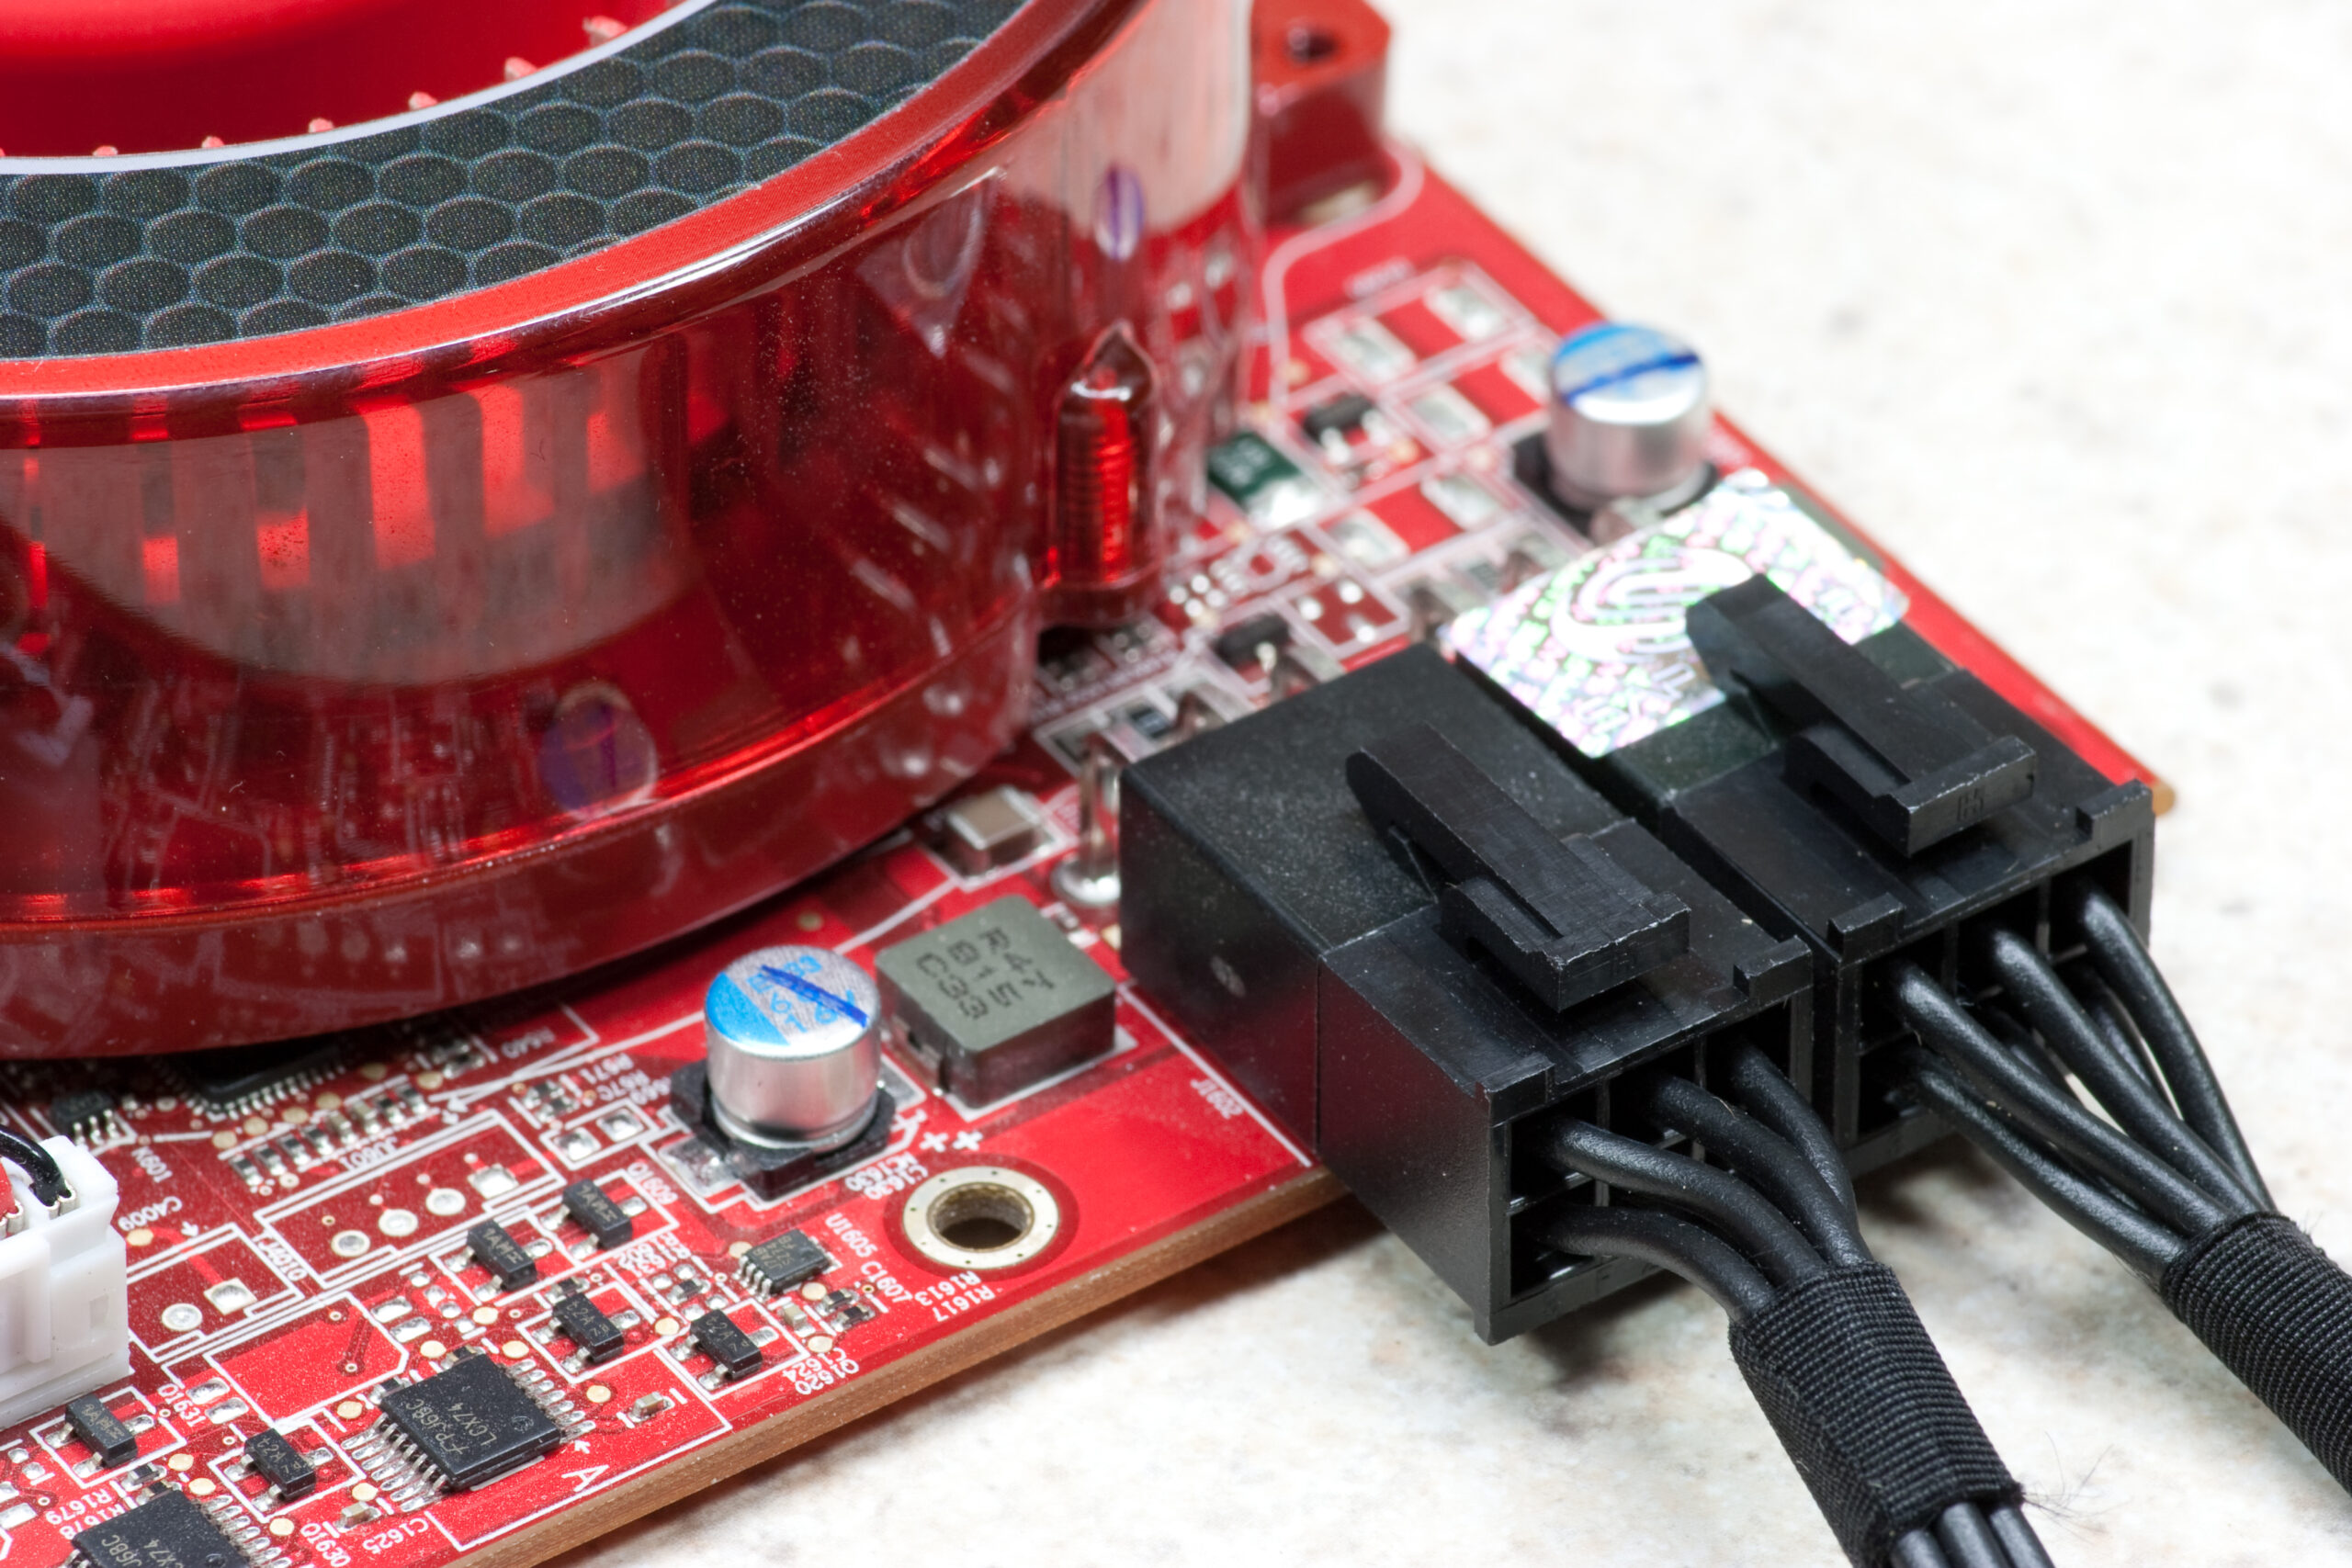
First, I ordered two power cables from ATI, Power Cable for Radeon® X1900 MAC G5 Edition. These cables allow one to get PCIe 6-pin power connectors from the Mac Pro mainboard. Most modern video cards require more power than the slot can provide, so these connectors are generally connected directly to a PC’s power supply to provide the extra needs. As Macs tend not to have extra connectors just hanging around in the case, Apple provided the power connectors right on the main board. These cables thus plug right into the main board (Picture) up near the SATA connectors, then connect right to the back of the video card (Picture).
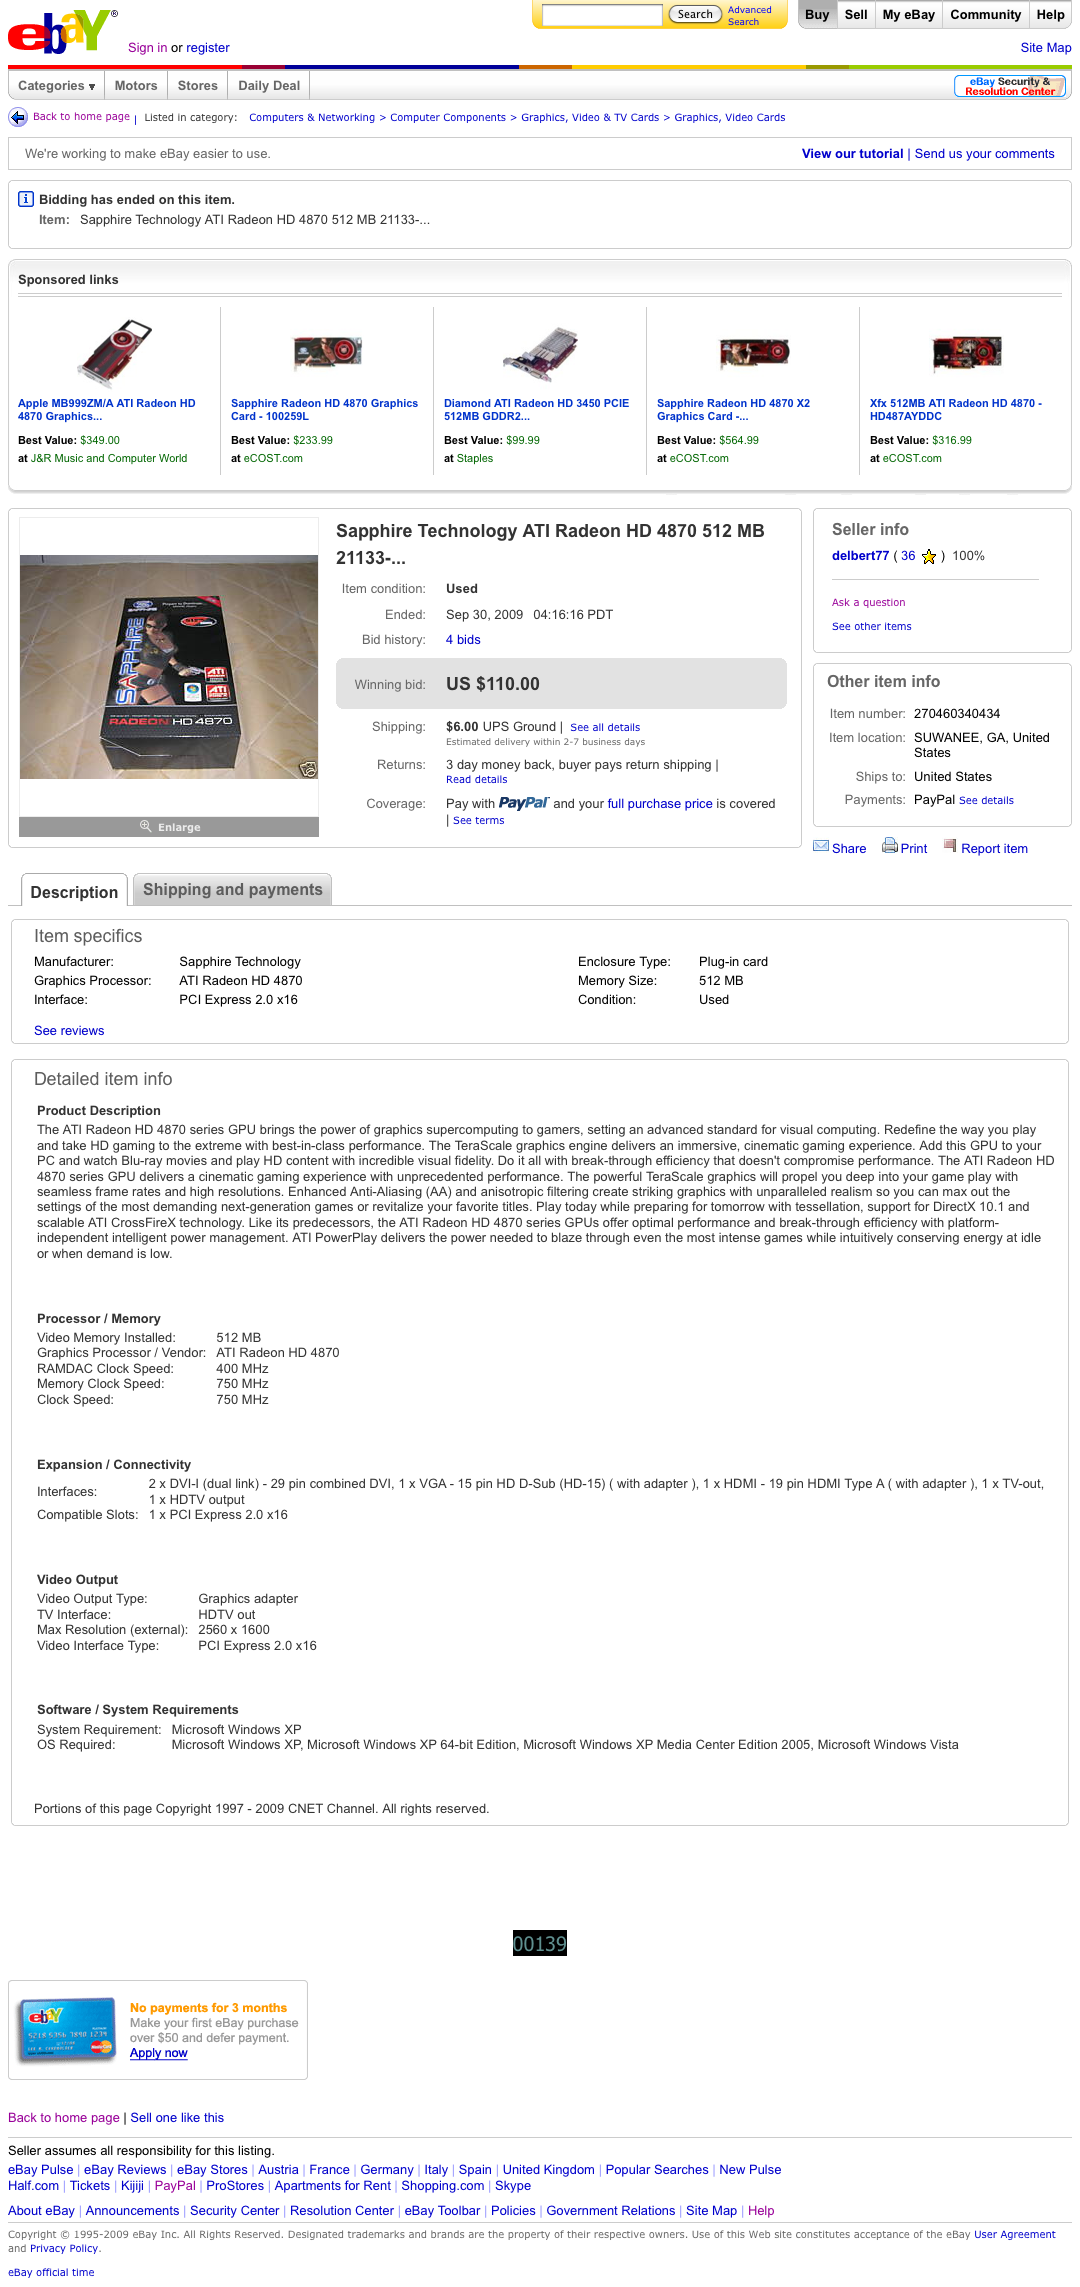
Next I purchased a Sapphire 512MB ATI Radeon HD 4870 from eBay with a winning bid of $110 (Auction Mirror). This shipped quite quickly, and arrived in great shape with all the original retail box items, which was a pleasant surprise.
After getting the card and the cables, it was time to install it and flash it. To do this I followed Alexandre Boeglin’s article entitled How to flash a PC 4870 for a Mac Pro, using only Mac OS X. I’ll recap the steps that I performed here:
· Acquire the iMac Graphics FW Update 1.0.2 and use Pacifist to extract ATIFacelessFlash.app and ATIROMFlasher.kext from it. This will be used as an OS X native ATI video card flasher for doing the firmware update.
· Acquire the appropriate firmware. I used sapp-512-4870.rom from this MacRumors: Forums post. If you don’t have a 512MB Sapphire ATI Radeon HD 4870 you will likely need to find another or make your own firmware image.
· Remove all the .ROM files in .../ATIFacelessFlash.app/Contents/Resources and put your .ROM file in there.
· Ensure that ATIROMFlasher.kext will load. The command sudo kextutil -nt ATIROMFlasher.kext is useful for this, and you’ll likely have to do sudo chown -R root:wheel ATIROMFlasher.kext and sudo chmod -R 644 ATIROMFlasher.kext to get it loading.
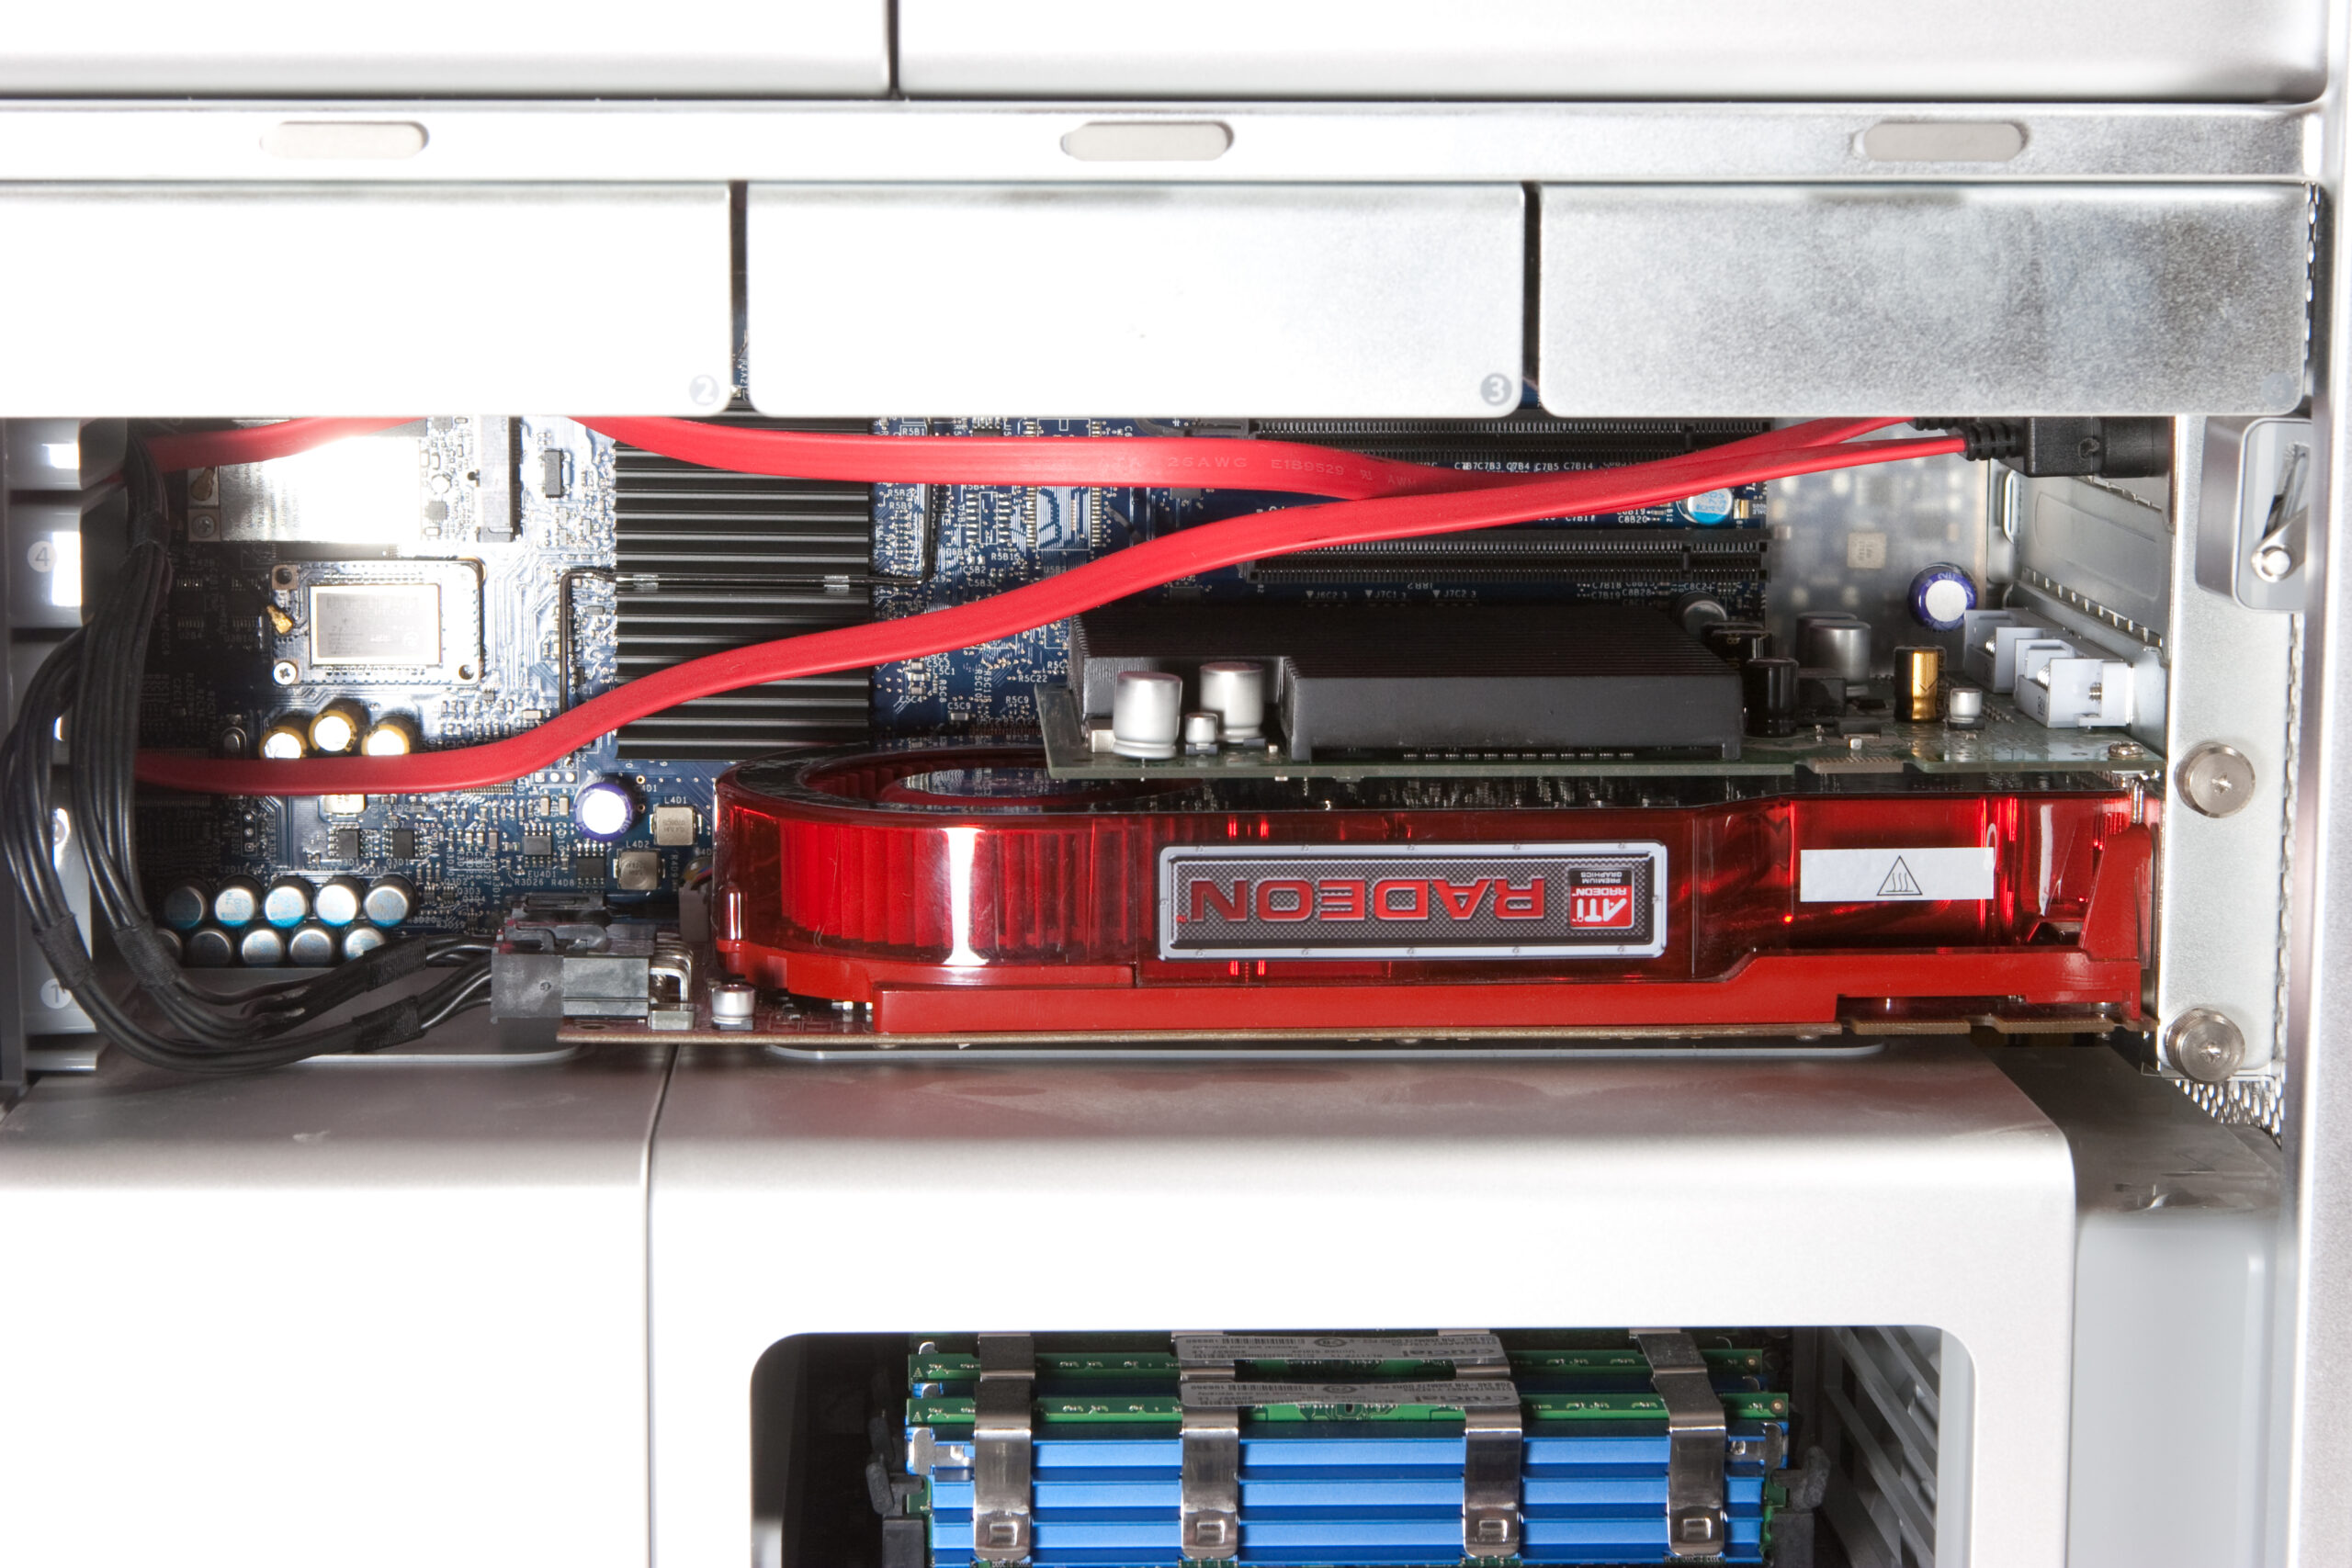
· Once the .kext is loading and ATIFacelessFlash.app is prepped, shut off the computer, move your old video card up one slot, and install the new one in Slot 1 as shown in this picture.
· Boot the computer with the monitor connected to your old video card. Load the kernel extension for the flashing (sudo kextload ATIROMFlasher.kext), then run the flash utility: sudo open ATIFacelessFlash.app.
· Shut down your computer, pull the old card, and boot up with the monitor connected to the new one. Everything should work great, and you should now have an ATI Radeon HD 4870 for Mac.
After the flashing is done, System Info showed the following under Graphics/Displays:
ATI Radeon HD 4870:
Chipset Model: ATI Radeon HD 4870
Type: GPU
Bus: PCIe
Slot: Slot-1
PCIe Lane Width: x16
VRAM (Total): 512 MB
Vendor: ATI (0x1002)
Device ID: 0x9440
Revision ID: 0x0000
ROM Revision: 113-B7710C-176
EFI Driver Version: 01.00.318
Now that the upgrade is done I can run Google Earth with all the quality settings turned up. I also did a quick compare with two graphics benchmarks, CINEBENCH and OpenMark. With the old card on CINEBENCH I got a score of 3380, and with the new one 5427. Under OpenMark, which seems to test OpenGL, I went from a score of 8520 to 22579.
Having a fan the new card is slightly louder than I’d like, but I was a bit spoiled before with the old fanless card. I’ll try and investigate a way to quiet this one down, but all things said it is still quite quiet. If it ends up being a bit much I can always sell the card with its Mac firmware upgrade for at least as much as I paid.
If you’d like to see a few more pictures, they are all available in this album entitied ATI Radeon HD 4870 in Mac Pro (photo gallery retired).
That is a great set of instructions. I wish I had seen it earlier. My graphics card had to be replaced, as it was doing death throes. We did it the hard way, installing Windows to do the flashing, and hunting for everything ourselves. It doesn’t really work yet. System info is as it should be, but on startup a dialog says that one of the cables to the graphics card isn’t connected, whereas they both are. We have taken them out, cleaned the connections, swapped them, all to no effect. Quartz Extreme doesn’t work, and performance on benchmarking is so poor it is laughable. 3D is essentially nonexistent. However, the computer is stable using 2D graphics. One cable came with the original card, and the other is a recently purchase. My card has 1Gb memory (an XFX ATI Radeon HD4870).
We plan to borrow a multi-meter and test the cables and the places they connect to.
Do you have any other suggestions?
I was wondering if this setup is stable under bootcamp (vista). Does it need special driver for the Windows?
Thanks,
MK
Mike: Sorry, I’m really not sure. When I still had the card I didn’t try it under Boot Camp. I’ve actually since sold it and moved my home computing stuff from a Mac Pro to an iMac.
Pam: I’d try going back to the original firmware then following these directions. I’d guess that the BIOS you installed on it isn’t quite right for it.
I am thinking about installing ATI Radeon 4970 on my mac pro 1,1. Could I do it the same way as you do it with 4870?
Sam: Yep, I believe it’s a very similar process; you will just need to obtain the appropriate BIOS for the card. If you dig around online forums I wouldn’t be surprised if you can find a copy of the BIOS ready for you.
I tried your instructions on my sapphire HD4870 1024mb–however I cant get past the grey screen. The dial under the apple spins for a bit then stops.
I’ve tried it several times to no avail. I’ve researched online but can find nothing. Any help would be awesome.
I have never used terminal before, so I’m a complete novice on syntax using a command line.
I think that I need a little more info on where to add a directory path to the ATIROMFlasher.kext
I opened terminal and typed in ( sudo kextutil -nt ATIROMFlasher.kext ) and I get, “sudo: kextutil: command not found”
I must be missing how to enter a directory path in the above syntax. The ATIROMFlasher.kext file is sitting on my desktop currently. What would be the complete syntax that I should enter in terminal to access it.