Press "Enter" to skip to content

Category: making things

First Complete SDrive NUXX

Front of the first completely assembled SDrive NUXX, with MetalPhoto end panels.

There it is, the first completely assembled SDrive NUXX. Here’s the back, showing the SIO connector, reset button, and DIP switches.

I’m really, really happy with the MetalPhoto material used for the end panels. The manufacturer also did an outstanding job with the panels themselves. They snap nicely into the bezels, fit perfectly with the PCB, and just work.

After I finish eating this giant leftover portion of biyrani I think I’ll get to work assembling the rest of them.

Leave a Comment

Wheelpro Truing Stand

Wheel truing stand based off the design in the Wheelpro Wheelbuilding Book.

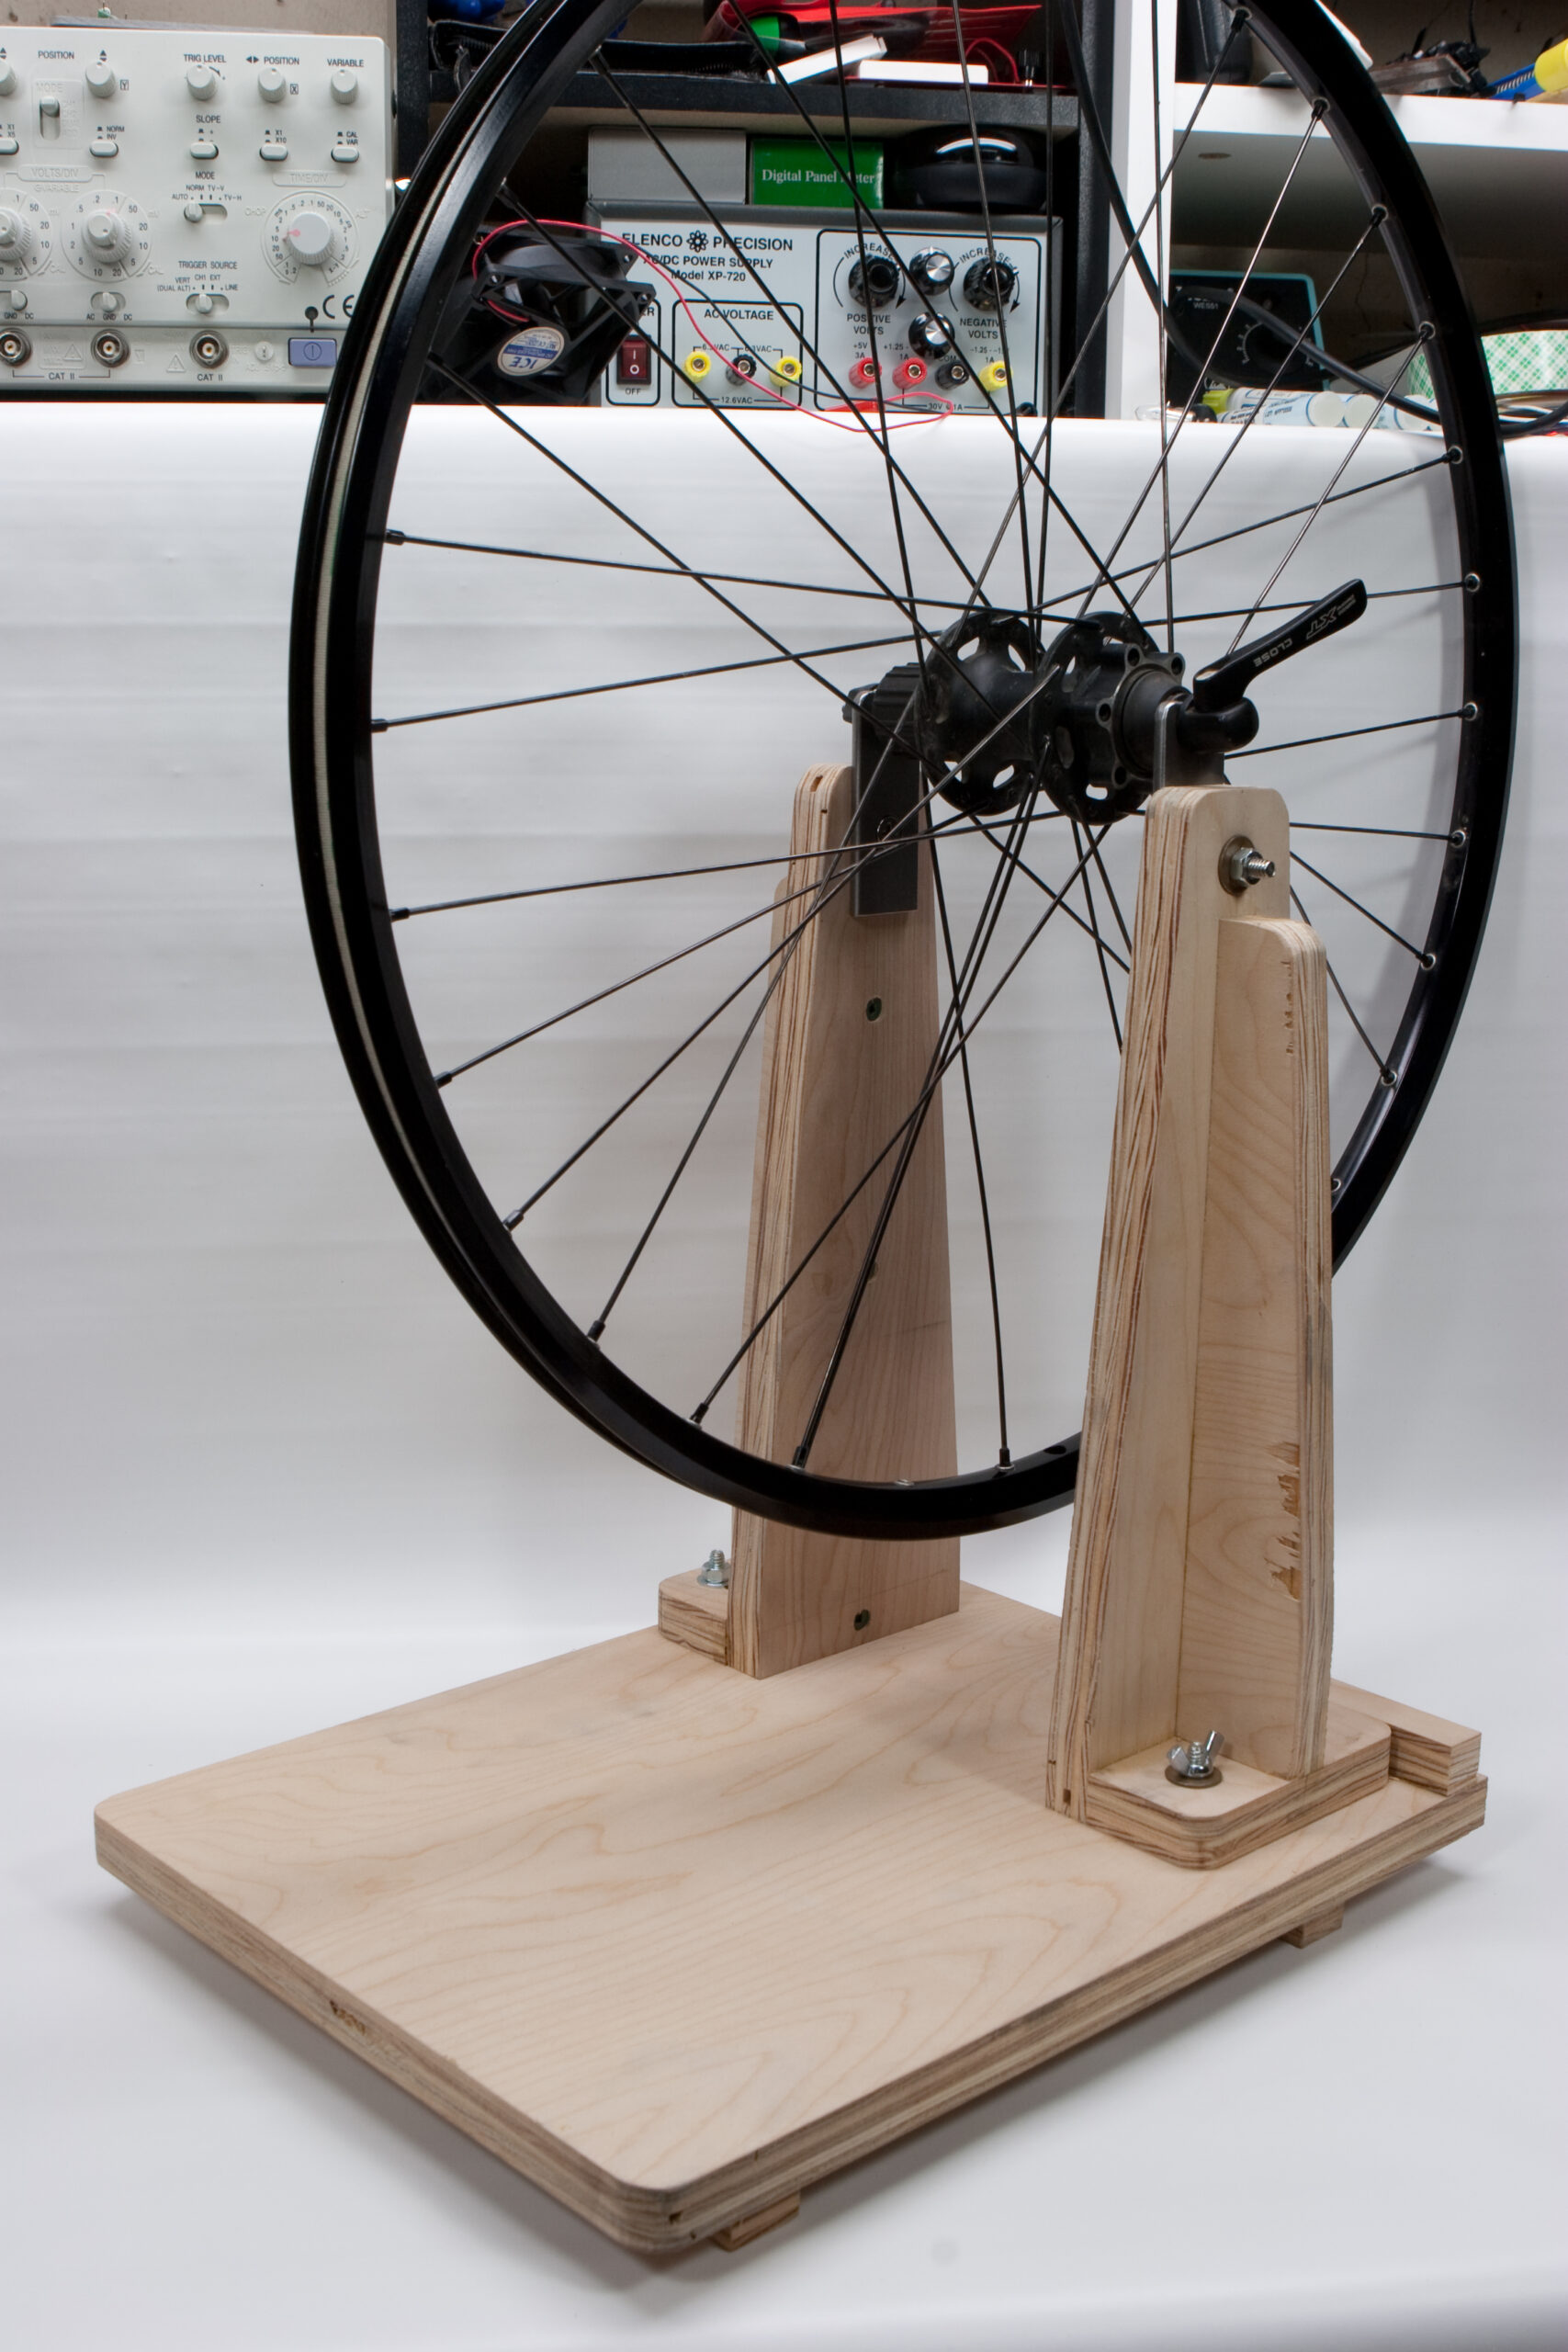
Having had some wheel problems lately I’ve been wanting to build a truing stand. Well, tonight I did.

The stand above is based on the one in the Wheelpro Wheel Building Book, except made with 3/4″ plywood and unfinished. I still have to make some alignment tools and get another 1/4-20 machine screw for the base. Here is a photo another Wheelpro stand with some tools, built by a cabinet maker and with a melamine finish, originally from this page.

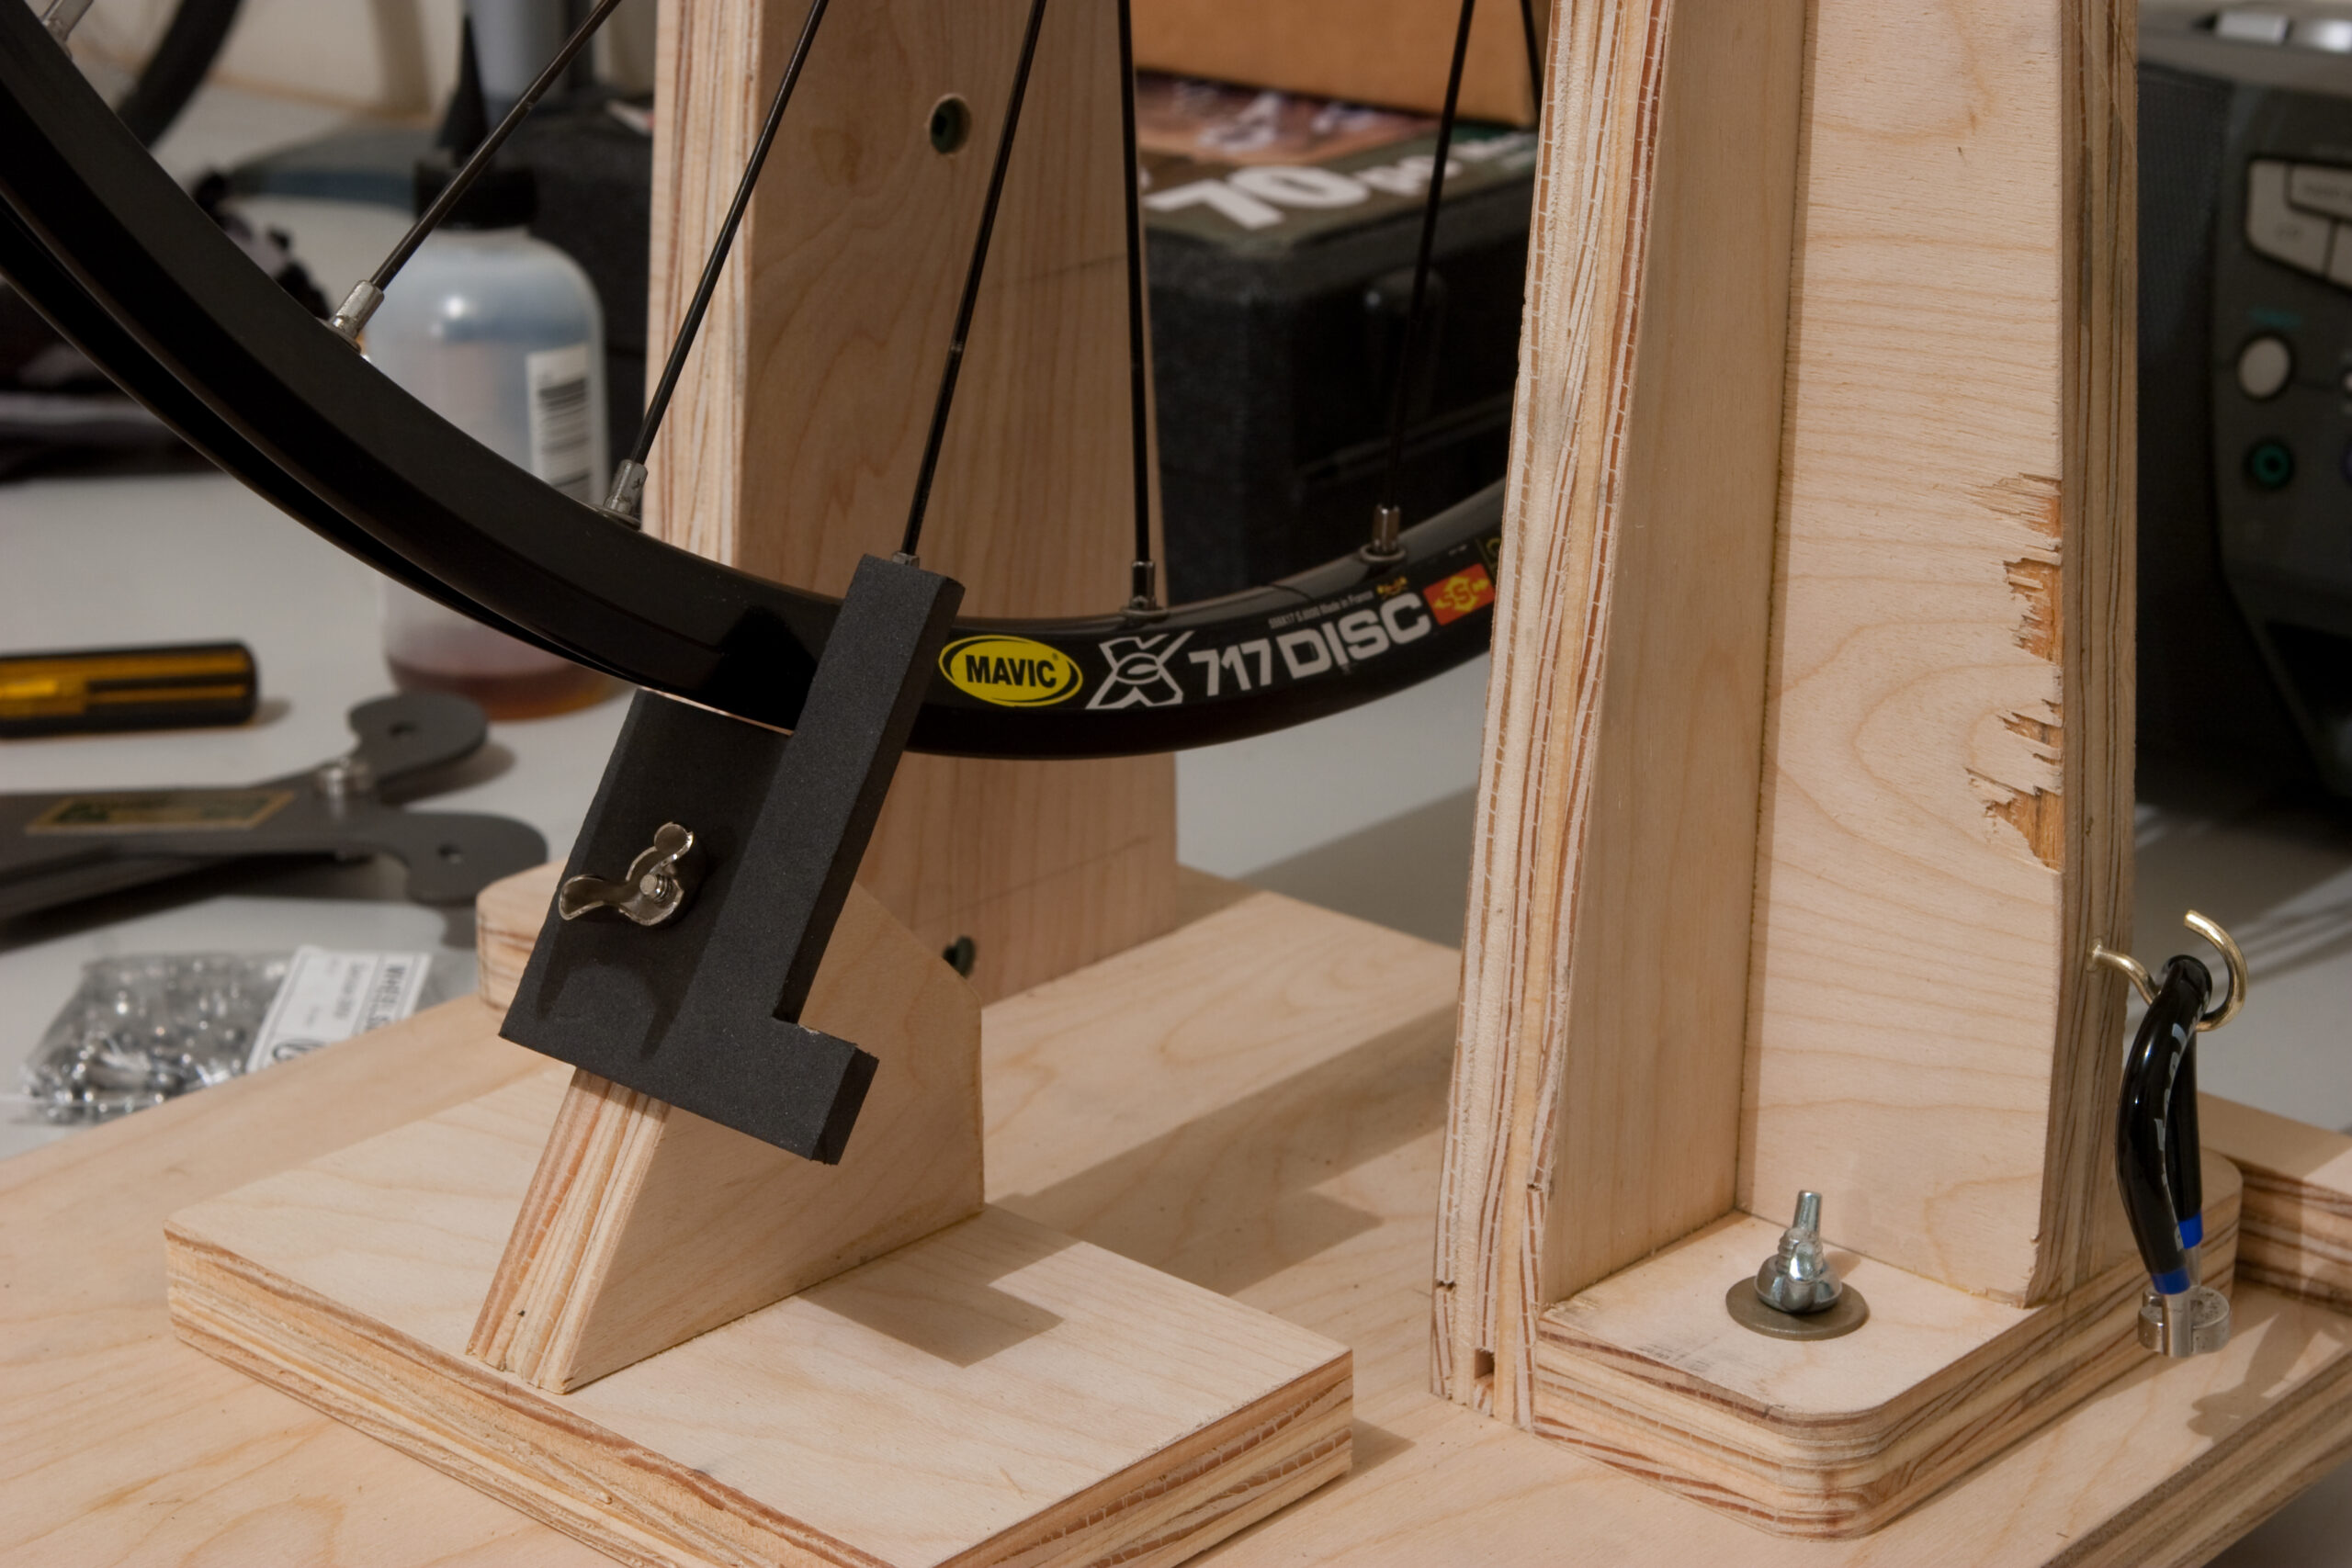
I think that I probably spent five or six hours building the stand, but as it only cost about $32 and I enjoyed making it, I think it’s worthwhile. An hour and a half or so was spent working the steel for the dropouts, but as I don’t have any real metal working tools it was a bit difficult. I also had a problem with a bit of tear out on the plywood, which is likely because I wasn’t paying attention to the direction of cut versus top layer grain, and had a multi-purpose blade on my saw. I’m also not great at woodworking, and hadn’t done anything with a table saw in at least two years.

It could have been a lot cheaper too, but being a Sunday when I went to purchase parts I ended up buying everything at Lowes. This meant $4.66 for four flat-head machine screws, $7.67 for the steel used for the dropouts, and $6.27 for the 2′ x 2′ piece of birch plywood. There was also the $4.35 countersink that I bought, then stupidly tried to use on steel, completely ruining it, relegating it to the trash can. Yes, I had to buy steel because I did not have any scrap pieces sitting around the house. At least now I do…

It also would have been possible for me to build a simpler stand, but this one seemed to do everything I wanted. The right dropout slides to accommodate different width hubs, it works fine with 26″ or 700c (29er) wheels, and it’s quite sturdy. This week I’ll have to order some replacement nipples for my wheels and find some time to make the alignment tools, then actually figure out how to tension a wheel after undoing it. That is, actually use the stand.

4 Comments

SDrive NUXX PCB Assembly Complete

Sixteen of the assembled SDrive NUXX PCBs. They have all passed initial testing and are ready to be inserted into enclosures.

After working on and off for a week and a half, I have finished assembling most of the SDrive NUXX PCBs. It turns out that I’m missing a voltage regulator and DB25 connector, but I was still able to get 17 boards fully completed and two more missing only one component each. (The table pictured above contains more boards than shown, but I cut some off to better frame the image.)

Each board has also passed initial testing (100% success rate), which involves checking for shorts, checking voltages, checking LEDs, checking the buttons, and ensuring that the microcontroller can read the SD card. I’ll do more testing later, to be sure that booting an 800XL, running an app, doing R/W, and all that other important stuff works.

Leave a Comment

TiVo HD Power Supply: Fixed

Broken traces / board in a friend's Tivo HD power supply, model ST7002-BW0G.

Question: How long will a defective power supply (model ST7002-BW0G) last in a TiVo HD?

Answer: Just until the parts warranty expires.

Yesterday some friends of mine dropped their TiVo HD (TCD652160, manufactured 11-Jan-2008) off at my house so I could try and figure out why it wouldn’t power on correctly. It was reported to me that tapping various parts of the power supply would make it power on and off intermittently, so I set to look at why this happened.

When removing the board from the chassis I’d noticed that the substrate appeared cracked around a central screw hole, but an initial check on the copper side of the board showed that this damage didn’t extend through the metal. However, after reproducing the problem and finding it isolated to the 5V and 12V rails, I flipped the board over and found that the crack ran all the way to the edge of the board, severing a few traces in the process.

This was fixed by removing (scraping) soldermask as needed and soldering salvaged resistor leads (from here, specifically) across the gaps. This, plus the extra solder surrounding the lead, should make for a nicely permanent fix. The fixed PCB can be seen here, from a different angle than the above image. After the fix was put in place flexing the PCB on the bench nor pressing / tapping on it while installed in the housing caused the power to glitch.

Leave a Comment

Leads To Trim

Leads from the resistors, crystal, and diode sticking out of the back of the production SDrive NUXXs. Time to trim these before fitting the capacitors.

After fitting the crystal, diode, and all resistors to eighteen SDrive NUXX PCBs there are lots of leads to trim before I can move on to the capacitors. Here is the pile of cut leads.

Leads are trimmed in batches as eventually there are enough sticking off the board that they get in the way. Next comes the capacitors, LEDs, and DIP switches before flux is cleaned off and the non-washable parts are fitted.

Leave a Comment

Assembled SDrive NUXXs In Progress

Nineteen SDrive NUXX PCBs being assembled.

After assembling the first SDrive NUXX v1.1 (Production) PCB and ensuring that it worked as expected I started assembling the other eighteen PCBs. I only managed to get the SD slots and DIP28 sockets fitted before calling it an evening, but it’s coming along nicely. Hopefully by the end of the weekend I’ll have a good bit more done.

It’s really nice to have a final / complete PCB which doesn’t require any jumpers or other hacks to work.

Leave a Comment

Winding Down…

Whenever I start wrapping up a personal project, I start to feel a bit let down. It’s almost as if I enjoy doing the work more than any sense of accomplishment or completion which comes with finishing a project. While the SDrive NUXX project isn’t totally done, as long as I didn’t screw something up, the difficult / interesting work is pretty much done. I’m just waiting for parts to be delivered (all orders have been submitted), then I’ll have some packaging / kitting / assembly / shipping, and it’ll be complete.

At times like this I start to feel around for something to do next, but until I find that I end up feeling a bit lost and useless. It’s not like these little projects give me much purpose in life, but they do at least hold my attention, teach me something, and make things interesting.

I think that tonight I’ll clean up the basement a bit, ensuring that the workspace needed for the aforementioned kitting and assembly is available, and then setting up a workspace for IC programming. Maybe after that I’ll swap out the tires on my bike for something a bit more trail-friendly, as I think that the weather is probably going to break after this weekend. Still, I need to find another big project. Maybe a device which monitors power consumption of USB devices on a per-port basis, or some sort of nifty clock, or something…

Leave a Comment

Programming Problem w/ AVR Dragon and ATmega8 in HVPP Mode

Over the weekend I received the jumpers for connecting the recently acquired AVR Dragon, so I decided to give it a go this weekend. Because the chips I’m using are programmed to use an external clock, the best programming mode for writing chips stand-alone is High-Voltage Parallel Programming, which doesn’t rely on an external clock.

After jumpering the board for HVPP per the SCKT3200A2 devicesheet in the official AVR Dragon documentation I tried it out on both OS X and XP, and it mostly works well, except for programming the EEPROM. For some reason, EEPROM seems to just not write, and thus validation fails. If I insert a chip with EPROM already programmed properly, validation will work, so reading is definitely working and nothing is (even partially) overwriting the existing data.

There are no problems writing the Flash or fuses, and since writing to both Flash and EEPROM use the same lines, I don’t think it’s something mis-jumpered. Nor do I believe the problem is the chip itself, since I’ve tried multiple chips which can be programmed in an STK200 (parallel port bitbang) programmer.

Here’s the command lines used with the AVR Dragon which errors while validating the EEPROM:

avrdude -p m8 -P usb -c dragon_pp -U lfuse:w:0x3f:m -U hfuse:w:0xdf:m -U flash:w:SDrive.hex:i -U eeprom:w:SDrive.eep:i

Here’s the one used with the STK200 clone, the same chip, and the same version of avrdude, which works just fine:

avrdude -p m8 -c stk200 -U lfuse:w:0x3f:m -U hfuse:w:0xdf:m -U flash:w:SDrive.hex:i -U eeprom:w:SDrive.eep:i

Here’s the actual error:

[Working stuff here cut...]
avrdude: verifying ...
avrdude: 8084 bytes of flash verified
avrdude: reading input file "SDrive.eep"
avrdude: writing eeprom (329 bytes):

Writing | ################################################## | 100% 36.51s

avrdude: 329 bytes of eeprom written
avrdude: verifying eeprom memory against SDrive.eep:
avrdude: load data eeprom data from input file SDrive.eep:
avrdude: input file SDrive.eep contains 329 bytes
avrdude: reading on-chip eeprom data:

Reading | ################################################## | 100% 33.60s

avrdude: verifying ...
avrdude: verification error, first mismatch at byte 0x0000
0x72 != 0xff
avrdude: verification error; content mismatch

avrdude: safemode: Fuses OK

avrdude done. Thank you.

If anyone has an idea as to what might be wrong here, I’d love to hear it. This is exactly the same problem I get on both Windows XP (avrdude v5.6 from WinAVR-20081205) and OS X (avrdude v5.5 from AVRMacPack).

For what it’s worth, I have posted this here on the AVR Freaks forum, but it doesn’t seem to be receiving any replies.

UPDATE: It seems that this is a problem with avrdude. I can program the chip with no problem in HVPP mode using AVR Studio. This would be a good time to have a logic analyzer. Maybe I could actually fix the problem.

2 Comments

SIO Connectors!

Pile of 25 Atari SIO Connectors.

Today I just happened to find a package containing 25 brand new SIO connectors in the mailbox. Because of this I have reopened orders of wholly assembled SDrive NUXXs. I’ve also put the assembled devices on the SDrive NUXX ordering page, so they can be ordered by people without my manually sending invoices.

Leave a Comment