nuxx.net
Making, baking, and (un-)breaking things in Southeast Michigan.

Category: making things

x0xb0x Front Panel Redesign

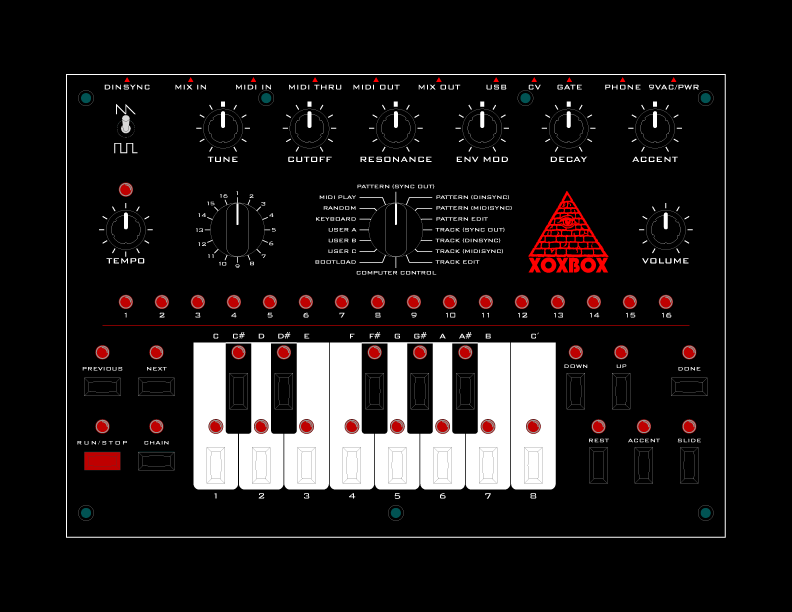
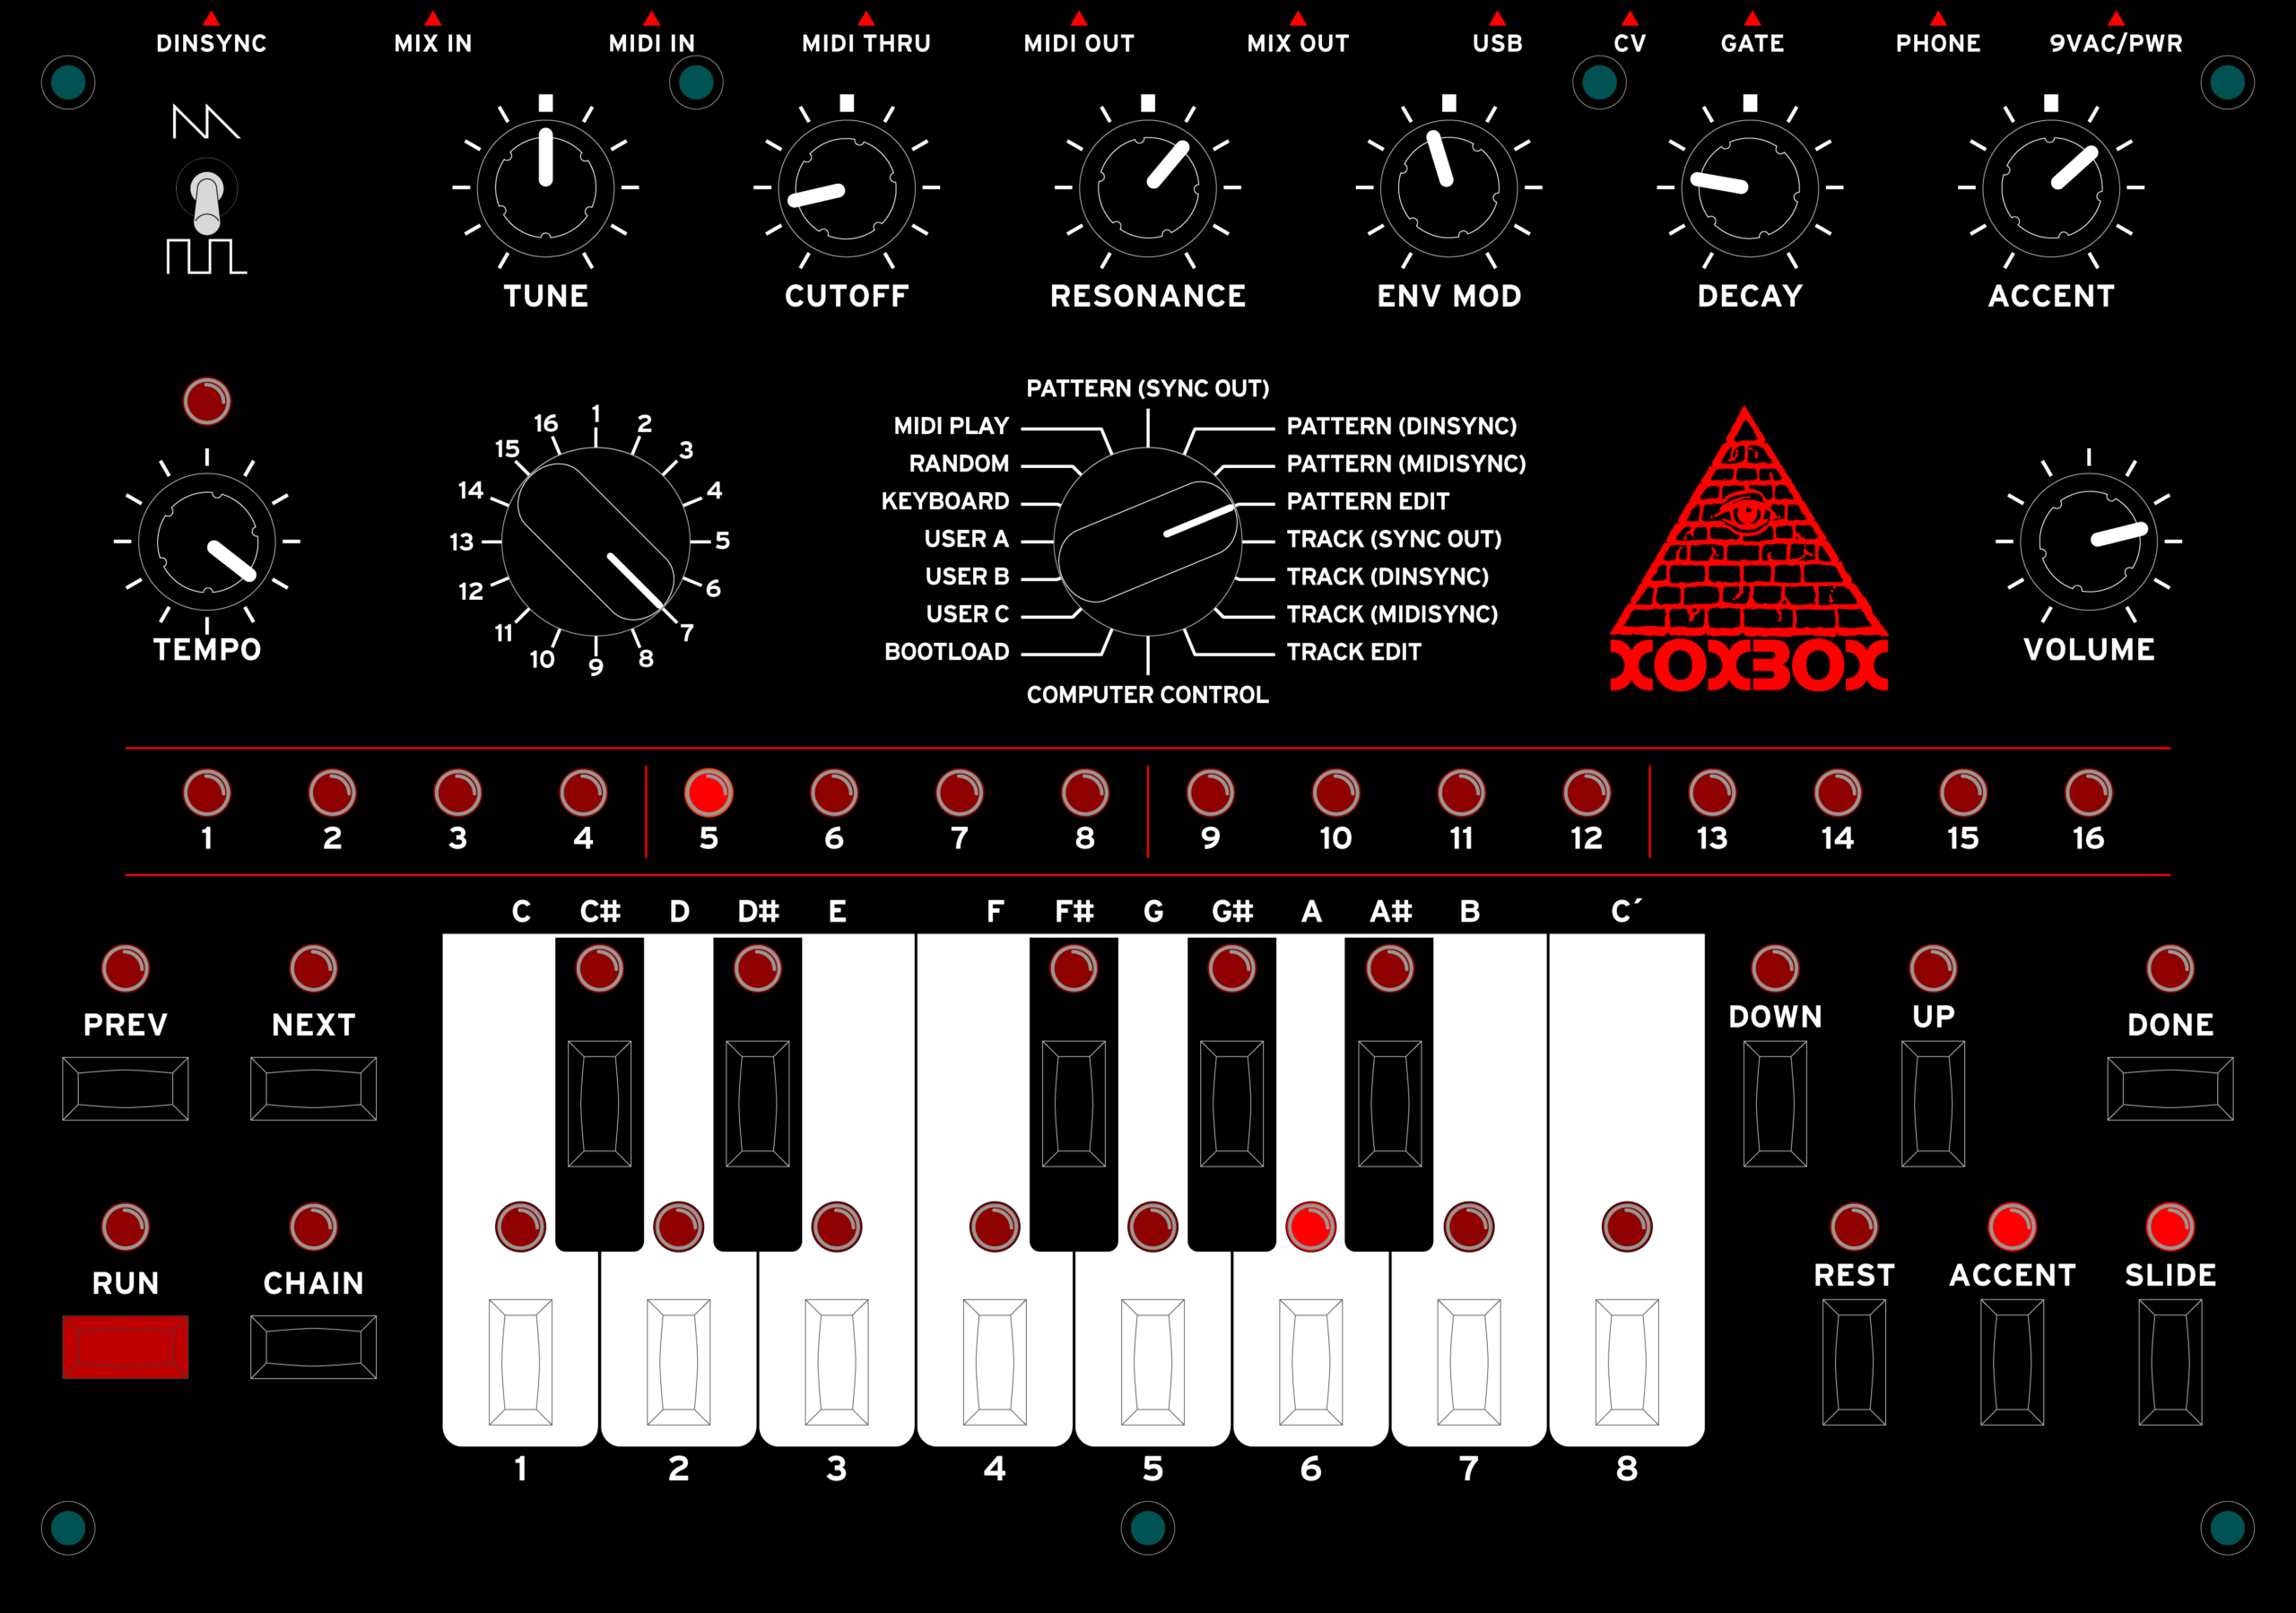
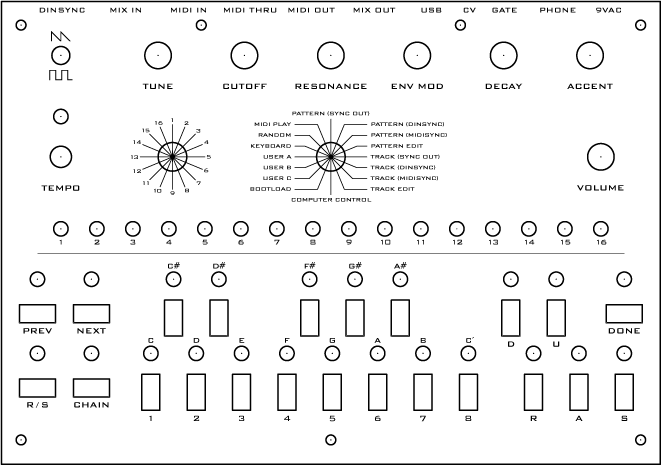
Well, after a bunch of work over the past few days, this is how far I’ve come in the redesign of the front panel of the x0xb0x which I hope to build. It’s also come a long way from my original data sources, which were a DXF of the panel and it’s through holes (no text), a PDF which will become the instruction manual, part spec sheets looked up the BOM, and the TIFF used for the laser printed overlay seen here.

I also had to learn to use Illustrator, which is pretty darn useful now that I’m comfortable with it.

Now I’m going to go take a bath.

I’ll be letting the overlay ideas seen up above stew for a bit… As in, a few days or a week. I like what is there, but I want to be certain before I spend $30 – $50 to have it professionally printed.

Oh, I also have to actually receive the kit and confirm that the expected front panel size (as detailed in the DXF) is the actual size of the panel. If it isn’t I’ll have to… Do some adjusting. Or something. (I really, really hope this isn’t the case).

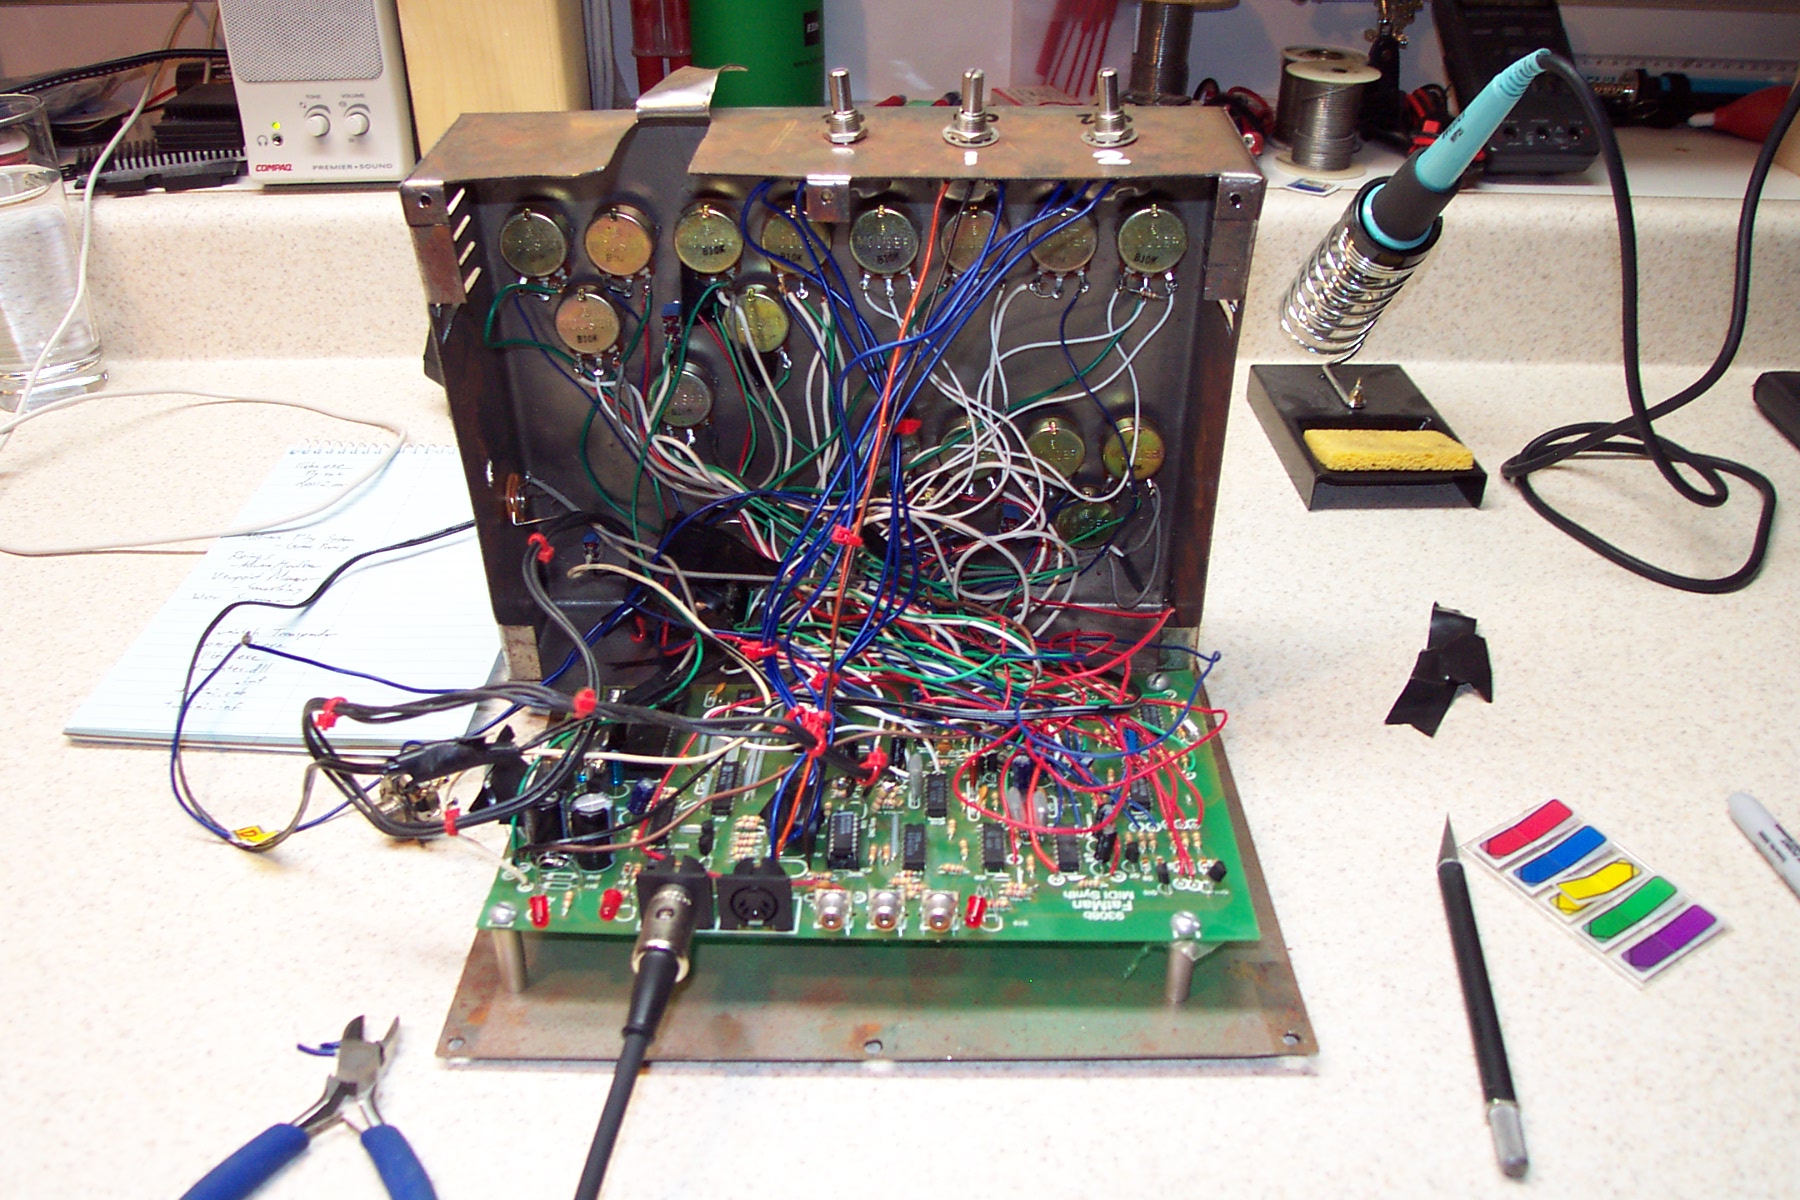
Today I also spent a good bit of time refreshing my soldering skills by stripping and partially fixing the PAiA FatMan seen here. It had been given to me about a year and a half ago, and it’s in really sorry shape. In short, it doesn’t work… The board is rather scratched up, there were a good number of bad solder points or mis-soldered parts, and most of the pots seem bad. So, I’m going to order up replacement pots and a new chassis, and whatever other parts I need to fix it… Then I’m hopefully going to make it work. I’d like to put it in a PacTec PT-10, which is what the x0xb0x uses, then the two could match nicely… That means there will be another CP to design… Ah well. :)

Oh, yeah. That’s enough babbling for now. I’ll go take that bath now.

UPDATE: Oh, yeah… I now have a nice, vector-based version of the all-seeing eye. This makes me happy. I’ve wanted such a piece of data for a while, and being unable to find one I just made one. I first scanned the logo from the side of a box of Illuminati cards, removed the word ‘Illuminati’, drew the lines around the bottom back in as needed, made it two colors, traced it in Illustrator, then used it. It was a good bit of work, but I’m glad it now exists…

electronicsmaking thingsmoved from livejournal

New x0xb0x Panel

Well, after one day’s work, I’m able to export that from Illustrator CS. This will (hopefully, eventually) be printed out similar to how an arcade game control panel overlay is made and applied to the control panel of my x0xb0x.

Provided I’m able to properly make the synth itself, I’d like to take what you see above and use it as a foundation for something really nice looking. Currently it is just the original CP, brought into Illustrator, broken out into layers for various parts, and the SAW / SQR waveform indicators replaced with waveforms that I just drew.

Currently everything, including the text, is vector, so it can all be moved / changed pretty easily. Tomorrow I’ll likely get going on the hardest part of the whole art portion of the job. That is, taking the TIFF file for the panel seen here and re-drawing it in a vector format. I also want to make the text in the TIFF consistent with the rest of the panel.

Then will come playing with the color of the whole thing. I think the keys should (obviously) be black / white. Everything around it… I don’t know. I’m thinking that (if I can) I may do the whole panel in black with white text. Then a nice red Steve Jackson-esque All-Seeing Eye could be placed in the blank space just to the left of the volume knob. Or… I don’t know. I’ll see what I find out when I talk to the print shop tomorrow. That is, if they can do it…

electronicsmaking thingsmoved from livejournal

Bank Gothic

Do any of you have a copy of the font Bank Gothic? I guess it supposedly comes with Windows, but I’m not seeing it here… I need it for part of the x0xb0x layout I’m trying to do.

Thanks!

UPDATE: I should add that I need it in TTF for Windows. Thanks!

electronicsmaking thingsmoved from livejournal

Power Supply

To Do Tomorrow:
· Order Elenco XP-720K power supply kit.
· Order additional soldering iron tips (very fine cone, or something similar, different from what comes with Weller WES51 (ETA). Person at the place I ordered things from happily added to the order.
· Look for a good deal on a scope (maybe 50mhz or so) on eBay. Hopefully less than US$100. Currently bidding…

electronicsmaking thingsmoved from livejournal

Custom Printing Help

Hey everyone… I’m trying to find some place to get something printed at, but I’m really not sure where to start looking.

First off, I’m looking to have a set of overlays printed for the x0xb0x I hope to make soon. My idea for this overlay is to have something similar to an arcade game control panel overlay, which is similar to the heavy plastic adhesive ads stuck to the floor of some grocery stores.

My understanding is that these are typically printed on the back of a piece of plastic, and then the adhesive is applied to the back. Or, it is printed on adhesive vinyl then the textured plastic is applied to the top of that.

So, this brings about the question of where one would get something like this printed.

I’m thinking that I’ll first try the sign printing place in downtown Utica, as one of the services they advertise is custom printed car wraps, and this isn’t too different. But, do any of you know some place to get this made up?

Thanks!

electronicsmaking thingsmoved from livejournal

Hackjob Lighting


My workbench, all lit up…
(Click for more.)

Well, one of the other things I did today was get my hacked together lighting rig (photo gallery retired) put together and give it a try. Well, it seems to work. (The photo in my last post was taken using it.)

In the end, I have a setup which I metered (using the Photoshop Camera Raw plugin and a grey card) at 4900K, which is just great for my purposes.

The setup was made using four Sunwave 30W compact fluorescent bulbs which I’d ordered ordered from Cindy at Cloud Dome for a pretty reasonable price. The bulbs are fairly large and well made, and fit fairly nicely into the clip-on flood lights I purchased from Home Depot.

To diffuse the light, I took four sheets of Roscolux 116 ‘Tough White Diffusion’ gel, cut them down to 12″ x 12″ squares, and clip them in front of the lamps by the corners, forming a puffed out box. I found that if make marks 2″ in from the corners and clip along the line formed between these points, things work out rather well.

In the end I’ve got four rather workable lamps which seem to provide some pretty even lighting. I may want another four down the line, but at a total of about $100 for all the parts needed to make this (the lamps themselves are by far the most expensive and inaccessible parts) I’ll have to hold off on this for a bit.

The only other change I may make is in the size of the gels used. I think that I may be losing some light to the sides and rear of the fixture with the gels billowing out slightly as they do. I imagine if I used 10″ squares instead, I may get more light on the work surface… Oh, and then I’d also get all four pieces needed for a project like this out of one 20″ x 24″ sheet of gel.

making thingsmoved from livejournal

iPod Install


Finalized iPod Installation
(Click for more…)

Okay, I just wanted to share this picture to show that my iPod installation all finished, with the new iPod in place. I have to say, I think it looks quite nice. This view here is pretty much what I see while driving…

So, yeah. It’s all set. I’m happy. Now I just need to clean up my work area in the basement. I was going to do that today, but I ran over at Waveform, and then I spent other bits of time straightening up my office and getting a few random things done.

Now it’s time to relax.

automotivemaking thingsmoved from livejournal