Press "Enter" to skip to content

Category: acquired things

New Helmet Pads for Giro Xar

After ~2 years (and maybe four months of need) I finally replaced the pads on my daytime helmet†, a Giro Xar. I’ve been quite happy with this helmet, and it’s done well for me, but the soft pads inside were soundly compacted and some parts were starting to delaminate. This meant that there would be large lumps inside the helmet if I didn’t put it on very carefully.

At $4.99/set for the pads I should have done this a while ago. The replacement is as simple as pulling out the old pads and sticking the new ones to the velcro.

† At night I wear my old helmet, a Giro Phase. This one isn’t quite as comfortable as the Xar, so I keep a light mount on top and use it mostly at night. It’s also a backup in case something happens to the Xar.

1 Comment

Wahoo Cycling Speed/Candence Sensor for Salsa Vaya

The Salsa Vaya (and hopefully the forthcoming Motorless City bike) has the rear disc brake cable run along the top of the chain stay, which means the Garmin GSC-10 (Speed/Cadence Bike Sensor) cannot cleanly fit on the bike (photo). To work around this I picked up the Wahoo Cycling Speed/Cadence Sensor (a compatible ANT+ device) and thus far it seems like it’ll work just fine. I had no problems hanging both sensors below the chainstay, and my Garmin Edge 510 quickly picked up the sensor and was able to get both wheel rotation and cadence data from it.

This setup isn’t as attractive as Garmin’s single unit, and the need to double the cable back on itself looks a bit sloppy, but it does offer more flexibility and overall it should work out fine. I was also a bit disappointed that it doesn’t feature a Garmin unit-like test button/LED which makes setup super easy. It’s a bit higher priced than the Garmin sensor, so it’d be nice if it was at least identical feature-wise. It’s also a bit awkward how the entire sensor body needs to be pivoted in towards the spokes instead of a small/discrete arm, but I do think it’ll work out fine.

Since this was a test mounting I was a bit careless with the cable ties and didn’t peel the adhesive pads off of the cadence sensor, making for sloppy work. I intend to leave this (with its ugly, temporary fittings) in place for a month or so, and then hopefully after that it’ll be in place on the Motorless City bike.

Leave a Comment

2014 Huron-Clinton Metroparks / Oakland County Parks Passes are Poor Quality


The 2014 Huron-Clinton Metroparks / Oakland County Parks pass is much lower quality than the ones from past years. Starting this year the sticker has a few changes which make it much harder to apply: the backing is split instead of starting at a tab at the top, and the white background fill is alcohol soluble. Because of the split backing I had a much harder time applying it and ended up with a slightly wrinkled sticker, and cleaning the window post-application wiped off some of the white paint and left it smeared all over the window. With the tear-off top of the decal being perforated along the top of the decal itself this also means that the top edge is rough and can’t be evenly smoothed.

I much prefer the older style decal, as I could easily get it applied smoothly in the lower corner of my car window (photo) and passing over the sticker while cleaning the windshield didn’t wipe white paint all over the lower reaches of the glass.

UPDATE: When I attempted to use the Contact Us page on metroparks.com to relay this concern to park management it returned an ASP error that I believe was trying to give me an HTTP 500 (Internal Server Error) so I tried using the listed info@metroparks.com email address, which then bounced saying recipient not found. That’s worse quality than the passes. Time to dig up some real people’s addresses.

Leave a Comment

On-One Floater: Traction for Days

This evening I left work a little early to squeeze in a ride at River Bends before it got dark, and this ended up being a great evening. Because of a freshly fallen quarter inch of snow and a few days of below-freezing temperatures the ground was a beautiful white, and clearly visible and ridable half an hour after the sun had set. Riding comfortable along the ridge, sun just below the horizon, looking down at the oxbow lakes (ponds, really) along the Clinton River looking at the leafless grey-brown trees and mottled white forest floor was incredibly beautiful. I would love to have what I saw captured in a photo, but it’d be so difficult that I didn’t bother to try.

Besides just getting out for a ride, one other intention for today is to try out the On-One Floater tires (package photo) that arrived last week. I purchased these hoping for something with a similar knobbiness as a Surly Nate, but a bit cheaper. Last year I’d picked up a Big Fat Larry for the front, moving the original Larry to the rear, and while this was a decent setup it left me wanting for more traction in snow. While the Nate would have been my tire of choice for this, at $128.74 (shipped) for a pair of Floaters they are (per tire) less than half the MSRP of a comparable 120 TPI Nate. Roger picked up a pair of the Floaters earlier this year and was happy with being happy for general trail riding, so I figured I’d give them a go.

Last night I set them up with 20 PSI to seat and stretch the tires to shape, then today I rode them at 11 PSI (rear) and 9 PSI, and I’m really happy with them. At 1460g and 1462g each they added a total of 172g (0.38 pounds) to the bike, which is nothing to be concerned with given the radical increase in traction. The center / transition knobs are about 5.1mm tall on the Floater, versus ~3.15mm – 3.5mm on the Larry / Big Fat Larry, and they have a very square-ish shape as opposed to the Larry’s ramped triangle shape. Width came in at ~3.85″, which is a bit shy of the 4.0″ printed on the sidewall, but still a very acceptable width. On the Mukluk’s 82mm Surly Rolling Darryl rims the furthest-out side knobs are parallel with the sidewall, giving the whole setup a great profile and feeling. Here’s two photos showing tread detail: 12.

Normally with the Larry family tires I’d get a controlled, comfortable bit of slide/drift in corners; something which was very predictable and worked nicely. When on frozen surfaces it’d get a bit weird, and would at times wash out if I pushed a bit too hard. I wasn’t able to make the Floaters behave in the same way, and coupled with the deeper tread I think these will meet my desire for a snow fatbike tire.

Oh, and that monster truck feeling when one first gets a fatbike and rides through rough surfaces with impunity, holding lines that would have been considerably harder on a skinner tire bike? Tonight I had that feeling again while riding the frost heaved Swamp Loop at River Bends. It was rough, bumpy, crunchy, icy, and oh-so-much-fun.

Leave a Comment

Avid BB7 Road w/ Black Knobs

Yesterday’s first ride (Strava) on the Salsa Vaya exposed the problem with BB5s that I was most afraid of: weird noises.  Because of the loose pad design, whenever I’d hit a small bump a very audible bell-like “ting” sound could be heard as a pad would rattle against a rotor. Braking briefly would remedy this for a short while, but after not long it’d be back again. The brakes themselves performed much better than I expected, and were a really welcome feel when riding on a drop bar bike, but the noise began to bother me after a while.

I was even able to demonstrate this sound for my friend Roger by picking up the front end of the bike and dropping it gently, where it made the sound over and over again.

Thus it’s a really good thing that last Friday I’d won eBay auction 360797543167, for a set of dark grey Avid BB7 road disc brake calipers with black knobs for $76.85 shipped. This is a OE color not shown on the Avid website and clearly a bike take-off (photo as shipped), as they were missing one set of bolts/washers and didn’t include rotors. The auction claimed like-new, and save for a couple small nicks on the calipers everything is in great shape, and the pads look like new.

As expected setting them up with the existing rotors was extremely simple, and I’m ready to take them out for a ride. I really prefer this darker / monochrome look, as the lighter silver and red knobs doesn’t go well with anything else on the bike. I’d even stuck with the original black bolts to keep the colors as dark as possible. I’m glad I was able to find this set of calipers on eBay, because I believe they are otherwise unavailable in this color scheme.

A couple times while stopping last night I inadvertently locked up the rear wheel, skidding briefly. This makes me understand why many road bikes have 140mm rear rotors, as there really isn’t much stopping power needed on the back of a road bike. I won’t be switching to 140mm rotors, though, as the Vaya frame is post mount and thus can only take 160mm or larger rotors. I’m sure this won’t be a problem, and may even be a benefit if I do some longer / hillier rides, as I tend to drag my rear brake when I’m trying to keep my speed in check.

(Switching to the BB7 brakes even saved eight grams! The BB5s are 172g per caliper w/pads, and the BB7s are 168g w/pads. I’m sure that’ll make a tremendous difference!)

Leave a Comment

Hope Pro 2 Evo Fatsno Hubs

Since I’ve recently bought a bunch of new bike stuff I’ve been trying to hold off on spending for bike stuff, but another great deal happened my way that I couldn’t pass up. After seeing the Stan’s Notubes prototype fatbike rims at Interbike I’ve been wanting to build up a set, which meant that once the rims are available I’d also need another set of fatbike hubs.

A few days ago a brand new set of the highly regarded Hope Pro 2 Evo Fatsno hubs (135mm front w/ rear brake spacing, 170mm rear) popped up on the MMBA Forum for $225, a price that really grabbed my attention. Some email back and forth with the seller, a payment sent, and a few days later they are here. I’m really looking forward to building these up, so hopefully the Stan’s rims are available soon and at a reasonable price. If I end up not building up the wheelset I shouldn’t have a problem selling them for what I paid.

These are really nice hubs, wholly made in England, with an extremely high quality feel. When actuating the freehub by hand I can tell that it will have the telltale Hope sound (read: loud) when riding, something which I’d been a bit irked by in the past on others bikes. I hope it doesn’t bother me, but I guess if it does I can always add grease to dampen it a bit… so long as I don’t screw with winter-time engagement.

Leave a Comment

Salsa Vaya 2 (2012): Ready To Go

After unboxing, some very detailed cleaning which let me get to know the bike thoroughly, fitting accessories, and transferring measurements from the Jamis Nova I’ve got the 2012 Salsa Vaya 2 mentioned previously (full bike photo) ready to go. While on its face this bike seems redundant and that the Nova would have met my needs, I think it’ll be a big improvement over the Nova for a couple reasons:

  1. The Nova with a 570mm ETT is a bit too large for me, evidenced by the 75mm stem needed to get the fit right.
  2. I prefer disc brakes on bicycles, even though the cantilever rim brakes on the Nova work well in most conditions.
  3. The Vaya has much longer head tube requiring far fewer spacers to get a comfortable position. This makes for an overall stronger/nicer setup.
  4. The Vaya comes with a crank that has 170mm arms. I’m not yet sure if this’ll work out for me, but I’m looking forward to trying it on long rides with lots of spinning.

Thus far I’ve only taken it on some short paved and trainer rides, but so it seems to fit well and I’m really looking forward to getting it out on some lengthy dirt road trips. With December and the first snows (and very cold headwinds on dirt roads) upon us I’m not sure this’ll be possible before spring, but I can hope…

In the mean time I spent a couple lazy hours over the past few days putting together my thoughts on the bike, mostly for my purposes a couple years from now. If you’re interested in that info and the full current build details, read on, or if you are interested in photos of this particular Vaya 2 click here

Leave a Comment

Used 2012 Salsa Vaya 2

Online wandering a week or so ago looking for an orange 54cm Salsa Vaya frame led me to this blog post from Colonel’s Bicycles in Fort Worth, Texas showing exactly the frame I was interested in, but posted 2.5 years ago. These are generally a bit hard to come by, and I’m not particularly fond of the current frame-only colors, so I didn’t want to get a new one, so on a whim I emailed asking if they still had any. The reply that I received surprised me: they had a used, but complete and in good shape 54cm bike in stock, and it was available for $900.

After some email back and forth where I had some pictures to look at (1, 2) and with the shop confirming that the fork recall (photo) didn’t apply to this one, I decided to go for it. Total after shipping was $1004, which strikes me as a good deal seeing as these bikes regularly go for $1300+ shipped via eBay. While the bike is definitely used and needed a drivetrain cleaning, the frame is in immaculate shape with only some slight cable rub along the head tube (which I’ll be covering with protective tape anyway), and slight marks on the rear brake mount from being bumped by the rotor during wheel insertion. All of this is typical wear that any bike would pick up in its first couple of months.

(The guy at the shop said the original owner was very good about caring for his bikes and this one likely has less than 2500 miles on it, and has never been crashed. If it has that many, those were definitely gentle miles…)

Dust in crevices of the frame and slight marks around the rack mounts indicated that it’d been used for touring / gravel road stuff, but it’s in otherwise great shape. The build seems to be pretty close to the original spec, but with different chainrings, a chain that’s in great shape, a like-new cassette, and an absolutely terrible saddle. The steerer has a lot of extra space on it, which is great for adjusting fit. The saddle is just a placeholder that’ll likely be given away (almost anyone buying a bike like this immediately replaced the saddle with one that they prefer), but I’m pretty impressed at how bad the molded plastic/rubber thing that came on the bike is. It’s even got an air vent hole on the bottom to let air with a whoosh out as its compressed. (Photos: 1, 2). Yes, that’s the stock seatpost.

The bike is now extremely clean and ridable, with a bunch of measuring and trainer / parking lot fit checks done to get it ready for me, and the initial feel is really promising. The saddle was replaced with the Specialized Avatar fromt the Jamis, fitted to the Salsa Pro Moto 3 seatpost originally from the Mukluk 2 (Photo). There’s likely some more fiddling needed and I have to cut a couple inches off of the steerer and finish fitting some accessories, but this far I’m really happy with it. Now to find a good day to ride it.

Leave a Comment

Race Face Turbine Fatbike Crankset

My 2012 Salsa Mukluk 2 came stock with an e*thirteen XCX fatbike crankset, and while this has worked well for two years, the variety of other fatbike-compatible cranksets on the market had me wanting to try something different. I also haven’t been particularly fond of the bottom bracket design, particularly after ruining one set of bearings after a bit of a lake ride. Race Face, a stalwart brand in mountain biking, now manufactures a number of their cranks in configurations that support 100mm bottom brackets just for fatbikes.

After finding a surprisingly good deal on one of these cranksets and the chainrings that I prefer I ordered it, and in a bit of time this afternoon between work and a group ride I got it installed. After tonight’s ride I’m quite happy with the purchase. This crankset has a much more traditional bottom bracket with a well-known seal design, and unlike the e*thirteen includes a sleeve connecting the two cups, which should help keep contaminants out of the bearings.

This setup ended up being the following items:

  • Race Face Turbine Crankset for Fatbikes (100mm bottom bracket shell), 175mm arms, for 175mm rear hub spacing.($182.99)
  • Truvativ Trushift Chainring, 22t, Aluminum, 64 BCD ($13.99)
  • Truvativ Trushift Chainring, 32t, Steel, 104 BCD ($20.00)
  • FSA Torx Chainring Bolts, Alloy, Black ($17.50)
  • BBG Bashguard, 104 BCD OVAL, 32t ($26 shipped, but taken off of e*thirteen crankset.)

The total for this was $234.48, and I’m hoping to sell my functional but unwanted e*thirteen crankset to offset a bunch of this cost.

At 951g for this entire crank setup (versus 879g for the e*thirteen) there is a slight weight penalty (72g) for moving to this crankset, but as this is a fatbike I’m not particularly concerned. This amount of weight will be absorbed by extra clothes that I wear or food that I carry. The complete bike, with bottle cage and pedals (but without bike computer) comes in at 32.4 pounds with this crankset, which I think is pretty reasonable for a fatbike where weight isn’t a primary concern.

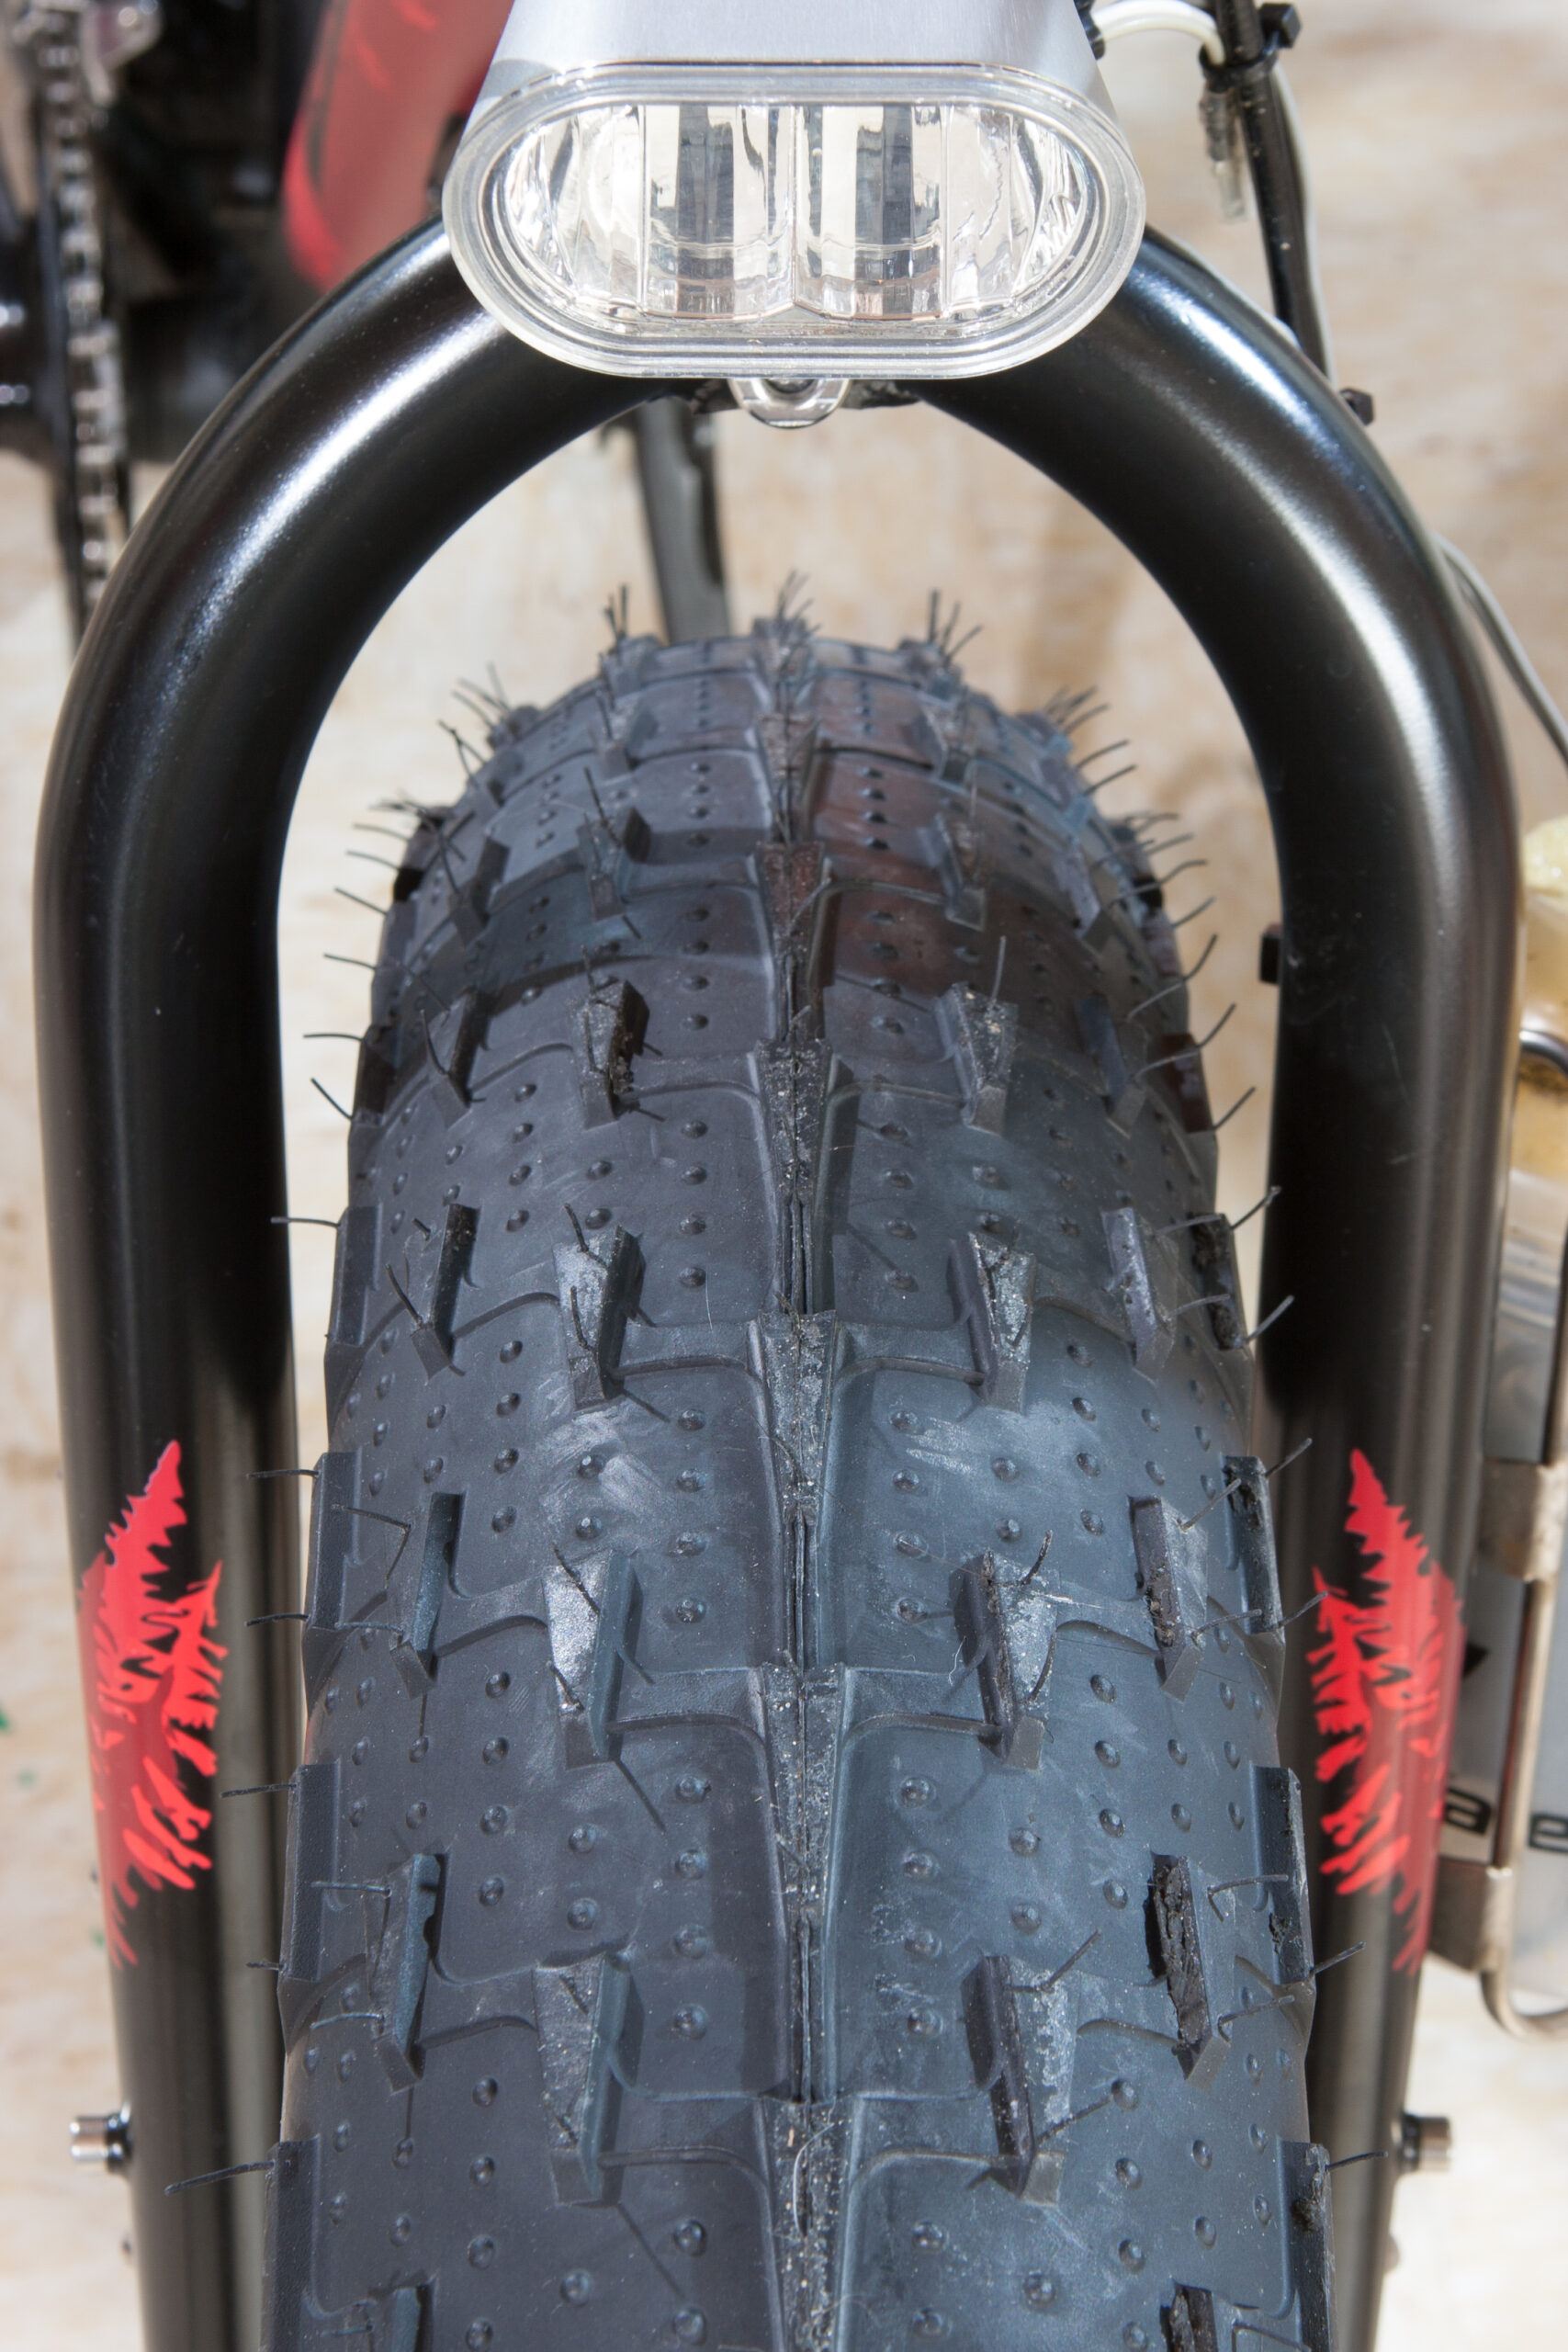
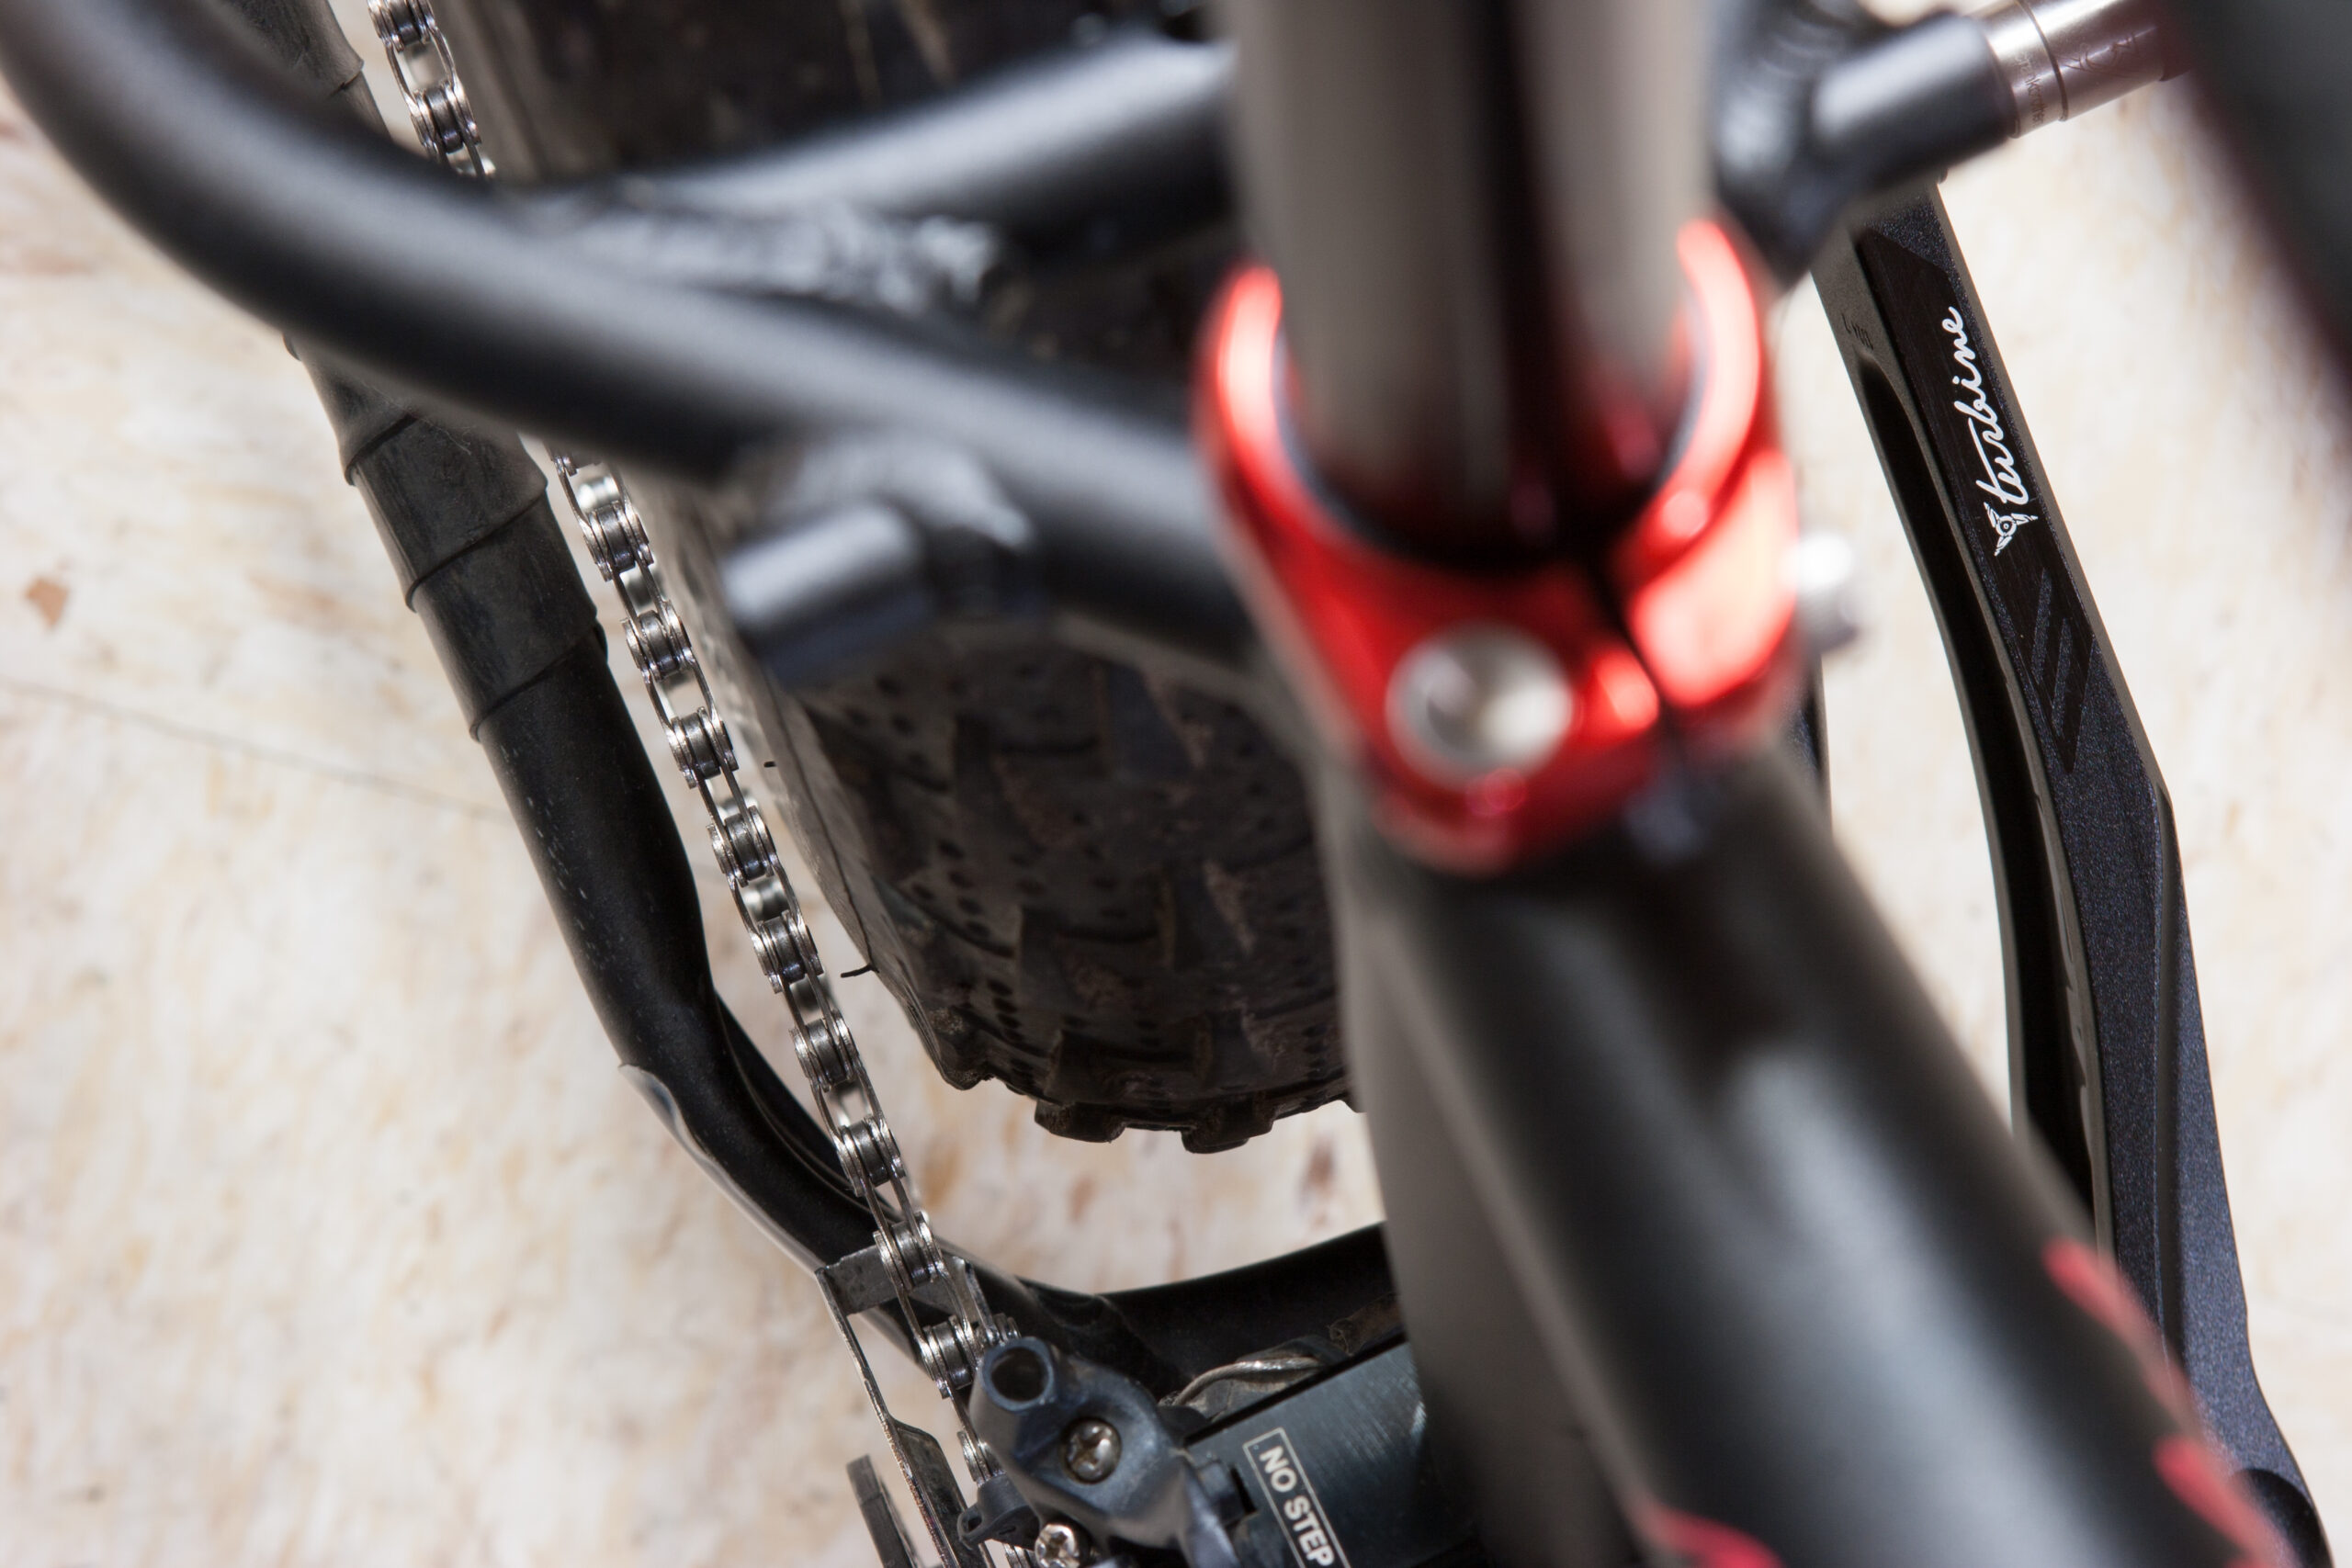
Tonight’s test ride at River Bends showed that this crankset seems to work as expected. It does what a crankset needs to, was sufficiently easy to set up, and moved the chainline outboard far enough to provide about 5mm of clearance between the chain and tire when in the 22t chainring / 34t cog combination. (Photo) This is the lowest gear that I have on the bike, and while it isn’t a very common combination for most riding, it’s useful in winter or inclement conditions when needing to move slowly and steadily through very difficult conditions. With the e*thirteen crankset there was a bit less clearance, resulting in more gunk being scraped off of the tire by the chain.

I have high hopes for this crankset, but based on what I’ve seen thus far I don’t think I’ll be disappointed.

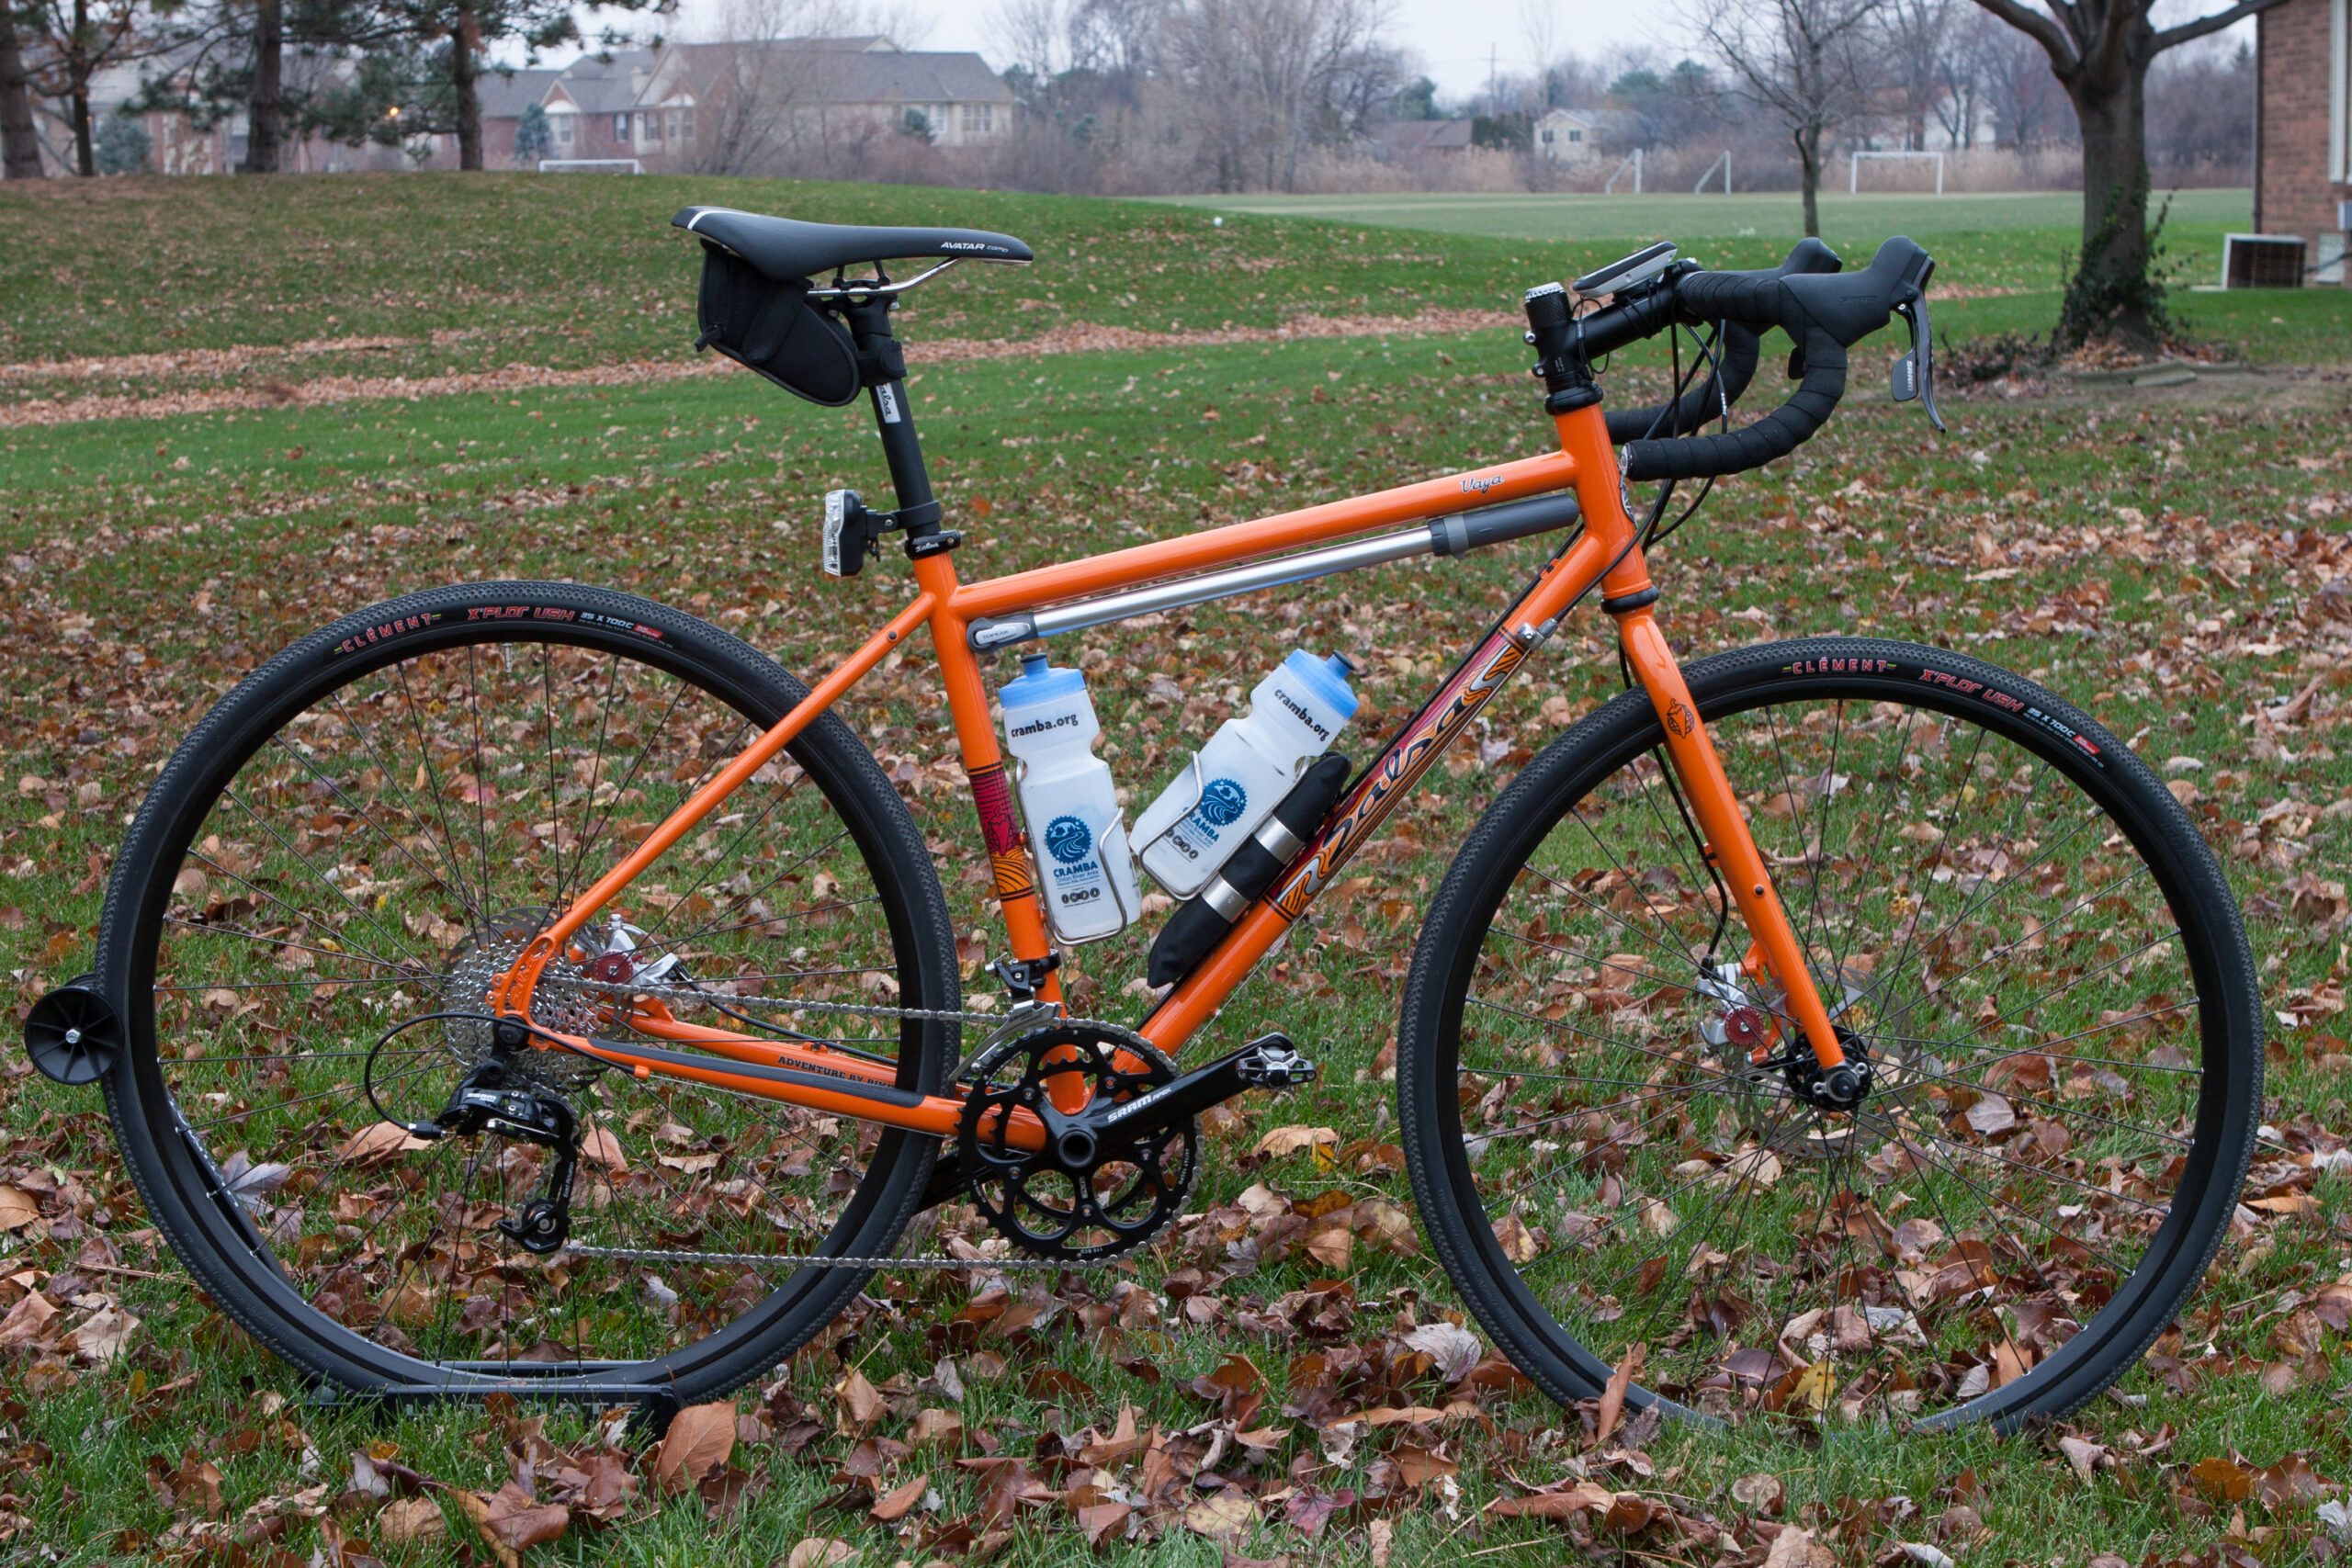
(Yes, I know the derailleur is mounted high… That’s still the original position compatible with 44t outer rings, but due to the shaping of the derailleur and the slightly more outboard chainline of the Turbine crankset leaving it this way allows me to use almost the entire cassette when in the 22t chainring.)

Leave a Comment

Remarking the Seasonal Loop at River Bends

River Bends is going to have a bit of remarking at the CRAMBA-IMBA trail day this weekend, and in preparation I removed most of the the wrong-way signs from the segment formerly known as the Seasonal Loops. A number of these signs were no longer necessary, and a handful of them had been shot with airsoft pellets to the extent that they weren’t very readable from a distance.

At some point in the next year or so I hope we are able to replace many of these with more permanent Carsonite-type fiberglass markers (such as this one at Bloomer), but for now it’ll be more of the same corrugated plastic and vinyl markers, color coordinated with the map.

Leave a Comment