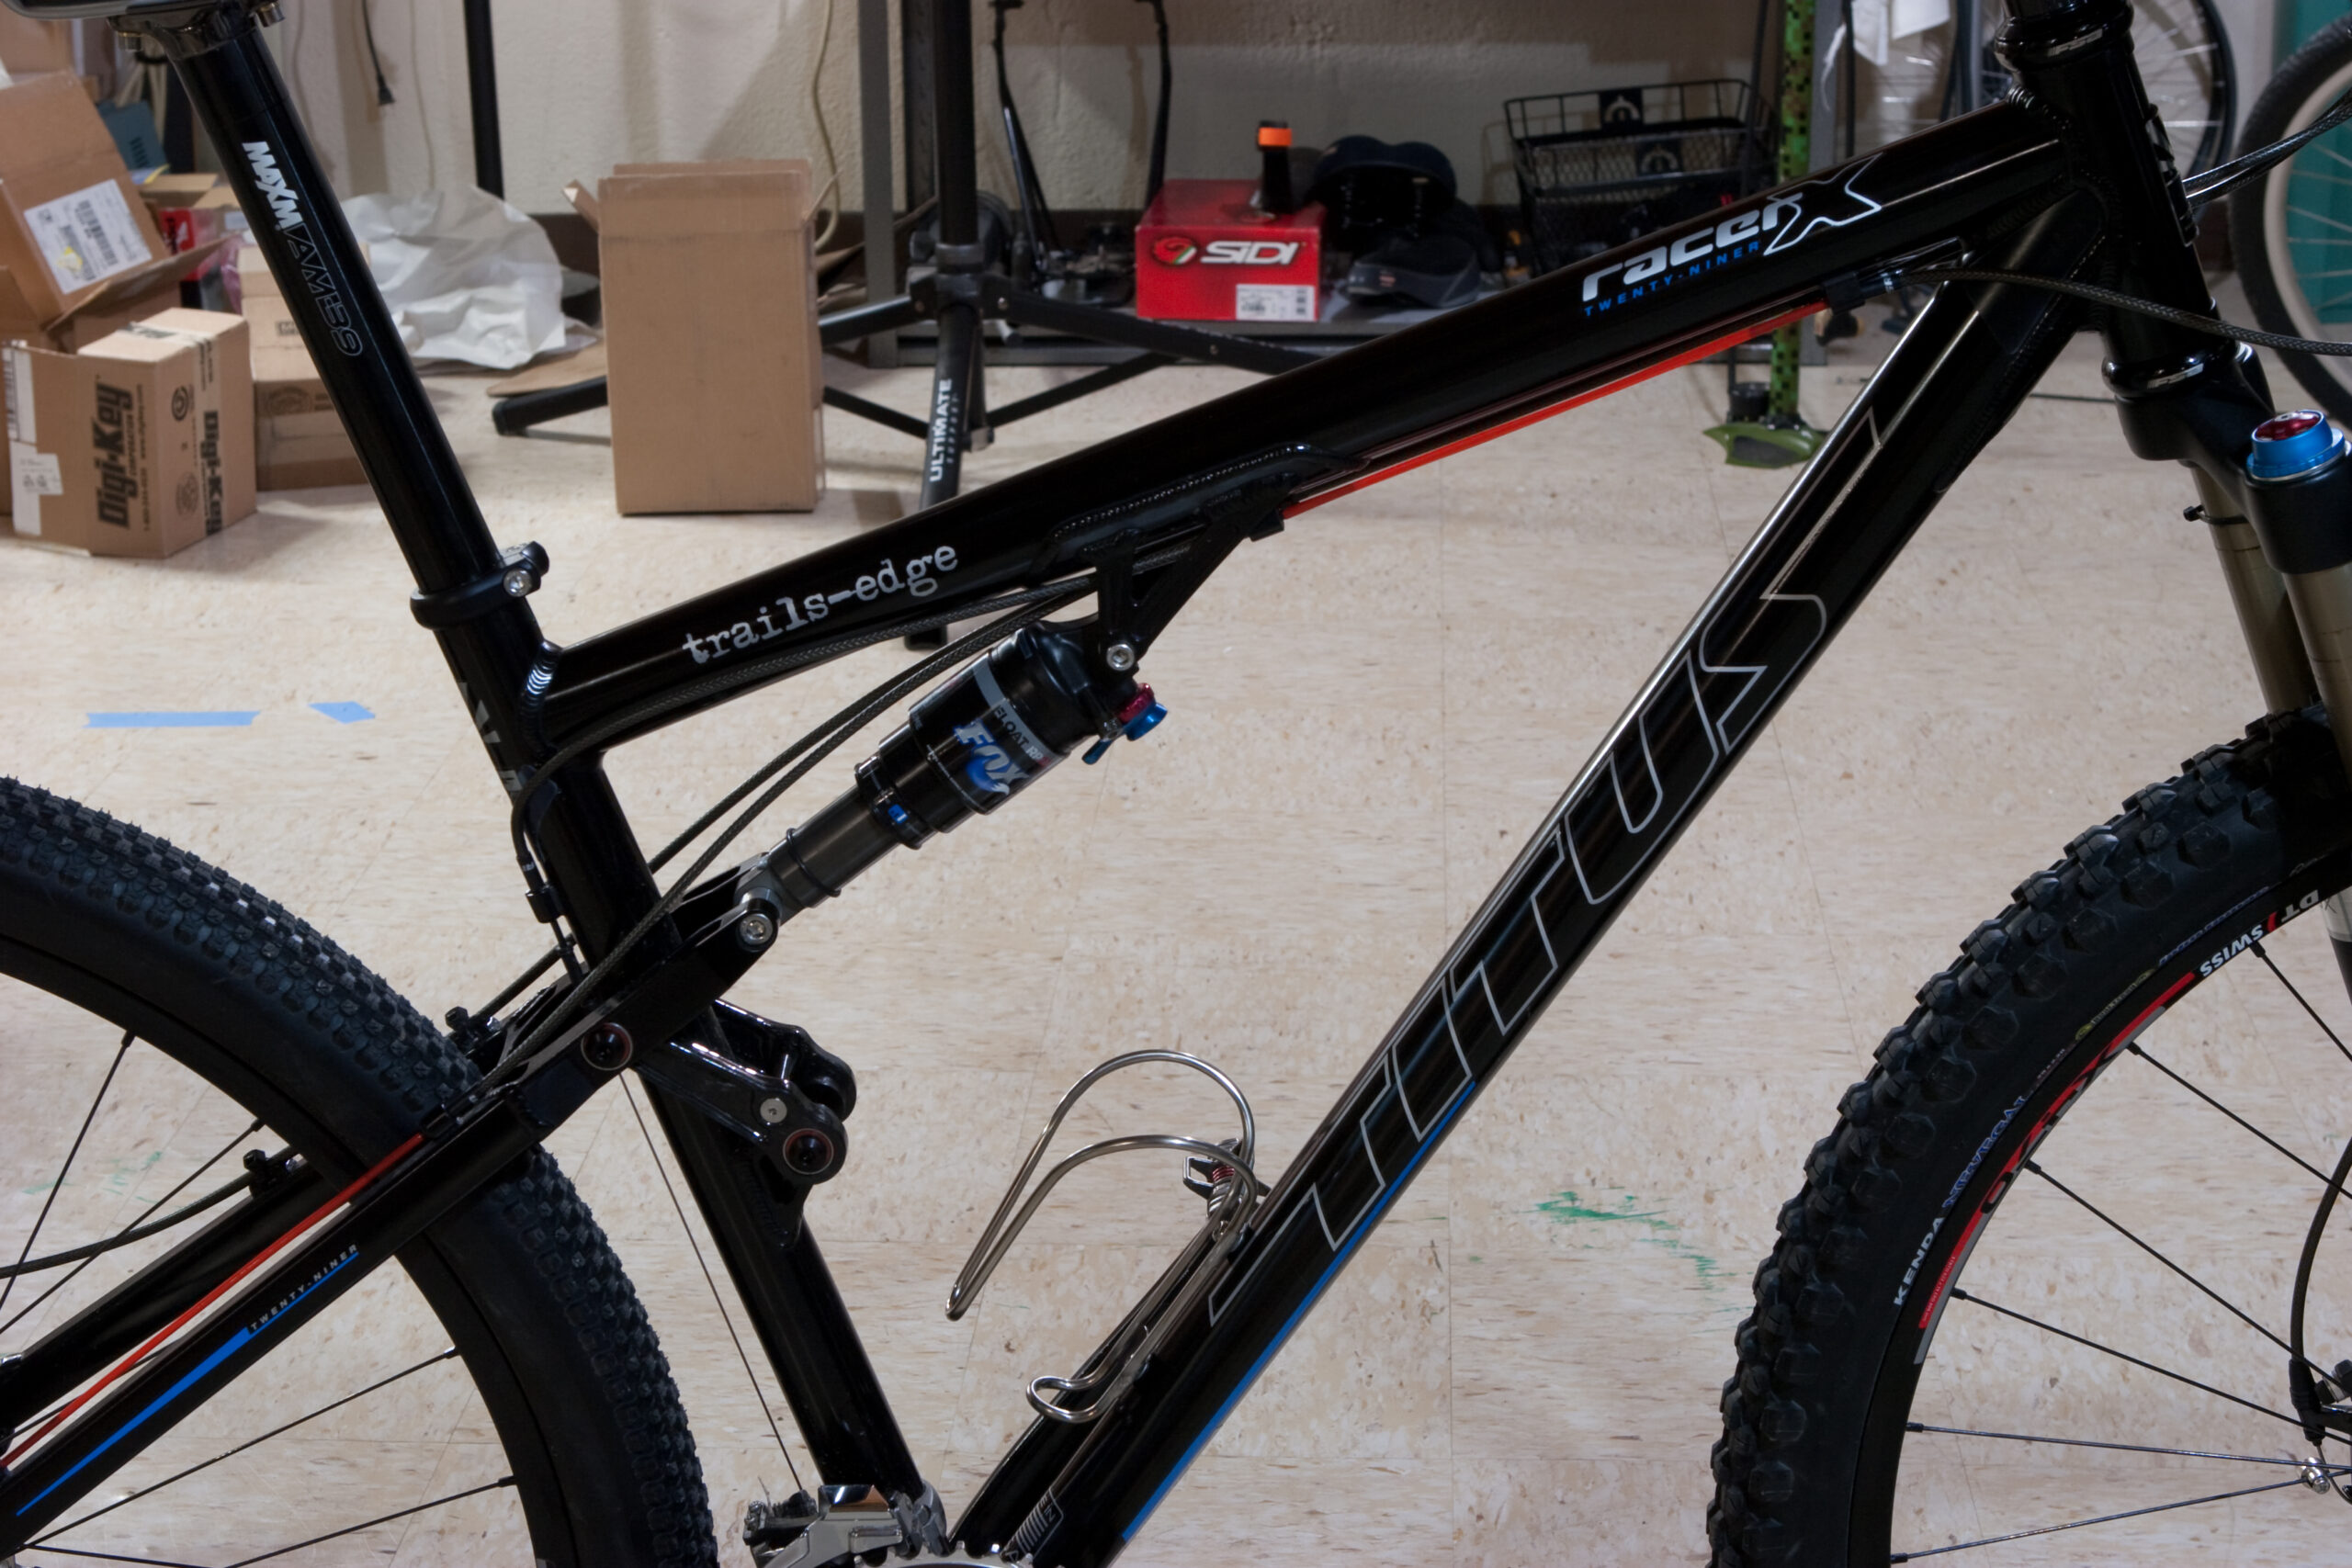
Press "Enter" to skip to content

nuxx.net Posts

Packing with Foam Peanuts

When packing items with foam peanuts it’s important to ensure that they are compressed and will hold the items they surround firmly in place. One of the best ways to do this is to slightly overfill the box when adding the packing material, compressing it while taping the box shut. It’s easy to tell if this method is done right, as the sealed box will feel solid without internal movement when shaken but there also won’t be any bulging of the packaging.

Leave a Comment

Early Winter Moblog Photos

Here, have a bunch of winter-time moblog photos including food from Slows Bar-B-Q in Detroit, ice skating at Campus Martius, and random bits of snow:

· Danielle taking a nap.
· Random poor quality photo taken at home.
· My order of pulled pork and cornbread at Slows Bar-B-Q.
· Danielle’s plate of catfish and beans at Slows Bar-B-Q.
· Kristi, Erik, and Nick at Slows Bar-B-Q.
· Outside of Slows Bar-B-Q in Detroit.
· Danielle skating in Campus Martius.
· Zamboni smoothing the ice at Campus Martius after ice skating with Kristi and Erik.
· Purchasing a stack of RAM and an external hard drive as christmas presents at Micro Center.
· Grilled cheese and cajun fries from Five Guys in Auburn Hills.
· Looking inside of a sharps container at Danielle’s work.
· Slow, slick drive to work along M-59 through construction.
· Looking out the window at work on a very empty holiday week Monday.

Leave a Comment

Incorrect Hours

Today I saw the above post-Christmas sale advertisement on Macomb Bike and Fitness’ website. Even better, unlike many other local shops they are listed as being open on Sundays. Needing a different saddle and stem for my new bike I figured that I would head there and try to pick up some cheap parts, hopefully pulls from bikes or demos. This would both support a local shop and get me the parts quickly. Unfortunately, when I got there a printed sign on the door indicated that they are closed on Sundays.

While I understand that many bike shops are closed on Sundays, it’s really frustrating to waste a bunch of time because a shop can’t get its posted information straight. I think at this point I’ll just order the stem and a likely-fit saddle online from somewhere.

UPDATE: I should note that I contacted Macomb Bike and Fitness after this and they apologized profusely and promptly changed the listed hours. They’d also offered to make it up to me with something reasonable, but in the mean time I was able to trade someone for saddle (which seems to fit) in trade, and acquire appropriate stem from another local shop.

Leave a Comment

Measuring My Sit Bone Spacing


Using a spare aluminum plate, some leftover cheap cardboard, a chair, and a ruler I was able to measure my sit bone spacing. This was done by sitting on the assembly with my legs bike pedal spacing apart, then grabbing the metal plate and pulling it against myself to ensure good dent formation in the cardboard. I then looked and felt for the dents in the cardboard, marked the centers with dots, and measured. I then rotated the cardboard and repeated the process to get a second measurement. Both measurements were ~122mm, so I’m happy with the result.

Some research into how sit bone measurement should translate to saddle size uncovered the Specailized Body Geometry recommendations for saddle widths, which are supposedly as follows:

· 130mm saddle for sitbone center to center width of 100mm or less.
· 143mm saddle for sitbone center to center width of 100mm to 130mm.
· 155mm saddle for sitbone center to center width of 130mm or more.

The WTB Rocket V saddle which came with my new bike (post forthcoming once it is complete) felt a bit narrow in the few test rides I’ve taken, and at ~130mm measured width these measurements confirm that it likely is the wrong size for me. The Specialized OEM saddle that came on my old bike is ~140mm and matches the aforementioned recommendations. As it has been comfortable for two years now, I think I’ll be looking at a new saddle somewhat along these lines.

Now to figure out which one to try…

† Former Power Mac G5 and Mac Pro stand.
Twelve South BackPack box.

Leave a Comment

UHMW Polyethylene Tape for Cable Rub and Chainstay Protection


I’ve had little luck finding products to protect bicycle frames against chain slap (on the chainstay) and cable rub on the frame itself. As illustrated here on the Bianchi D.I.S.S. cable rub can be quite ugly, and chain slap can lead to paint chips on the chainstay. After a bit of research I found McMaster-Carr part number 76445A764, a 5 yard long, 2″ wide roll of 0.0115″ thick Ultra High Molecular weight polyethylene (UHMW / Wikipedia article) tape with a self-adhesive backing. Selling for $17.85, this translucent material is commonly used to make slick abrasion-resistant surfaces, so I figured it would work well protecting bicycle surfaces from rub wear.

The roll of tape arrived today, so I devised some abrasion and impact tests which would replicate wear conditions found on bicycles along with testing removability of the tape and its acrylic adhesive.

These five tests, two impact and three abrasion, are as follows. All surfaces cleaned with 99% isopropyl alcohol prior to UHMW tape adhesion:

Impact Test #1

Scenario: Tape applied to curved edge of clear powder coated steel and hit with metal objects such as file handles, tweezer handles, and a chain whip.
Result: Tape dented, no damage to surface below. Tape shown to be deformed by impacts but did not pull away from surface.
Photos: Dented Tape · Undamaged Surface

Abrasion Test #1

Scenario: Tape applied to curved edge of clear powder coated steel and abraded with small and medium fine metal files.
Result: Tape abraded, no damage to surface below. Sharper cutting with the corner of a file may have pierced the tape and damaged the finish below.
Photos: Abraded Tape · Undamaged Surface

Impact Test #2

Scenario: Painted aluminum panel with tape applied to a portion of it. To each of the protected and control surfaces the handle end of large file is dropped 20 times in a space the size of a dime and a metal rod is set in place and hammered gently with a metal bar for 10 impacts.
Result: Small metal nub on metal rod pierced the tape and damaged the metal. No other visible damage.
Photos: Bare Metal Control Surface · Taped With Impact Marks · Surface Below Tape Showing No Damage

Abrasion Test #2

Scenario: Brush made from Jagwire cable housing is placed in an electric drill. Brush is run for 45 seconds against each of the protected and control surfaces on painted aluminum panel.
Result: Severe damage to control surface, much less damage to taped area, occurring only after brush wore through tape.
Photos: Jagwire Brush · Control and Taped Surfaces After Brushing · Control and Taped Surfaces with Tape Removed

Abrasion Test #3

Scenario: Painted aluminum panel is bent, tape is used to protect half of the bend. Wire wheel is run for 45 seconds over both the protected and unprotected areas, simultaneously.
Result: Severe damage to unprotected area resulting in removal of paint and erosion of aluminum. Taped area is undamaged.
Photos: Wire Wheel and Test Surface · Control and Taped Surfaces After Brushing · Control and Taped Surfaces with Tape Removed

This tape was also relatively easy to remove from both the powder coated steel and painted aluminum surfaces. It sticks solidly in place, but picking at one corner of the UHMW tape with a fingernail will lift it and allow it to be pulled off the surface. Some adhesive residue was occasionally left behind, but it was not difficult to clean up with an isopropyl alcohol-soaked paper towel.

With these tests complete I feel that this UHMW tape will work wonderfully as a product to protect against bicycle frame damage due to cable rub and chain slap. Lacking logos and being translucent white it should be fit nicely on most frames. The tape is easily cut with scissors or a sharp razor blade and conforms nicely to simple curved surfaces. More complex surfaces such as joints should be possible to cover with some smart trimming of the tape.

While protecting the frame it will not deaden the sound of chain slap much, so it may be desirable to use some manner of rubber chainstay protector if one wishes to cut down on both noise and wear. As done previously I’ll likely continue making chainstay protectors from old tubes, or perhaps with bits of old tire as Trail’s Edge Cyclery does.

If you would like to see all of the photos from this series, please look here in the UHMW Tape album.

Leave a Comment

Snowy Stony Creek Ride

Today a group of us set out for a ride at Stony Creek through the snow, along the usual trails. As pictured above the ride entailed Nick and Marty Shue, Jon Rose, Carlos McIntyre, Bob Costello, Kristi Heuvers, and Erik Silvassy, and I was behind the camera. We rode in from the trail head, did one regular route of the single track (Pines → Snake → Roller Coaster), then a generally-rare in-daylight backwards lap of The Pines.

While there was snow on the ground, none of us (save for Bob) had studded tires on our bikes, and none of us were wanting for them during the ride. Despite a couple icy bits on the two track (including one that I fell on while trying to pass Marty so I could get out front of the pack and take a picture), almost all of the single track was simply snow covered. A few of the climbs resulted in tire spin and loss of traction (leading to walking), but nothing was icy enough to cause problems.

With the bright sun and temperatures hovering around freezing this was an ideal day for a winter ride. Things were warm enough that I rode comfortably in just a long-sleeved shirt and head cover, having stripped off my jacket and balaclava early in the ride. All said, it was a great day for a ride and a nice way to spend it with friends.

If you’re interested, here is one more image from today, showing the bottom bracket area of my bike covered in snow.

Leave a Comment

Glitter, Herpes of the Craft World

Today I received a Christmas card with glitter on it. While I appreciate the card, the glitter is a bit difficult to like. It’s already on my pants, stuck to my hands, on my desk, and in the carpet. I’m sure I’ll find bits of it for years to come. After all, glitter is the herpes of the craft world. (I believe this phrase must be attributed to Demetri Martin.)

Leave a Comment

Failed CrankBrothers Eggbeater MXR Pedals

A number of months ago I purchased a pair of CrankBrothers Eggbeater MXR pedals. A few weeks ago I let a friend of mine borrow them for his new bike, to use until a set that he ordered arrived. Unfortunately within a few rides they had failed, with the plastic end cap popping out, the body wobbling around the shaft, and the bearings feeling very stiff. While these are the cheapest Eggbeater pedals made I had expected them to last for more than a handful of rides. After all, I’ve been using the second-lowest-end Eggbeater C pedals all year and they continue to work great.

Seeing as the pedals should still be under warranty I filled out a support ticket and submitted it, along with the image above and this one. They had space to upload two images for context, but I only had one image of the pedals. Here’s the text of the support ticket which I hope will result in upgraded replacement pedals:

I purchased some Eggbeater MXR pedals back in May as spares and put them on a bike a couple weeks ago. Within a handful of rides rides on fairly basic Michigan trails the end cap had come out of one pedal while riding and the pedal stopped moving smoothly and began wobbling. Closer inspection showed a ball bearing in the grease behind where the cap was. This is shown in the picture of the pedals below. The other picture is my girlfriend’s dog, wet from a bath.

While I understand that these are your cheapest pedals, I was hoping that they would last for more than a few rides. If you are able to help me out with these under warranty, is there a way which I could upgrade them to the SL model instead, even if for an additional charge? I’ve recently used a friend’s set and found that I prefer them over either the MXRs or the Cs which I use on my other bike.

Thanks very much!

Leave a Comment

It’s Almost Winter…

Here’s Bob putting more air in the rear tire of his bike after tonight’s cold weather made it feel particularly soft and uncomfortable to ride on.

For tonight’s ride we started out from my house with the temperature in the low 20s and headed up to River Bends for a quick ride on the trails there. This resulted in 14.31 miles over an hour and a half, making for a rather pokey 10.1 MPH average. With the air as cold as it is anything over 13 MPH or so hurt, and the trails we were on are lumpy and icy enough that one tends to poke along in a relatively low gear. Not long after returning the National Weather Service had my area listed at 18°F.

Cold weather riding is nifty, and I’m glad that I’m appropriately equipped to do so, but it sure is a lot harder than when its nice out.

Leave a Comment