Press "Enter" to skip to content

Category: beer

Beer Filtering: First Attempt

Ever since I began brewing beer I’d heard about filtering my beer to remove haze. While I know that filtering is not necessary as with sufficient skill one can produce quite clear beer without it, it held some appeal to me. After learning that a number of local breweries filter their beer to remove haze and produce sparkling, shiny, clear beers that still have quite a bit of flavor I became even more interested, so after cleaning the beer lines and getting some more stuff kegged I decided to order the parts to give it a go.

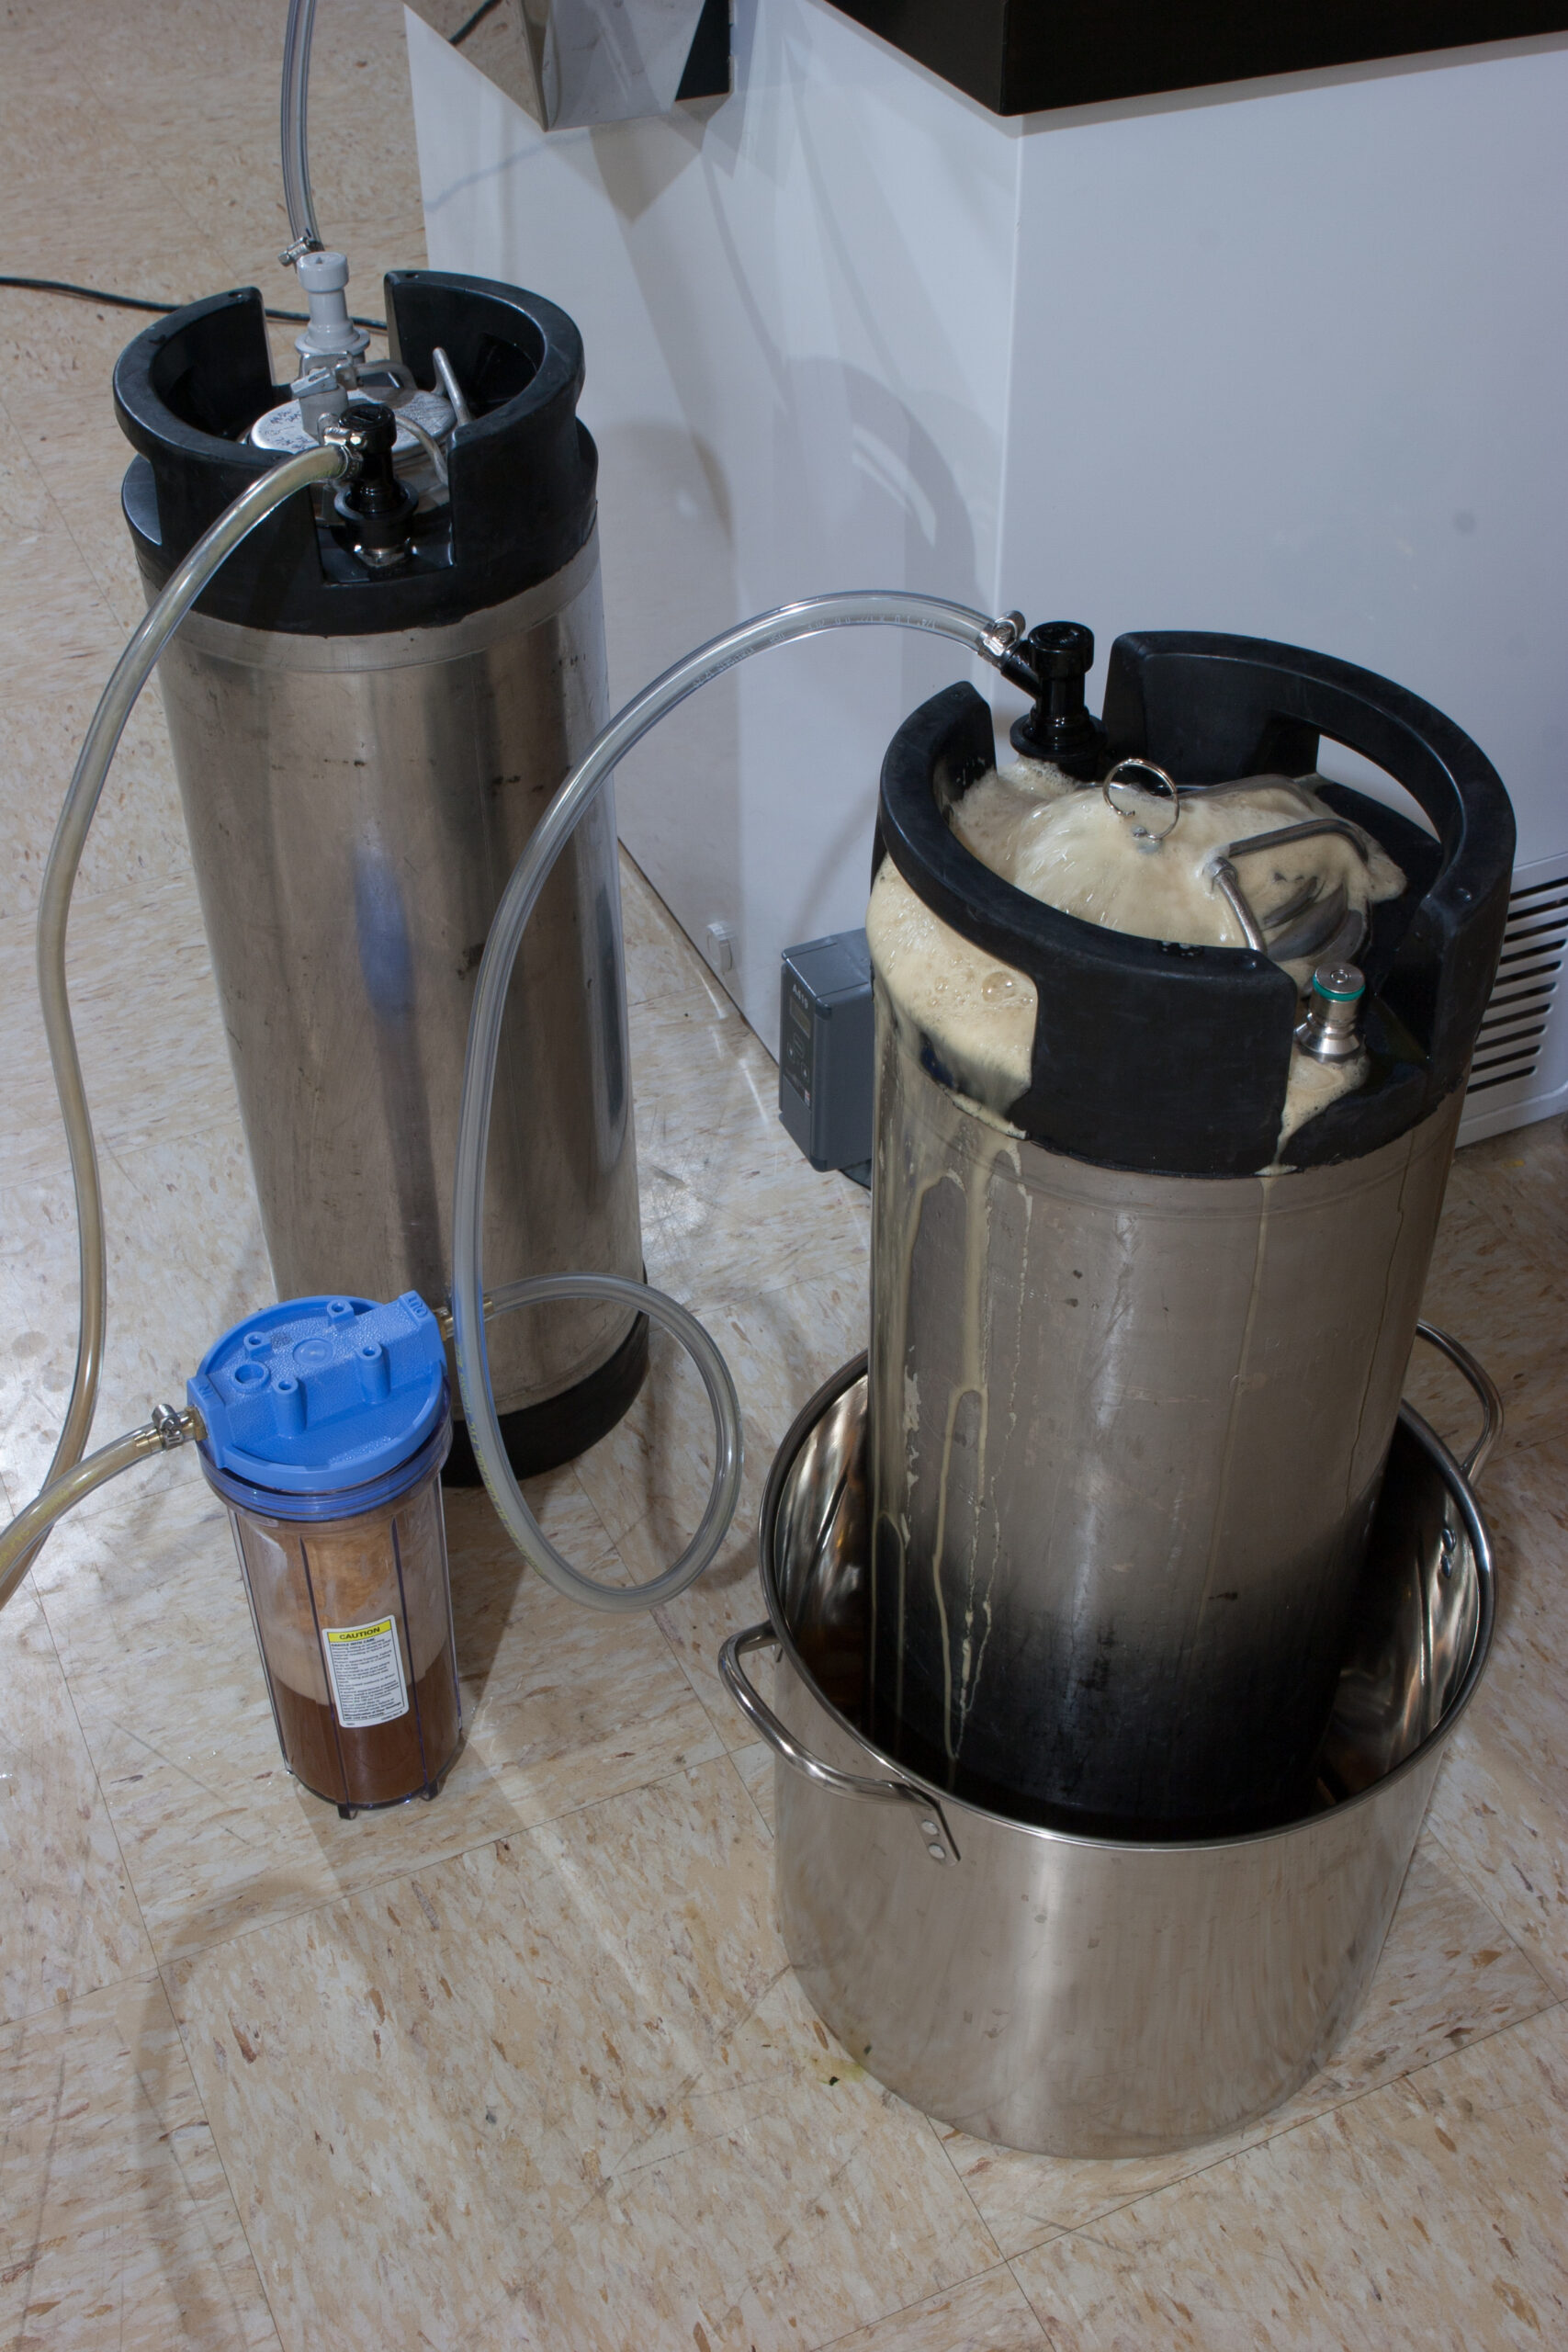
To get started I tried filtering a rye pale ale that I brewed a few months ago and kegged just after cleaning the lines. It was already partially carbonated so it foamed a bit during the process (nucleation in the filter and due to pressure drop), but there it wasn’t nearly as much of a problem as I’d expected. I used a 5 micron filter for this batch (the 1 micron filters hadn’t come in yet), and this left the beer a every so slightly hazy, but it looks way better than it had with just aging and letting settle in the keg and it still tastes great.

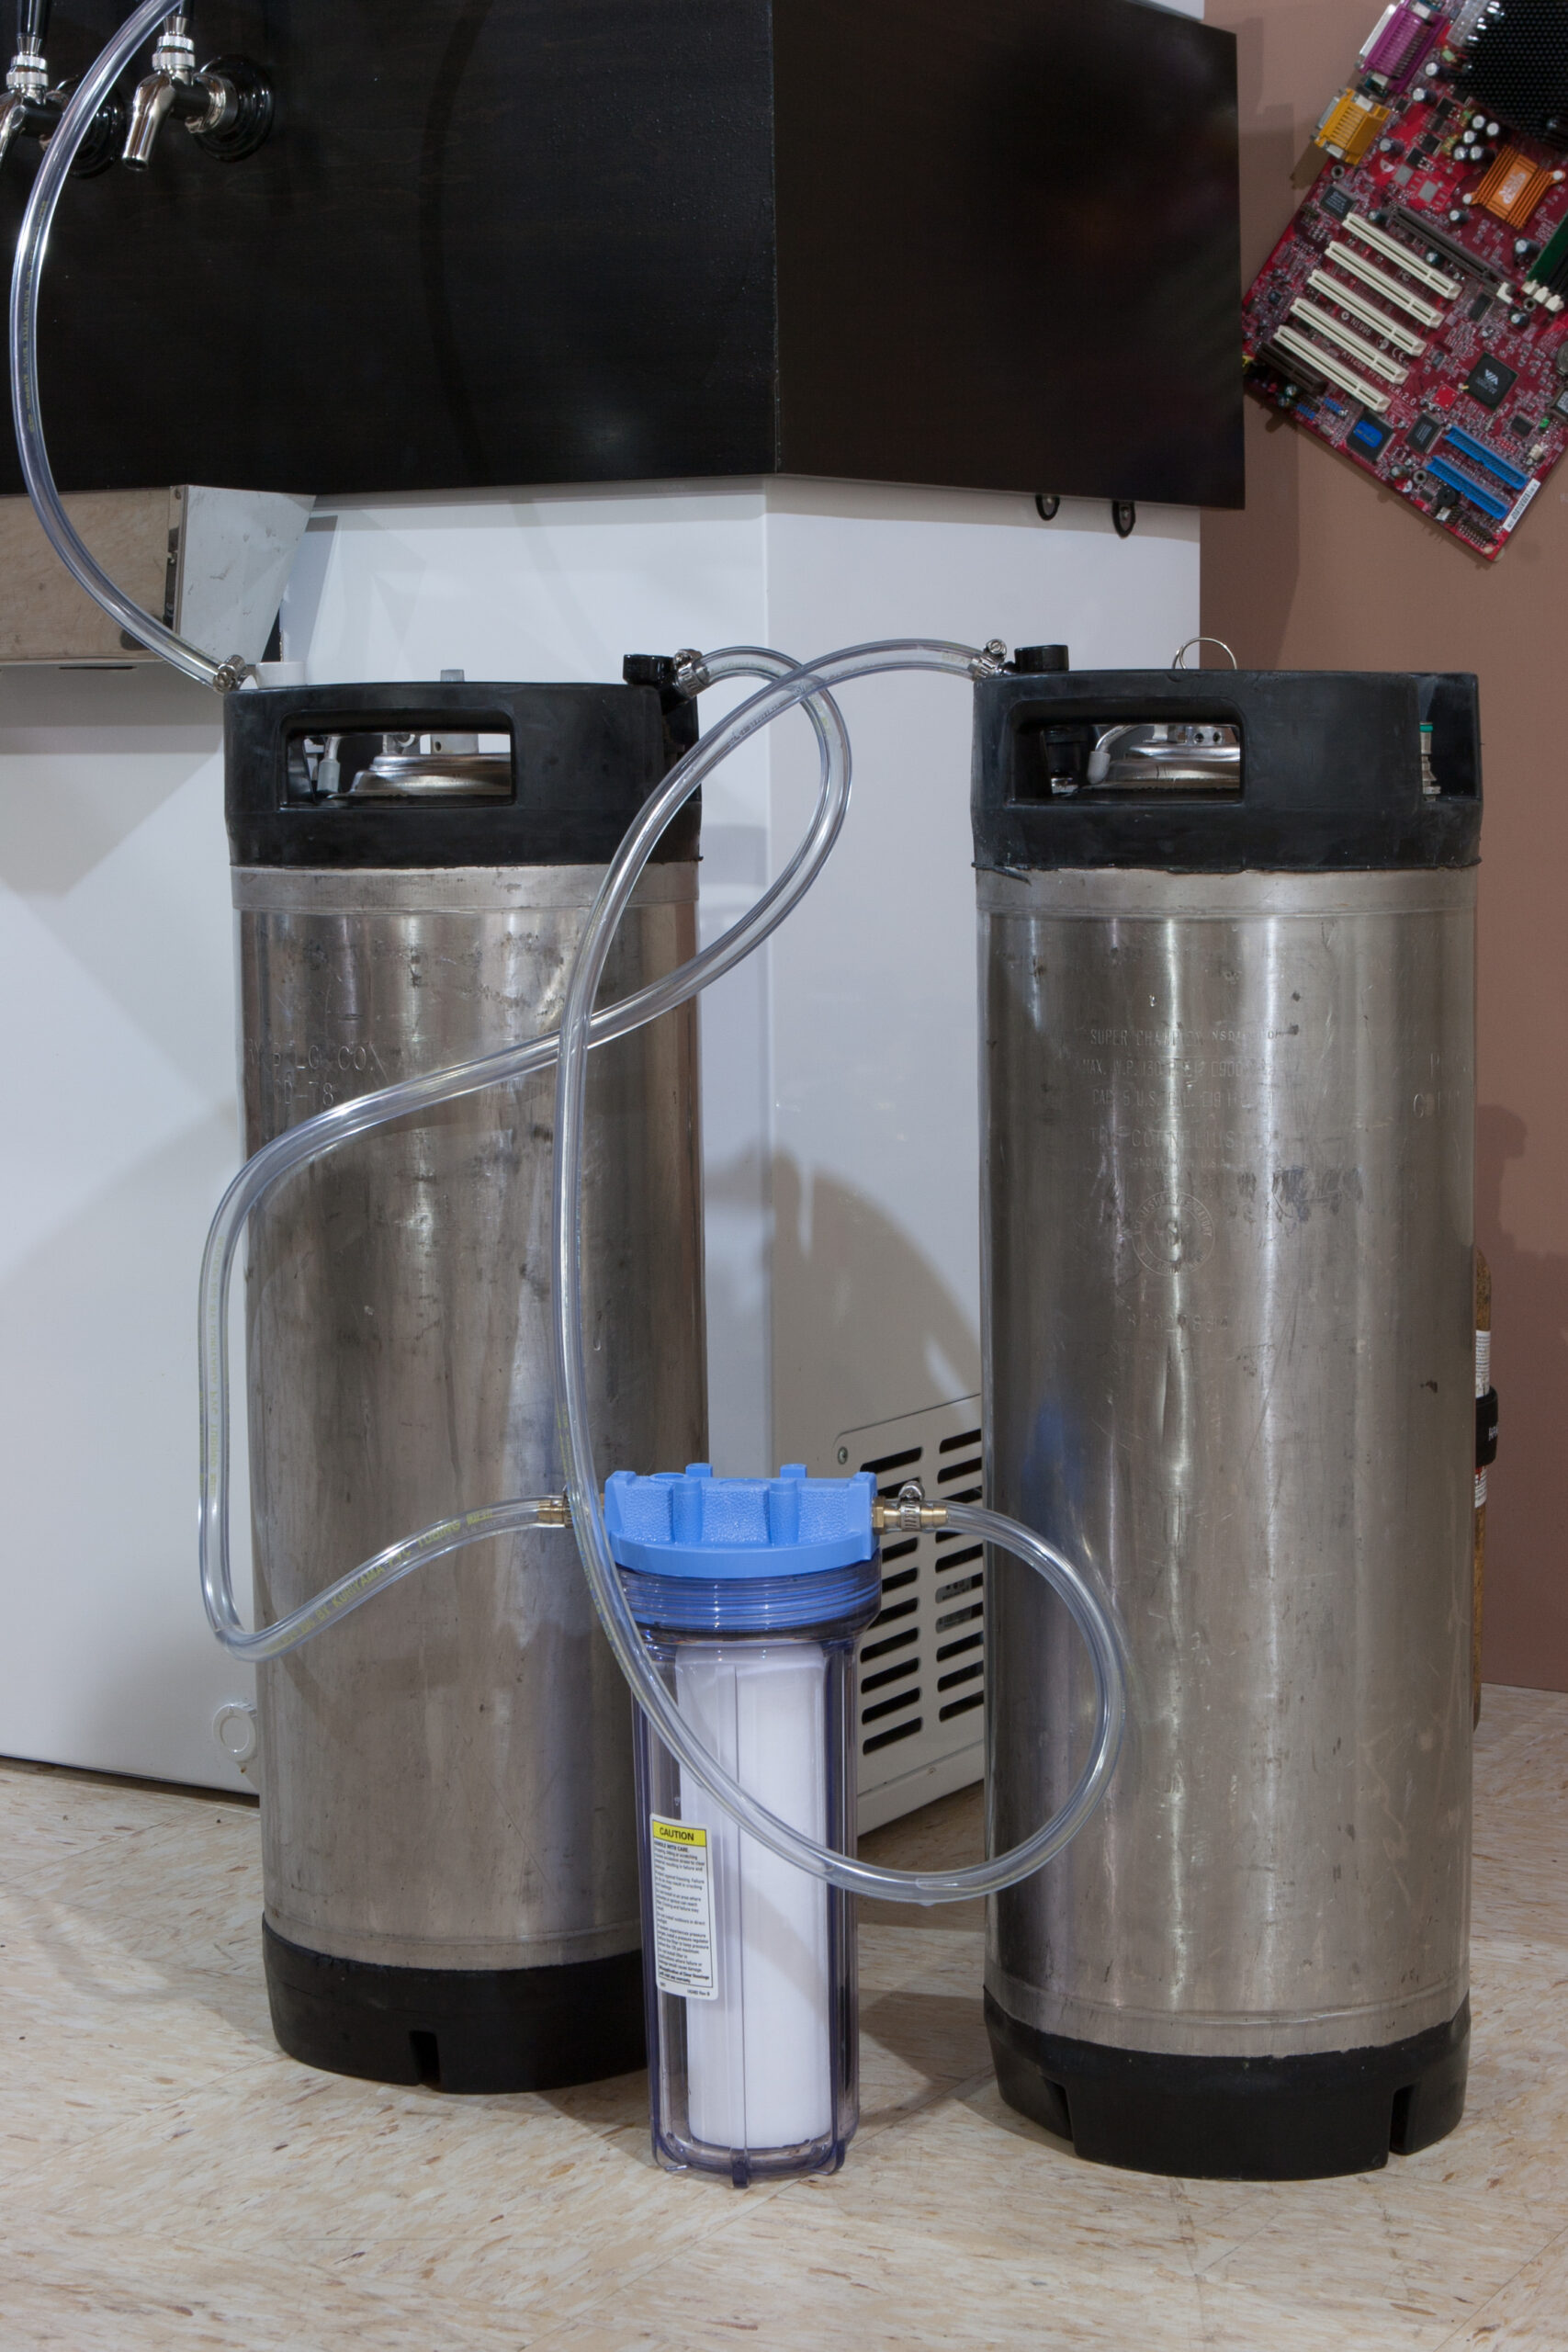
The process I put together (based on lots of info I’d read) uses a Pentek 158116 filter housing with two liquid-out ball lock keg fittings connected to each side. The housing is sanitized then fitted with a filter that has been dipped in sanitizer, the filter is fitted between two kegs (full keg on the in side, empty on the out), the empty keg’s safety valve is opened, and CO2 is applied to the full keg to push the beer through. I started out with 2-3 psi, but near the end I had to increase this to around 10 psi as the filter became clogged. Periodically throughout the process I’d open the top of the output keg to check the level and foamyness, closing it back up to keep the system relatively closed.

This worked out very well, and I only had a bit of foam blow out through the safety valve right near the end of the process. This lost foam likely resulted in a loss of only a couple ounces of beer, and the filter housing itself probably lost half a pint.

Next time I try this I’ll chill (but not carbonate) the beer in a keg, then force it through the filter to another. I expect that there’ll be no foaming then resulting in even less hassle and mess. The next time I try this will be with the two beers I’ve got brewing now (a golden ale and a red ale), perhaps with 1 micron filters if they arrive in time. My desire is to get crystal clear, sparkling beers that still have good flavor in a relatively short period of time, just by filtering it.

Here’s a few photos taken during this filtering experiment:

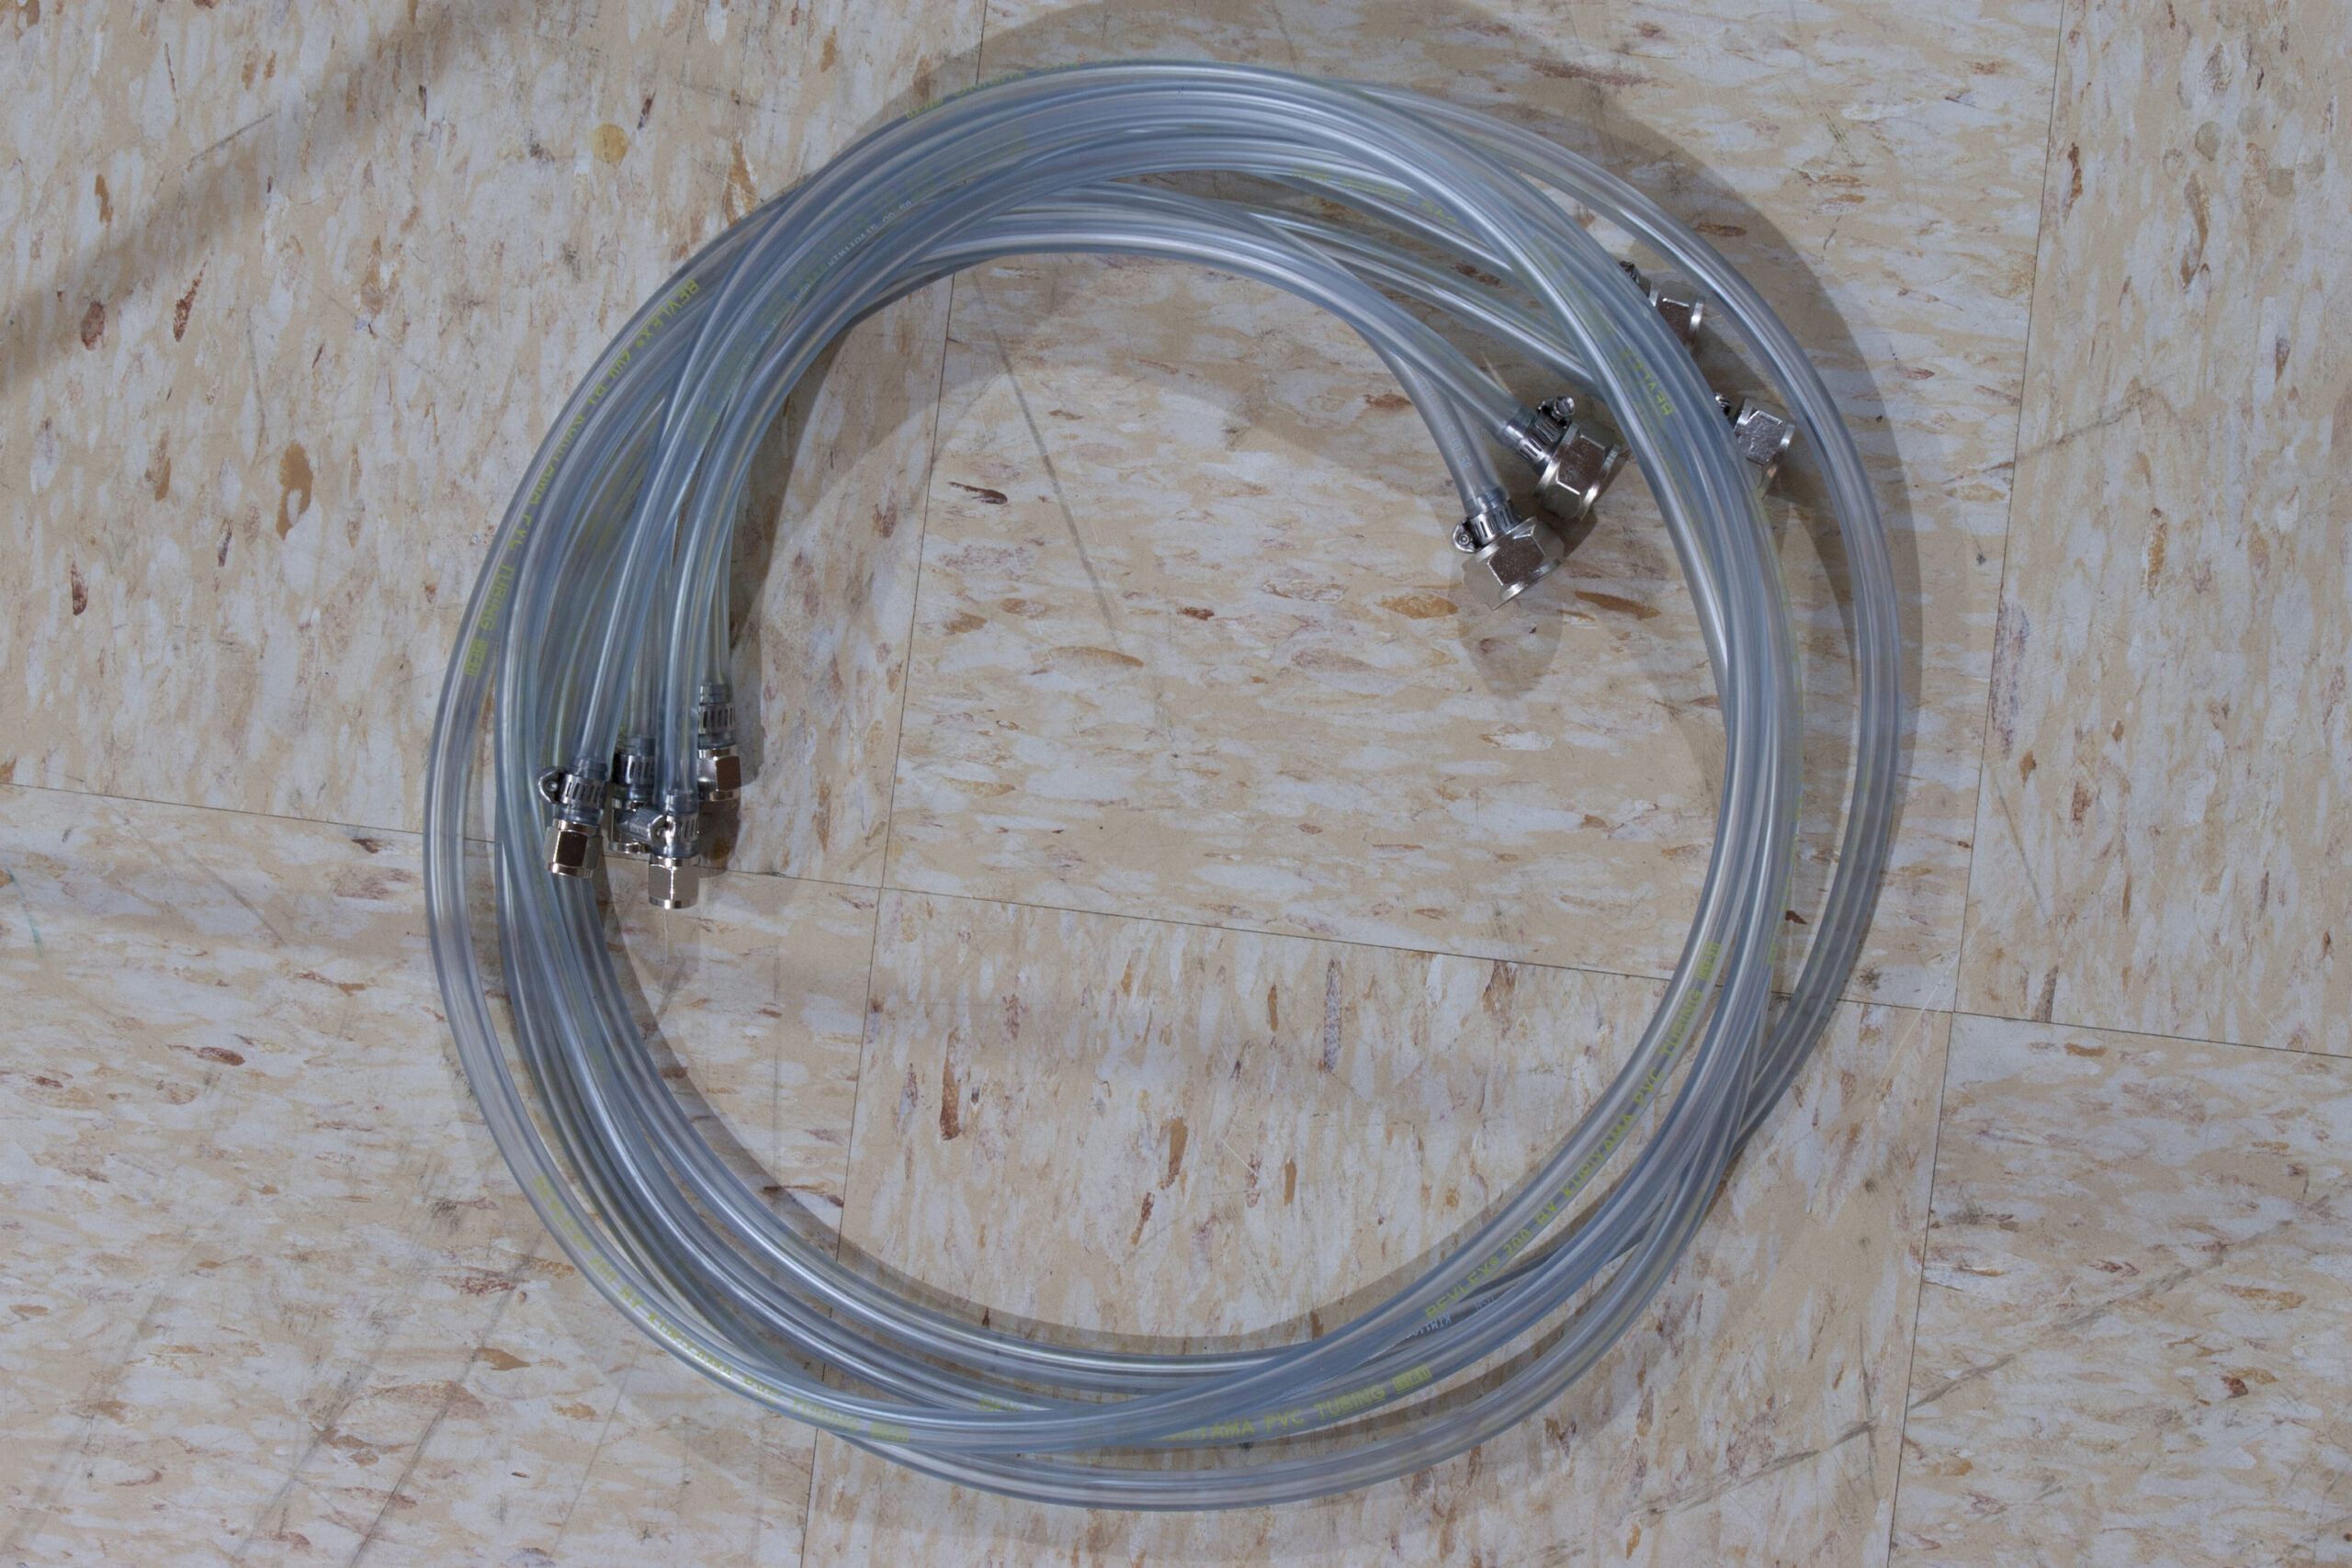
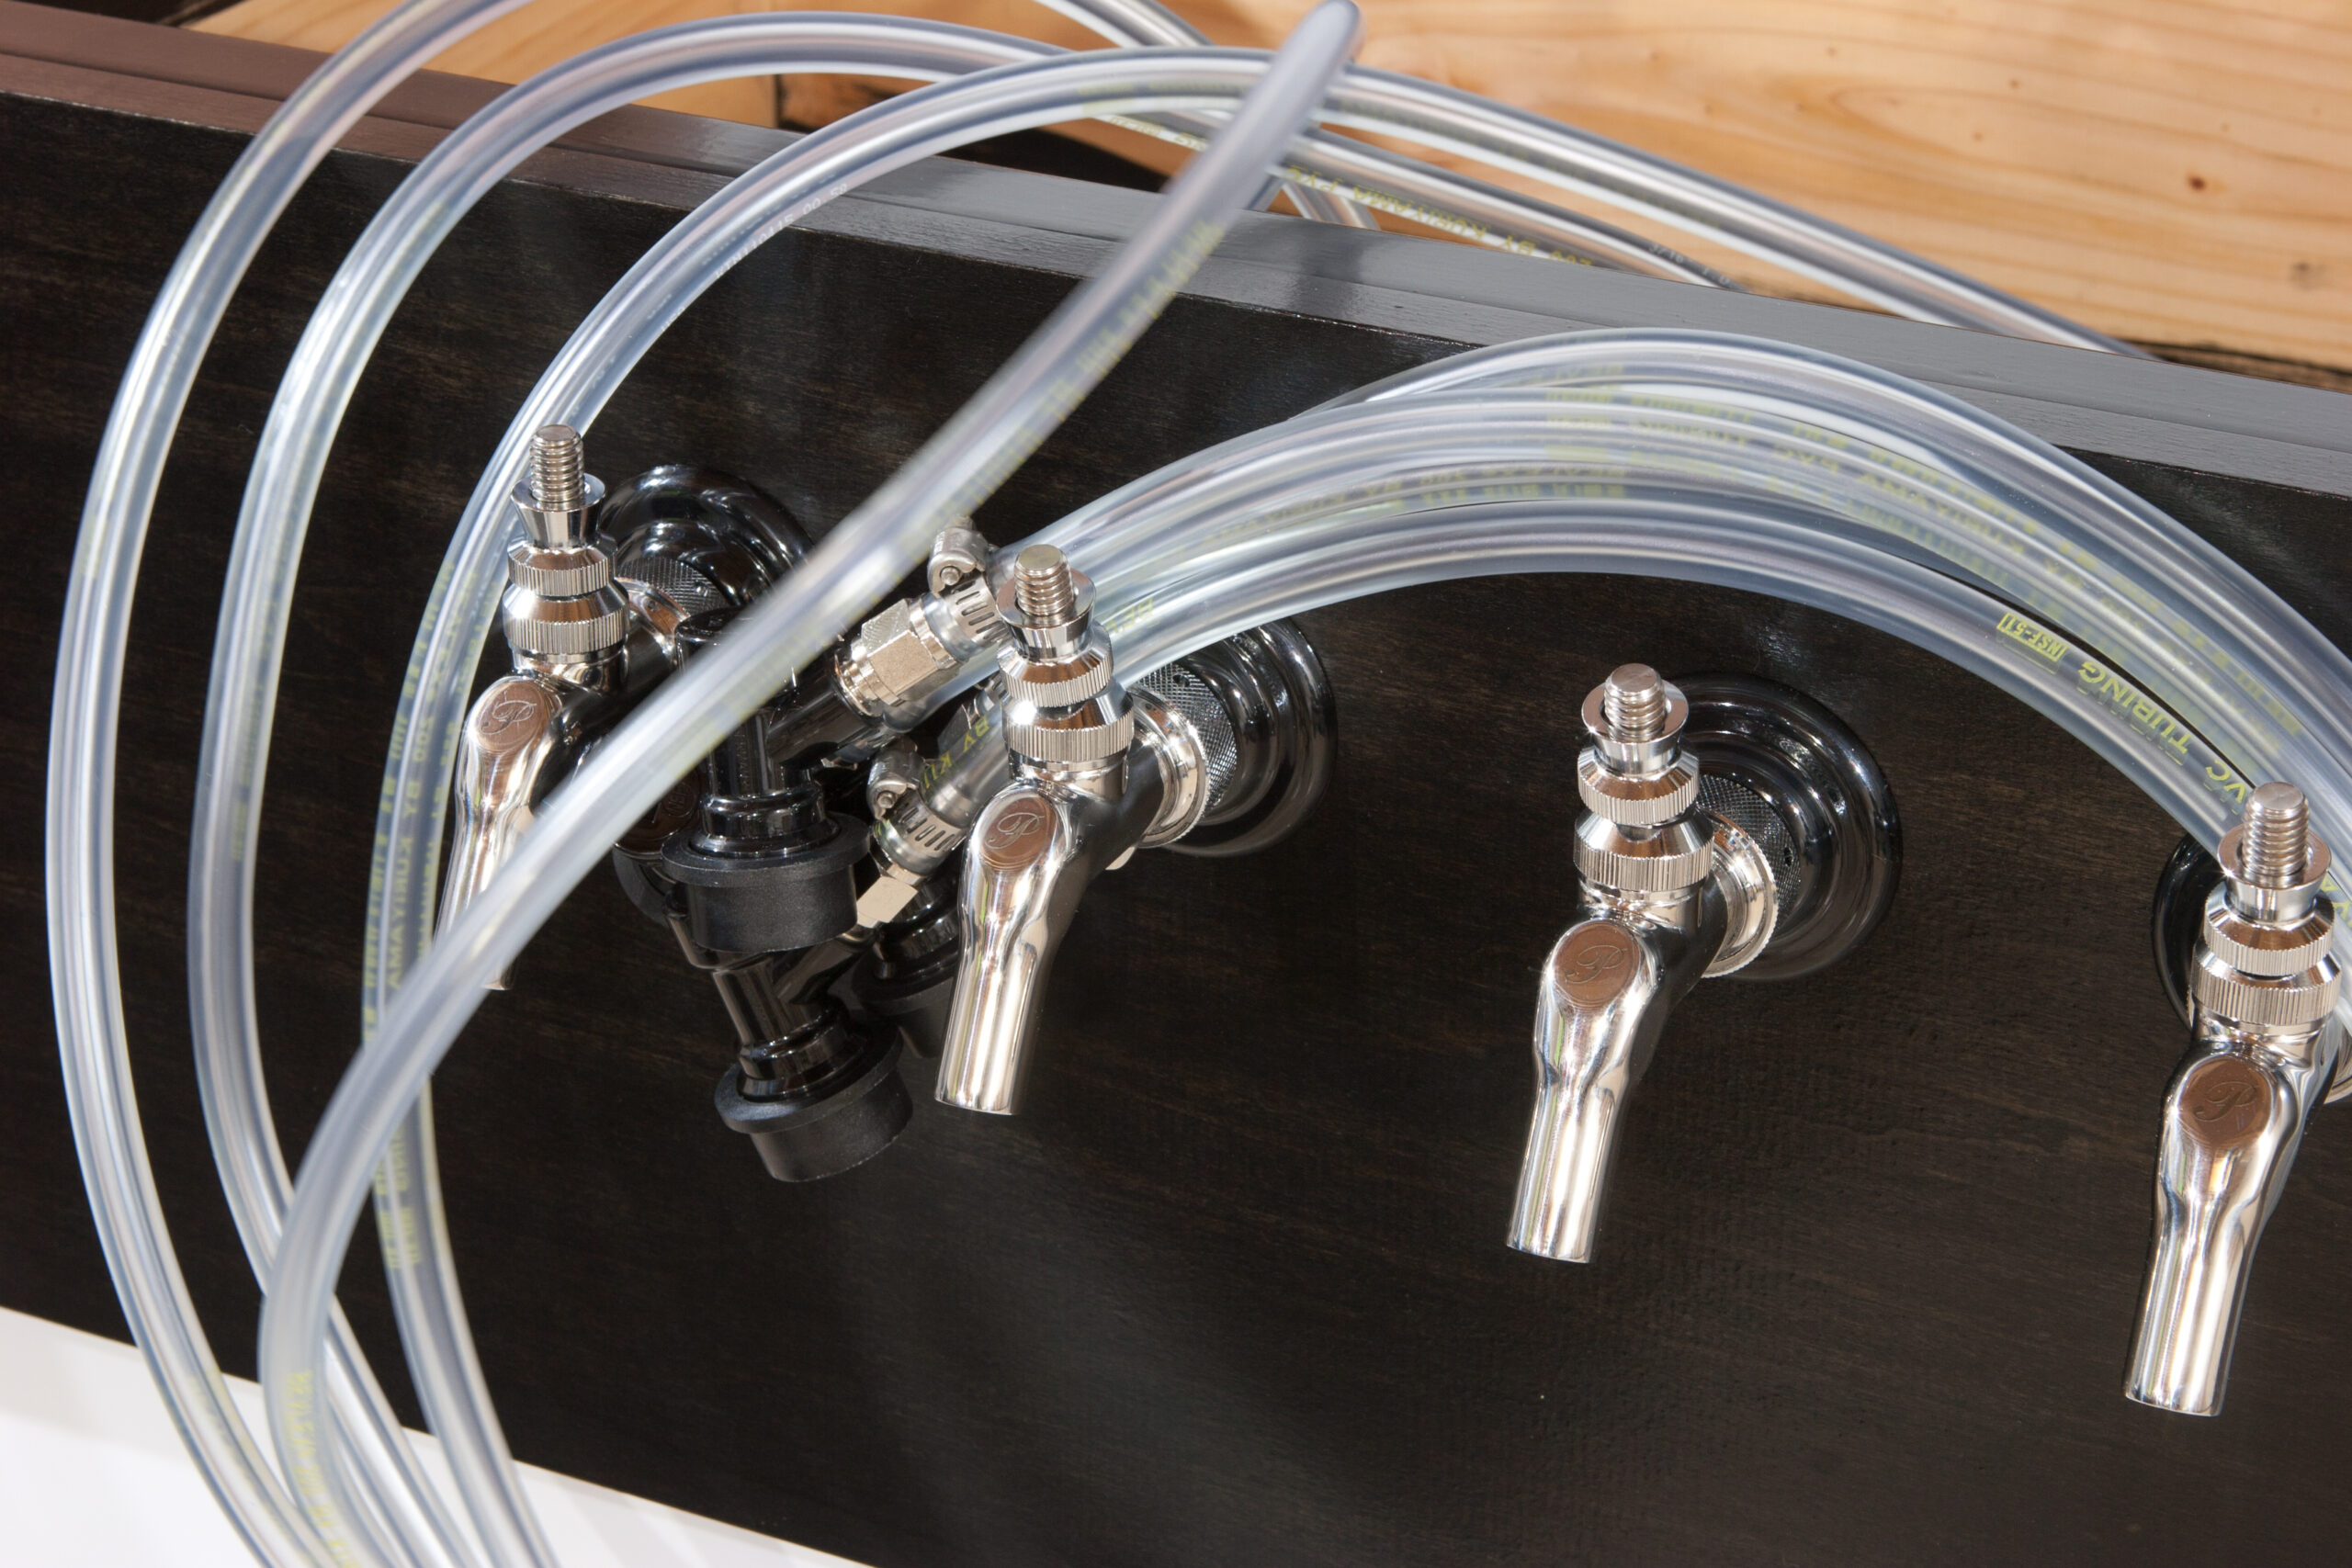
· Two kegs, Pentek 158116 filter housing, 5 micron water filter, and connections necessary to filter beer.
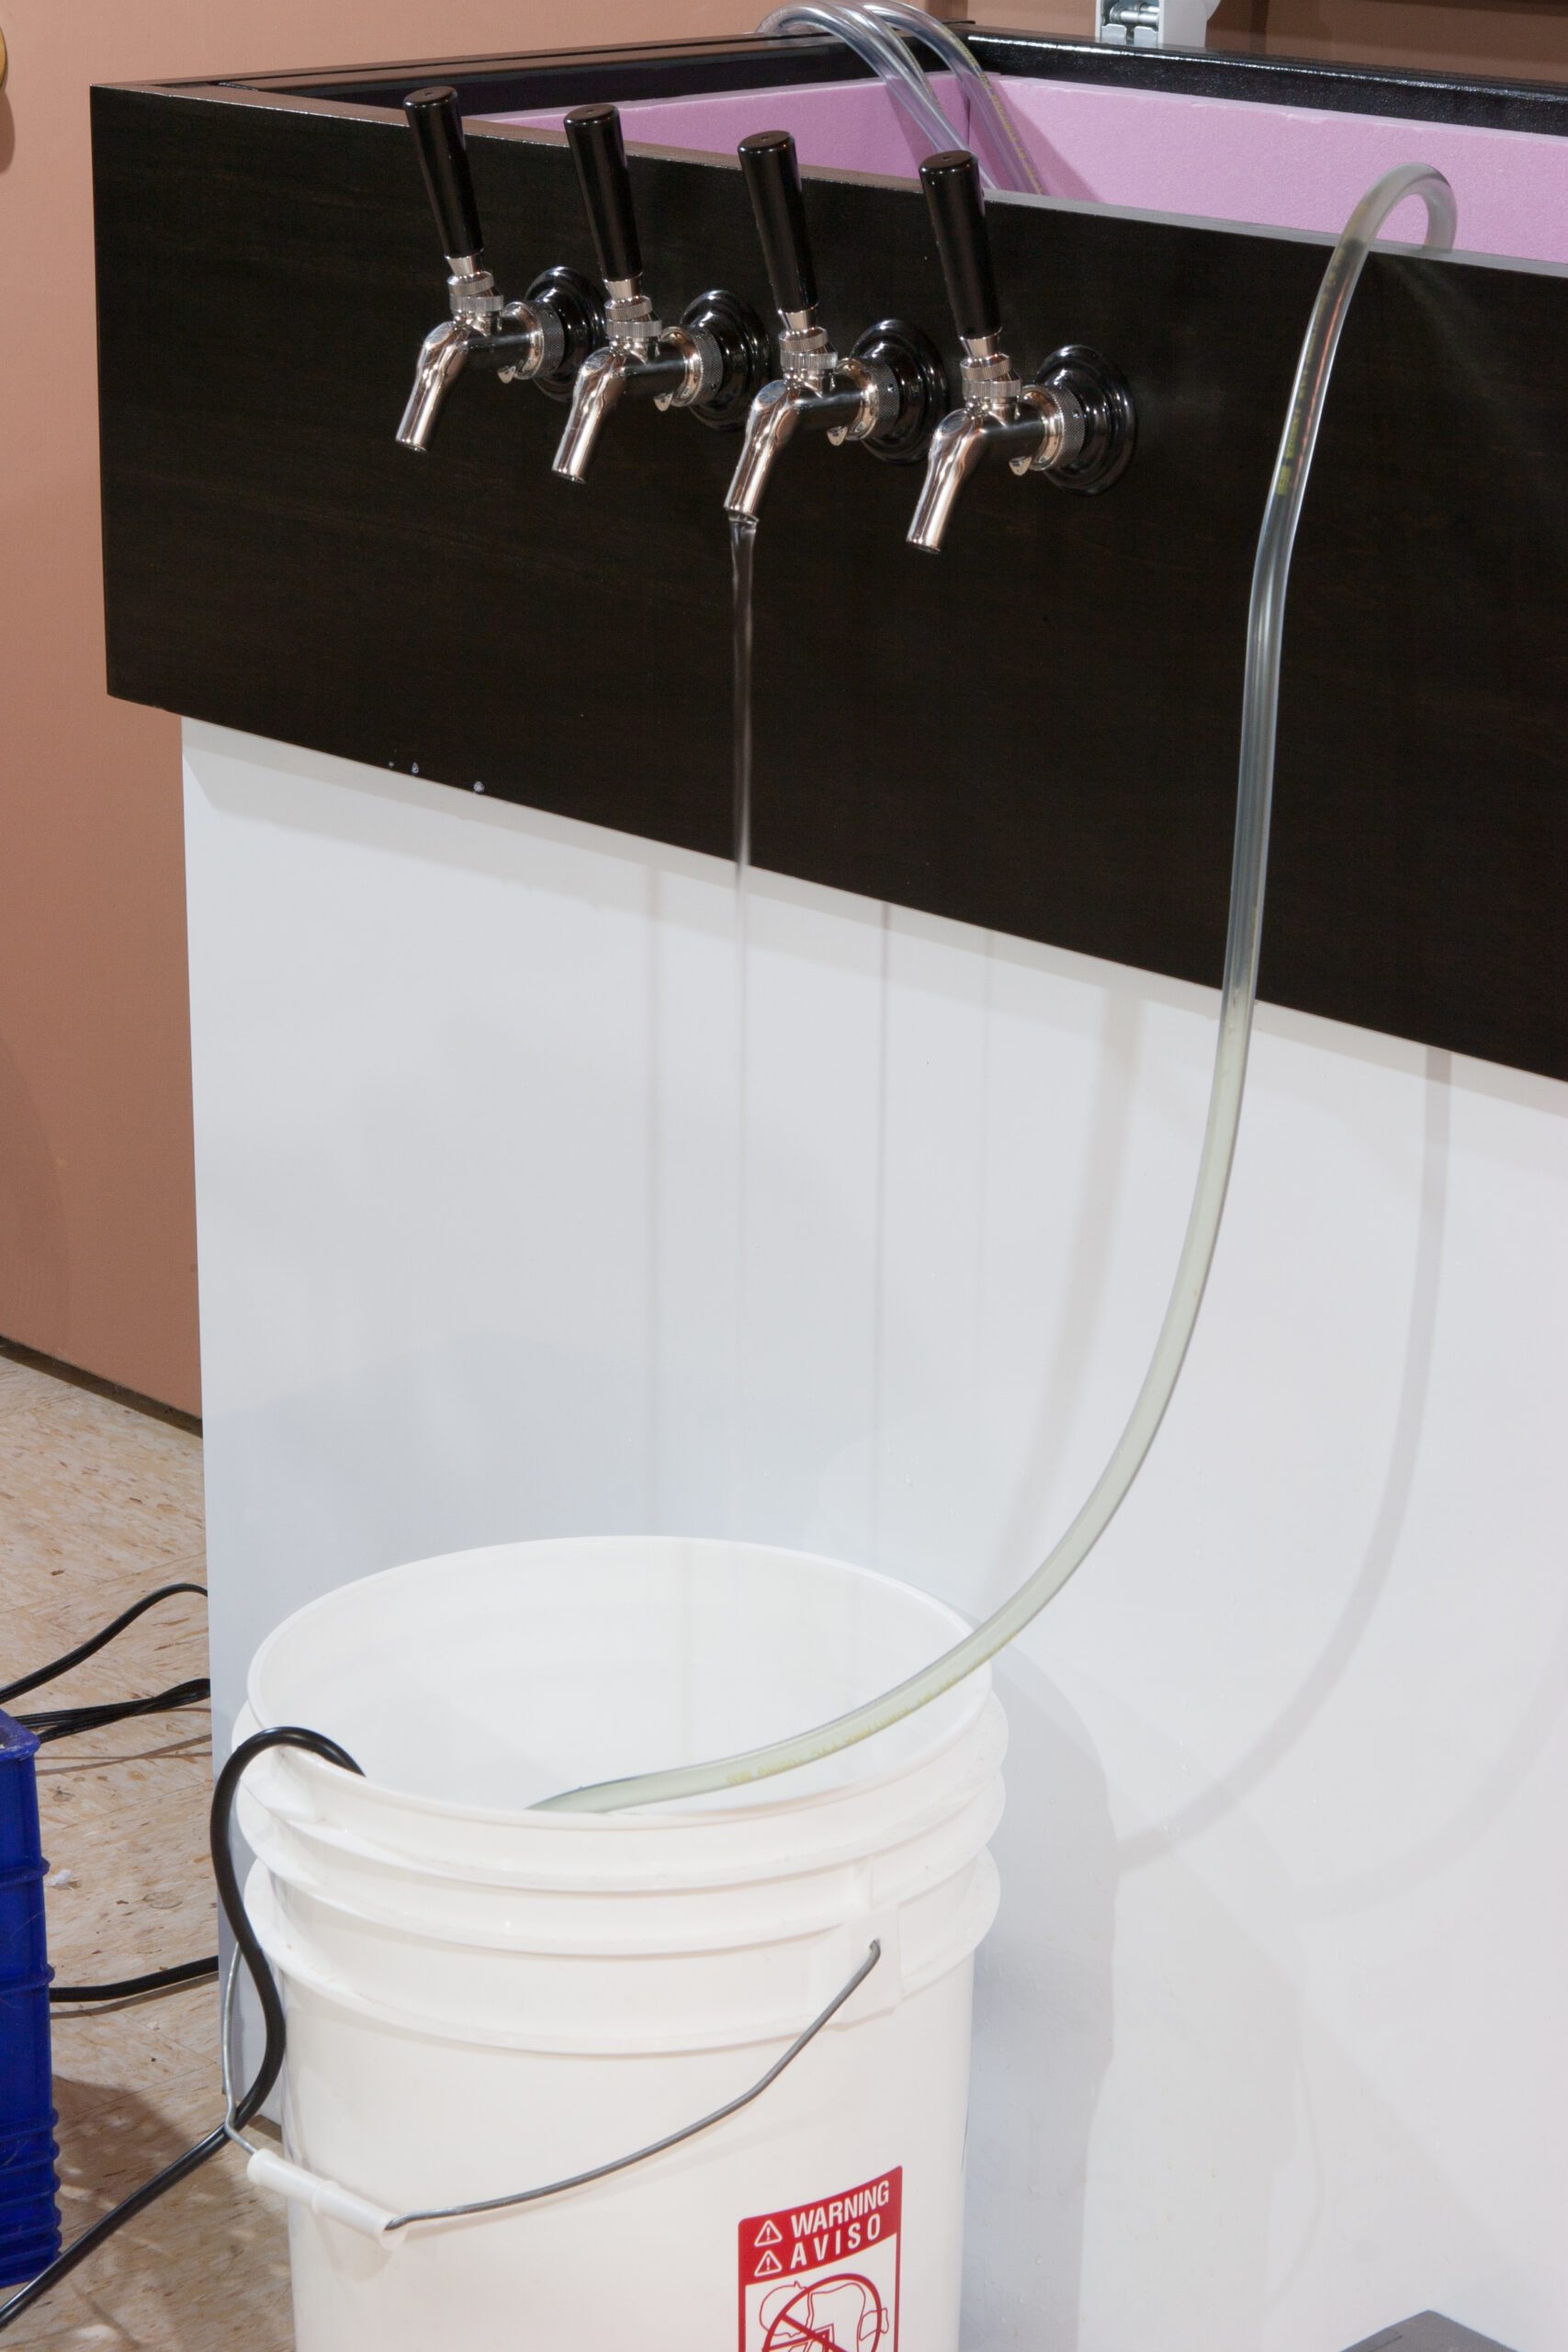
· Mostly-carbonated rye pale ale being filtered.
· Since the beer was already carbonated it foamed a little out of the pressure release, but not enough to cause problems. There was very little loss overall.
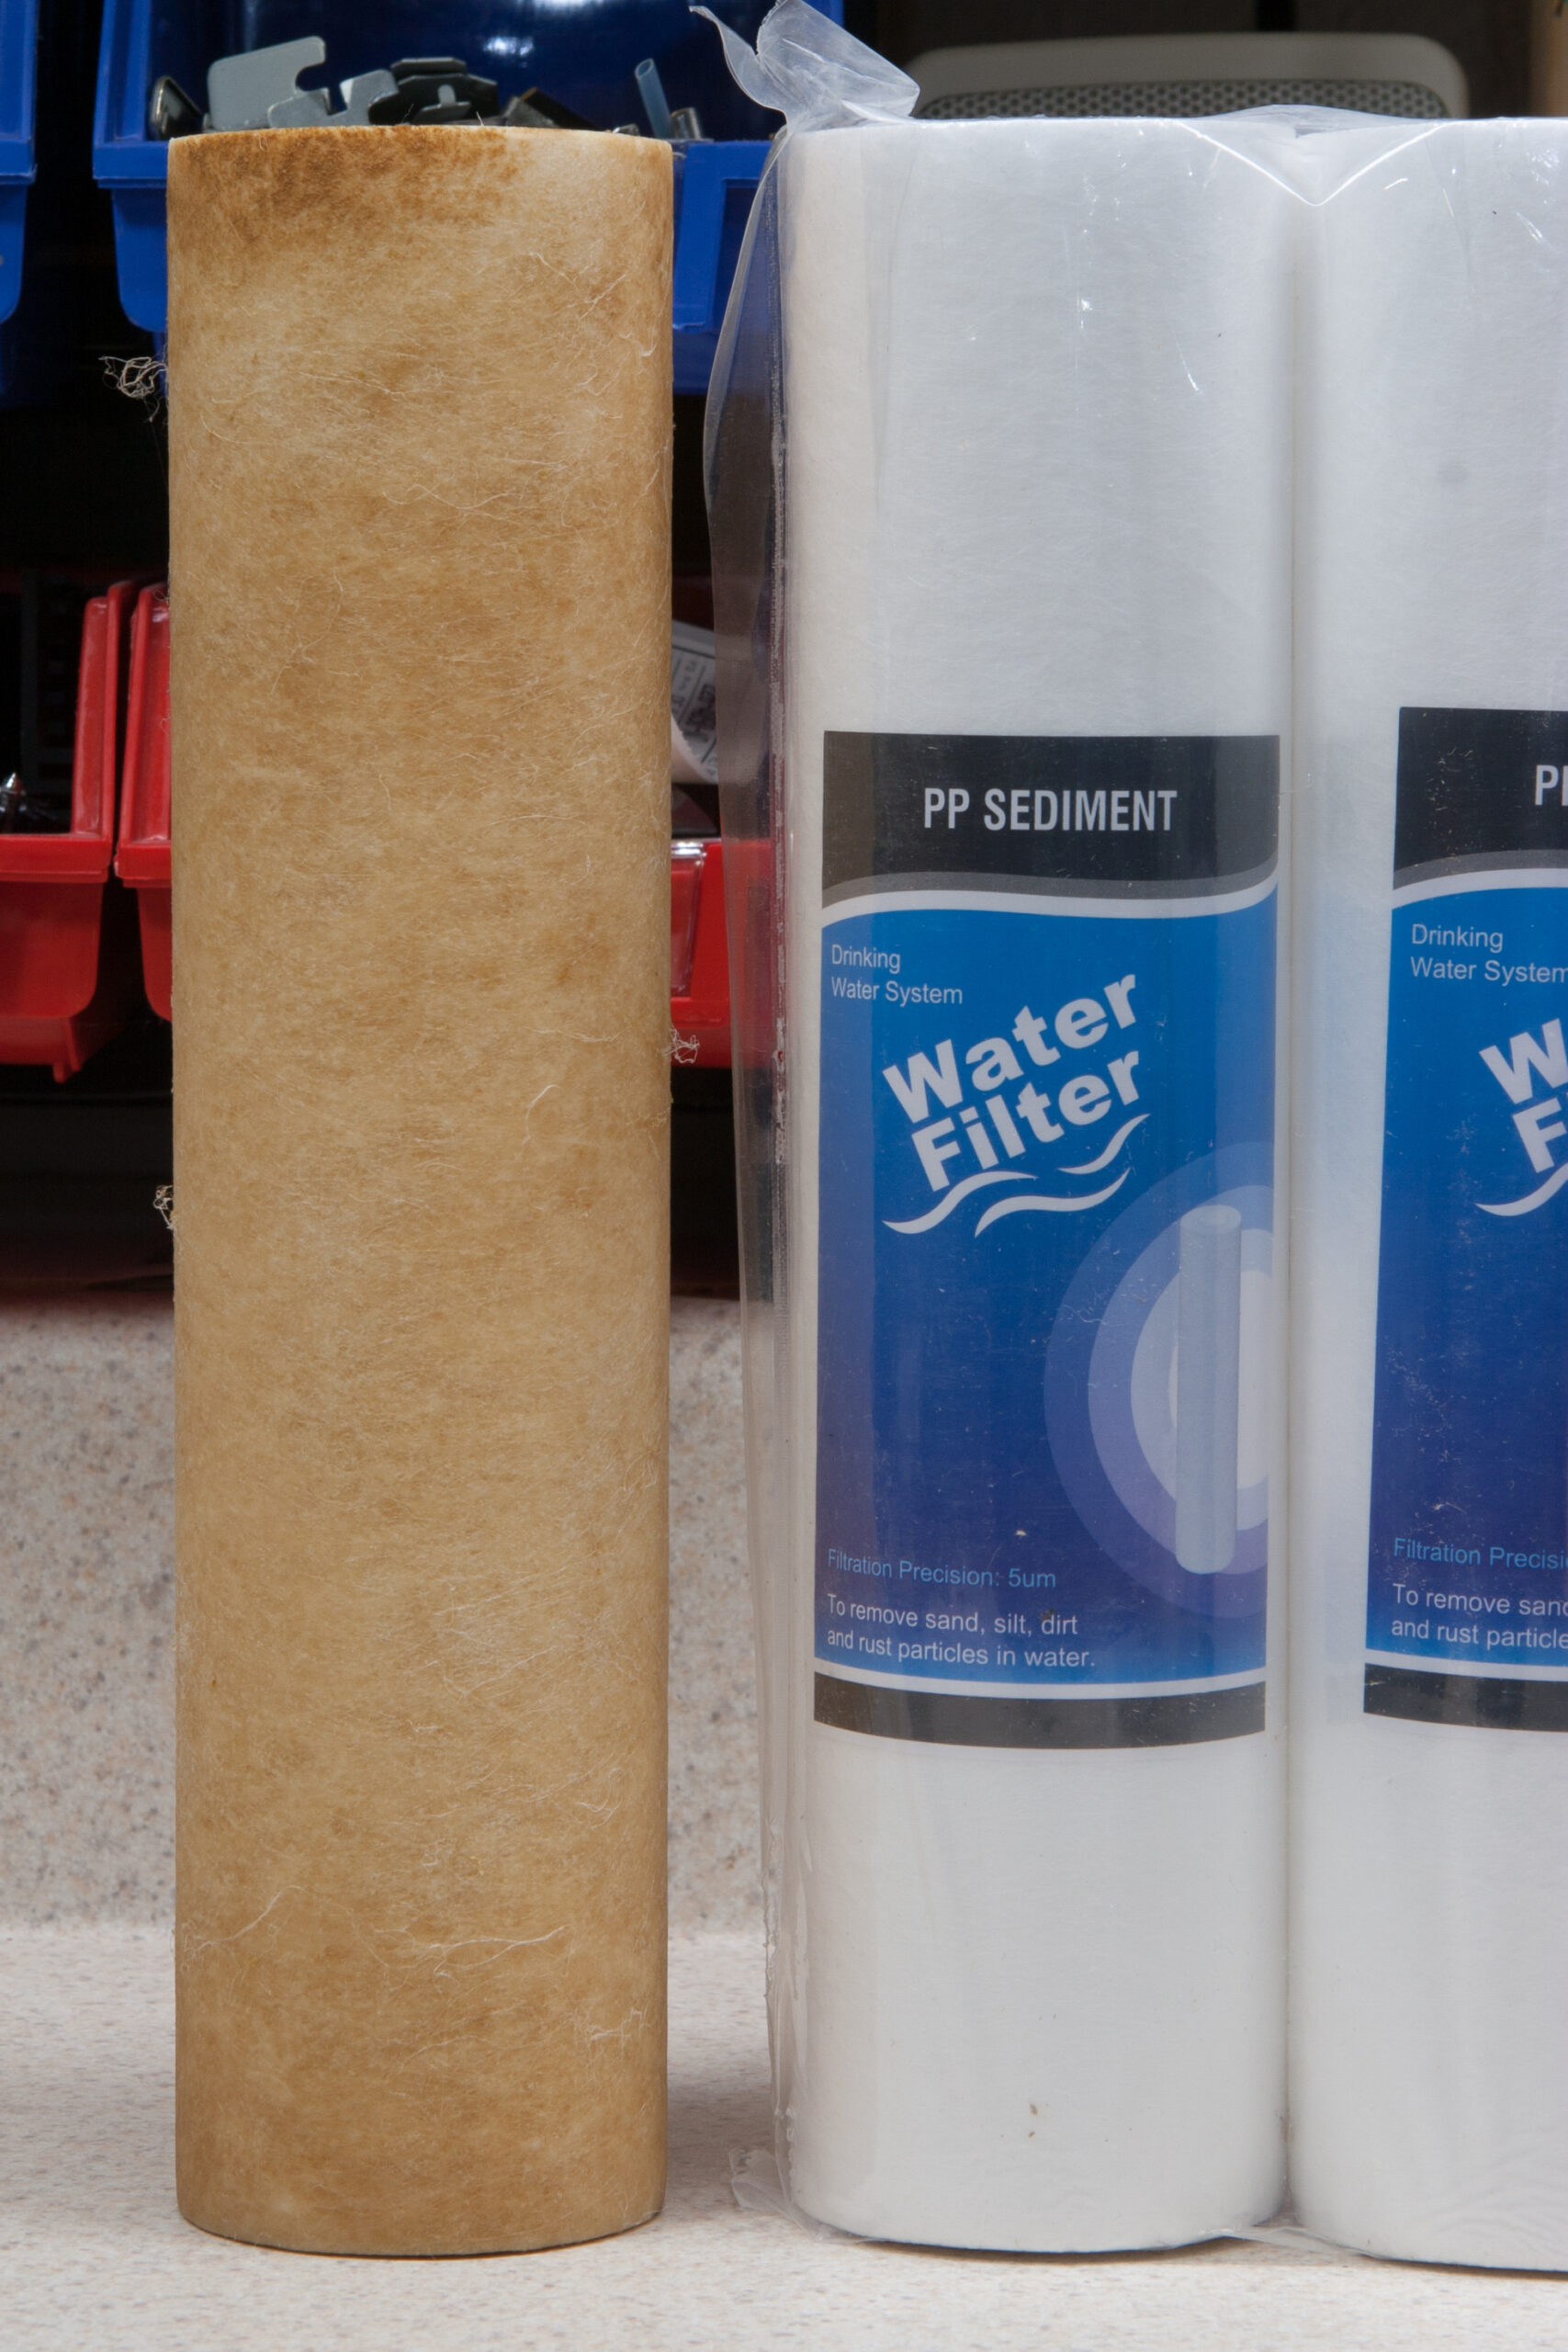
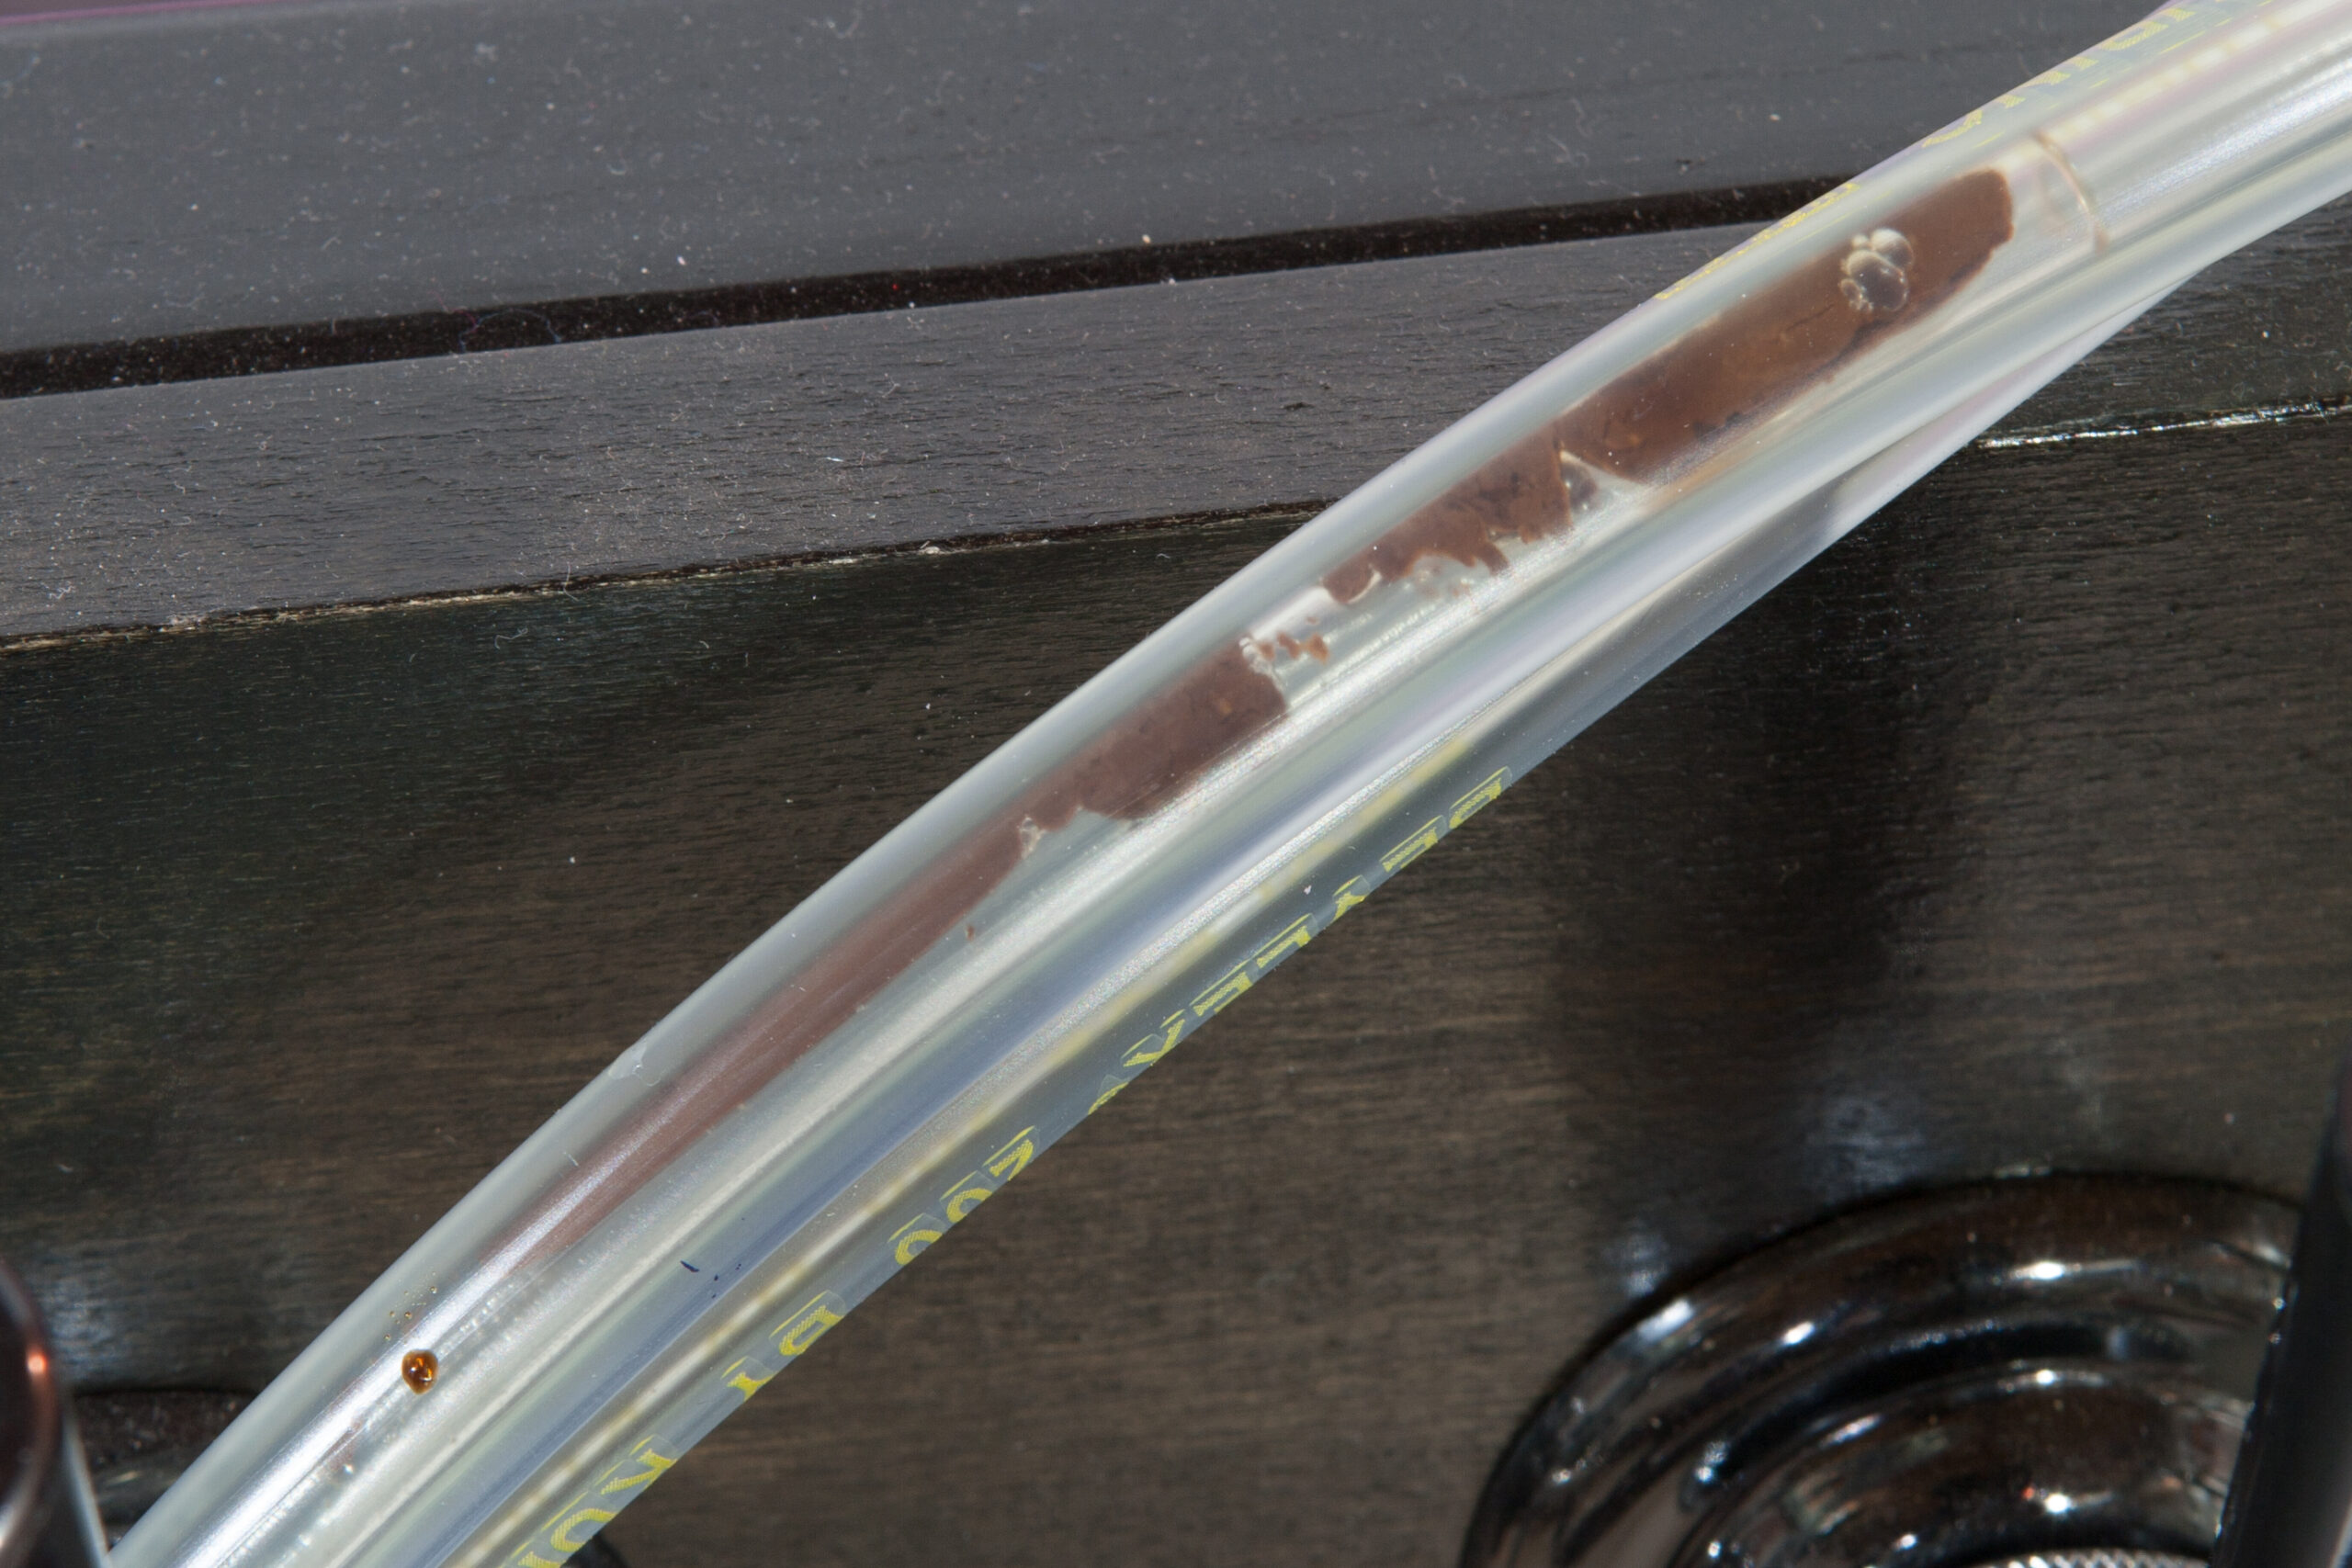
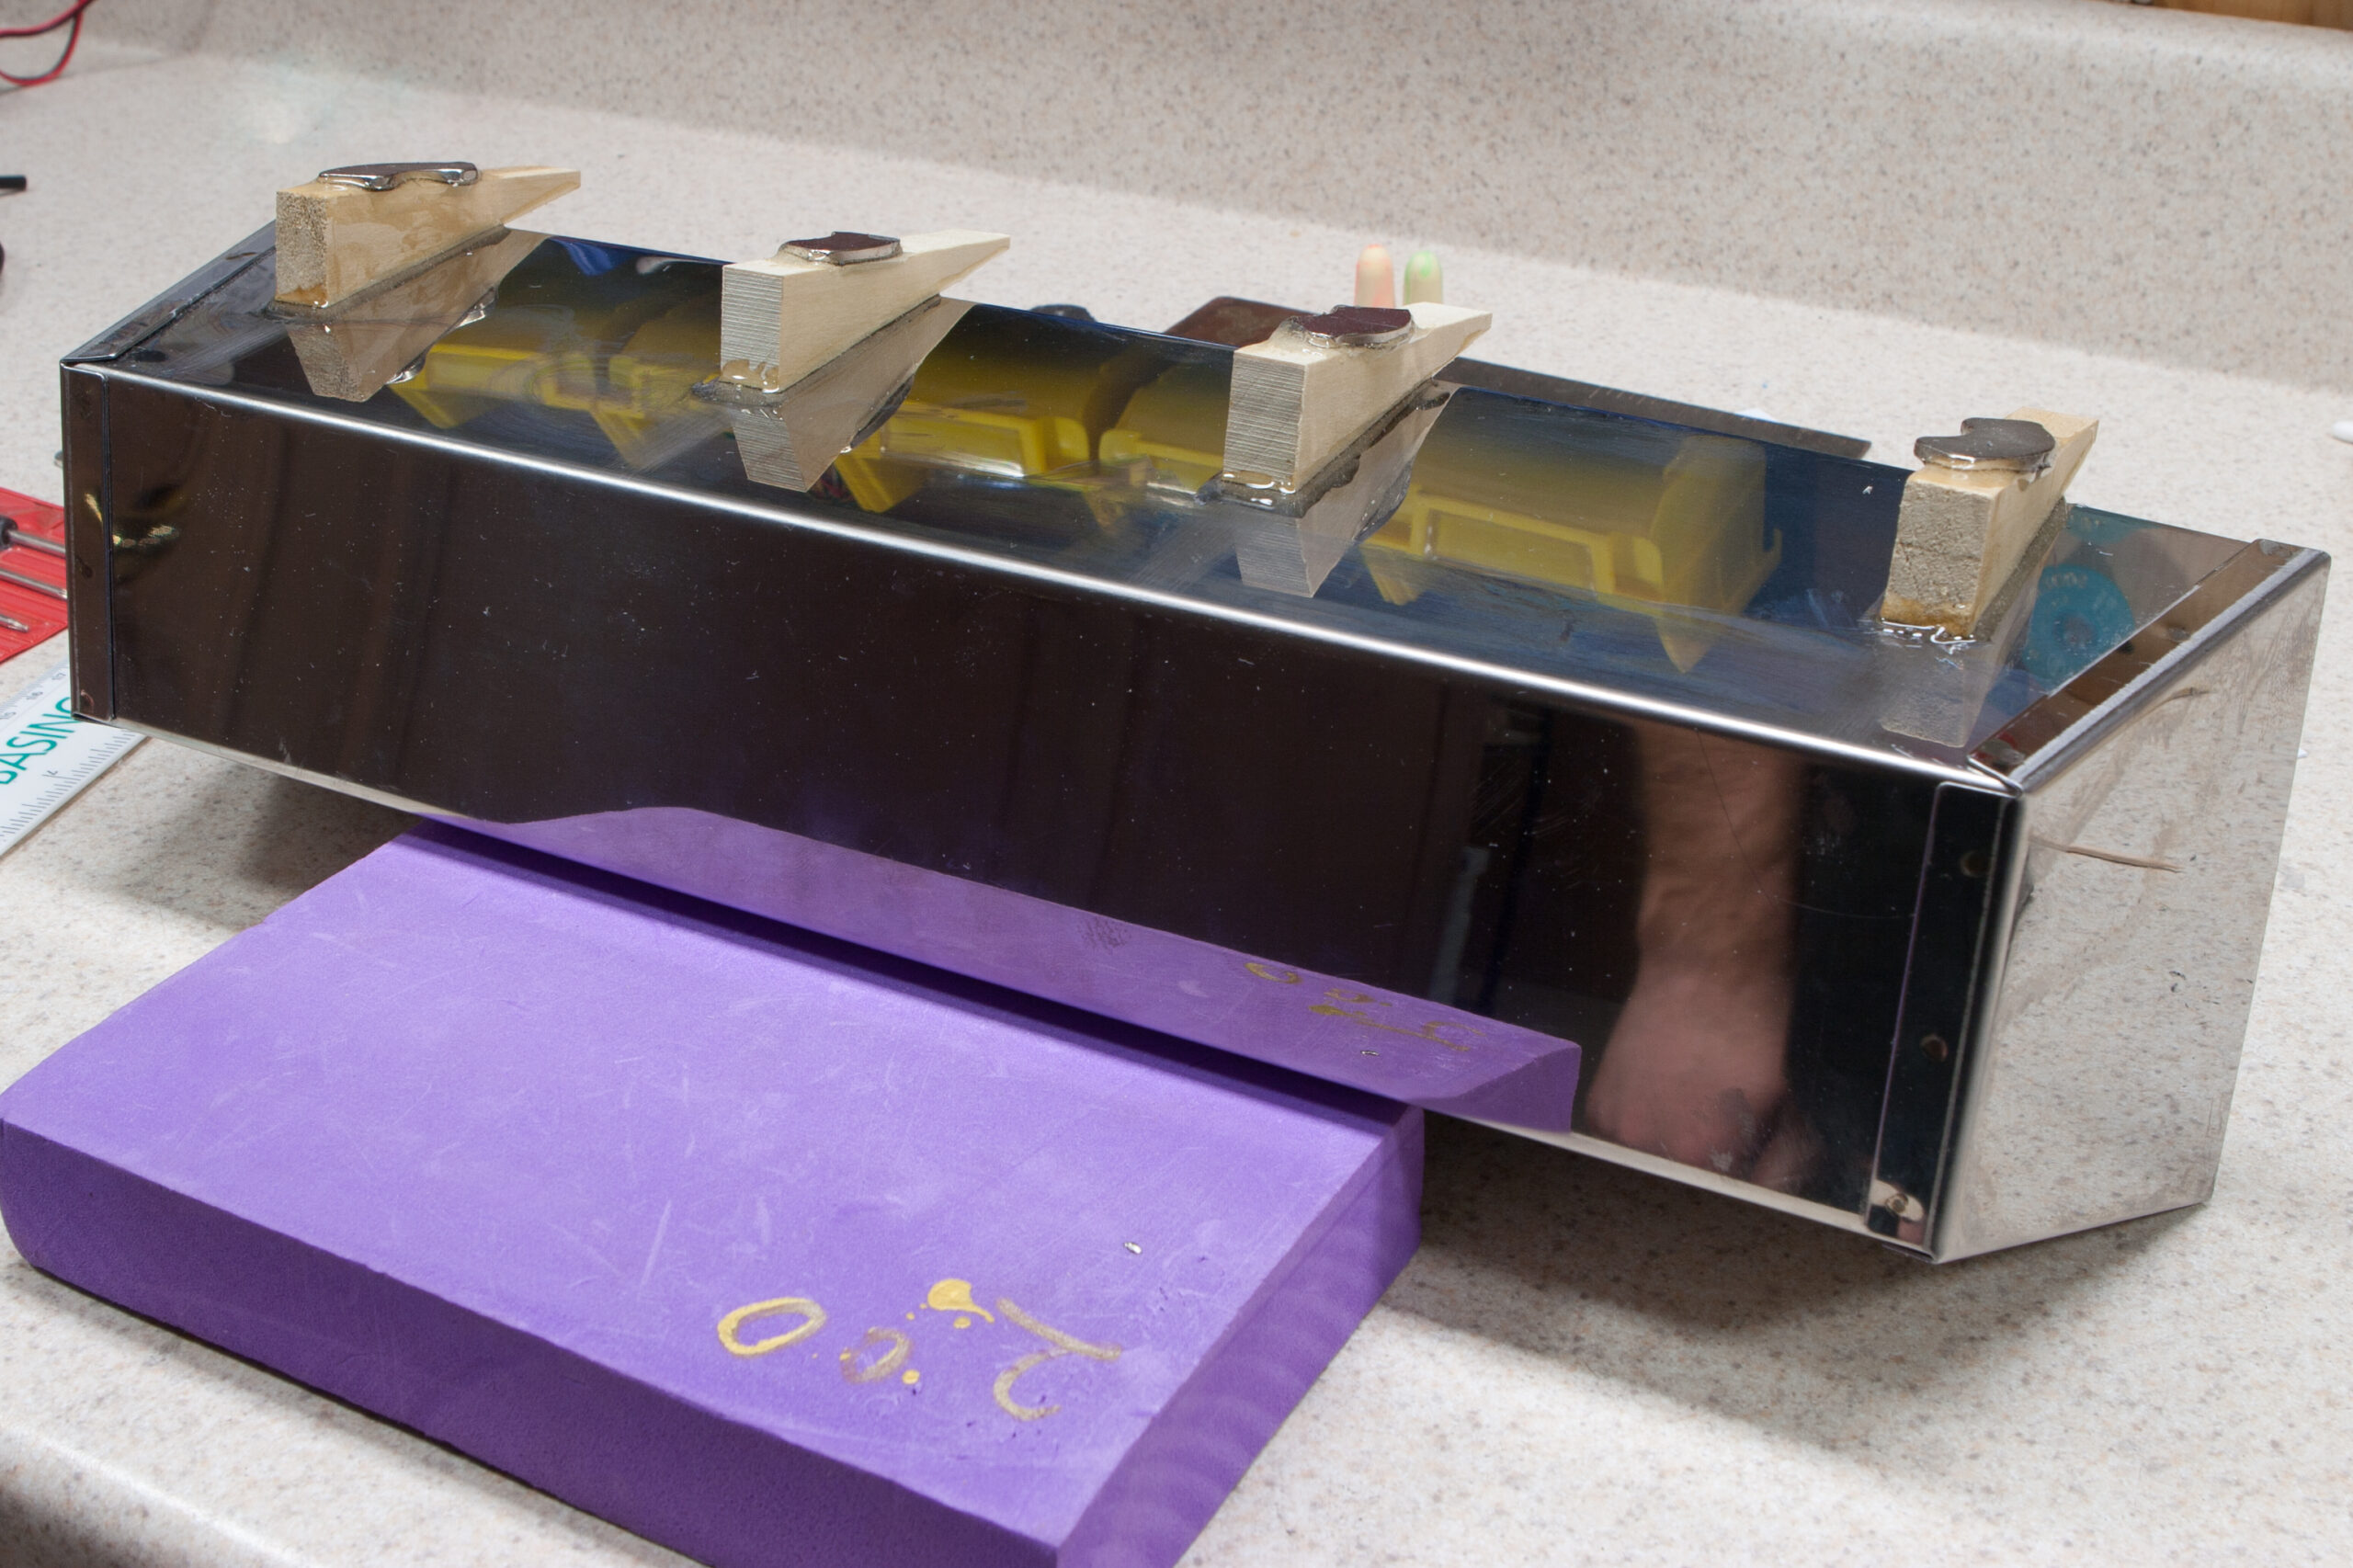
· Side view of the filter after processing five gallons of beer.
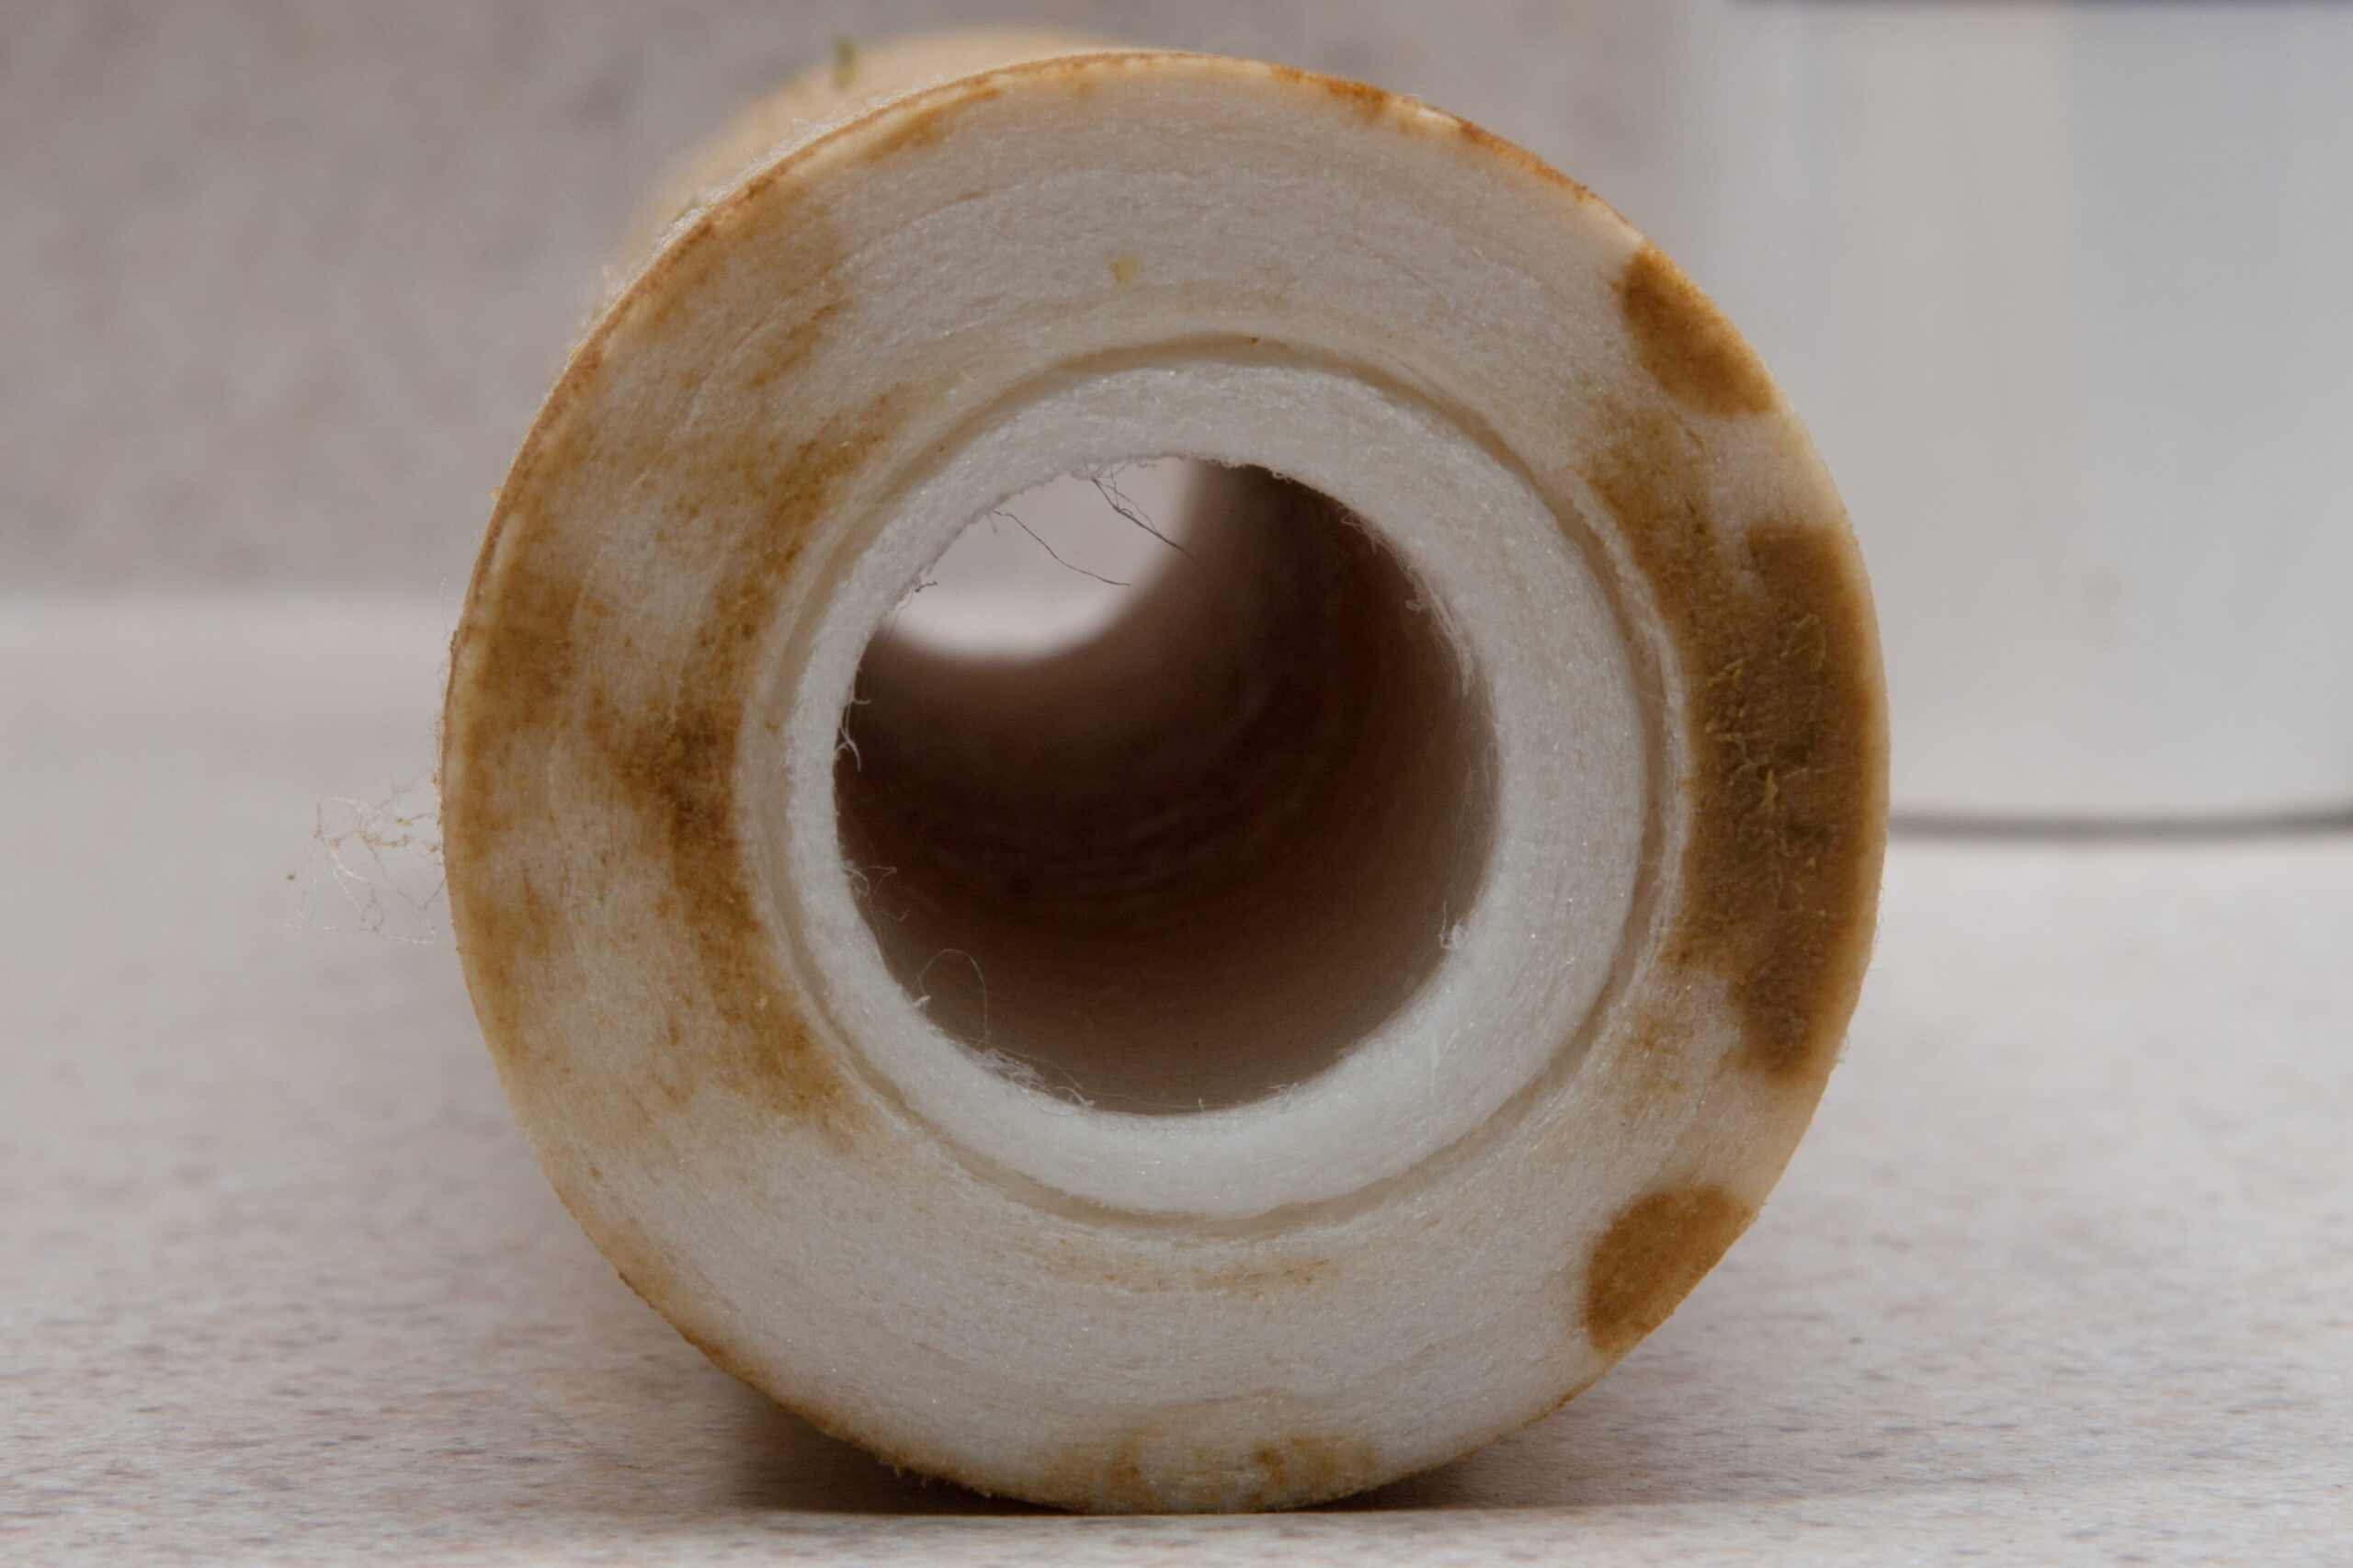
· End view of the filter, from the top, after processing five gallons of beer.

Leave a Comment

Beer Line Cleaning

About a month ago ran out of beer in my Kegged Beer Cooler and I hadn’t really gotten around to refilling it. This past weekend I was ready to rack some new beer in, but I noticed that the lines had some residue in them, so I wanted to clean them out. (This is good practice, as it keeps the lines clean so the beer doesn’t become fouled by whatever might have ended up in there.)

A bit of online reading showed that there are generally two ways to go about doing it, either something to push the liquid from one end through to the other, or a pump to recirculate the liquid. Being a bit lazy I figured the pump would be better, as I could set it up and let it run for a while instead of having running a few containers full of liquid through the system.

I ended up purchasing a cheap Pacific Hydrostar (read: house hydroponics brand) submersible pump from Harbor Freight, fitting it with a 1/4 flare to 1/2 MIP brass adapter from Warren Pipe and Supply. This allowed me to connect the screw-on ends of the beer lines (after removing the ball lock fittings) right to the pump and push the cleaning solution through them. Doing so required ignoring the warnings about not pumping hot liquids nor cleaners, but the pump didn’t have any problems doing so.

Prior to using the pump for cleaning I removed the suction cup base and inlet filter material, as I figured these wouldn’t provide any benefit, and might just foul things a bit more if the soft rubber and plastic had issues in the caustic cleaner. I then ran the pump for a few minutes in a sink full of Oxyclean and water, then in another rinse of straight water to clean it out. This made a noticable difference, as the plastic no longer had an oily sheen and lost the typical Harbor Freight cheap Chinese machine oil funk that permeates the store.

After connecting the pump to a beer line, I then submerged it in a bucket of BLC Beer Line Cleaner, fit a return line (1/2″ thinwall) to the end of the tap and back into the bucket, and powered it up. A few times during the cleaning process I’d cycle the tap handle to be sure the cleaner found its way into the nooks and crannies around the shut-off ball and O-ring. Each line was cleaned for 15 minute and leave the lines looking practically new.

Once the lines were all clean I wanted to sanitize them, but with the cleaner being a base and the sanitizer acid-based, I thought it best to rinse the system with water first. So, a brief cycle of water went through each before I ran the sanitizer through, with a bit more tap handle cycling to be thorough.

After this the lines were great, so I hand-washed and sanitized the liquid out ball lock connectors and put it all back together. Now it’s ready to dispense more beer!

Here’s a few photos of the cleaning process and pump:

· Harbor Freight’s Pacific Hydrostar submersible fountain pump with a 1/4″ flare to 1/2″ MIP adapter, ready to connect to beer lines.
· Detail of the gunky residue that had built up in some of the lines.
· Cleaning the lines with a submersable pump connected to the beer lines, return line connected to the tap, and some warm caustic Beer Line Cleaner.
· Using the pump without a return line to rinse the taps with sanitizer.

Leave a Comment

Fat Tire and Potawatomi

This past Sunday was the Triple Trail Challenge, a rather nifty fundraising group ride out at Pinckney State Recreation Area which spans parts of the normal mountain bike trails and also some trails which are only open to bikes for that day. I headed out with Jeremy and Sol and had a really great time. The route was rather nice and I’d love to do this ride again. The Lakelands Trail was a bit rough, and some of the dirt roads were a bit slimy due to recent grading and spraying, but it all added up to an outstanding 38.5 mile ride.

While the ride itself is free, it’s used as a fundraiser by the Potawatomi Mountain Bike Association by selling t-shirts, beer glasses, and trying to sign up members. This seemed to be really successful, as I heard there were 600+ people out for the ride, they acquired over 100 new members that day, sold out of t-shirts, and were running short on pint glasses. After the ride there were ample supplies of complimentary chili (vegetarian, I believe) and Arbor Brewing Company beer for all those who participated.

I was one of those who bought one of the glasses (t-shirts were sold out when I tried to get one), and it can be seen above filled with some of New Belgium’s Fat Tire Ale. I’m not a huge fan of this beer, but it is a pretty solid, reliable beverage. Since it’s now available in Michigan I’ll probably pick up a few more bottles of their stuff, and it’s nice to know that these glasses nicely hold an entire 22oz bottle.

1 Comment

New Belgium’s Red Hoptober

With New Belgium beers now being distributed I’ve been giving all the available varieties a try. I’m still not fond of Fat Tire (it’s not bad, but nothing I find particularly special), but the others that I’ve tried along with this seasonal variety Red Hoptober (Shift Pale Ale, Ranger IPA) are quite nice.

It’s nice to see another widely available quality beer here in Michigan. While we do have loads of good local stuff and I prefer to buy Michigan beers if I can, I think that the available beer market improving in quality overall is nothing but a good thing for everyone.

Leave a Comment

Excited Hefeweizen

After work yesterday I brewed a very simple hefeweizen and put it to ferment. This morning I found that it had blown out of the airlock, even though it’s not a particularly thick beer. Nor was the yeast pitched at a particularly high temperature (~75°F), so the yeast shouldn’t have gotten too excited.

The Activator pack did inflate quite quickly yesterday so maybe the yeast is particularly strong, but I still wouldn’t have expected this to happen. A blowoff tube has since been fitted so everything should be fine. Now I just need to wait for it to ferment.

The recipe I’m using is as follows, as told to me by Andy, the owner of Cap N Cork Home Brewing Supply:

· Six Pounds of Wheat Dried Malt Extract
· One Ounce of German Hallertau Hop Pellets (@ 60 Minutes)
· Wyeast 3056 Bavarian Wheat Blend Yeast

Ferment for ~11 days in primary (until it’s done, plus a few more days), transfer directly to the keg, carbonate, and drink fresh.

I’ve got pretty high hopes for this beer. Much of what I’ve brewed lately has been reasonably complex (for extract brewing) so I’d like to have some simple, easier recipes like these tested and available.

Leave a Comment

Gulden Draak 9000 and Brewery Vivant’s Triomphe


Here are two tasty beers that I’ve had recently: Gulden Draak 9000 Quadruple and Brewery Vivant’s Triomphe Belgian Style India Pale Ale. I’d also recently had Farmhand (also canned) and Big Red Coq (on draft at Clubhouse BFD), but I don’t have photos of those.

Each of these beers is quite excellent, but I particularly like Brewery Vivant’s canning. It works out very well, and getting a full pint in each serving (as opposed to a typical 12 oz. bottle) is a nice change of pace. The only part I don’t care for is the plastic can holder. It’s got quite a bit of plastic in it, and it’s fairly difficult to remove from the cans themselves.

Leave a Comment

Post-Barry-Roubaix Treats

This weekend Danielle and I traveled out to the Grand Rapids area for my first go at Barry-Roubaix. After a great race and hanging out for a while we headed to get Roxie and then back home, but not before stopping in Ann Arbor at Zingerman’s. Being just off of I-94 we were able to easily stop at both the Bakehouse and Creamery where we picked up a bunch of great baked goods and cheeses. This resulted in tonight’s outstanding snack of a sea salt bagel spread with pimento cheese spread, eaten while sipping a glass of Bell’s Hopslam. We’d also picked up some doughnuts from Zingerman’s Bakehouse; properly fried ones filled with chocolate pudding. A picture of it can be see here, and this may be the best doughnut that I have ever eaten. The filling, dough, and topping were perfect.

As far as the race goes, it was a wonderful time. I probably could have pushed myself a little harder, but during the race I felt good, and finished with a time that I’m content with: 2:21:42 / 15.2 MPH average / 66th our of 92 in my class. My max heart rate was right at the end meaning I probably could have pushed a bit harder, but with an average of 156 I think I was doing okay.

The course was through some really beautiful areas, and the rain the night prior had the dirt roads in tip-top shape. Some of the anticipated sandy bits were a bit of a slog and required dismounting and walking, and there were some serious puddles in a few sections, but it was overall quite fun. The weather was absolutely beautiful, with 60-ish temperatures and overcast skies making me perfectly comfortable in typical summer wear of shorts and a short sleeved jersey, lightweight gloves, and simple socks. A bit of misting rain found its way to us for around 20 minutes of the race, but only the slight visibility degradation was a problem.

The start/finish area was also very well set up and included both some great beer and excellent food. I had some Korean-style pork tacos (with kimchi!) and a really nice chili-pork burrito. There was also a few kegs of Founders beer on hand, with tickets reasonably priced and proceeds going to benefit the WMMBA‘s campaign to build fifty new miles of single track trails in the next five years.

This was a really great race. I’m extremely glad I went.

My Garmin Connect data from it is here, if you’re interested.

1 Comment

Final Kegerator Drip Tray Design

This past weekend I put the finishing touches on the tap portion Kegged Beer Cooler (Kegerator) by finishing off the drip tray. It was built using a 14″ wide stainless steel drywall mud tray that has been caulked with RTV silicone. I’d originally attempted to hang it using hard drive magnets, but as can be seen here this didn’t look as nice as I’d hoped, and the magnets sitting off of the wooden support blocks made it a bit unstable.

This past weekend I cut some new blocks out of oak (picture), stained and sealed them to match the collar, drilled holes in them so epoxy could penetrate nicely (picture), then epoxied 24 square (1/4″ x 1/4″ x 1/8″) neodymium magnets on the back of each (picture). These blocks were then epoxied to the metal tray, and they now hold the drip tray nicely under the taps. As expected the magnets are quite strong, so spaced evenly along the block the tray is held on with considerable force. I imagine I could fill it with liquid and it wouldn’t budge.

This isn’t a particularly fancy design, but at a total of ~$30 I’m quite happy with how it came out. It serves the need of collecting drips, is easy to remove for cleaning, and looks pretty good.

Leave a Comment

LP Gas Tank Weights

My LP gas tank, when essentially empty, weighs 17.82 pounds. When freshly filled by Metropolitan Tool Rental in Shelby Township it weighs 36.32 pounds. The TW (tare weight) stamp on the chime indicates that the empty tank should weigh 17 pounds.

I’m not sure if I’ll go to Metropolitan for another tank fill, as they seem to charge a fixed price for tank filling regardless of amount needed. I was getting one tank filled and another (which was about half empty) topped off, and I was initially told that there was a flat rate for filling any tanks. Asking them if it’d really be full price to have one tank partially filled they cut that price in half. Next time I’ll try and find a shop that simply charges by the quantity of fuel sold plus a base service charge or something.

Essentially empty is defined as when the tank is empty enough that, while operating a turkey fryer burner for brewing beer, it would not produce a normal flame and thick frost was developing on the very bottom of the tank. Upon swirling the tank to warm the liquid the flame would return to normal size, but within a few minutes it would settle back town to a trickle. I’m presuming that the gas level was low enough that any evaporation (read: liquid turning to burnable vapor) was sufficiently chilling the remaining liquid so that it wouldn’t readily evaporate.

Leave a Comment