Press "Enter" to skip to content

Month: December 2023

DIY-ish Under Cabinet Lighting

After the kitchen was redone in our new house, the under-cabinet space (where lights would go) was intentionally left unpopulated; something for me to finish later. The electrician had fitted an outlet per cabinet grouping, and a switch on the wall that toggles those outlets, but I’d asked him to skip the lights because I really wasn’t sure what style or color we wanted, nor how I wanted to wire things. Being low voltage with the outlets and switch already fitted, it would be fairly straightforward later on.

This winter, looking for a project, I decided to finally get this done. After talking with my friend Dan and some investigating, I finally got a solution together.

What I ended up doing was sourcing a handful of parts, flexible PCB LED strips, aluminum enclosures, wire, and wall wart power supplies on Amazon, assembling it, and sticking it to the underside of the cabinets. This has worked out well, so I wanted to share what I did.

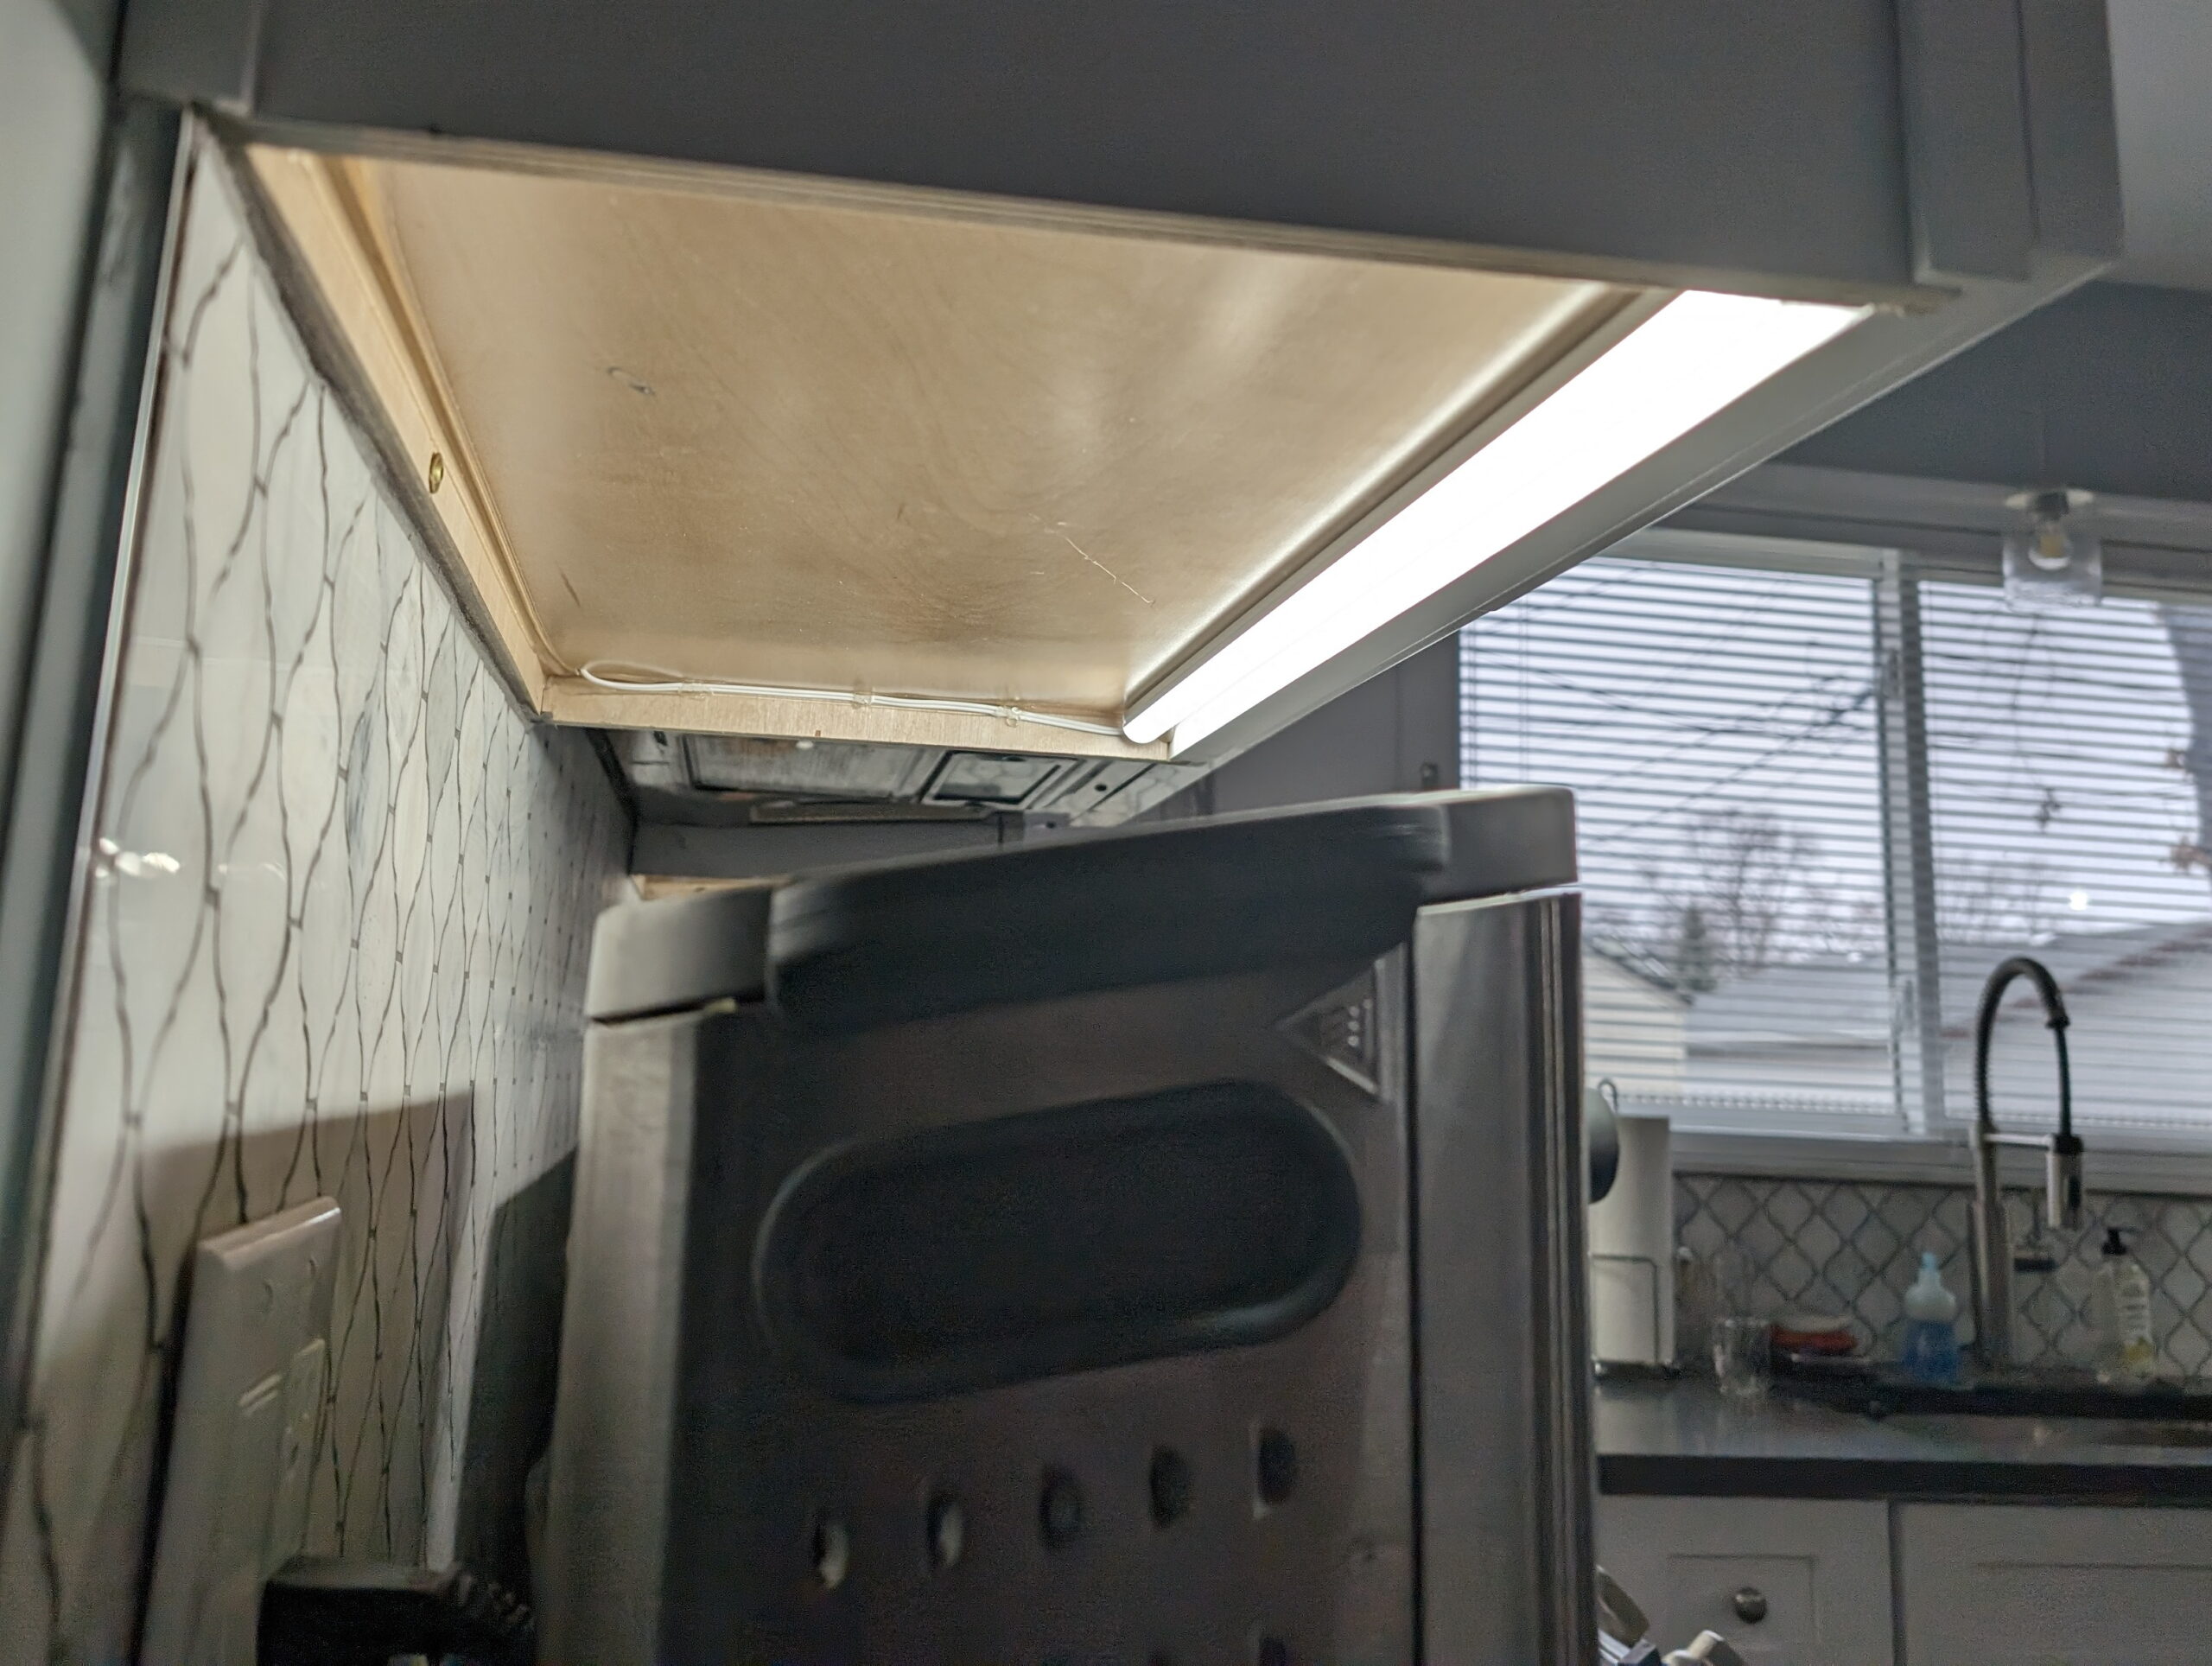
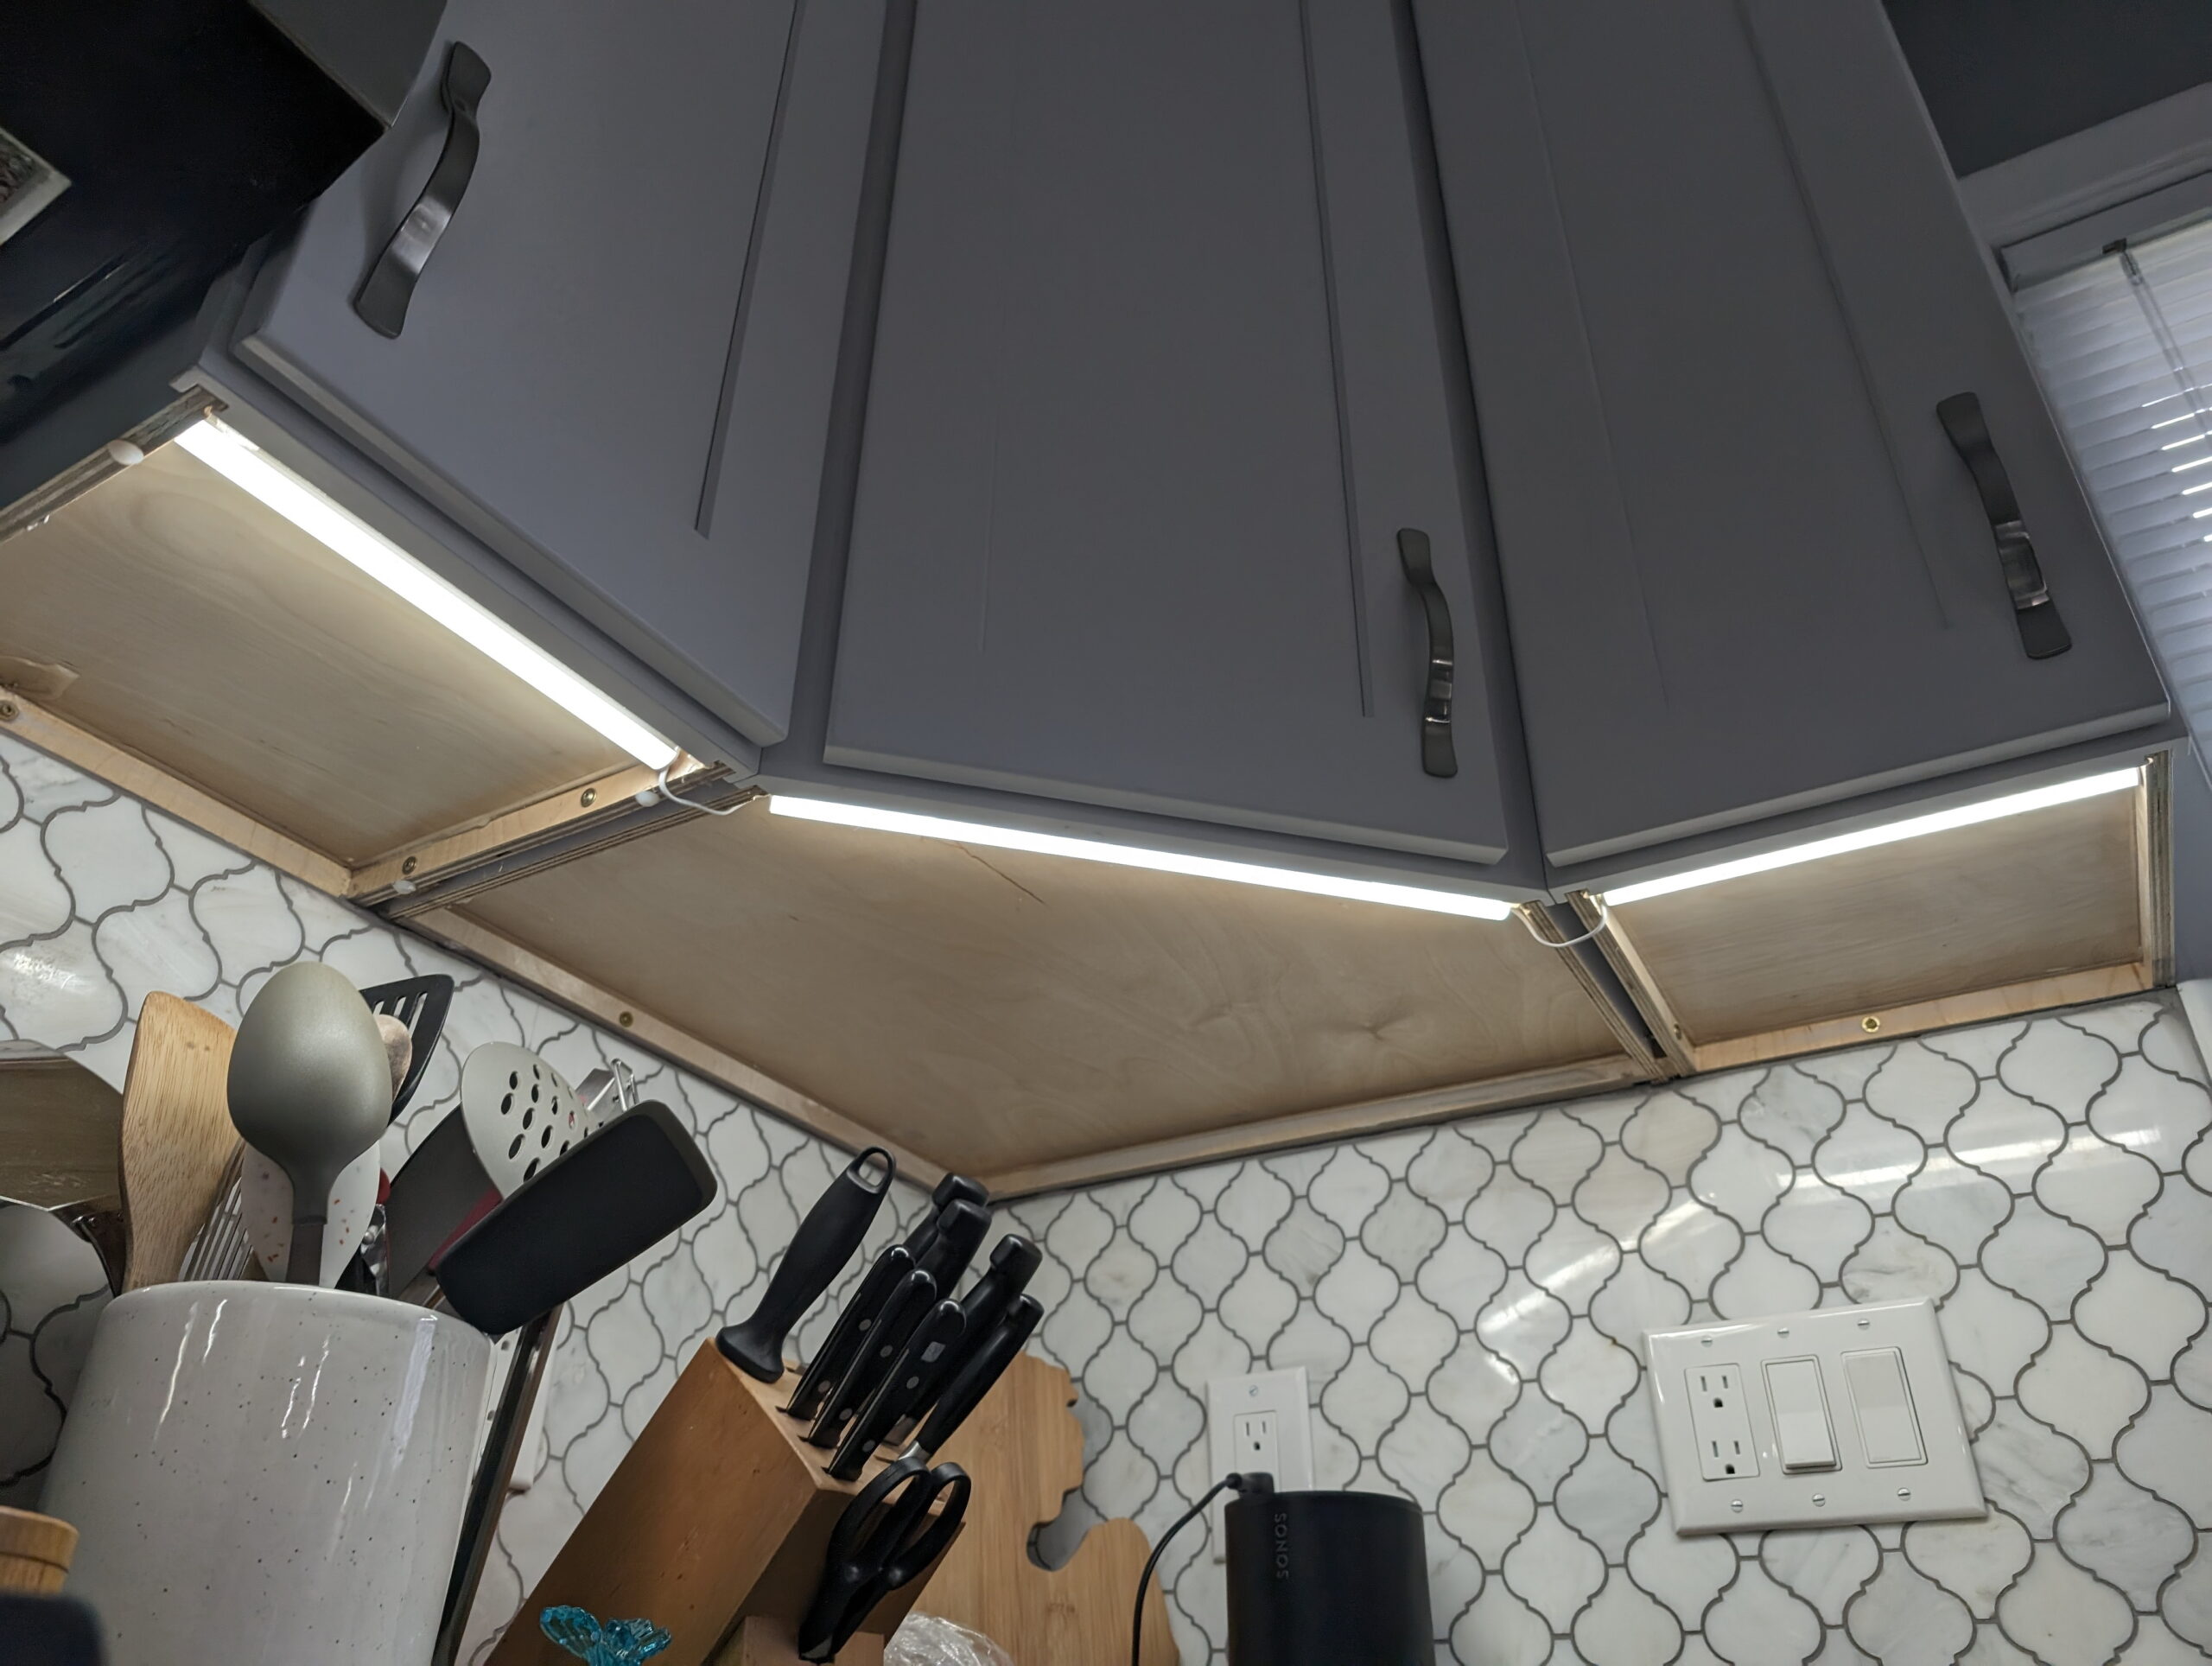
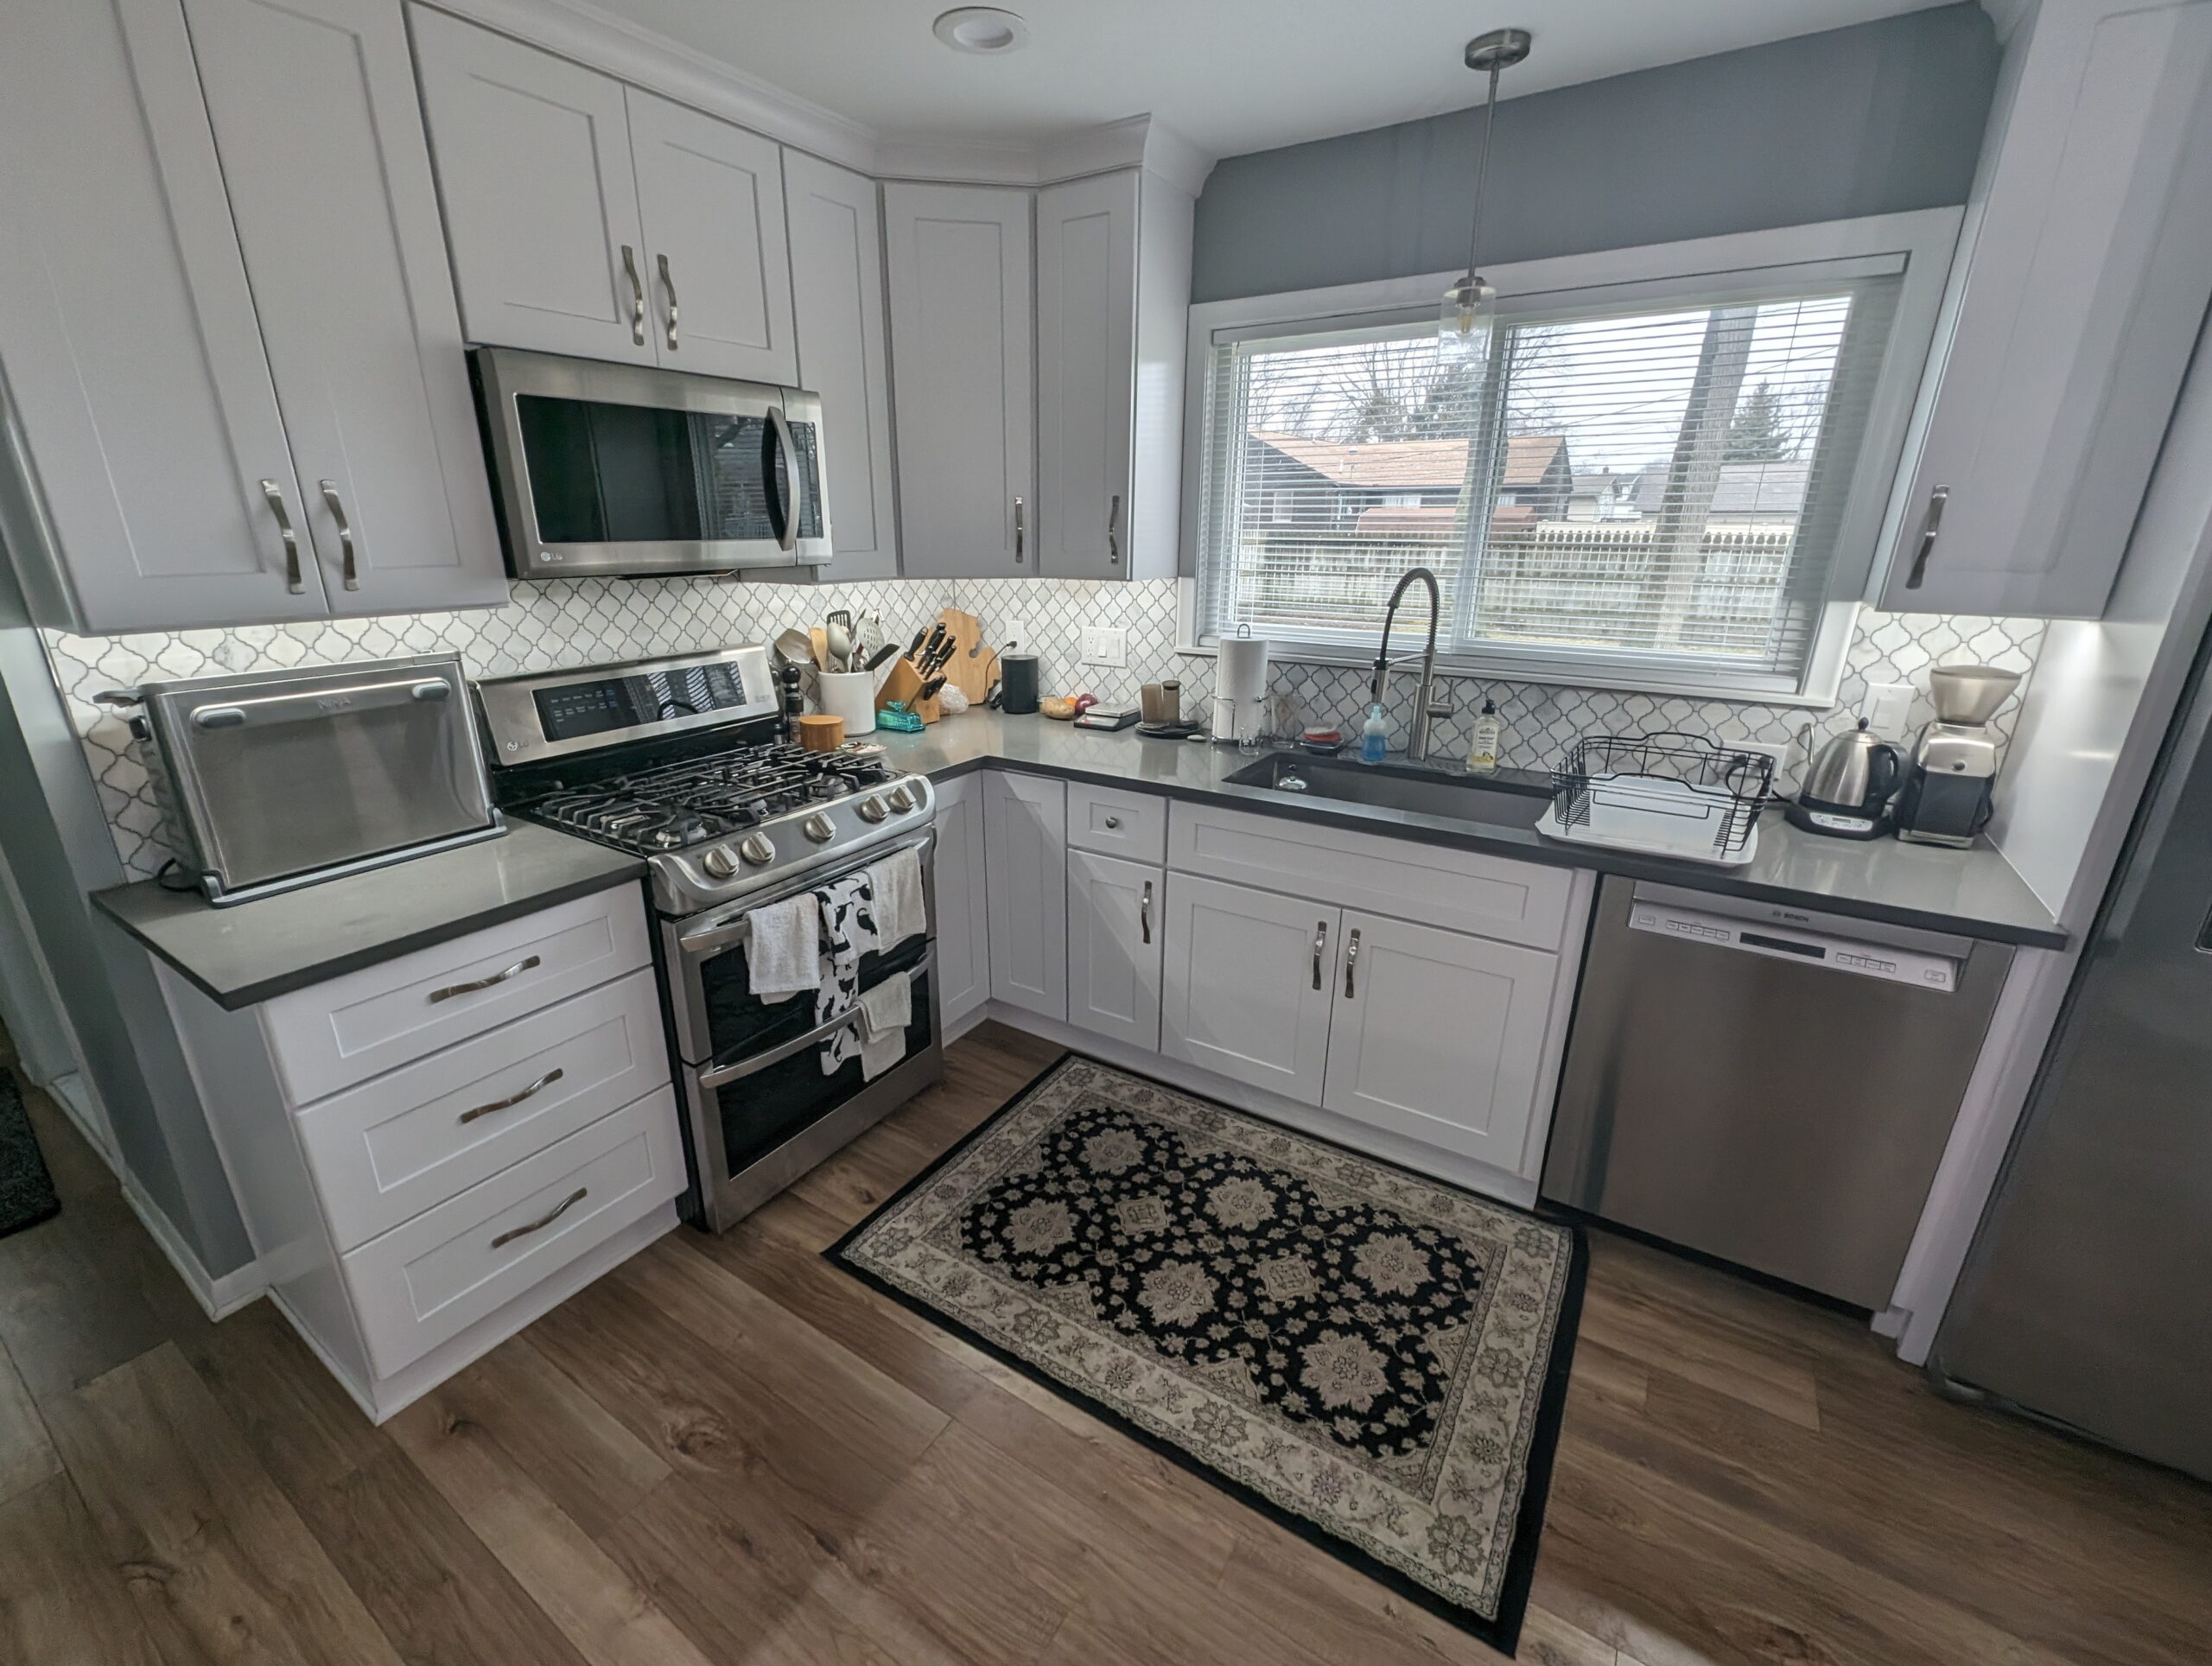
Our kitchen has three overhead cabinet groupings, the left-most has 22″ of face, the corner has 37″ of face (2x 10″ side cabinets and 1x 17″ center cabinet), and the right-most is a single 10″ cabinet. I had originally thought of ringing the underside of each cabinet with LED strip lights, but after some consideration I decided to do a single light assembly along the front edge of each cabinet, pointing down, with a wide-angle diffuser.

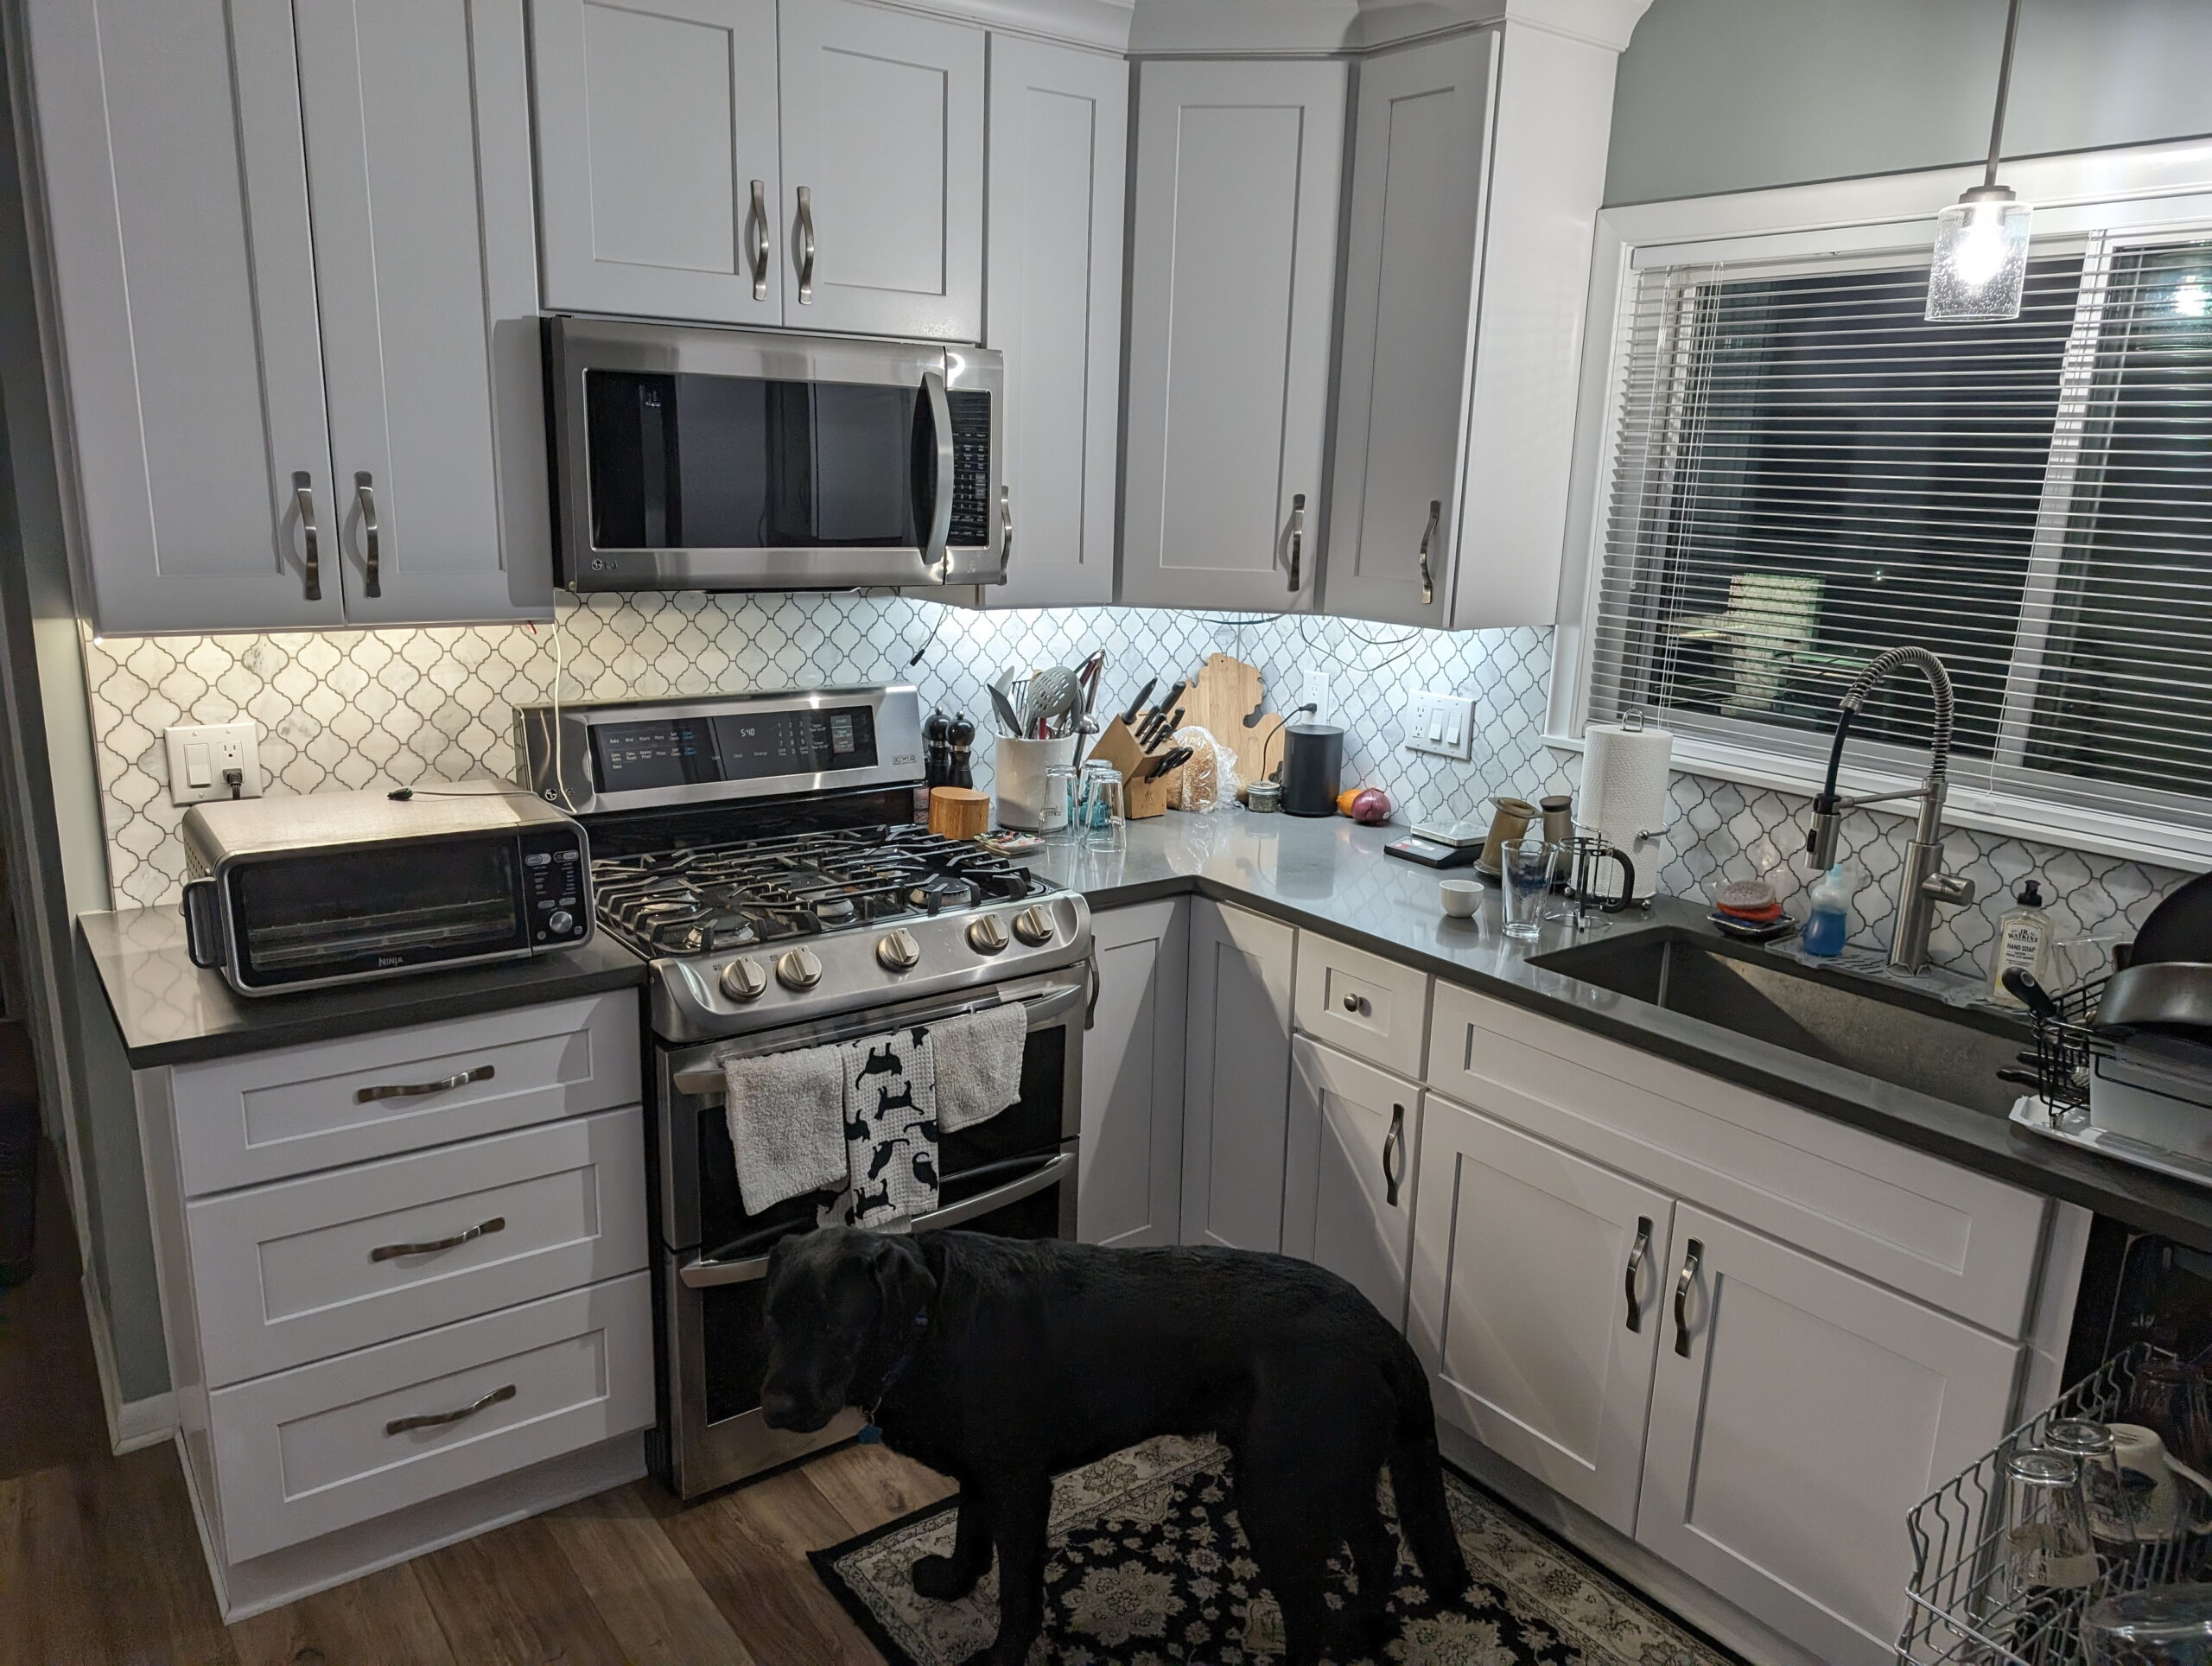
In the kitchen we have daylight (5000K) colored lights, but as the under-cabinet lighting is likely to be used as more of a night or secondary light, I figured on ~4000K lights. After buying strips of both 4000K and 6000K of to test, we ended up with some strips listed as Cool White 6000K. This matches pretty well whenever the overhead lights are on and it’s bright to cloudy day outside, and likely because of the grey-ish countertops it still looks fine when they are the only lights on.

It would have been possible to use a different type of strip that has multiple color temperature white LEDs and selectable color temperature, but doing this requires a controller external to adjust the light strips, which would have added around $60 just for the controllers, plus another $10 or so in LEDs, a remote control, more space taken up in the cabinets. This setup, with fixed color strips, is just AC-DC adapters plugged into the existing mains outlets, and the LED strips connected to the adapters. If we find that this isn’t good I may eventually go to controllers, but for now this is working nicely.

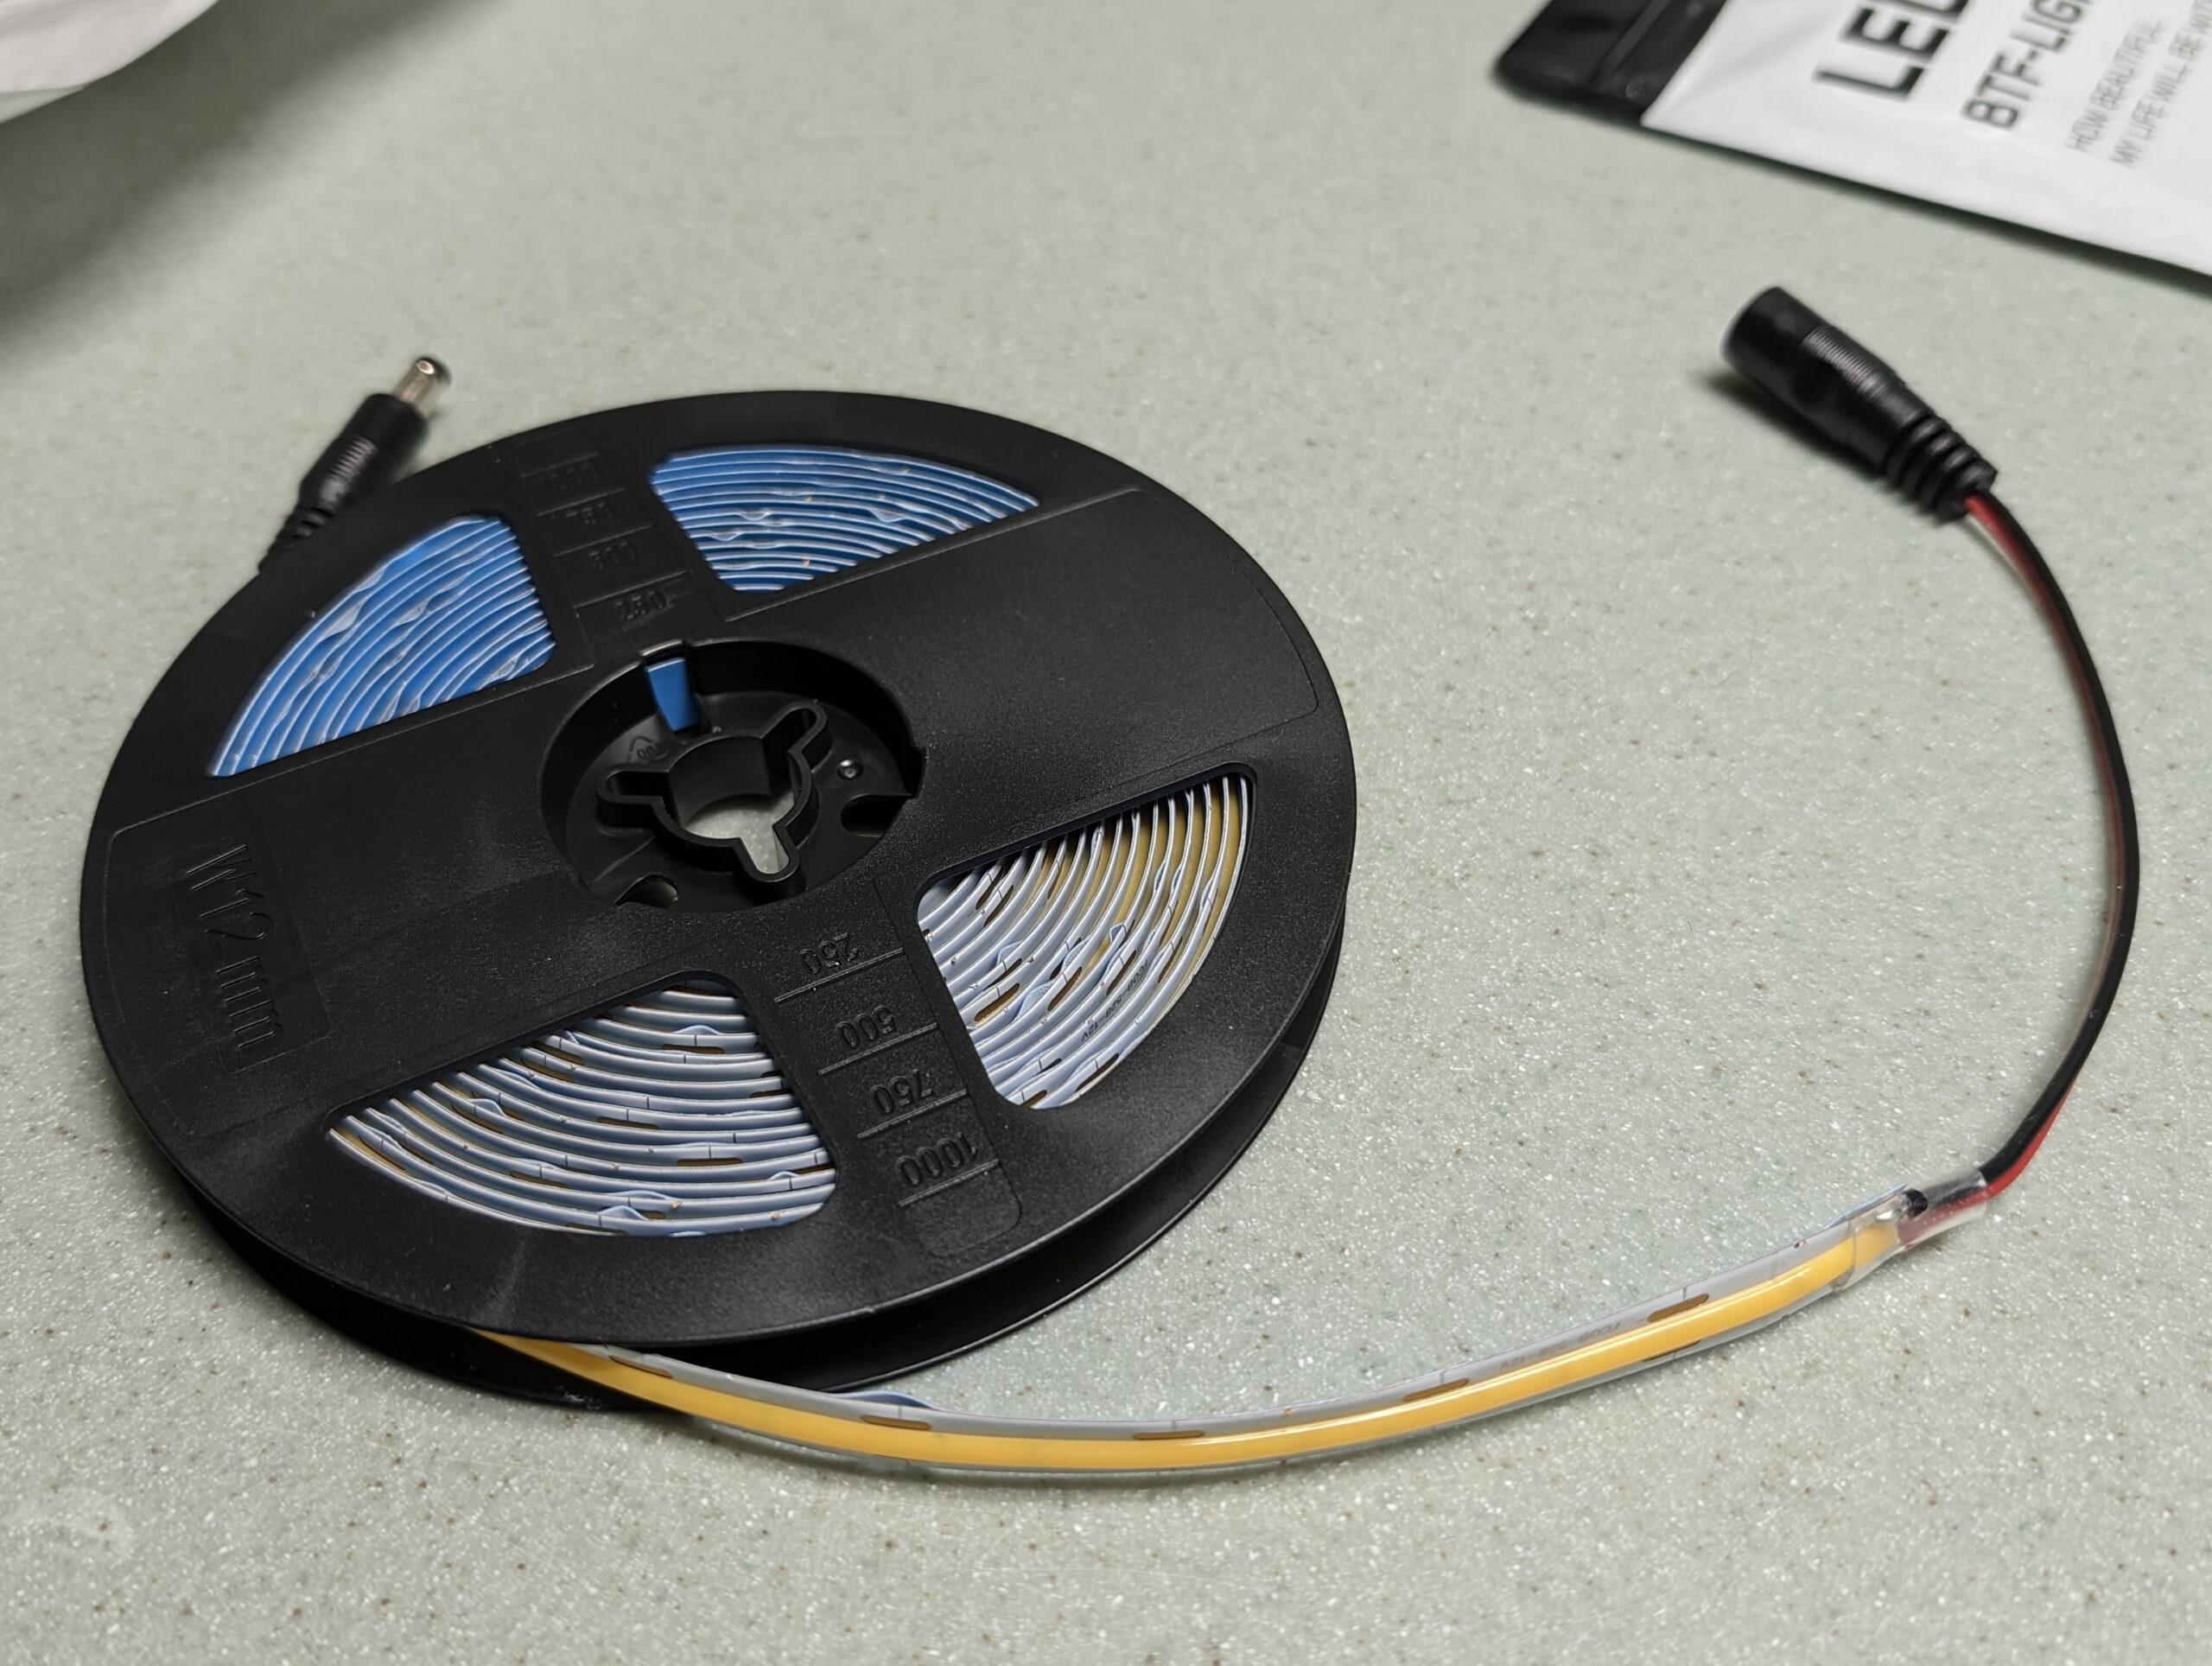
For the LED strips I chose FCOB LED strips from BTF-LIGHTING, 528 LEDs per meter, in 12V. With the heavy silicone coating over the LED chips it makes for a fairly even light. I chose the 12V variant of the lights because they have cut-points 22.83mm, which made it easy to make maximize the amount of LED strip under each cabinet. If the runs were longer it would have been wise to choose 24V to decrease the amperage, but at 14 watts per meter (W/m), the longest light segment will only take ~1.1 amps (A) so this should be fine. (Amazon Link)

For hookup wire I bought a simple coil of white 20 gauge copper clad aluminum (CCA) wire, again from Amazon. I already had some hookup wire, but I wanted white to blend in nicely with the cabinets. (Amazon Link)

For power supplies I picked up a basic five-pack of 12VDC / 2A wall warts. While I only needed three, the cost for five was $7 more than buying three, and since I’ll have LED strip left over and will likely build some more arrays for elsewhere in the house, I wanted spares. They also happened to come with (very cheap) barrel to screw terminal adapters that worked well enough. (Amazon Link)

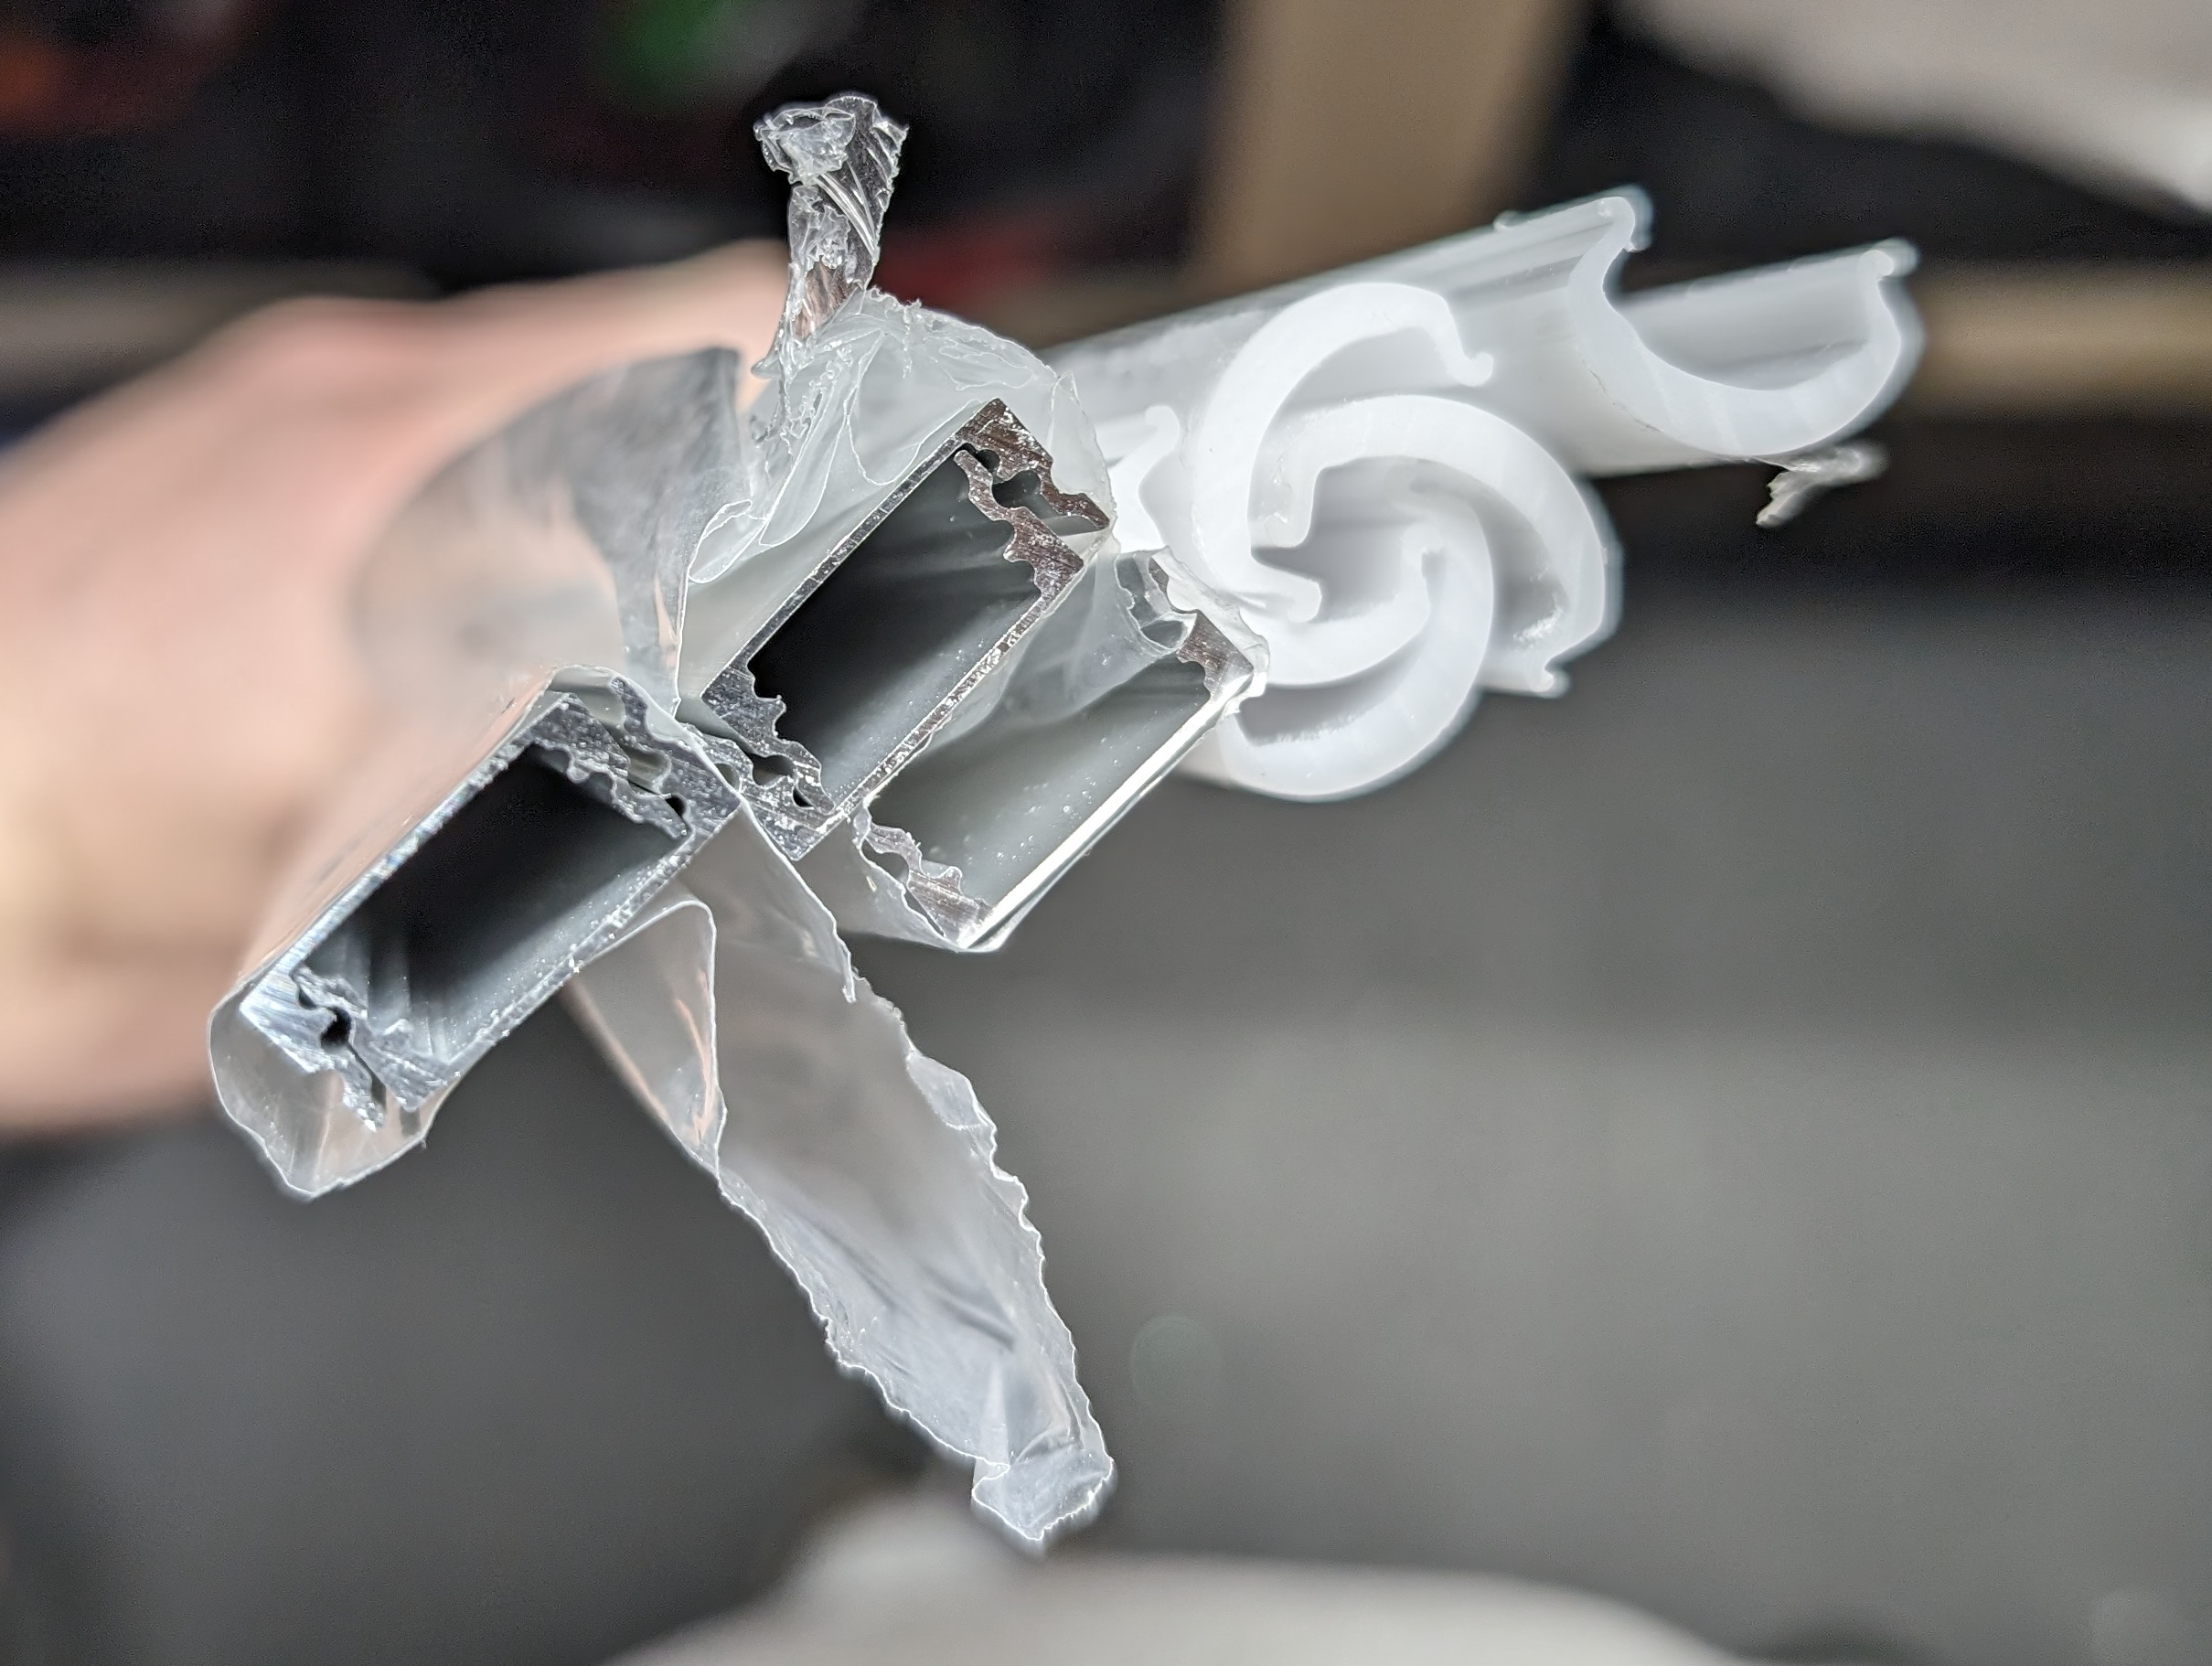
Initially I was going to mount the LED strips directly to the cabinets, but Dan convinced me that even while out of sight it would look much better in an enclosure, and he was right. The project feels properly finished this way and it looks tidy. The enclosures also add additional diffusion, making the light look smoother and more even and overall better. For this I chose some 1m long pieces of aluminum channel with a 60° milky white domed cover, then cut it to width for each cabinet section. (Amazon Link)

The light enclosures include screws and mounting clips, but I instead opted for tape, and picked up a 5 yard roll of 3M VHB 4910, which is specifically described as being good for Polycarbonate, Aluminum, and Acrylic/Polyurethane Paint; perfect for sticking these housings to the underside of cabinets. (Amazon Link)

Assembly was done by first determining the width of the housings, so I went with even-inch sizes that are just slightly narrower than the underside of the cabinet. This resulted in five pieces: 1x 22″, 1x 16-1/2″, and 3x 10⁻¹/4″. With the cover snapped into the aluminum channel it all cut clean and easily using a circular miter saw with a fine tooth carbide blade.

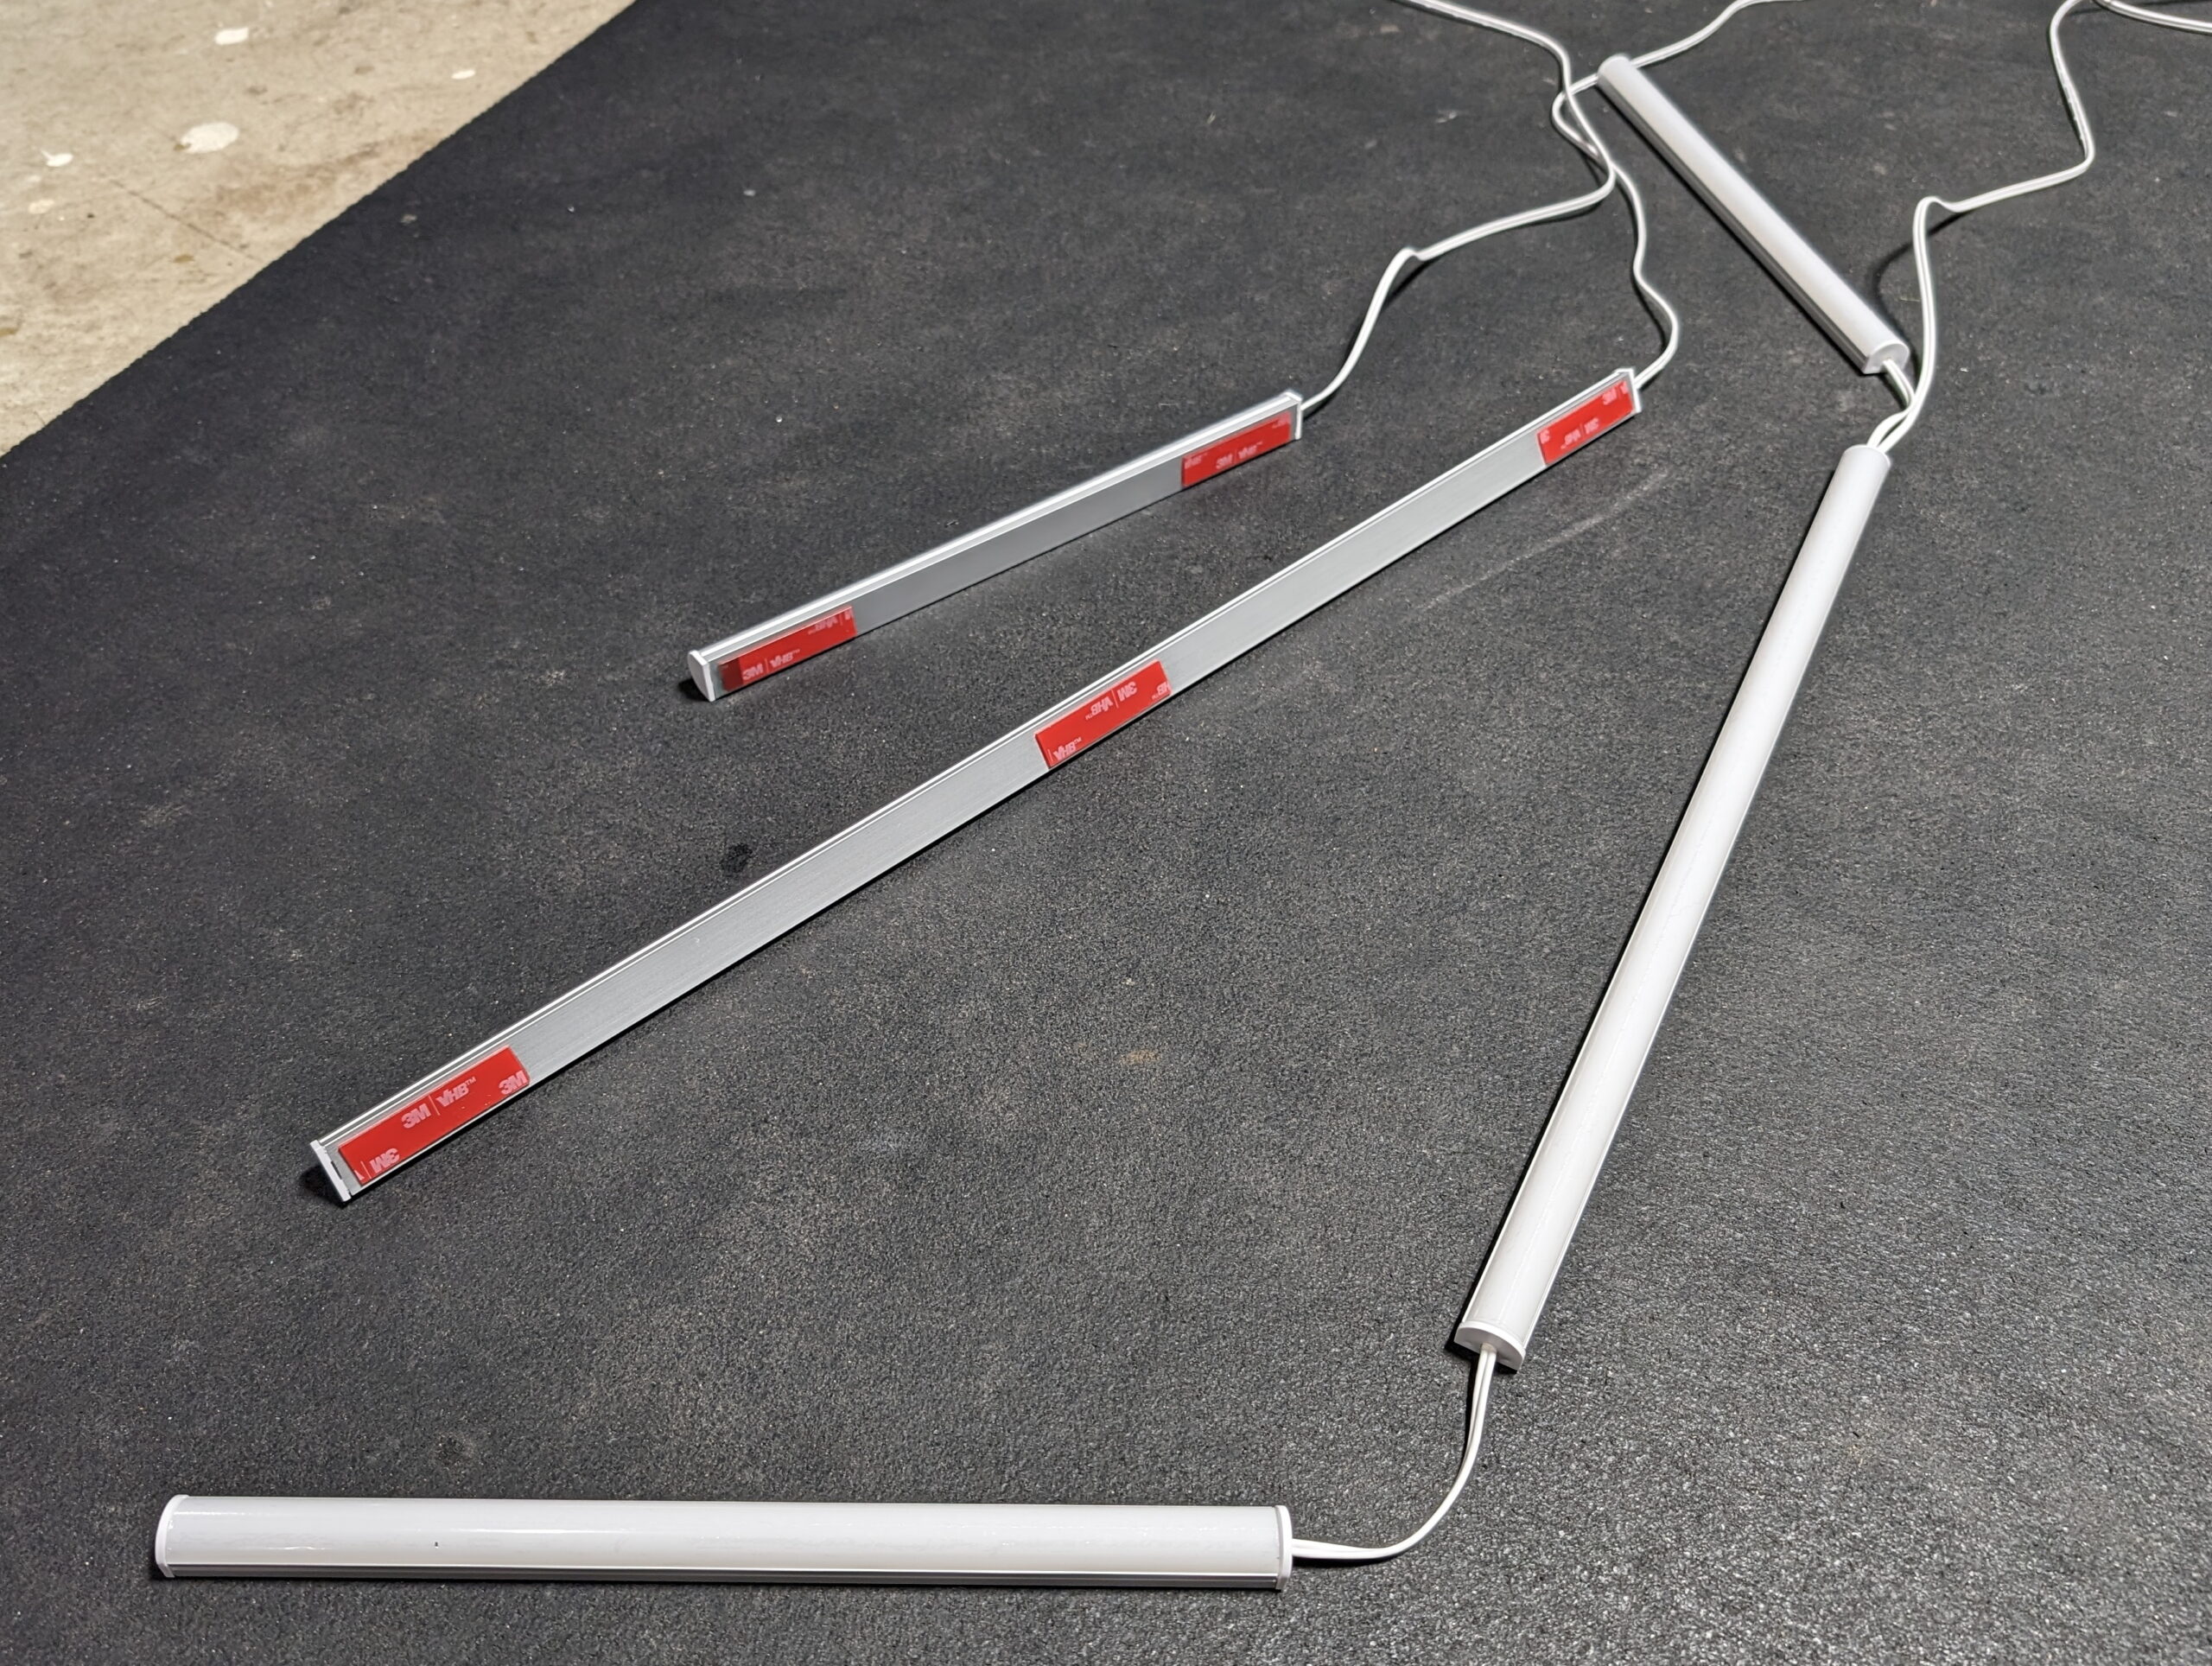
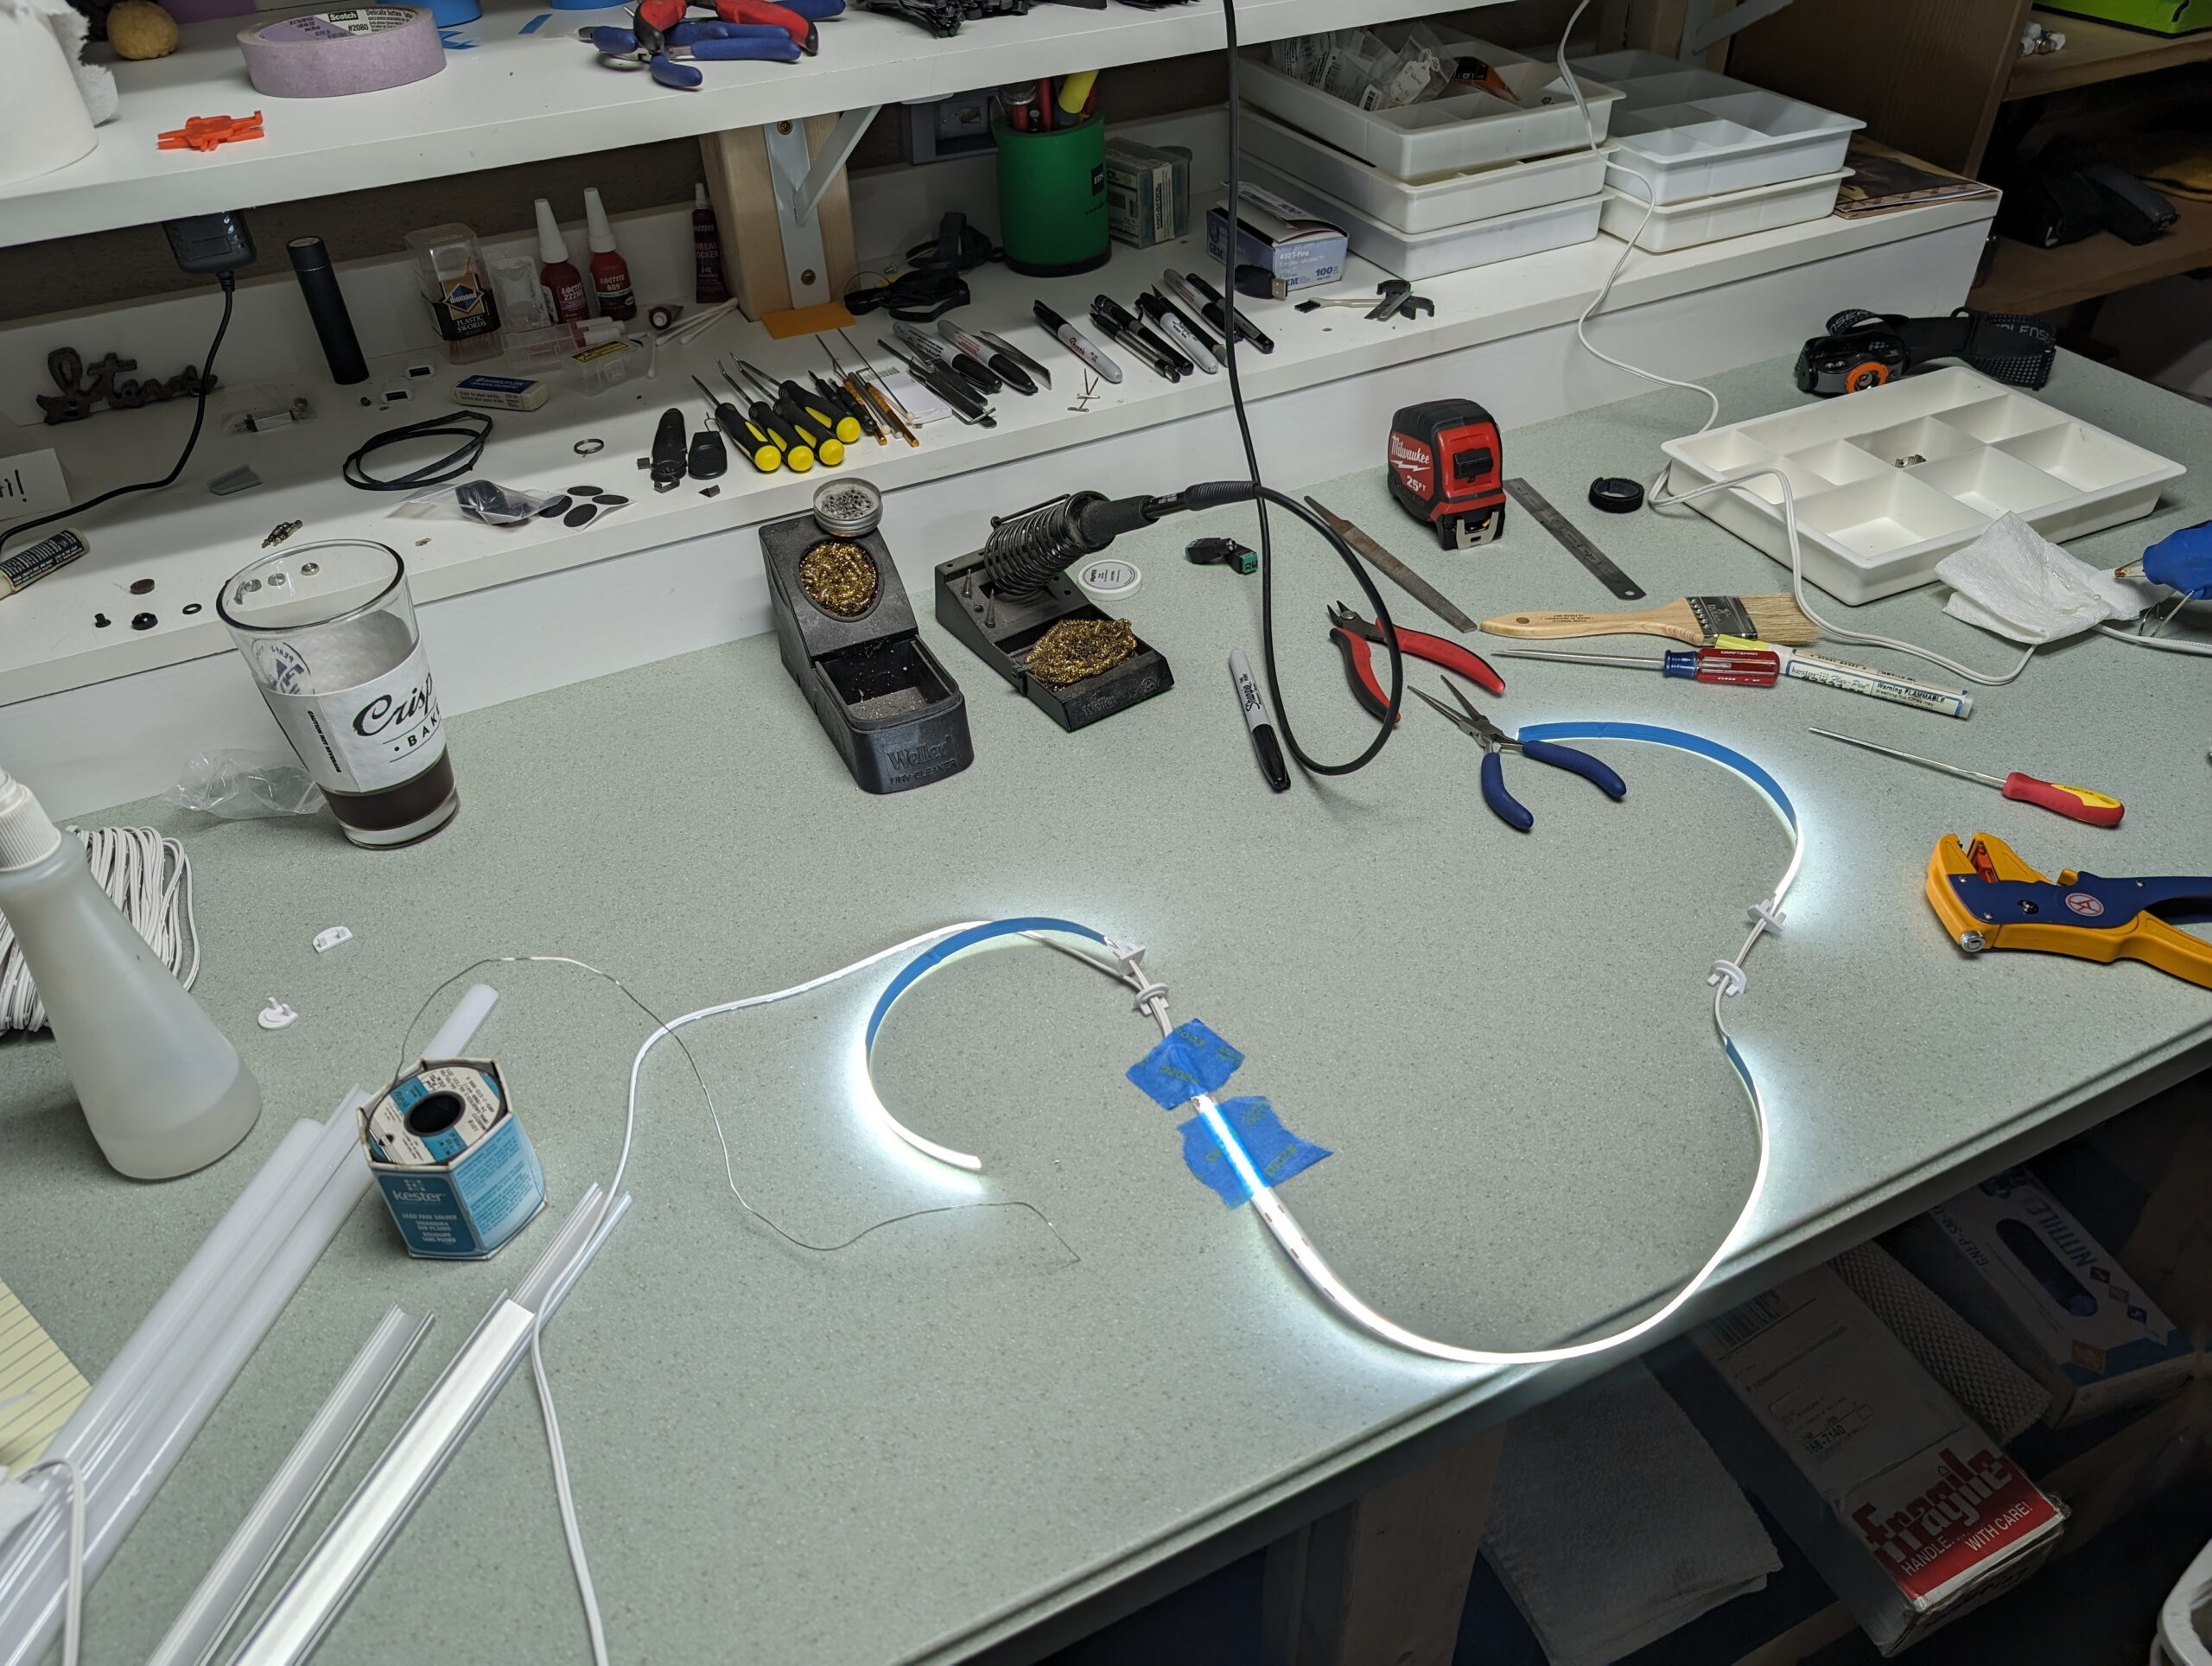
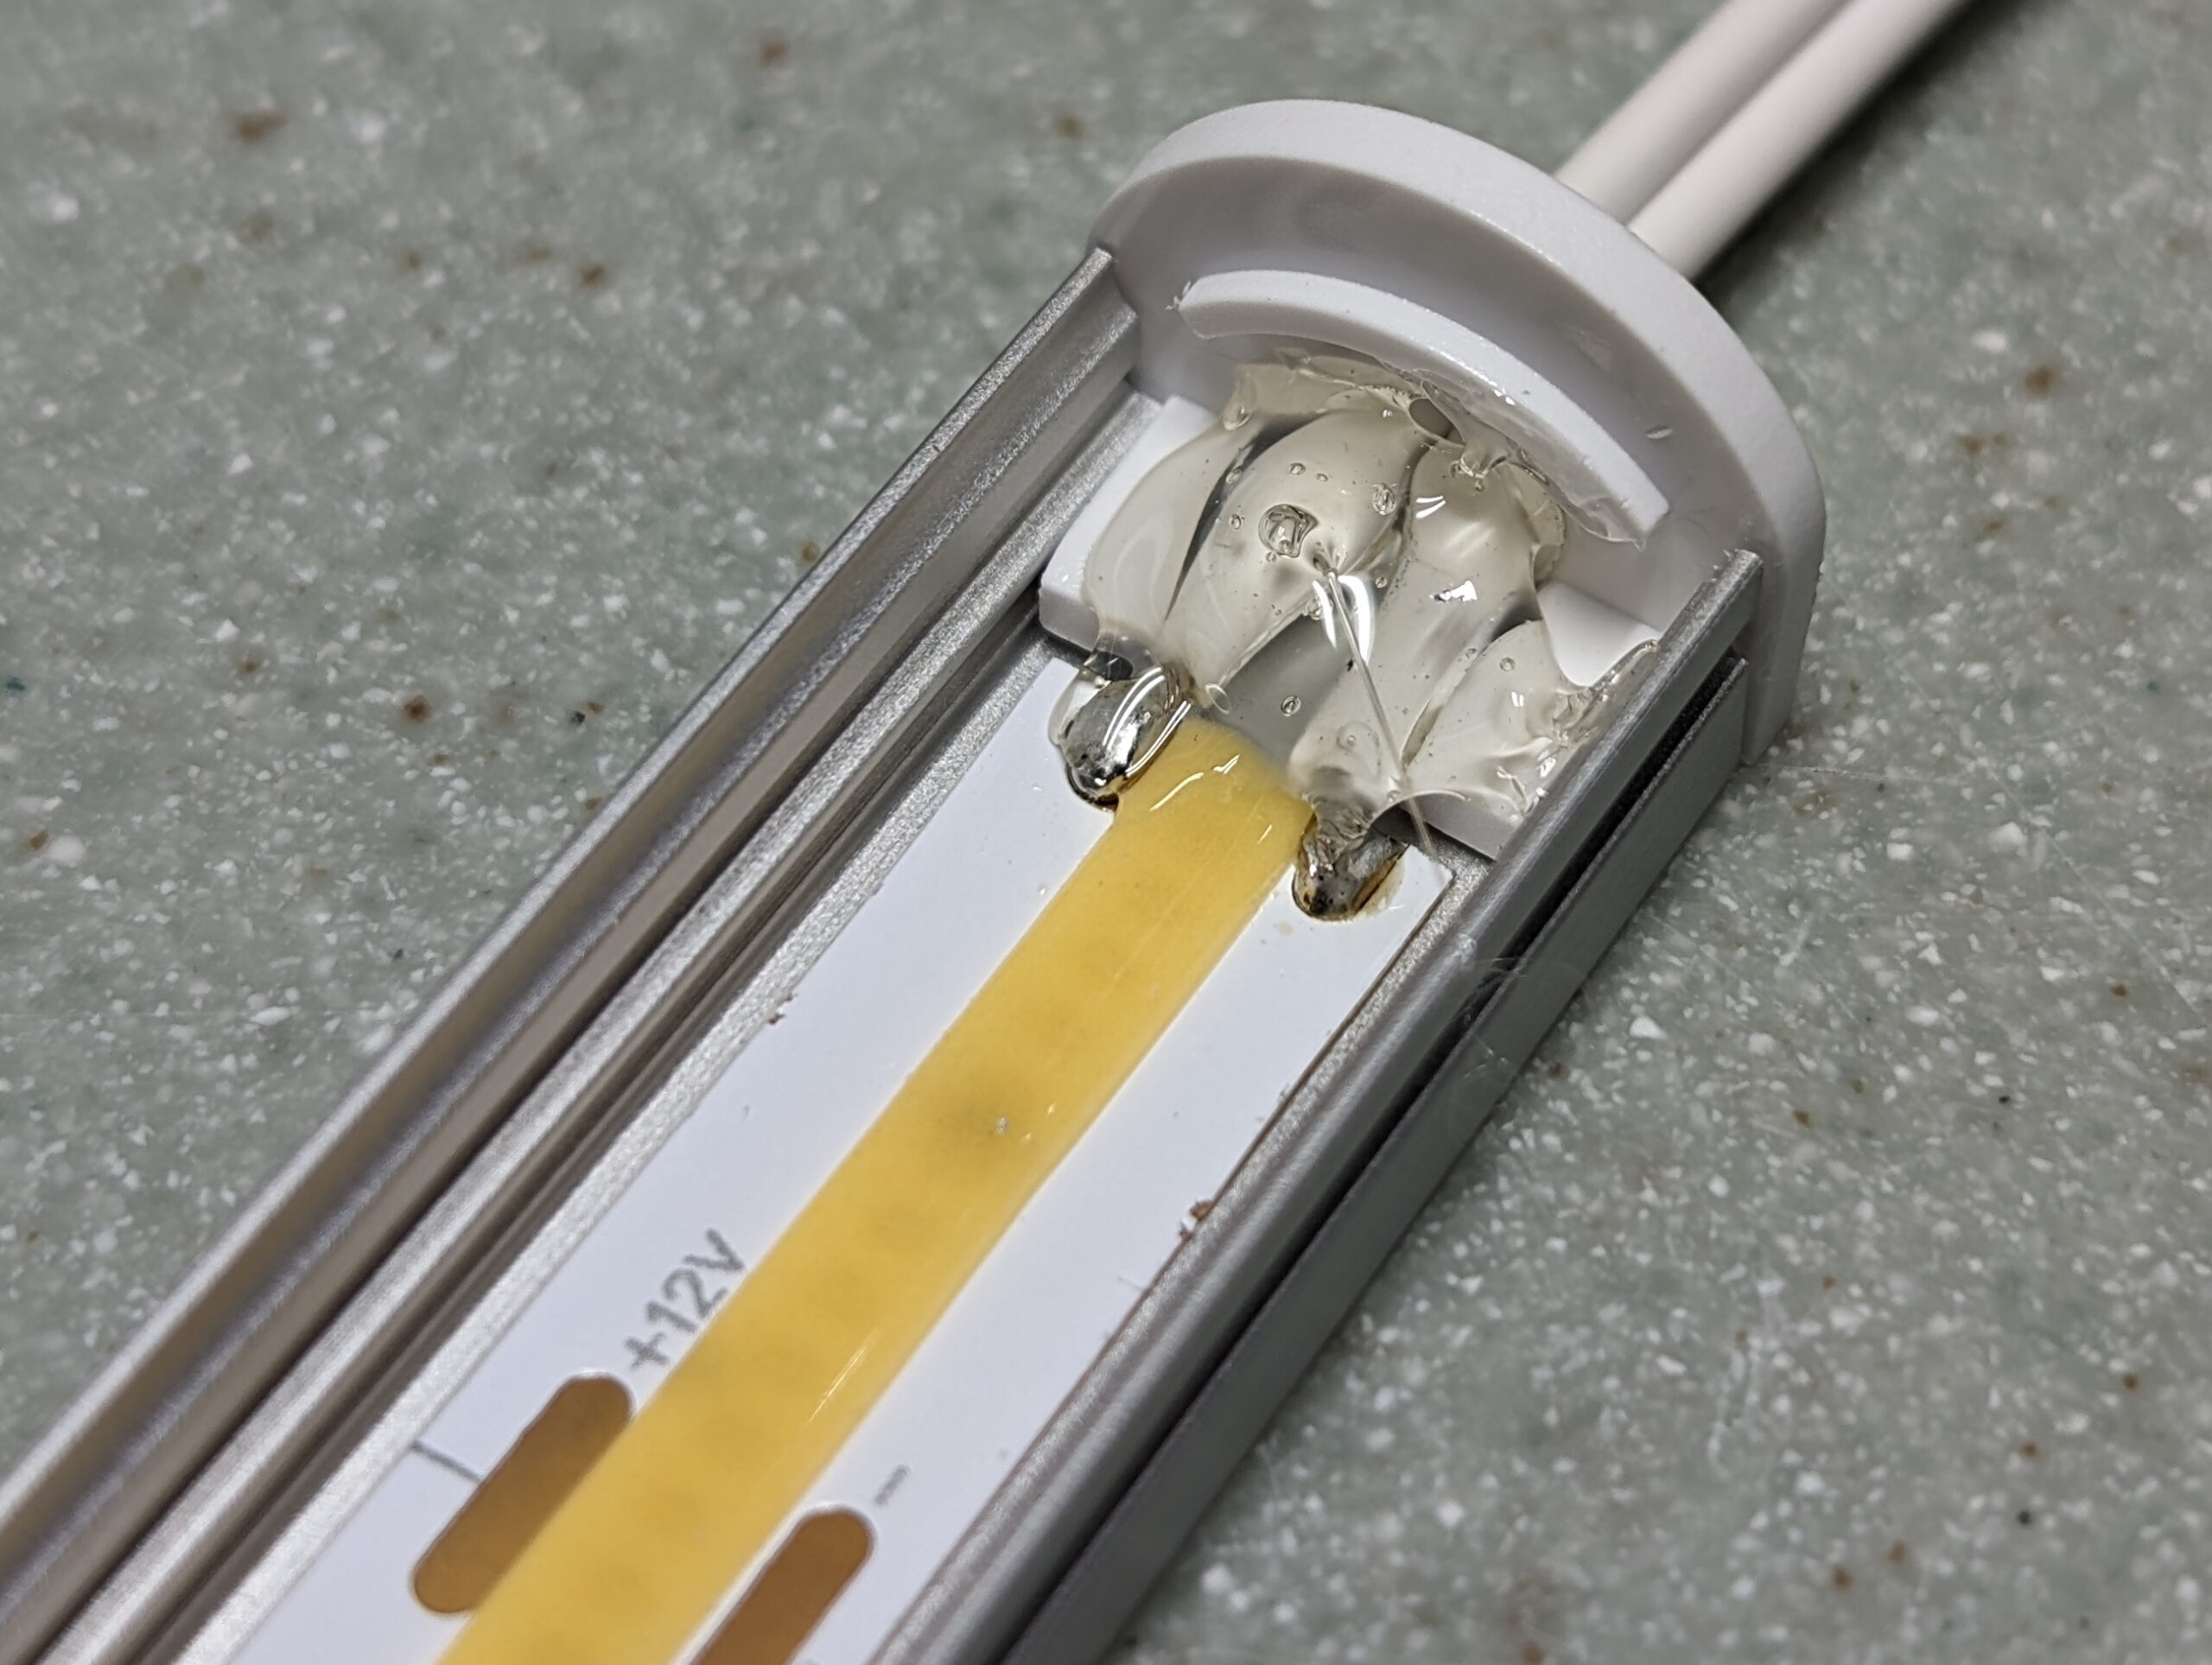
I then cut LED strip to the next step shorter than the housing, soldered the supply wire, stuck the strip into the housing via it’s self-adhesive backing, fitted the endcaps, added hot-melt glue for strain relief at the solder area, and snapped the face on. For the corner cabinet lights I wired it in a T arrangement, with the two sides being fed from the center, and then a wire out of the center to head up to the cabinet. This arrangement was because the corner cabinet holds the outlet near the back left side and it minimizes wire distance. It may have also helped with voltage drop on a long-ish strip of LEDs, but I’m not sure the ~30″ total would be enough to actually cause a problem.

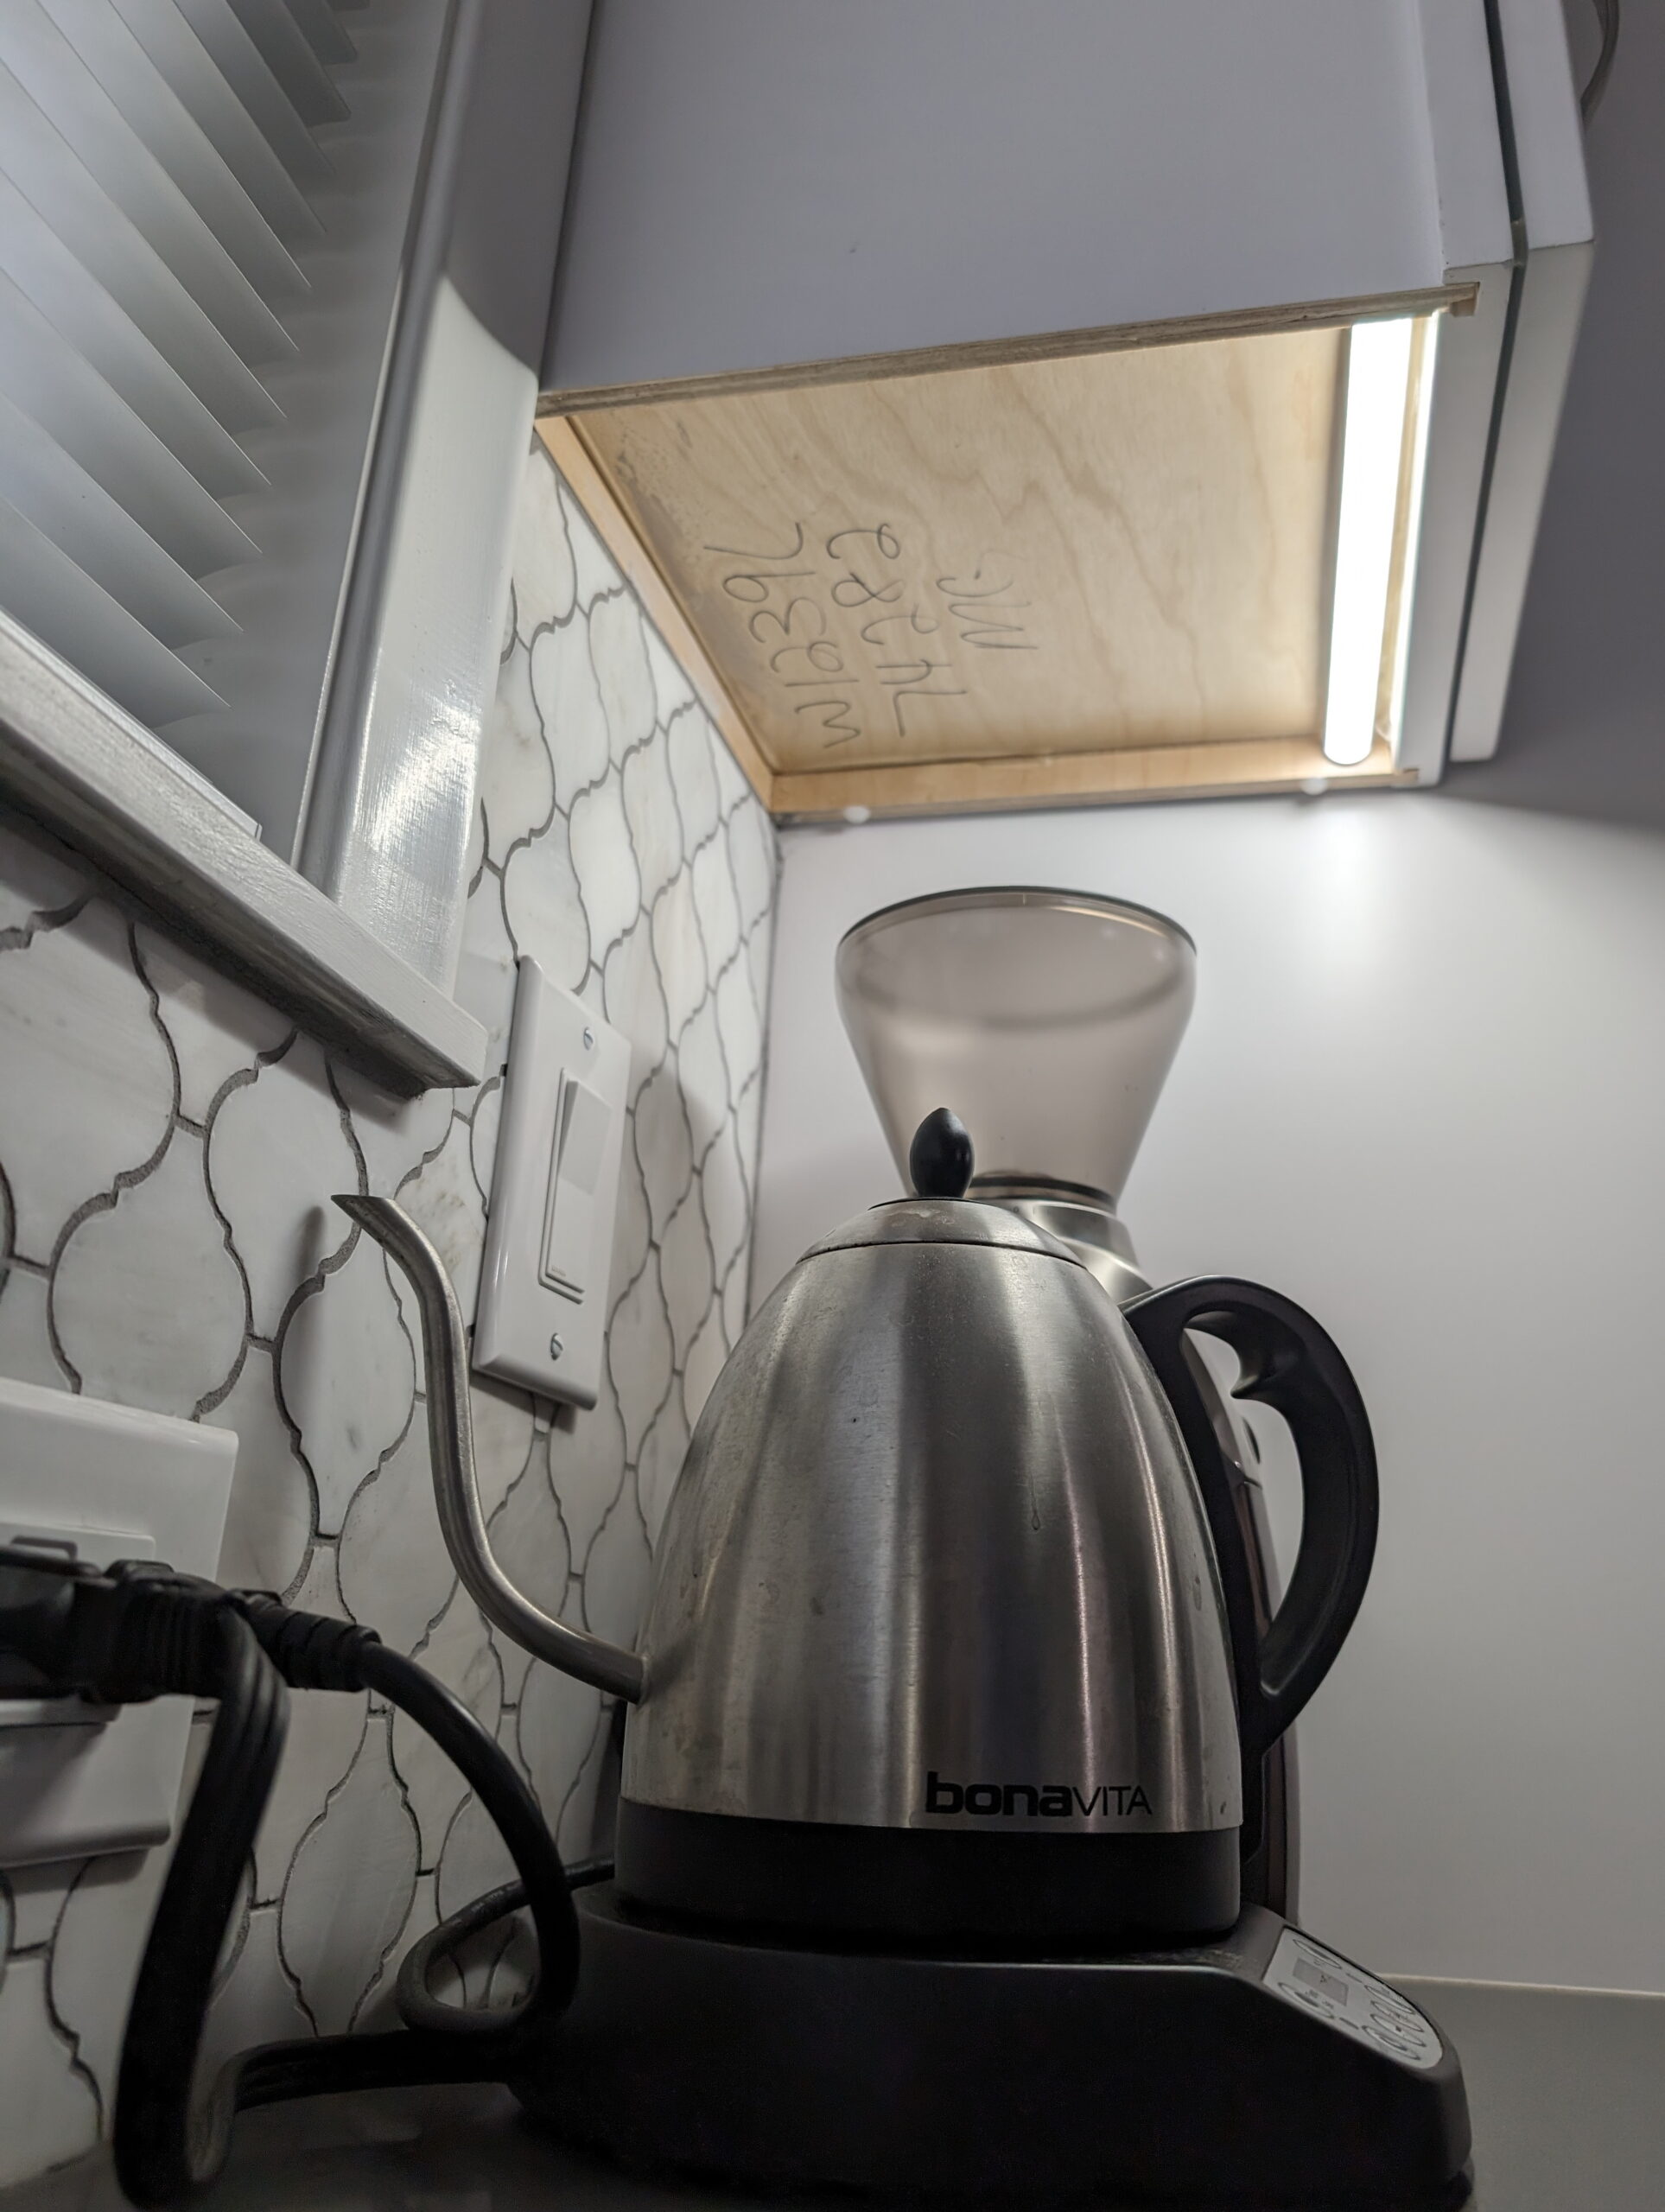
A small hole (3/16″) was drilled in the underside of the cabinet to run the wire up to the supply, cabinet undersides cleaned and strips stuck in place with VHB tape, wire was tacked in place with hot melt glue, and screw terminal to barrel adjuster adapters (which came with the power supplies) fitted. A bit of cable tying to tidy the cables in the cabinets and it’s all done.

Total cost for this project was $122.83, and that includes the unused 4000K strip that I bought as a test. There is enough extra left over to do at least another 10′ of enclosed light somewhere else in the house, so I might build some light strips for under my workbench shelves or perhaps where I have music gear in my closet.

Kristen and I are both really happy with how it came out. More than just filling in the room and serving as a night light it actually offers usable additional light when working on the counters, especially when cooking at the stove.

Comments closed

Surprise New Bike Day: 2023 Salsa Warbird C GRX 600 1x

It’s been no secret that for years my favorite drop bar bike was my beloved 2019 Salsa Warbird Carbon 105 700. This bike has been with me on some of my most memorable rides, from remote parts of the UP and Canadian wilderness to silly northern LP bike path routes, from single track where it didn’t quite belong to long summertime wanders on dirt roads.

For years, and especially in 2023 after switching it to 1x, I’ve told numerous folks that there’s nothing I’d change on it and no reason to get anything new; it’s simply excellent. But then in late November while cleaning it up for winter I found a bit of a shock: a small starburst crack in the frame at the top tube/seat tube junction and a couple other hairline cracks on the seat tube. As things wear out and everything eventually fails I can’t say I was devastated, but I really was disappointed. I loved riding that bike and did not want to change anything. I even came to really like the white color.

After finding the crack I rode it a couple more times and things seemed fine. I have a long seatpost which extended well below the crack area, and I didn’t feel or hear anything when riding, but like any crack it’s best to be safe. The warranty for a carbon frame is five years, which was coming up, so I sent photos of the crack to the folks over at the venerable Tree Fort Bikes and Salsa to get things rolling. I wasn’t sure if it was problematic, and — honestly — I really didn’t want to replace the frame if it wasn’t needed, but I wanted to ask. I love how my Warbird looks with the white frame and reflective black vinyl that I added, and I wasn’t exactly keen on a matte black replacement, re-running brake lines, etc. And, it rode great!

After just a handful of questions Craig emailed me with a massive surprise: Salsa is replacing my 2019 Warbird (v4) frame with a complete 2023 Warbird C GRX 1x bike, and instead of being a simple black warranty replacement it’s a nice clay-ish grey color! This was better than I could have possibly hoped for, because not only did it replace the problematic frame, it moved me to Shimano’s GRX drivetrain! And I also wouldn’t have to cut and re-run the brake lines, etc.

Back when my Warbird came out GRX wasn’t available, so it came with the (very good) 105 R7000 road groupset. This is an amazingly good drivetrain, but for rougher roads I switched to the Ultegra RD-RX800 derailleur, which was basically a high-end road derailleur with a clutch, originally intended for cyclocross use. Then in late 2022 I used a few Wolf Tooth Components parts and made it a sorta-hacky yet very functional 1x drivetrain because I wanted to get away from the problems inherent with 2x and riding in poor conditions, notably gunking up a front derailleur.

This setup worked great, but I felt a bit limited by maximum cassette size (40t) and my left brifter had a disconnected shift lever, which would rattle around on chattery roads. Minor, I know, and while I was proud of the semi-hacky drivetrain, improvements such as a full GRX drivetrain would have been nice, but I couldn’t justify it when things worked so well. But suddenly now I had it!

Last week I picked up the bike from Tree Fort, and over some unseasonably rainy, cold, and blah afternoons I shuffled parts around and now it’s ready. My new gravel bike, a 2023 Salsa Warbird C GRX 1x with a few upgrades!

Build

Frame / Fork: 2023 Salsa Warbird Carbon / Salsa Waxwing (Light Grey)
Wheelset: Specialized Roval Terra C
Ratchets: DT Swiss HWTXXX00NSK54S (54T)
Tires: Specialized Pathfinder Pro 2Bliss Ready (700×42, Black Sidewall)
Crank: Shimano FC-RX810-1 (42T, 172.5mm)
Bottom Bracket: Shimano SM-BB72-41B
Cassette:
 Shimano CS-M8000 (11-42)
Right Shift/Brake Levers:
Shimano ST-RX600-R
Left Shift/Brake Levers:
Shimano BL-RX600-L
Brake Calipers:
Shimano BR-RX400
Brake Rotors: Shimano SM-RT64 (160mm)
Brake Pads:
Shimano K05S-RX (Resin)
Chain:
Shimano CN-HG601-11
Rear Derailleur:
Shimano RD-RX812
Bar Tape:
MSW HBT-300 Anti-Slip Gel+ (Black)
Handlebar: Salsa Cowbell Deluxe (44cm)
Headset: Cane Creek Hellbender 70 (IS41/28.6/H9 | IS52/40)
Stem: Thomson Elite X4 (SM-E139 10° X 100mm X 31.8 1-1/8 X4 Black)
Spacers: Generic Aluminum
Stem Cap: MASH Donut 2.0
Seatpost: Thomson Elite (SP-E113SB 27.2 X 410 Setback, Black)
Seatpost Clamp: Salsa Lip Lock
Saddle: Specialized Power Expert (143mm, Black)
Pedals: Shimano PD-M8100
Bottle Cages: Specialized Zee Cage II (2x Left, 2x Right)
Bottle Cage Screws: McMaster-Carr 94500A233 (316 Stainless, M5 x 0.8mm, 20mm)
Front Light: Outbound Lighting Detour
Rear Light: Garmin Varia RTL515
Rear Light Mount: Garmin Varia Seat-post Quarter Turn Mount
Bell: RockBros Bell (Black)
Computer: Garmin Edge 840
Computer Mount: SRAM Quickview Computer Mount
Sensors: Garmin Bike Speed Sensor (Front Wheel), Garmin Cadence Sensor 2 (Crank)
Anti-Rub Tape: McMaster-Carr 76445A764 (Low-Friction UHMW Tape, 0.0115″ Thick, 2″ Wide)
Mounting Hole Plugs: Heyco 2590
Top Tube Bag: Revelate Designs Mag-Tank Bolt-On
Saddle Bag: Lezyne Road Caddy
Frame Pump: Lezyne Sport Drive HP
Derailleur Hanger: 465 / QBP FS2322

Weight

Total weight for the bike, with everything but bottles (including lights, pump, saddle bag+tools, and computer), is 22.54 pounds. Removing the computer/lights/saddle bag/pump brings it down to 20.78 pounds, so I expect that without pedals, cages, or mounts (the usual way of weighing a bike) it’d be in the 19-pound range.

Build Choices:

Crank/Cassette Upgrade: After moving my previous Warbird to 1x a year ago I realized that I like having a 42t front ring. Since the bike came with a 40t ring I wanted to upgrade that, but it turned out that I could get a complete FC-RX810 crankset with a 42t ring for not much more than a stand-alone ring. Swapping from the stock FC-RX610 swap saved 84g while increasing the chainring size, makes mounting a cadence sensor easier, and opens up the possibility of getting a power meter on the bike.

At the same time I ordered an CS-M8000 cassette to replace the stock CS-M5100, which saved another 114g. While I originally was going to get an 11-40 to match my previous Warbird, my friend Ray convinced me that a 42, ending up with an even 1:1 in the lowest gear would be good, and I agreed. Between the two sizes the seven lowest cogs are the same, so typical flat/rolling stuff would feel the same with either, but when I do need a climbing/trail gear it’ll be there.

Chain Drop Protection: I was originally going to fit some chain drop protection, like the Wolf Tooth LoneWolf, but after thinking about how many times I’ve dropped a chain in the past, I opted against it. Mounting this would also require fitting a front derailleur mount which makes bottle cage mounting more fiddly and makes the bike harder to clean. I may still fit this later on, but for now I’m content continuing without.

Rotors: I am generally very fond of Shimano rotors with solid aluminum center carriers as they seem to be harder to bend and have an aluminum core (Ice Technologies) to help with heat dissipation. The bike came with some SM-RT64, and while they are a bit heavier per-rotor (~25g) than others, and just steel, it would have cost a fair bit (~$100) to replace them. I have similar rotors on my fatbike and they’ve been working well, so for now I’m going to stick with these rotors and see how it goes. They can always be upgraded later.

Frame Pump/Saddle Bag: On the previous Warbird I used a somewhat large Specialized saddle bag with a tiny 4″ pump tucked inside next to the tube. This worked well, but I began having problems with the pack Velcro no longer holding, so I also had a releasable cable tie holding it to the saddle.

I’d also never needed — that is tested — the tiny pump in the field, so out of an abundance of caution (and some paranoia) I’d often tuck a second, larger pump in my jersey pocket for long rides. This other pump had been used a few times, so with the bike swap I’ve moved to mounting the beloved (and cheap) Lezyne Sport Drive HP to the frame behind the seat tube bottle cage. I’m wary of road spray causing problems with the pump, but if it does I’ll just start carrying it in my pocket.

By no longer needing room for a pump in the bag I was able to swap to the Lezyne Road Caddy, a small and elegant seat bag that I’ve had on my road bike for a couple years.

Bike Fit: This and my road bike, a custom built Salsa Warroad, are very very similar in geometry, but I’ve had it set up with the bars slightly lower than on the Warbird. Using my favorite stem comparison tool I found that by removing 10mm of spacers below the stem I can get the bar clamp to a nearly identical position on both bikes, so as a bit of an experiment I’m giving this a go, leaving the steerer tube uncut so I can go back if desired.

I’m slightly concerned about the fit when riding more technical trails, and I may have a harder time keeping my forearms near level while on rough surface, but it’s plenty easy to go back if needed.

Bottle Cage Screws: When using Specialized Zee Cages it’s important to have a low profile screw head, else they’ll rub on the bottle and make it hard to insert. The screws which come with the cages are a nice shape, but are a chromed steel that seems to corrode with sweat, sports drink, and road treatment chloride, so I prefer something else. I prefer something like 316 stainless, and I had some 20mm of these laying around from a previous project. For just-bottle-cages this is longer than the needed ~15mm, but the additional mass is across the three standard cages is only 6x 1/4 of the mass of a single screw (1.5x a single screw), or ~5g. It wasn’t worth spending $11+shipping to save that little mass.

Anti-Rub Tape on Head Tube: On my previous Warbird, and on the Warroad, I shortened the front brake hose so it’d take a clean path from the fork to the bar, not touching the head tube. This works, but also gets it the way of the light mount, and makes adjusting spacers difficult because I have to remove the bar from the stem to slide things upward.

The stock hose length on this model rubs the front of the head tube, but I’m not sure I want to shorten it yet. For now I simply put a strip of UHMW PE tape along the front of the head tube, below the Salsa logo, so the hose won’t rub on the frame/paint/carbon. Once I settle on spacers and work a bit more on accessory mounting I may shorten the hose, or I may just leave this alone.

Comments closed