SSD Installation in a Mid-2010 27″ iMac
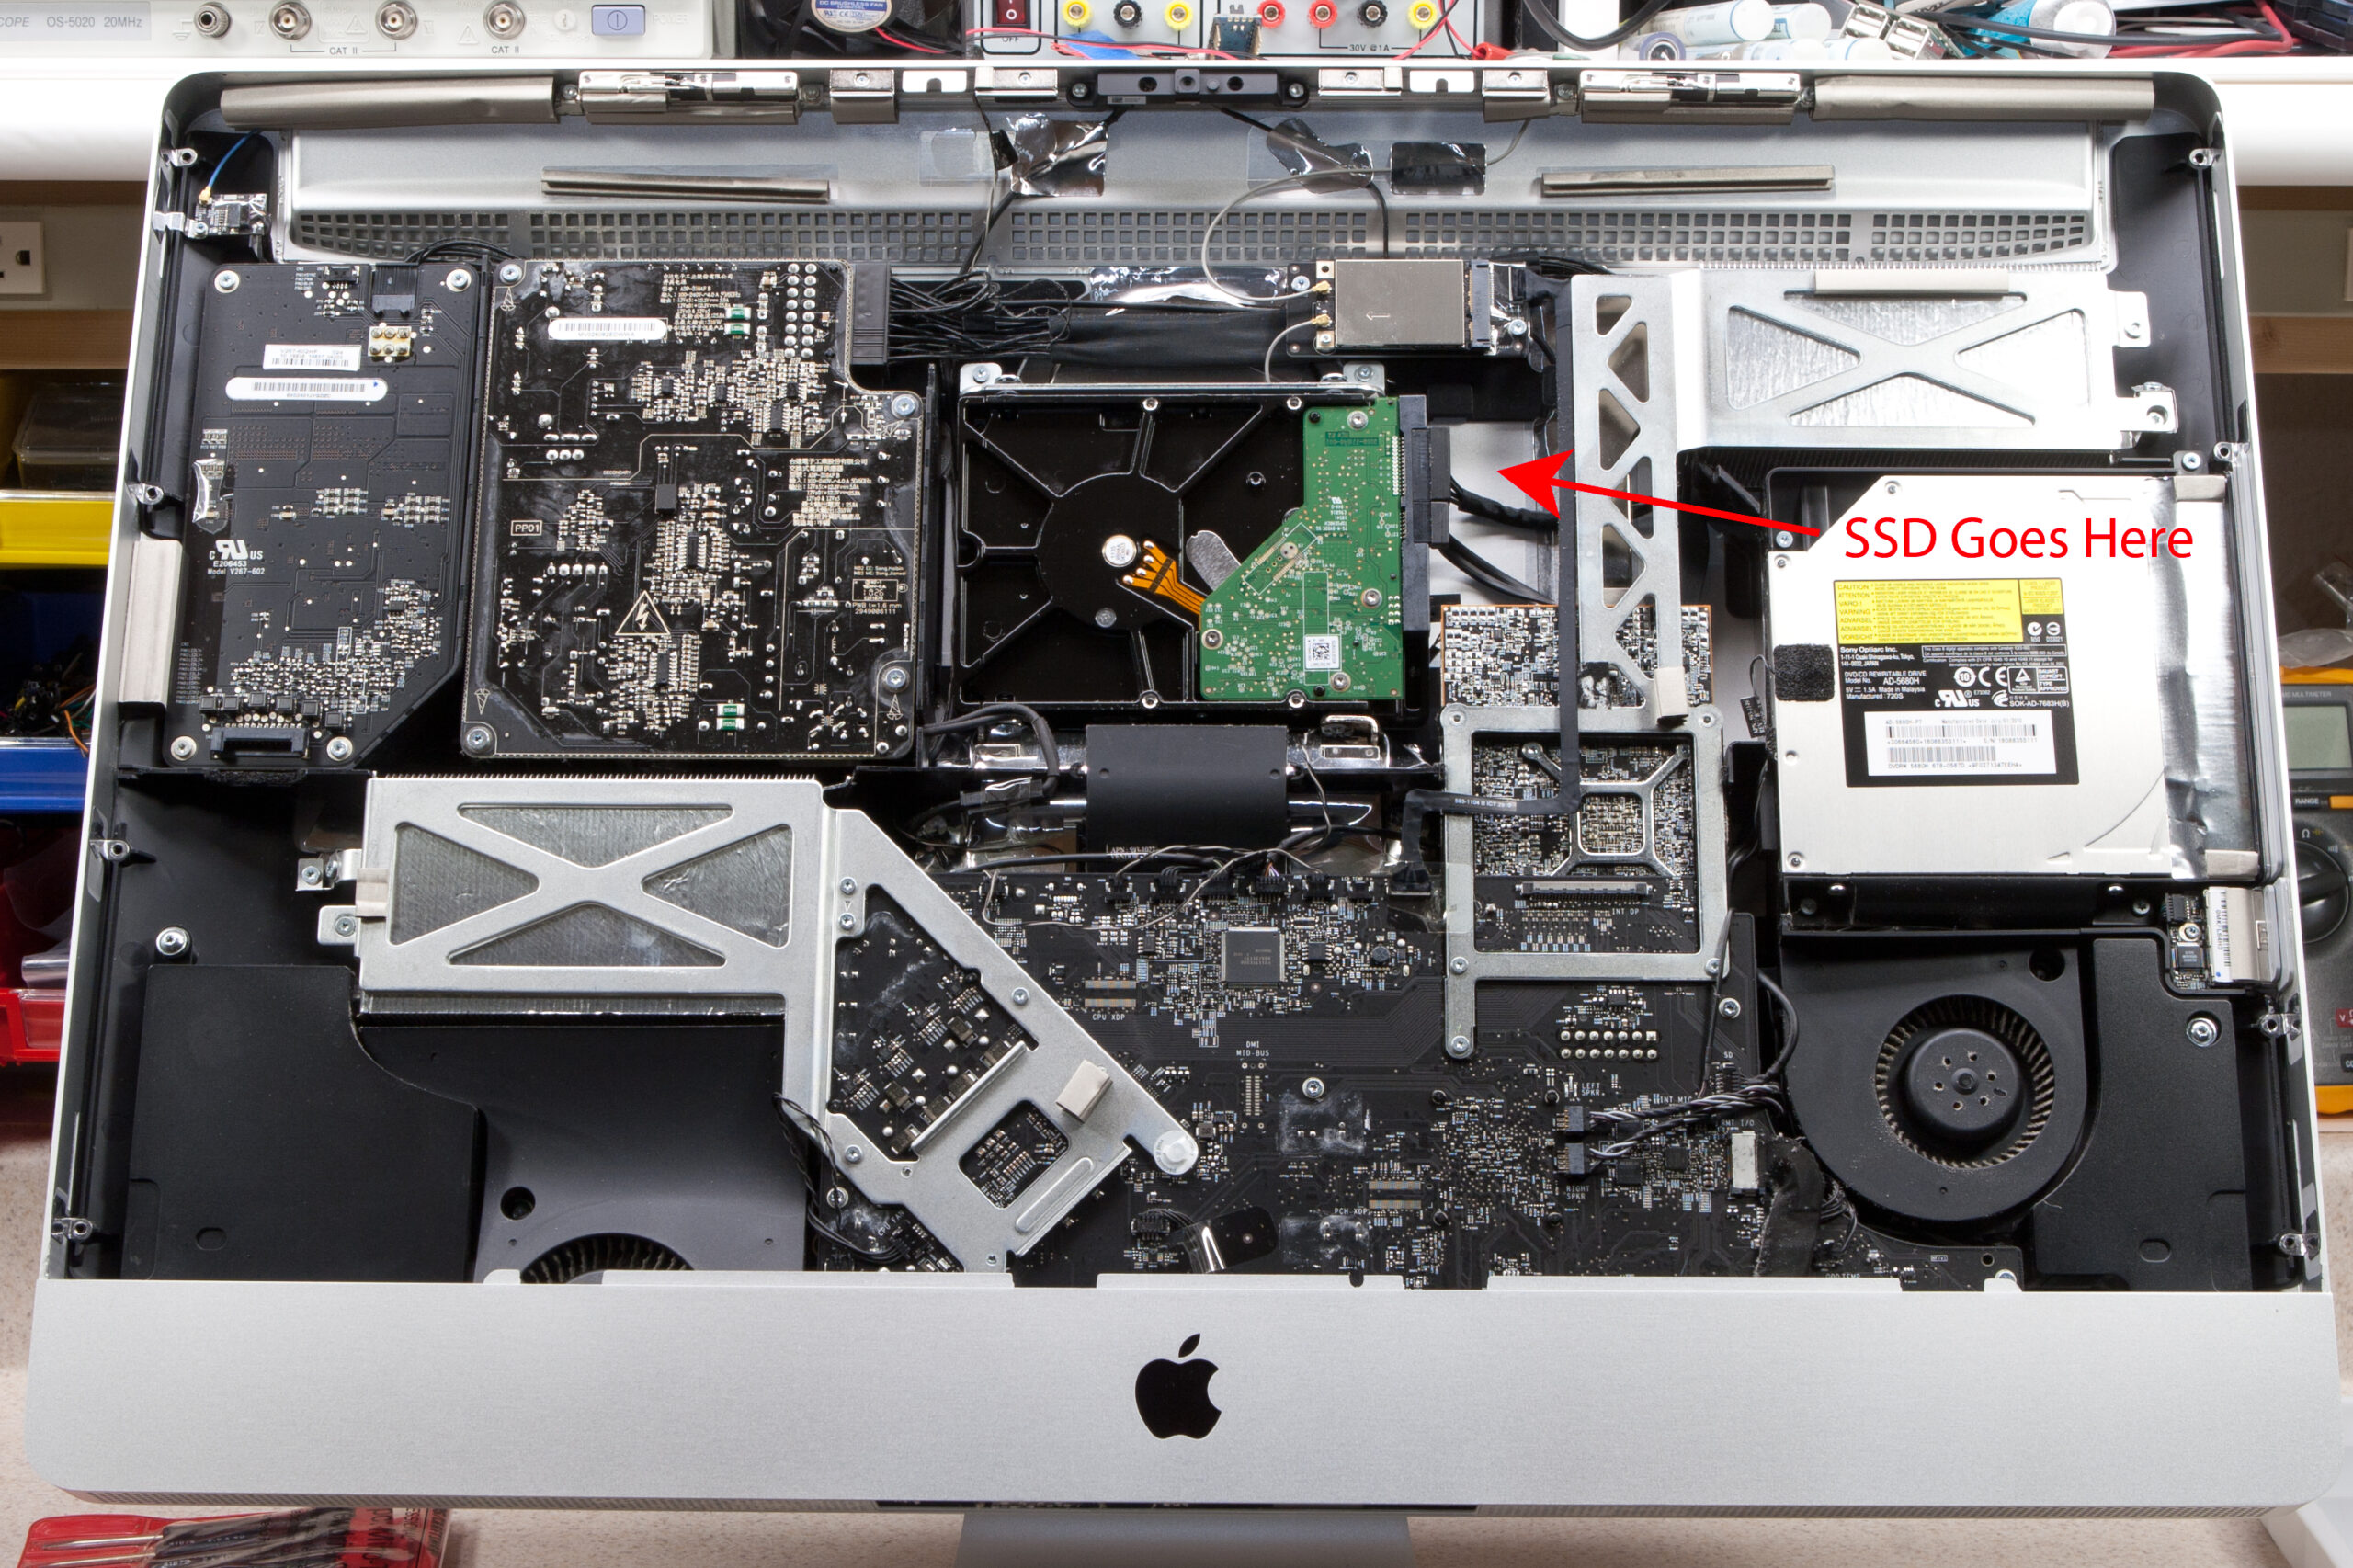
This weekend I fitted my 27″ iMac with an SSD and I now have that running as the boot and OS drive, with large-stuff-storage on the internal 1TB drive. I’ve been considering an SSD for a while, and with prices finally becoming reasonable (~$225 for 120GB) it was time to give it a go. Due to Apple’s screwup last year I ended up with a mid-2010 iMac; a model which could have been ordered with an SSD from the factory. While this 27″ iMac didn’t come with an SSD, thanks to this post by Tobias Müller I found that it was possible to buy the plastics and cabling and add one with a factory-type fit. So, I did.
After receiving the parts and reading through Tobias’ post and the Apple factory service manual I set about fitting the drive. I won’t go into details of the install here, but it would easily rate 4 out of 5 for difficulty of non-custom computer work that I’ve done. Because the SSD sits in a carrier behind the logic board I had to remove the display, power supply, LCD power supply, Airport card, a blower, hard drive, optical drive, logic board, and an IR receiver to get the job done. The SSD, mounted in the pressure wall / plastic carrier and connected with a new wiring harness, settled nicely into the case and everything went back in.
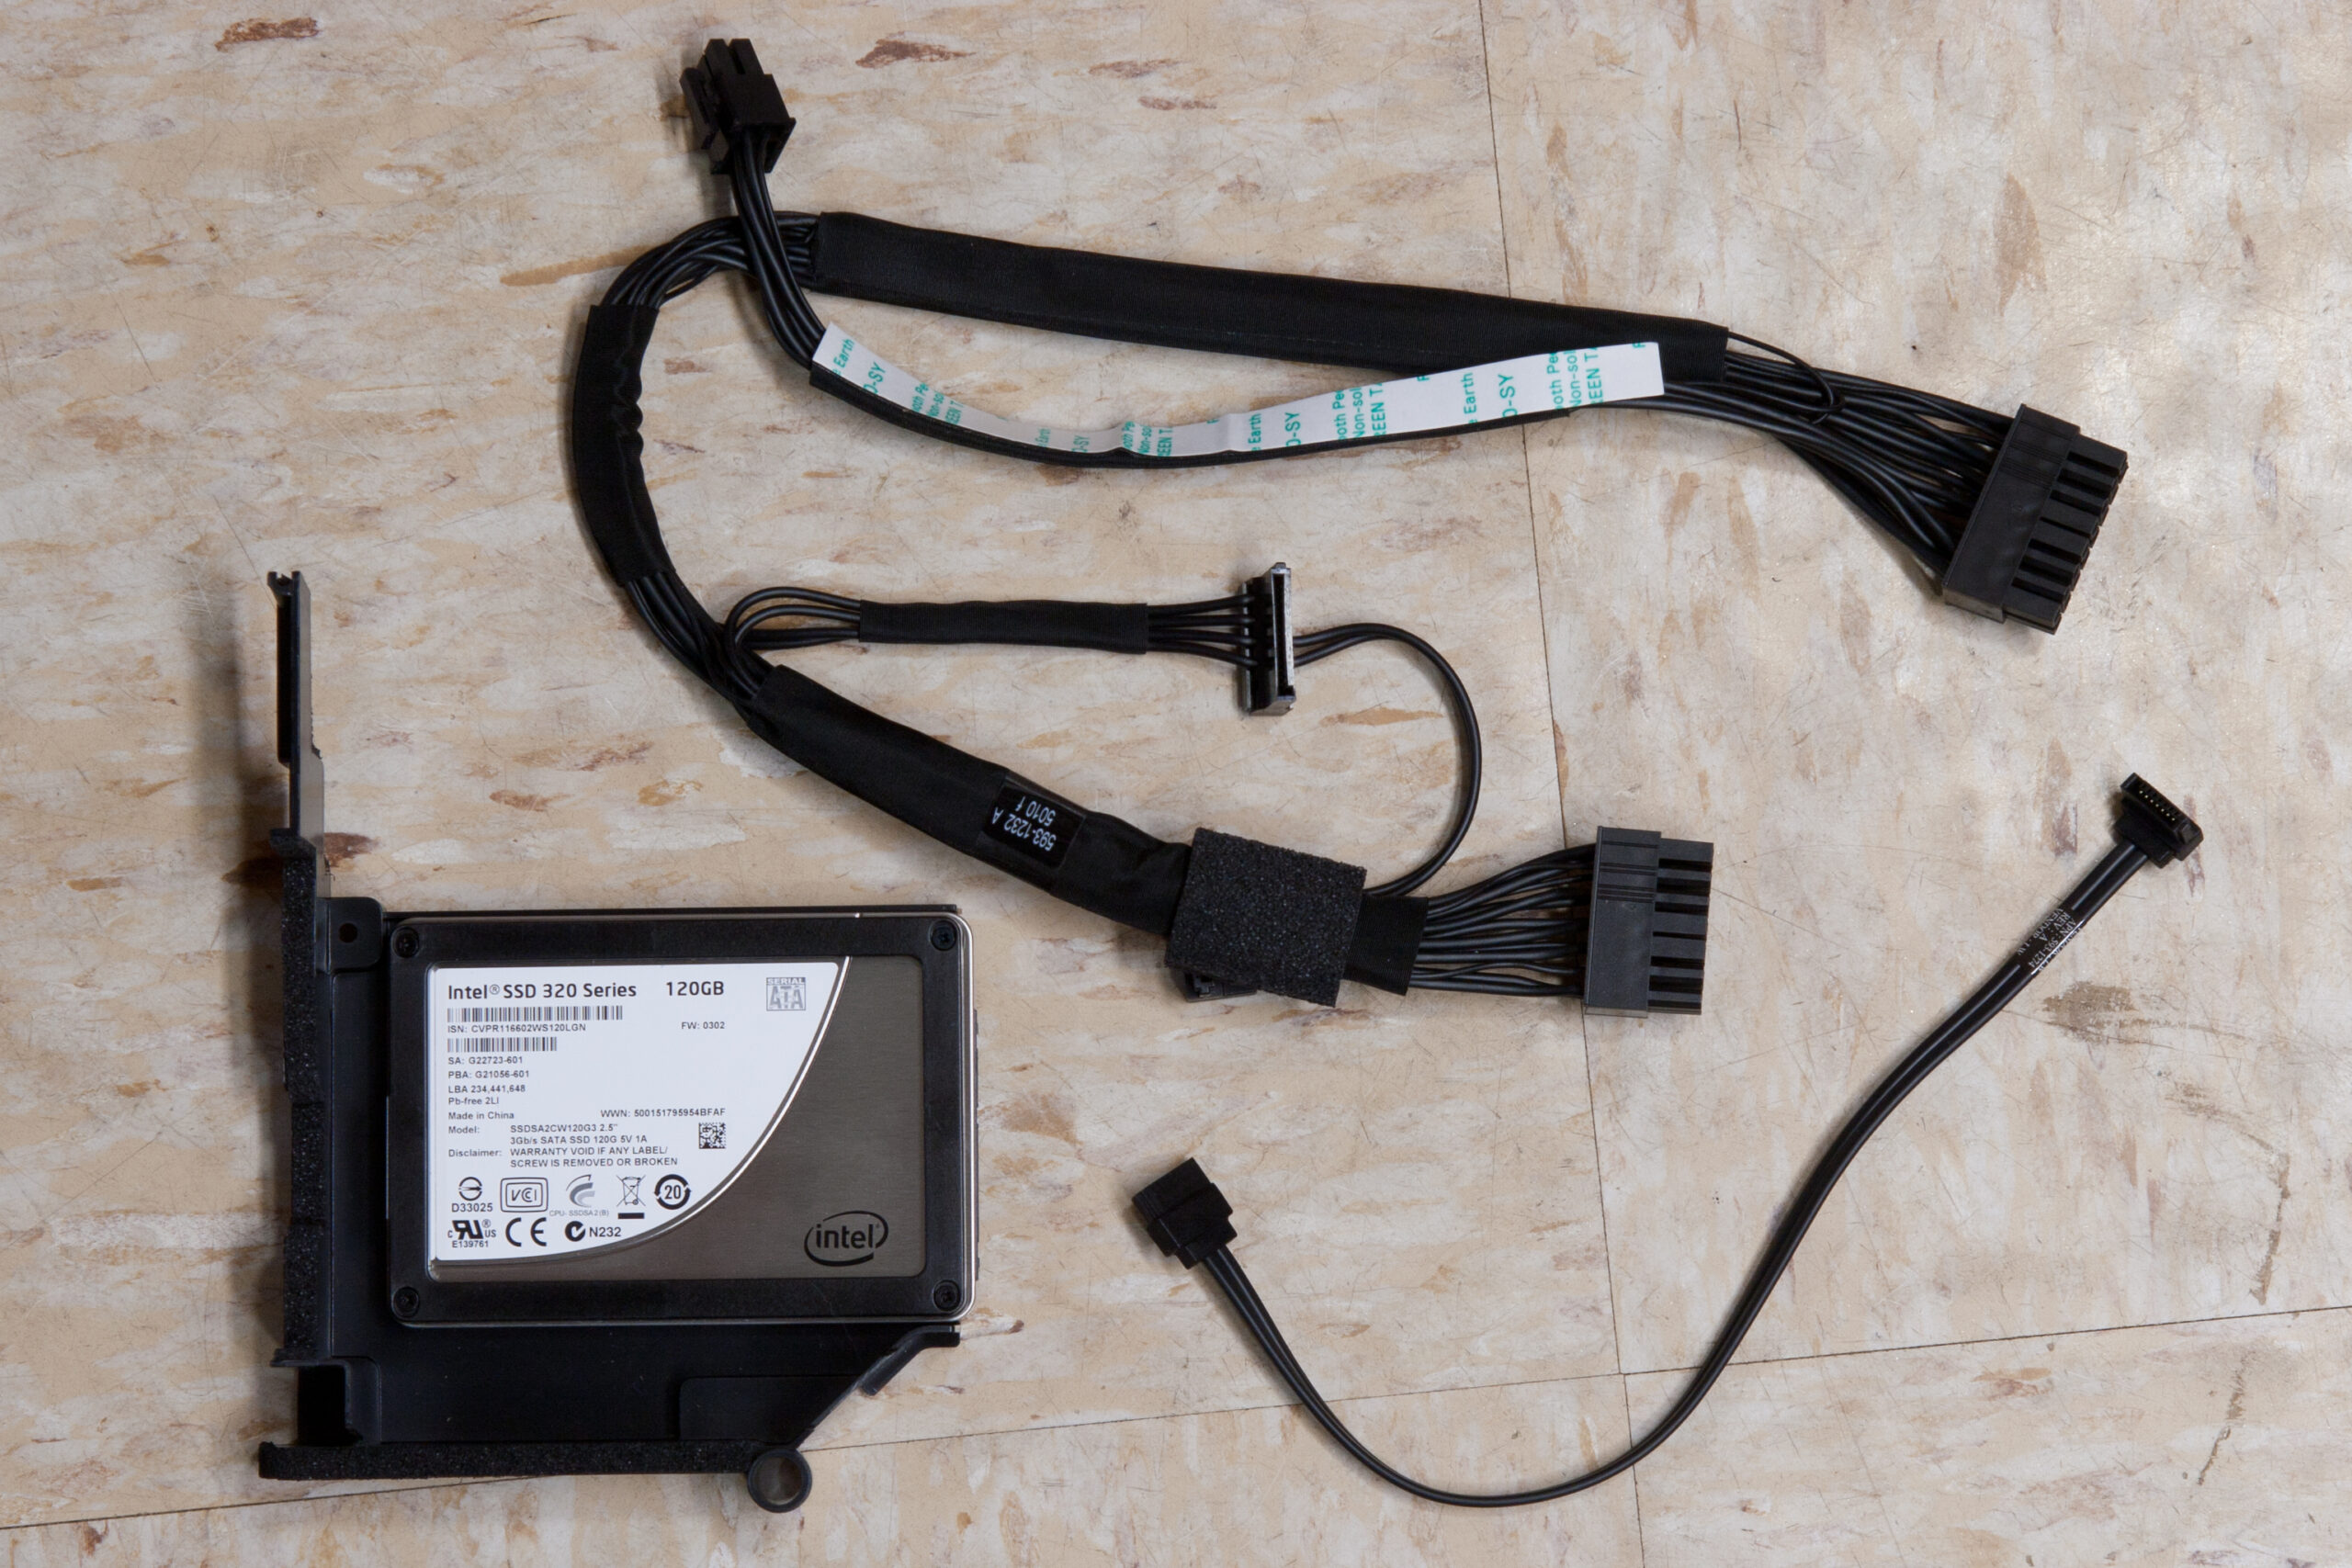
Beyond the SSD, if you’d like to try this modification yourself you’ll need the following Apple parts:
922-9531: Power Cable / Wiring Harness
922-9485: Pressure Wall
922-9538: SATA Cable
I purchased all of these new from Usedmac for a total of $84.24 shipped and installed them along with a 120GB Intel 320-series SSD. These parts, with the SSD attached, can be seen here. If you don’t want to pay ~$20 for an Apple-specific SATA cable, a 10″ cable with a right angle connector on one end (only) which bends towards the top of the drive will suffice.
There’s a lot of random looking junk inside that thing. I suppose that dispels the theory I had about them just putting a Macbook inside a big box with a screen on.
James: I only wish the power cable and some of the board to board stuff was a little easier to work with, but it’s definitely well integrated. Those large framework-looking pieces are the supports for the two heatsinks and heatpipes. The bulk of stuff in there is definitely the logic board.