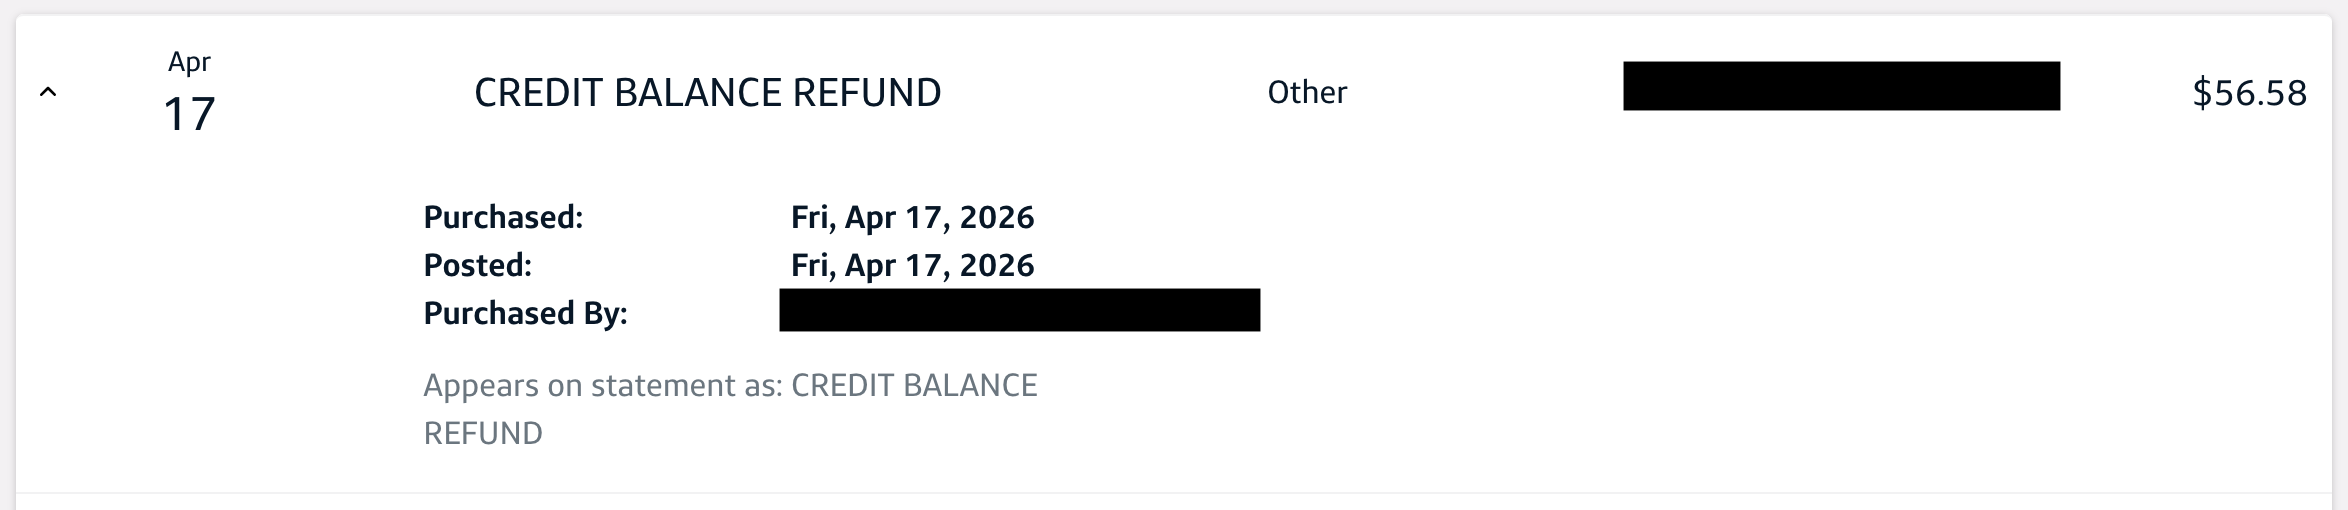
This morning when checking my Capital One credit card statement I saw a surprise item, a CREDIT BALANCE REFUND for $56.58. After some digging I found this is what shows up when a card user received a check requesting a refund of a credit balance (balance owed to the card holder by Capital One).
Online support was of no help, so after speaking to a customer support (and holding) for over half an hour, I got an answer.
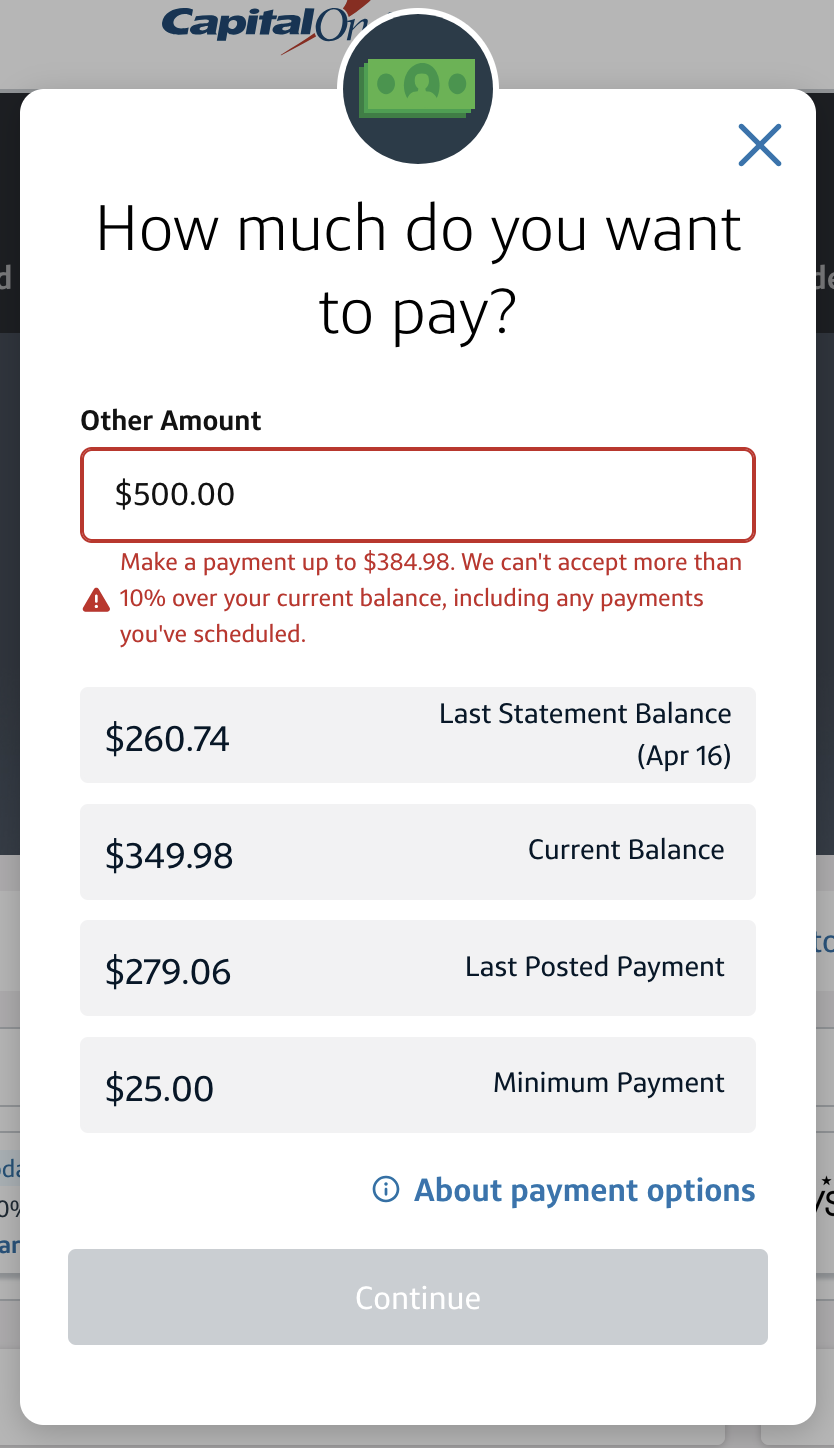
Whenever I go to pay to this credit card, I’m able to pay up to 10% over the current balance, which I tend to do because there’s almost always pending transactions, and it all evens out (returning to a normal balace) within a day or two.
Capital One says, per their support document Getting overpayment refunds (emphasis mine):
If you have a negative balance, you have options to bring the balance back to $0. Keep in mind that in some situations this happens automatically.
Spend the negative balance: If you have a negative balance, use your credit card like you usually do, and Capital One will apply the account credit toward your purchases.
Get an automatic refund: Capital One will issue a refund if you don’t make any other purchases after two payment cycles. If you don’t use the money for up to four billing cycles, we’ll automatically send a refund check to the address on file. Note, your overpayment must be more than $1.
Request a refund: Capital One will mail your refund within 7 business days of your in-person or written request. Delivery usually occurs within 15 business days but may take longer depending on the mail carrier.
That is, if you don’t use the card for two payment cycles, and don’t spend the whole credit balance within four payment cycles, they’ll send a refund check.
Here’s where the flaw was triggered. Apparently I made an overpayment for the past two months right as the payment cycle was ending. Despite there being plenty of transactions during each billing cycle, and the balance wavering between a credit (from the overpayment) and debit (from normal use), because there was a credit at the end of a number of two consecutive billing cycles, it triggered a check issuance. This was confirmed by the customer support person I spoke with.
This appears to be a flaw in their business logic, with the result being a bit of money floating out there in the postal system for no real reason. It certainly cost Capital One money to issue the check, so it’s a waste of time (for me) and money (for them). As I write this I have $641.30 in pending transactions on this account, with ~$588 of that from the days before the Credit Balance Refund was issued, so sending a refund check is nothing but extra work.
I was hoping to send this to Capital One to share this finding with them, but they don’t have a public email address and I don’t feel like spending any more time on the phone, so I just wrote it up here. Maybe / hopefully the customer support person I was talking with (and their manager, with whom they had to consult on the issue) log it as an issue.
Comments closed


