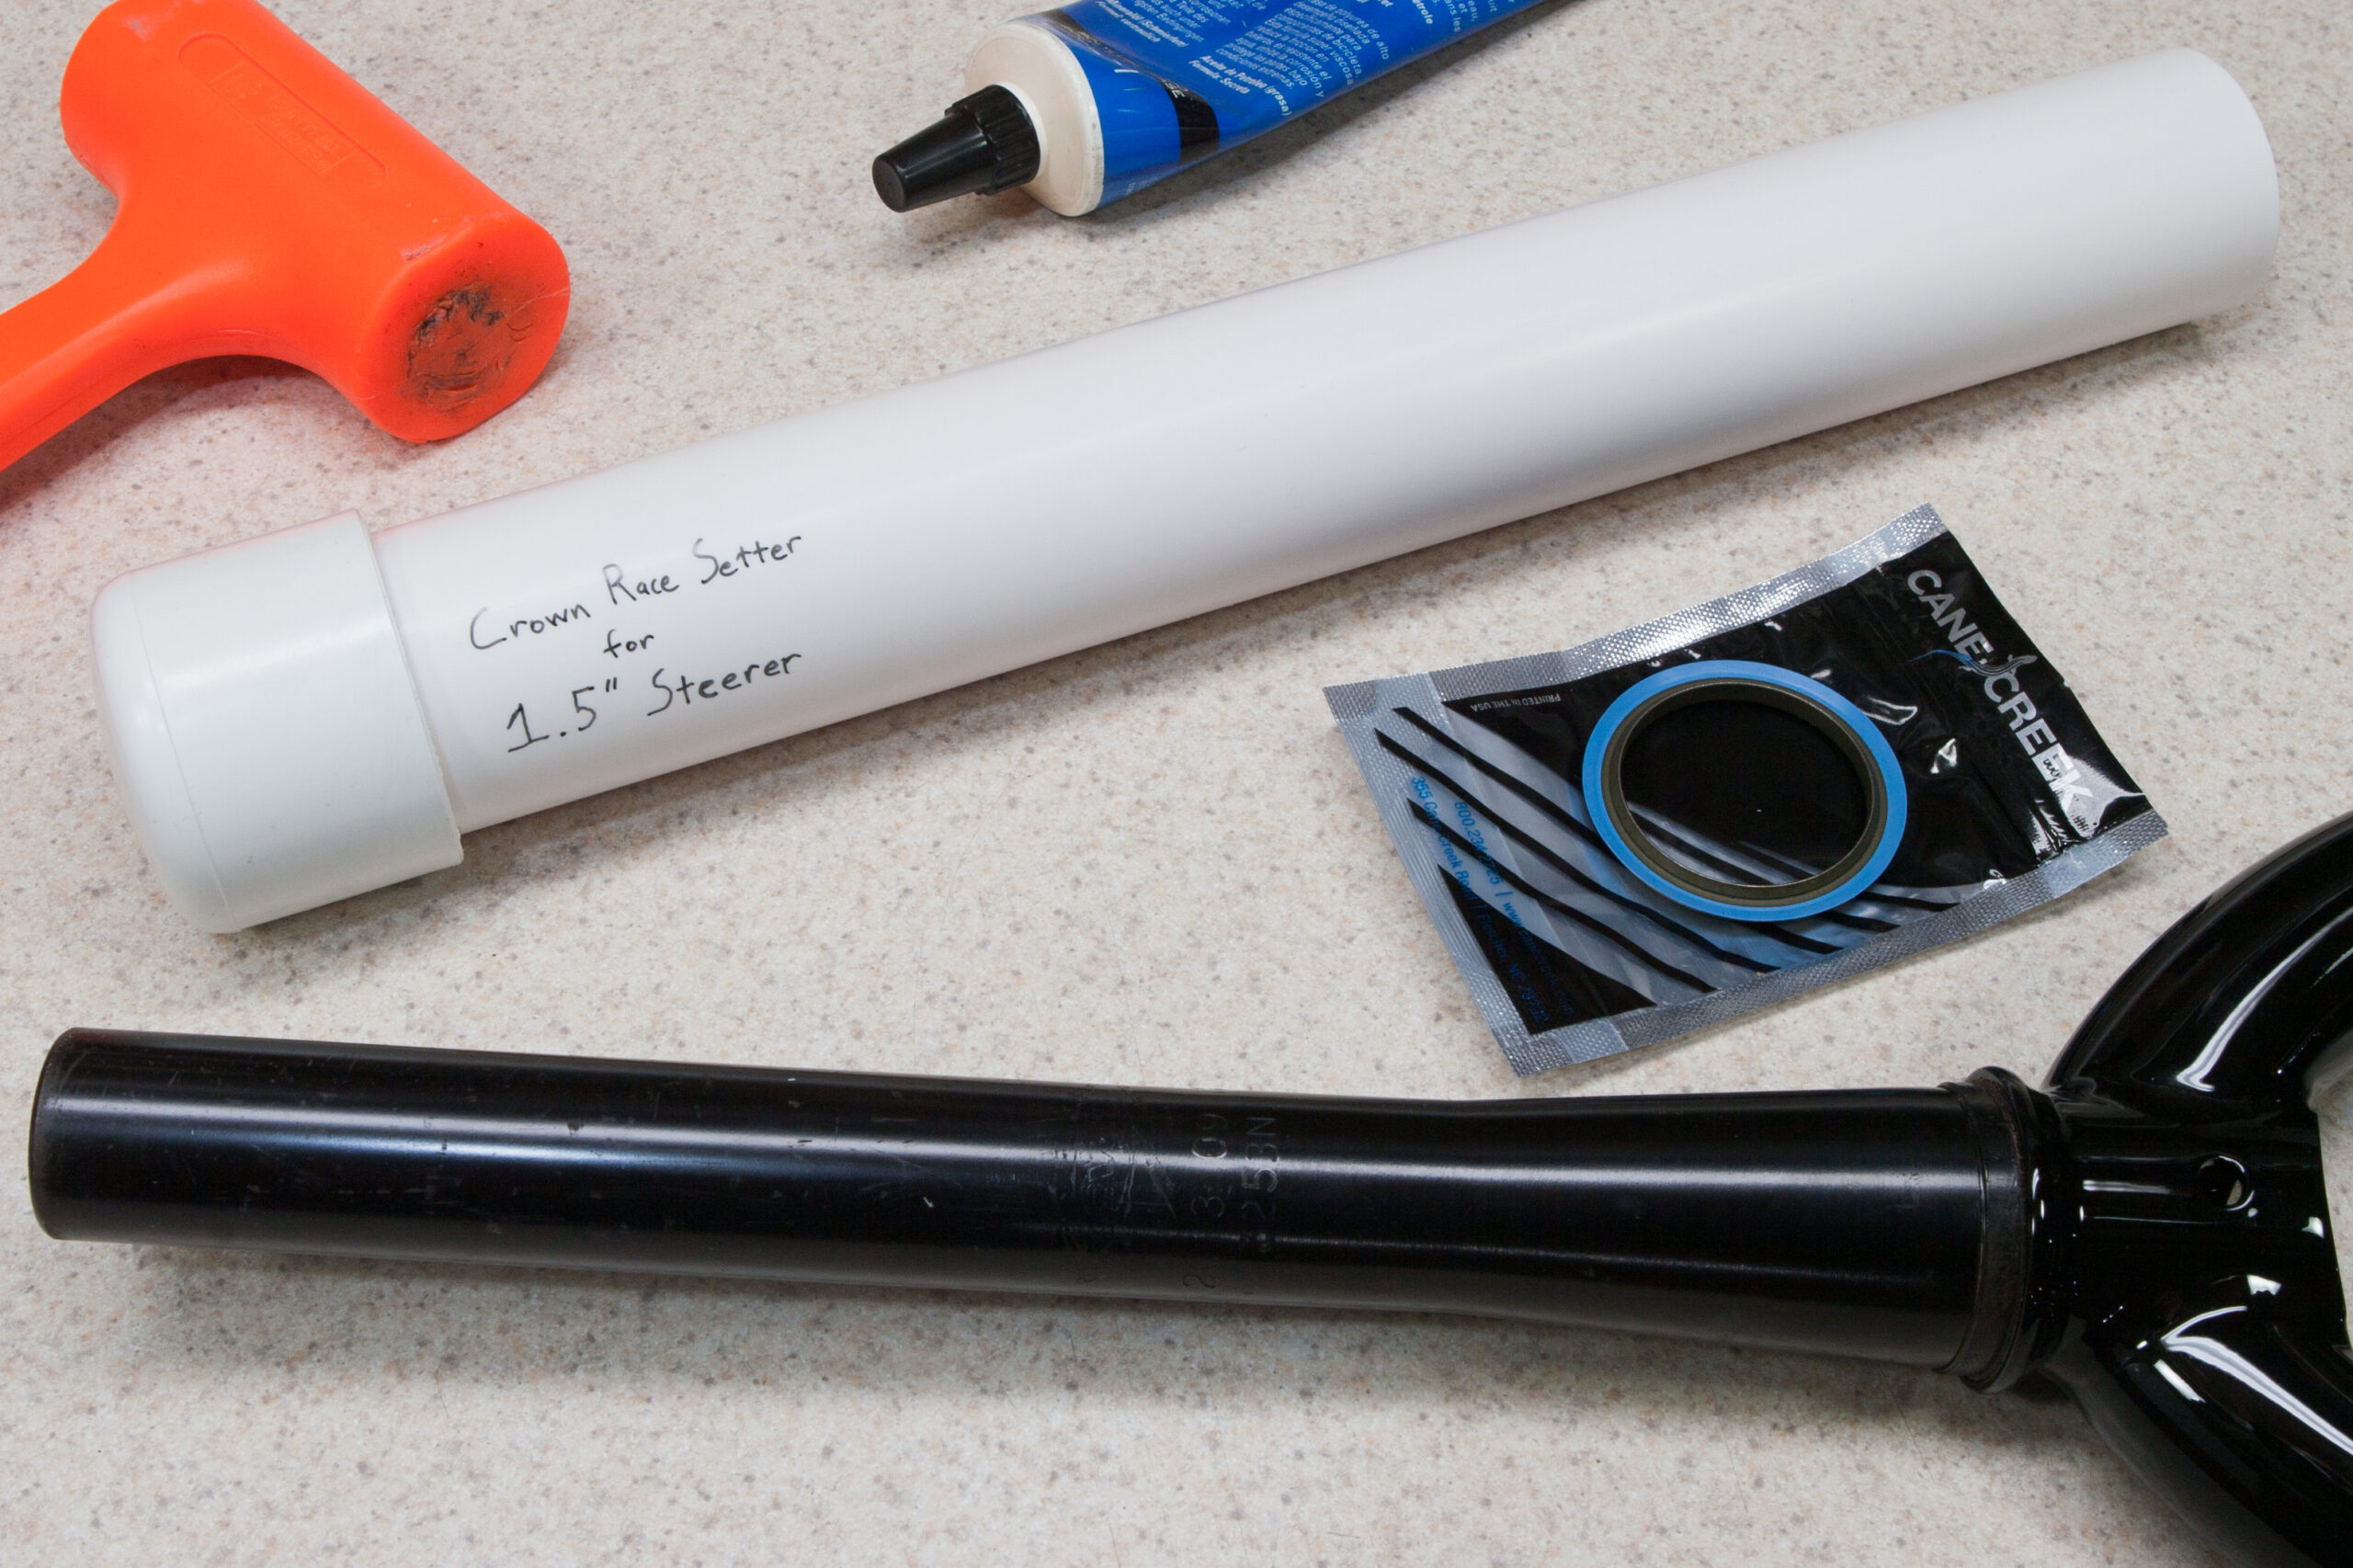
Press "Enter" to skip to content

Category: cycling

A Fine Day


Despite being a bit frazzled at times, today has been a pretty productive day. Due to the snow this morning I worked from home, but I got a fair bit of stuff done all while being able to listen to good music, watch a snowstorm outside of my window, bisected by the tasty lunch shown above†. There are definitely less comfortable ways to work.

After this I was able to:

  • Wash the salt off of my fatbike and experiment with some different techniques for cleaning off salt residue (none of which were successful). Thoroughly cleaned the somewhat-rusty (thanks, salt and lazyness!) drivetrain.
  • Figured out a likely reason why the fatbike has been ghost shifting: a partially-separated plate on the chain. This was easily fixed with a chain tool.
  • Went snowshoeing with Danielle, Erik, and Kristi to pack down the mountain bike trails at River Bends. This was my first time using snowshoes somewhere other than near home, and thanks to the four of us the trails should now be fatbikable and mostly prepped for ¡Ay CRAMBA It’s Cold Out!.
  • Shoveled the excess snow out of the parking spaces that both our neighbor Rick and I regularly use. These had been plowed, but as the plow can’t get right to the curbs, hand-shoveling the final bits helps keep the spots nicely open and accessible. I don’t like shoving the grill of my car into a snowbank to fit in a spot.
  • Ate some really tasty chorizo nachos that Danielle made for dinner.
  • Mopped the laundry room floor in cleaning up from bike washing, then did a the dishes.
  • Get started on some new signage (Coroplast ordered, vinyl spec’d / requested) for River Bends and other CRAMBA trails. Frustratingly, someone has stolen a number of the signs at River Bends and they now need to be replaced.

So, while I felt a bit frazzled and frustrated at times, overall this has turned out to be a quite fine day.

† A hot smoked salmon topped with herbs and an English muffin (Bay’s, of course) topped with cheddar, butter, scrambled eggs, and harissa.

Leave a Comment

Welcome to the LW Coaching 100 mile Finishers Training plan.

For the last two years I’ve followed the LW Coaching 100 Mile Mountain Bike Race — Finisher Plan for the 12 weeks prior to Lumberjack 100 (LJ). I purchased the TrainingPeaks version of this plan in 2012 and it’s worked well for me, so I’m going to do the same this year. However, there is something about the TrainingPeaks site — maybe it’s the visibility of weeks of stuff-to-do at a time — that feels very daunting.

Today I applied the plan to the 2014 calendar, set to finish on Sunday, June 22, the day after LJ. While the first day of actually doing stuff isn’t until April 1st (this is an LTHR test), just seeing the calendar again is a little intimidating. However, it means that nice bicycling weather shouldn’t be too far away… Even if it is structured and training, I tend to really enjoy the rides. Here’s to that continuing this year.

Leave a Comment

Another Elegant Cadence Sensor Magnet Option

I’m apparently on a quest to find ideal neodymium magnets for triggering the cadence side of ANT+ speed/cadence sensors such as the Garmin GSC-10 and Wahoo Cycling Speed/Cadence Sensor. I’d previously tried wide/thin (10mm wide, various thickness) magnets such as the one seen here on the Salsa El Mariachi Ti which sit on the end of the pedal spindle. This works well on the El Mariachi Ti where the crank boot supports it from the side, but on bare cranks it’s not difficult to knock the magnet off. My friend Jeremy has lost at least one magnet this way.

A few days ago I received some 8mm x 10mm (diameter x height) neodymium magnet cylinders via eBay and these seem like an even better solution. On Crank Brothers pedals with 8mm hex sockets in the end of the spindle, these magnets slide snugly into the 8mm hole, with a bit over 2mm poking out. This works great for triggering the reed switch inside the cadence sensor, and unlike other magnets which simply stuck to the end of the spindle, roughly 75% of the magnet is inside of the pedal so it won’t be possible to knock this one off.

Removing the magnet as needed is pretty easy, too. Because there is no flat surface at the bottom of the hex socket the magnet is relatively easy to remove. It can easily be pulled out with another magnet, by sticking a flat piece of steel to the top, or grasped firmly (say, with pliers or some strong finger tips) and slid out. While getting to this fastener outside of a shop isn’t usually needed, it’s good to have the option.

Leave a Comment

New Helmet Pads for Giro Xar

After ~2 years (and maybe four months of need) I finally replaced the pads on my daytime helmet†, a Giro Xar. I’ve been quite happy with this helmet, and it’s done well for me, but the soft pads inside were soundly compacted and some parts were starting to delaminate. This meant that there would be large lumps inside the helmet if I didn’t put it on very carefully.

At $4.99/set for the pads I should have done this a while ago. The replacement is as simple as pulling out the old pads and sticking the new ones to the velcro.

† At night I wear my old helmet, a Giro Phase. This one isn’t quite as comfortable as the Xar, so I keep a light mount on top and use it mostly at night. It’s also a backup in case something happens to the Xar.

1 Comment

Wahoo Cycling Speed/Candence Sensor for Salsa Vaya

The Salsa Vaya (and hopefully the forthcoming Motorless City bike) has the rear disc brake cable run along the top of the chain stay, which means the Garmin GSC-10 (Speed/Cadence Bike Sensor) cannot cleanly fit on the bike (photo). To work around this I picked up the Wahoo Cycling Speed/Cadence Sensor (a compatible ANT+ device) and thus far it seems like it’ll work just fine. I had no problems hanging both sensors below the chainstay, and my Garmin Edge 510 quickly picked up the sensor and was able to get both wheel rotation and cadence data from it.

This setup isn’t as attractive as Garmin’s single unit, and the need to double the cable back on itself looks a bit sloppy, but it does offer more flexibility and overall it should work out fine. I was also a bit disappointed that it doesn’t feature a Garmin unit-like test button/LED which makes setup super easy. It’s a bit higher priced than the Garmin sensor, so it’d be nice if it was at least identical feature-wise. It’s also a bit awkward how the entire sensor body needs to be pivoted in towards the spokes instead of a small/discrete arm, but I do think it’ll work out fine.

Since this was a test mounting I was a bit careless with the cable ties and didn’t peel the adhesive pads off of the cadence sensor, making for sloppy work. I intend to leave this (with its ugly, temporary fittings) in place for a month or so, and then hopefully after that it’ll be in place on the Motorless City bike.

Leave a Comment

New Trail Map of Bald Mountain Recreation Area – North Unit

This morning I’d originally planned on going for a ride in the currently-active snowstorm, but I started working on a project that I’d wanted to complete for a while, and this evening I completed it: a CRAMBA-IMBA map of Bald Mountain Recreation Area – North Unit. Home to some gently rolling, old-style trails built with cross country skiing in mind it’s not very challenging, but this is one of my favorite mountain bike trails in the area.

Over the last few slow speed wintertime rides there I’d collected the GPS data I was lacking, put it into OpenStreetMap today, cleaned up the existing data, and followed my mapping workflow to create this map. It has a fair bit more detail than the official park map, showing some of the unofficial but well used connector trails, colloquial names for some areas, and a bit more context. It’s what I personally would want for a mountain bike centric map of the trail.

So, what to map next… I’d like to do a CRAMBA-IMBA map of Pontiac Lake Recreation Area, but I’ll need to spend more time riding and exploring there before that’s feasible. I’m familiar with the trails, but not familiar enough with the park to do a proper map. I also want to update the Bloomer Park map to get something that better matches the style of the other maps. But, for now, I’m glad that this got done. I feel like I’ve accomplished something.

One can see this map overlaid on Google Maps, along everything else in the MMBA Trail Guide here: link.

Leave a Comment

Brake Lever Insulation for Winter

Riding a bicycle in winter is made easier by insulating one’s body from the metal frame, which acts as a heatsink pulling away warmth. Bicycle grips, saddle, and boots do this fairly well, but metal brake levers can quickly chill one’s fingers even with gloves on. I’d looked into some carbon fiber brakes such as the Tektro MT5.0 on the Mukluk, but $50+ seemed like a lot to spent for just a bit of extra insulation.

Earlier today I came across this post on MTBR in a thread about insulated brake levers which suggested using some heatshrink tubing to insulate the blade itself, so I’ve decided to give that a go. This was pretty easy to do, and while there are a couple slightly visible high spots and subtle wrinkles the curved part where my finger goes is smooth, and it seems to feel good.

I’ll give this a go tomorrow and see how it works out, but just basic experimentation in the basement is showing it to be warmer than the bare metal lever. Now if I could only find something to do about the metal clamp at the end of the Ergon grips…

UPDATE: After a 2+ hour ride in the snow at Bald Mountain I’m going to declare this a success. The brake lever never once felt cold, I had to consciously try to feel for a differing texture, and things just worked.

2 Comments

RAL K7 Colour Fan Deck

So that I may have proper samples for choosing a color for the forthcoming Motorless Bicycle Company frame, Rodney loaned me his RAL K7 Colour Fan Deck, 2012 edition, that contains samples of colors as used by many powder coaters. These are tremendously useful, as they allow one to see the actual color instead of a prone-to-misinterpretation (not to mention emissive vs. reflective) representation.

Thus far I’m not sure what color I want the frame to be, but I’m thinking that RAL 2004 (Pure orange) or RAL 2008 (Bright red orange) may do nicely if I’m sticking with my original desire for orange. If not that, I may consider a brilliant pink, maybe like RAL 4010 (Telemagenta) or RAL 4003 (Heather violet). I could see one of those oranges looking great with a bit of flake/sparkle to it as well.

Leave a Comment

Not-Quite-Clean Hydration Pack Zippers

I periodically wash my Deuter Race Air Lite hydration pack because riding causes heavy sweat buildup on the straps and zippers, eventually getting to the point where the zippers are hard to actuate. I washed it a few days ago by soaking it in a sink of hot water and sodium percarbonate (powdered OxiClean) by periodically agitating it and letting it sit overnight. This works very well, but I forgot one important step: actuating the zippers. The result is that after drying there are still some sweat deposits where the zippers had been, as seen above.

As a result the zippers are still difficult to move in these positions, so I’ll have to soak it again another day this week. Oh well, at least its winter time and I’m not using the bag on a near daily basis as I had been during the summer.

Leave a Comment

34×20 for Ray’s MTB

After our trip down to Ray’s MTB in Cleveland on Monday, Rodney loaned me a 20T Niner cog for the El Mariachi. For the riding down there I’d left my typical 34×19 setup on the bike, but a couple of the climbs were a little tough, particularly when I got stuck behind slower riders. Thankfully this was a rare occurrence, as the park was quite empty that day.

Since it didn’t require removing any links from the chain I figured I’d give this 20T a go and see if it works out better on the planned trip this coming Friday; particularly as I suspect there’ll be more people there that day and more chances to get caught in traffic.

Leave a Comment