Last updated on March 24, 2026
After a bunch of years I’ve updated my MTB trail mapping workflow with a much-improved tool for getting OpenStreetMap (OSM) data into Adobe Illustrator. I’ve been experimenting with AI development tools, and I’ve been looking for projects, and this one fit the bill.
My old workflow used osm2ai.pl, a rather crude script (which I found years ago) that’d take an OSM file and turn it into vectors that I’d then group and style in Illustrator. While the tool claimed to filter objects into layers, I never got this working right, so there was a lot of manual work before I could begin styling the map. Each map took a couple of hours solely selecting, joining, grouping, and deleting stuff.
With some time on my hands during a mountain biking trip I began prompting Claude Code, via Visual Studio Code, for something similar: a tool which would take OSM data and make it usable in Illustrator. After a bit of back and forth I ended up with this: c0nsumer/osm_to_ai.
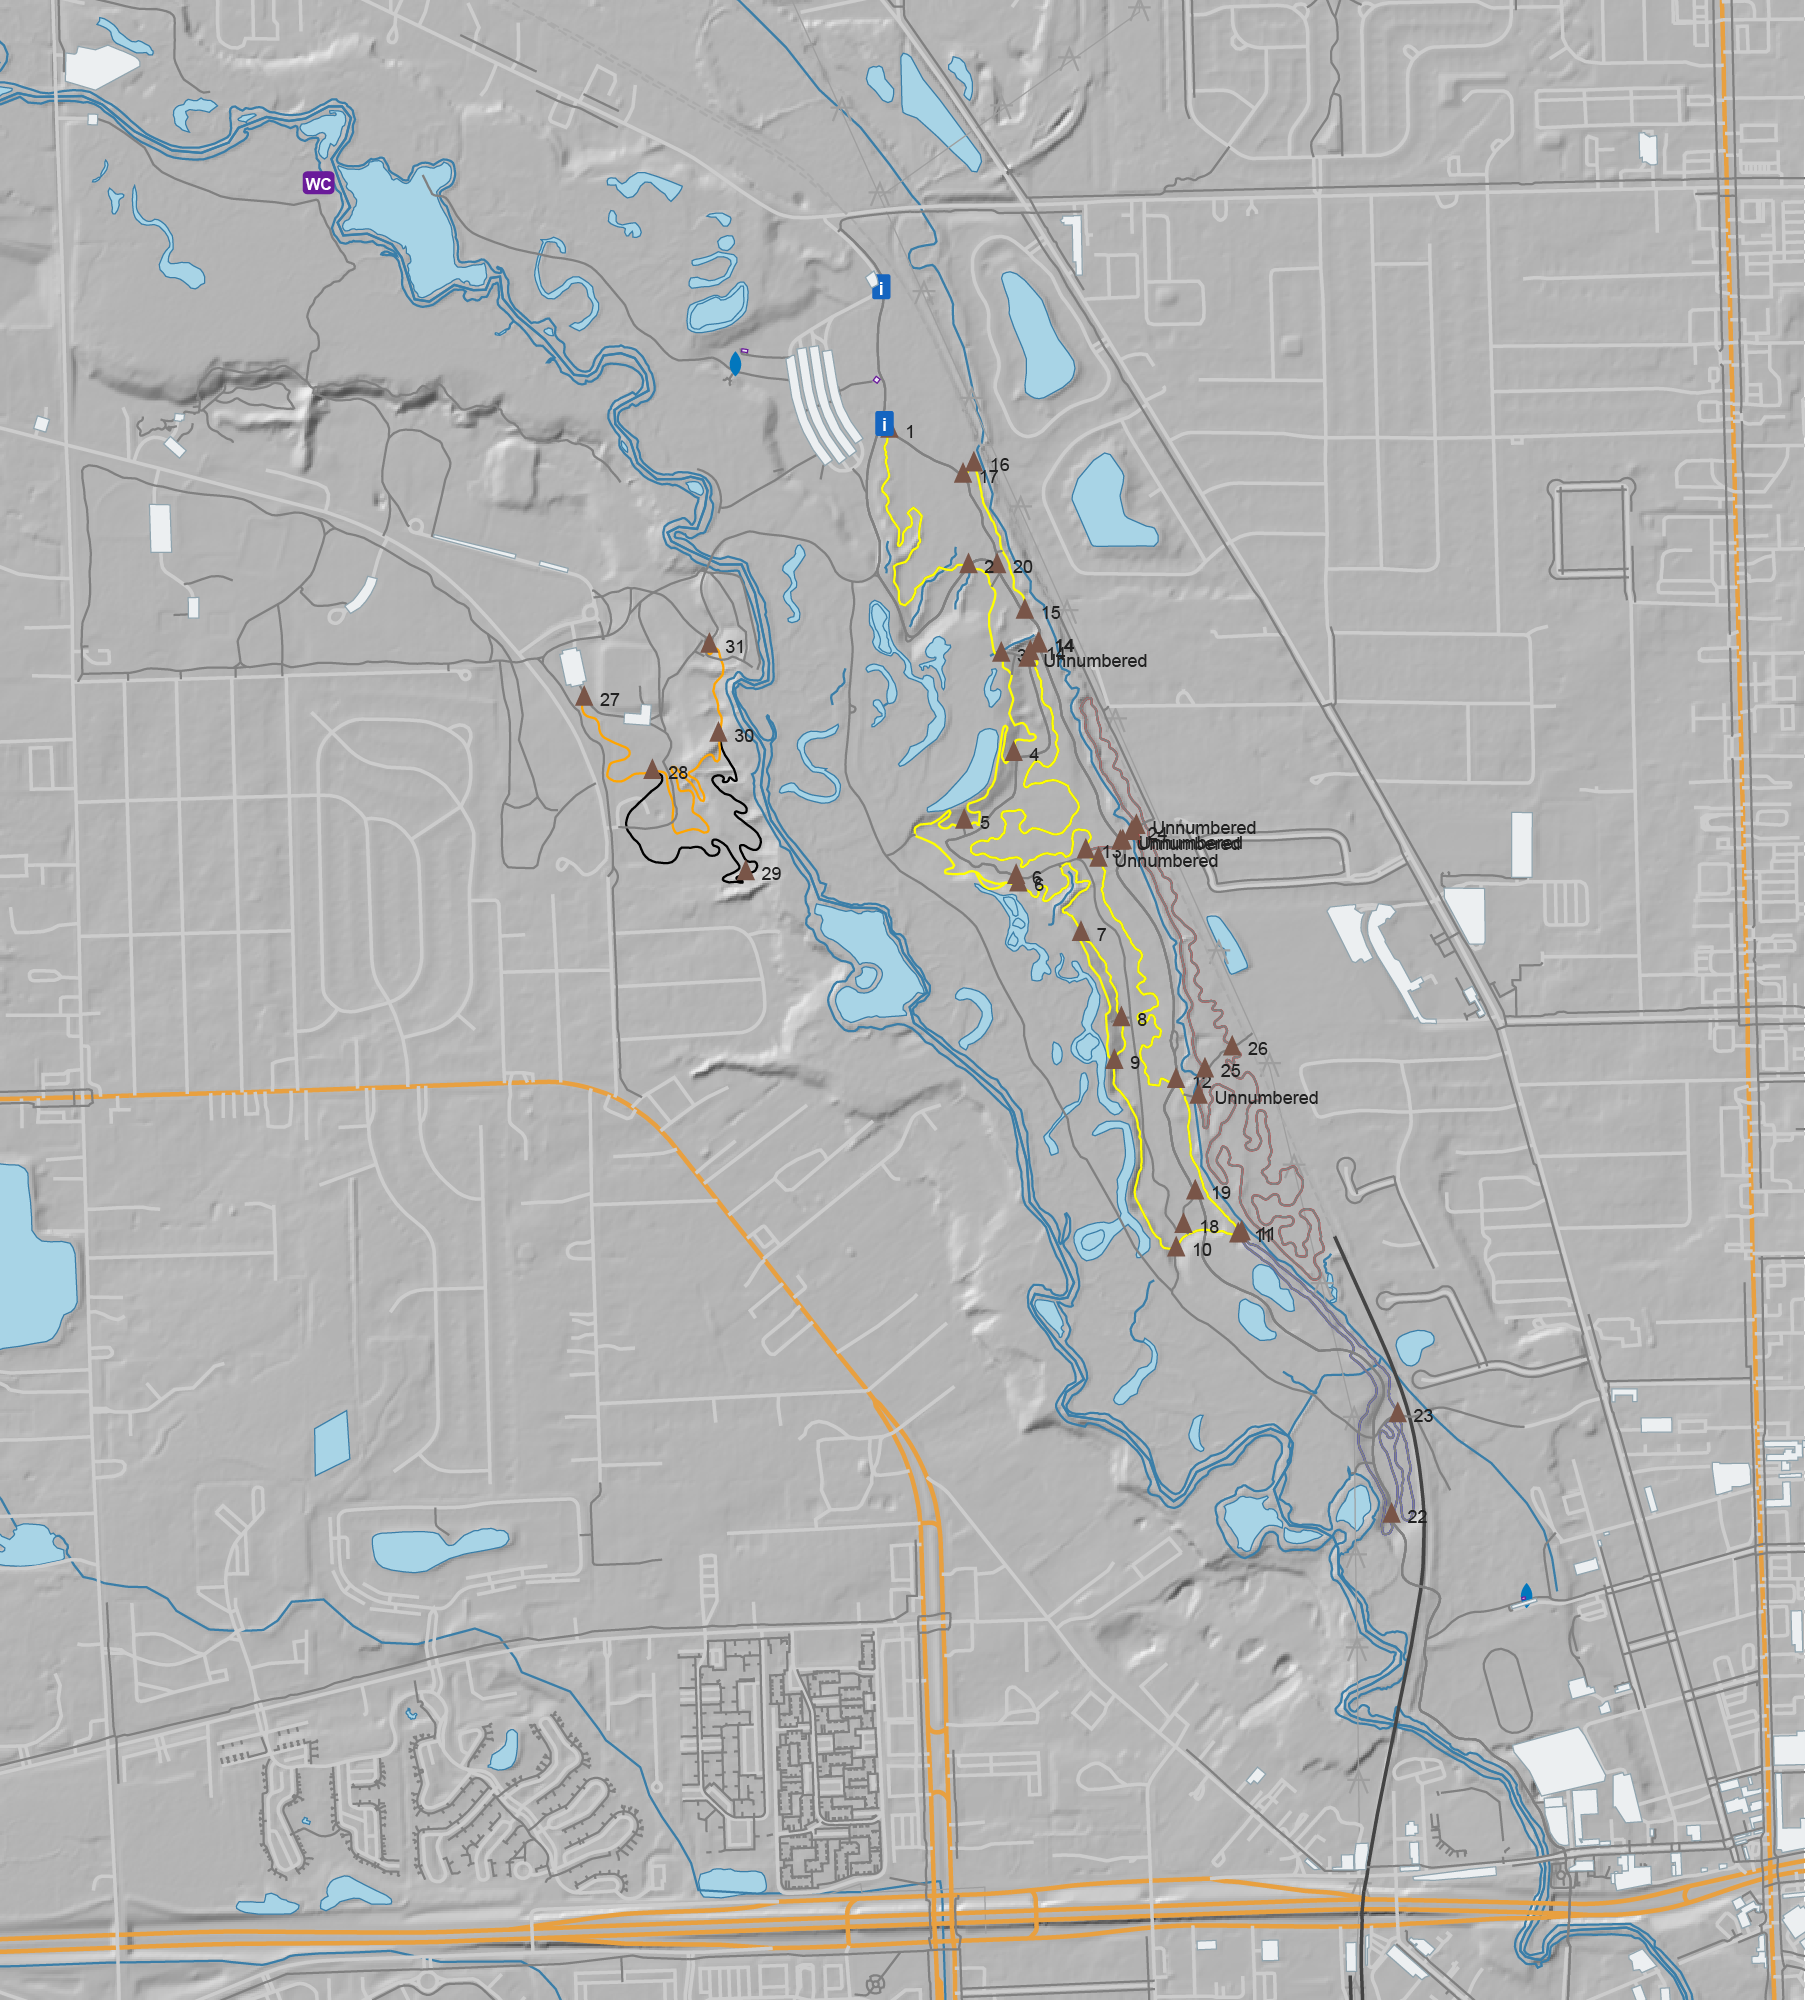
I very intentionally had Claude write everything on this, from the script to the readme, and it seems to have been a success. A bit of experience was gained, and I now have a tool that’ll read in OSM data (either exported from tools or queried live) and produce an Illustrator-compatible SVG that has trails grouped by OSM tag, colored, etc. All ready to finish up in Illustrator. It even has an extra layer of USGS 3DEP hillshade data, something I’ve wanted for years after seeing it on the Noquemanon Trails Network maps (but didn’t know how to do in Illustrator).
This was both a good exercise in using AI tools to assist in simple software development and helped streamline my mapping process. While I have a general discomfort with AI-developed code ending up with potentially uncertain output, this output is immediately validated visually, so it’s fine.
Unplanned, but on quick check this seems to have the side-effect of being compatible with Affinity Designer. While this wasn’t (yet) an intention, I’ve been looking for a good way to move away from Illustrator due to software cost (this is volunteer stuff, after all) but the old osm2ai.pl needed replacing before I could do that. This will make that possible.
So what next? Maybe I’ll see if I can make the PDF maps geospatial. This has long been a goal of mine, as it’d allow my maps to be opened in something like Avenza Maps and they’d show one’s actual location on the trail. But for now, I’ll start here.
As an overview, here’s the --help output to show what it can do:
(venv) PS C:\Users\svigneau\Desktop\OSMtoAI> python .\osm_to_ai.py --help
usage: osm_to_ai.py [-h] (--file PATH | --bbox BBOX | --overpass FILE) --output PATH [--width PX] [--dem PATH] [--fetch-dem] [--dem-resolution METERS] [--sun-azimuth DEGREES]
                    [--sun-altitude DEGREES] [--save-osm PATH]

Convert OSM data to an Adobe Illustrator-compatible layered SVG.

options:
  -h, --help            show this help message and exit
  --file PATH           .osm file to read
  --bbox BBOX           Bounding box: min_lon,min_lat,max_lon,max_lat
  --overpass FILE       File containing an Overpass QL query
  --output PATH         Output .svg file
  --width PX            SVG width in pixels (height is auto-calculated, default: 800)
  --dem PATH            GeoTIFF DEM file to generate a hillshade layer (any CRS)
  --fetch-dem           Download a USGS 3DEP DEM automatically and use it for hillshade. Saves a sidecar .tif next to --output for reuse.
  --dem-resolution METERS
                        Target DEM pixel size in metres for --fetch-dem (default: 3). Use 1 for lidar-quality where available, 3 for 1/9 arc-second, 10 for 1/3 arc-second.
  --sun-azimuth DEGREES
                        Sun azimuth in degrees clockwise from north (default: 315 = NW)
  --sun-altitude DEGREES
                        Sun altitude above horizon in degrees (default: 45)
  --save-osm PATH       Save the downloaded OSM XML to a file for later reuse with --file

Examples:
  python osm_to_ai.py --file mypark.osm --output mypark.svg
  python osm_to_ai.py --bbox "-71.12,42.36,-71.10,42.38" --output mypark.svg
  python osm_to_ai.py --overpass query.overpassql --output mypark.svg
  python osm_to_ai.py --file mypark.osm --dem elevation.tif --output mypark.svg
  python osm_to_ai.py --file mypark.osm --fetch-dem --output mypark.svg
  python osm_to_ai.py --file mypark.osm --fetch-dem --sun-azimuth 270 --sun-altitude 35 --output mypark.svg

(venv) PS C:\Users\svigneau\Desktop\OSMtoAI>