Last updated on September 2, 2024
Our living room has a very simple setup: a non-networked TV, an Apple TV, and an older Onkyo A-9050 amplifier that drives two small speakers and a subwoofer. It’s a great sounding yet simple setup for two channel audio, perfect for the basic streaming video watching we do.
Being older the amplifier doesn’t have any of the modern (eg: HDMI CEC) mechanisms for controlling it, but it does have a 3.5mm tip sleeve input on the back for Onkyo RI. This old, proprietary system uses a wired connection creating a bus that allows different Onkyo components to be controlled from one central component and thus one IR remote control.
This protocol is well documented, both via the LIRC project and some other sites (ref: LIRC documentation, Onkyo RI Protocol, docbender/Onkyo-RI) so this got me thinking it’d be pretty easy to implement in ESPHome and thus make the receiver controllable from Home Assistant. While this is only one-way control (since it’s basically a wired version of an IR remote), it would still allow for remote power on/off, input changing, etc.
After a few false starts, it turns out it was easy. Thanks to some pointers from folks in the ESPHome Discord I realized the best way was adding support for the protocol to the existing Remote Transmitter integration. Since this integration already had other protocols which used similarly timed protocols it was pretty easy for me to add Onkyo RI by copying the structure from another and modifying it for this protocol. (For reference, it’s not standard serial and requires specific timings, so it wasn’t as simple as just using a UART.)
I’ve since submitted PR #7117 to the ESPHome project to contribute this back, but despite passing all tests I’m still waiting for it to be accepted. (I looked into creating a custom component that could be included from another GitHub repo, but since this was best implemented by modifying an existing component, that didn’t make sense to me.) Until this gets accepted, I’ll just have to build esphome locally or if others want to do it, patching things based on the files in the PR.
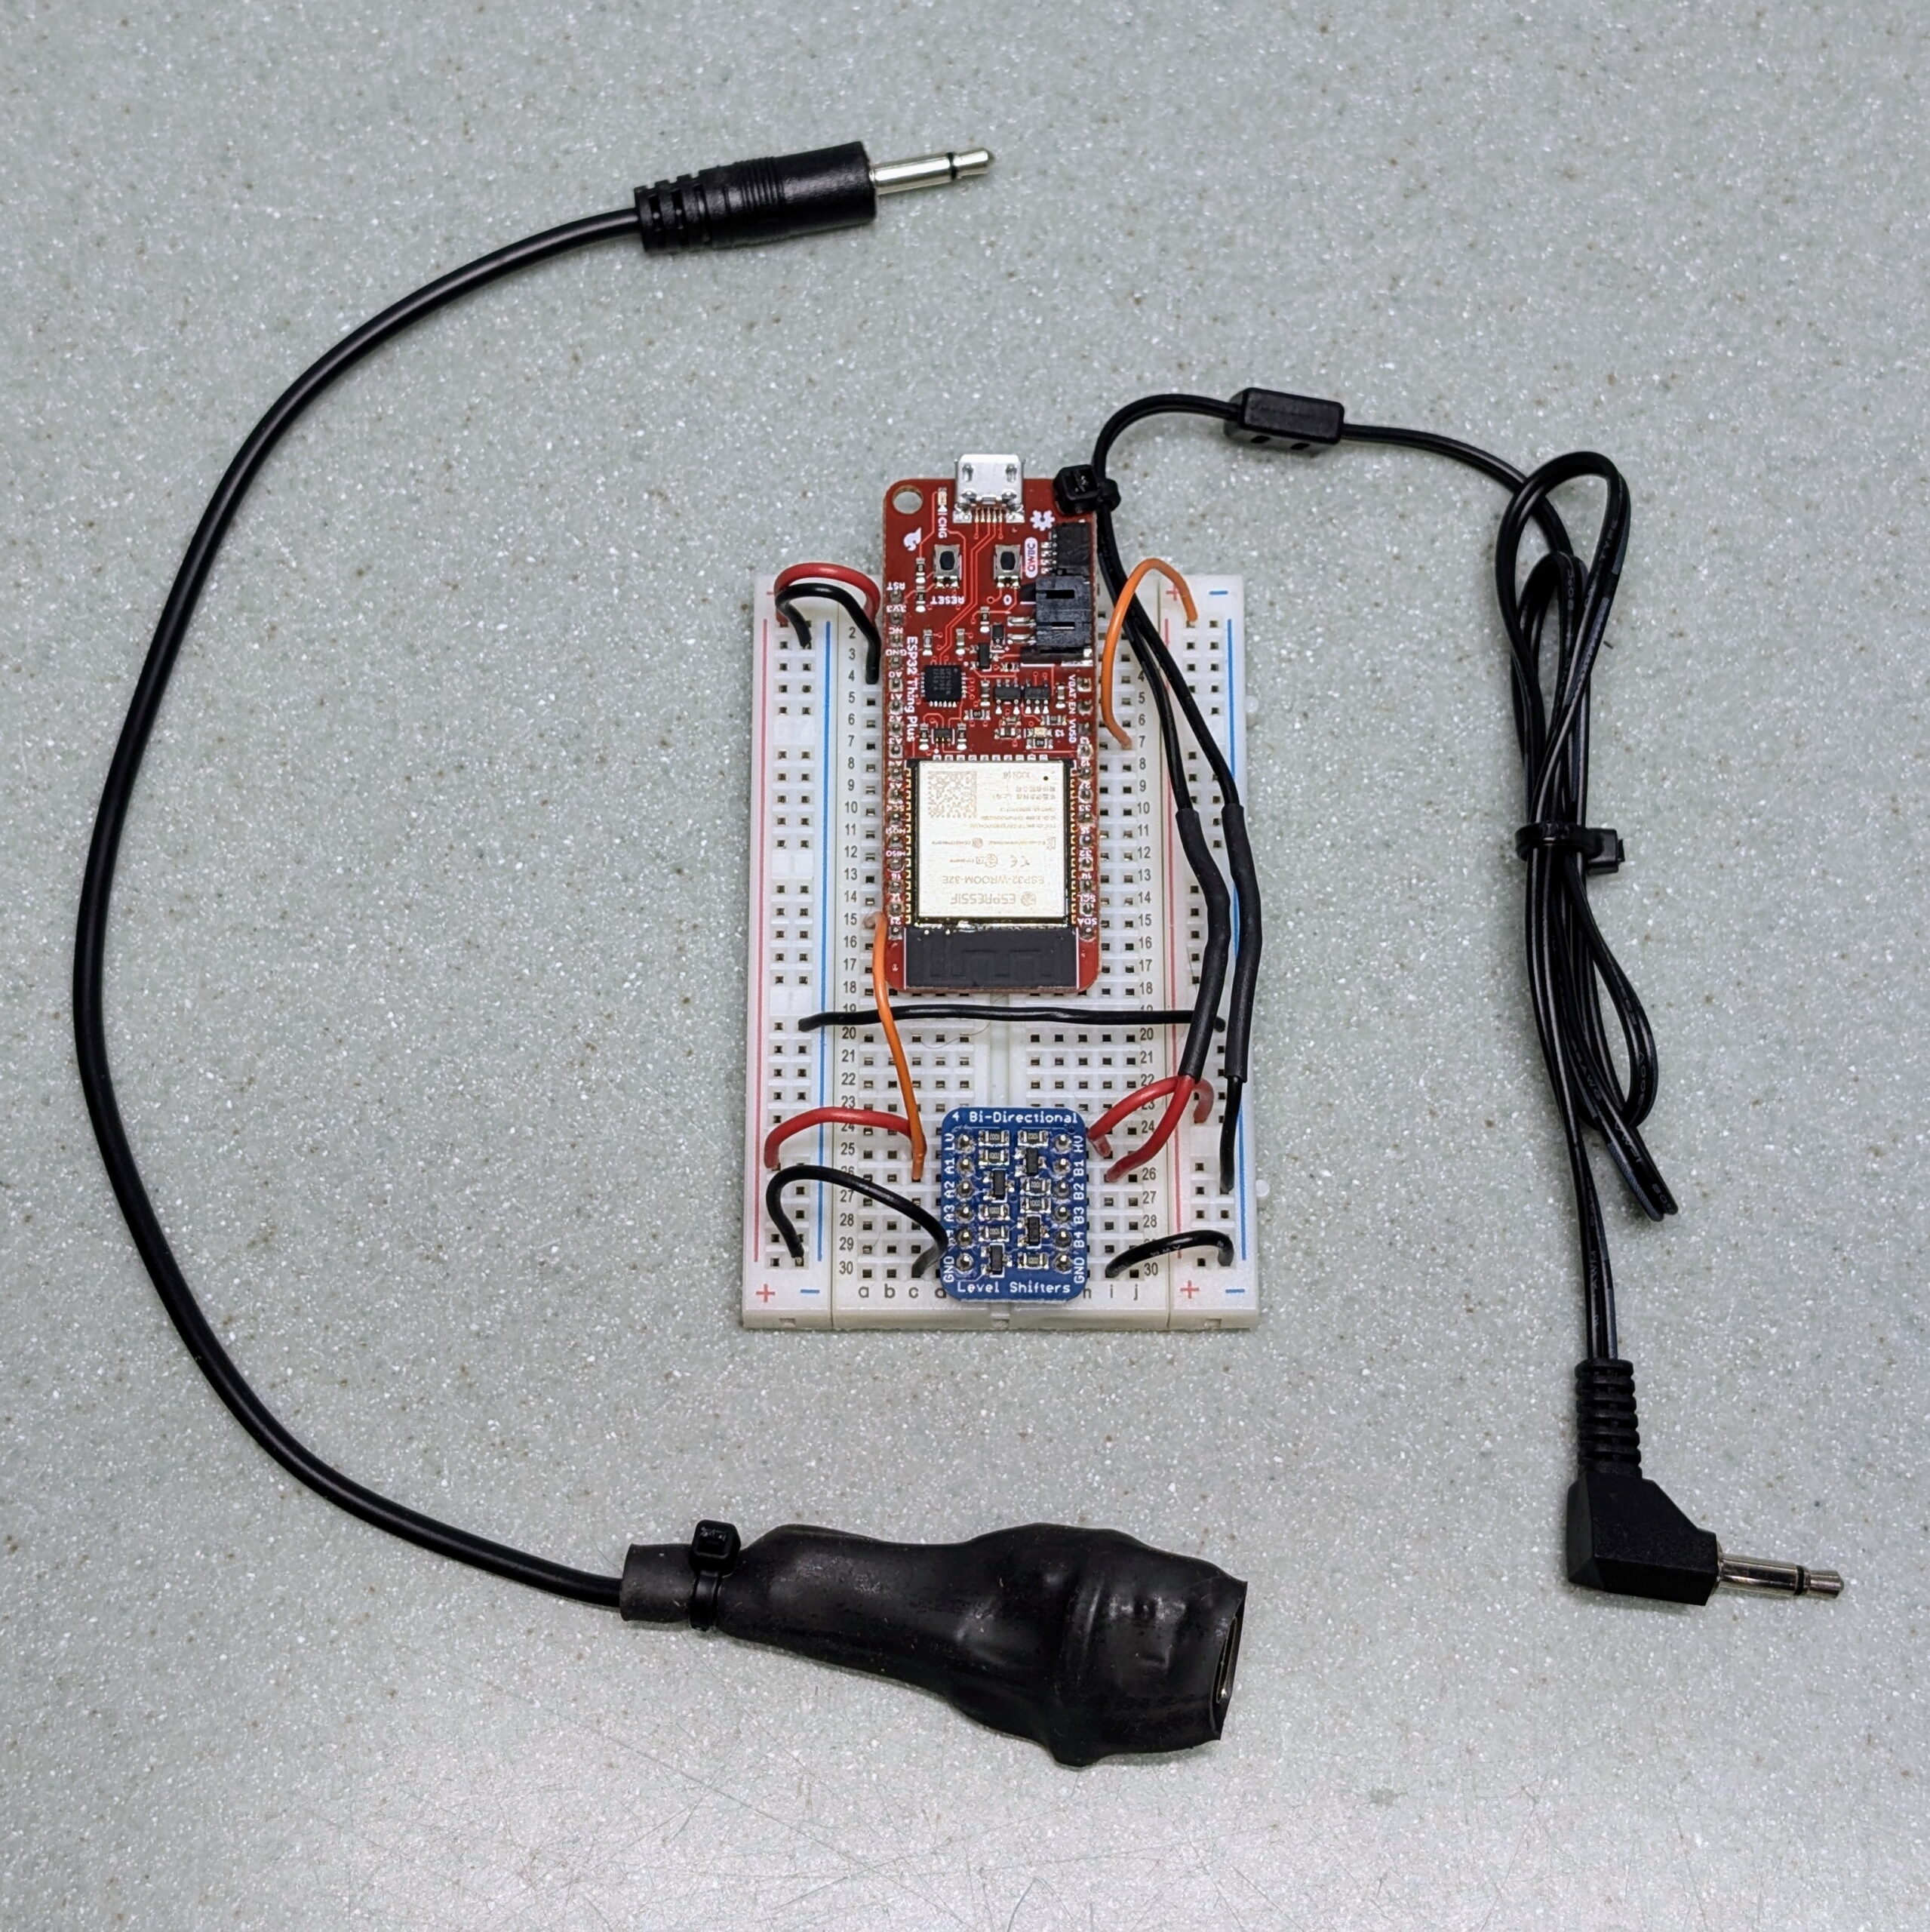
Getting it all wired up was pretty simple with the only thing needed was getting electrical levels right, as the ESP32 microcontrollers use 3.3V logic and RI uses 5V. Thankfully a simple level shifter based around a FET can handle this. I first prototyped it with a SparkFun ESP32 Thing Plus and an Adafruit BSS138 on a breadboard and this worked great.
I really don’t like the idea of having a fragile and ugly breadboard sitting in the living room so I made plans to replace it with something smaller. After ordering parts and letting them sit for a few weeks, I finally got around to it one rainy Sunday afternoon.
This smaller, final implementation uses a Seeed Studio XIAO ESP32S3, a cheap level shifter board from Amazon (electrically identical to the Adafruit BSS138), and a 3.5mm TS cable. This was all wired up then bundled, along with the ESP32’s external 2.4 GHz antenna, into the a single blob inside of some heatshrink tubing making for a simple, streamlined final package. This works great, and now I have a single thumb-sized module with a USB-C connector (for power input and reprogramming) on one end and a 3.5mm plug on the other for the receiver. And it shows up wonderfully in HA and works as a remote control.
While the initial prototyping went great, I did run into two problems worth mentioning:
First, the one of the super-cheap level shifters I got from Amazon seemed to be bad. After hooking it up levels seemed all wrong, and I was seeing 3.3V at the ESP32 end and a solid 5V at the plug. Turned out to be a bad level shifter (or perhaps bad PCB) but by moving to the second shifter on the same board things were fine.
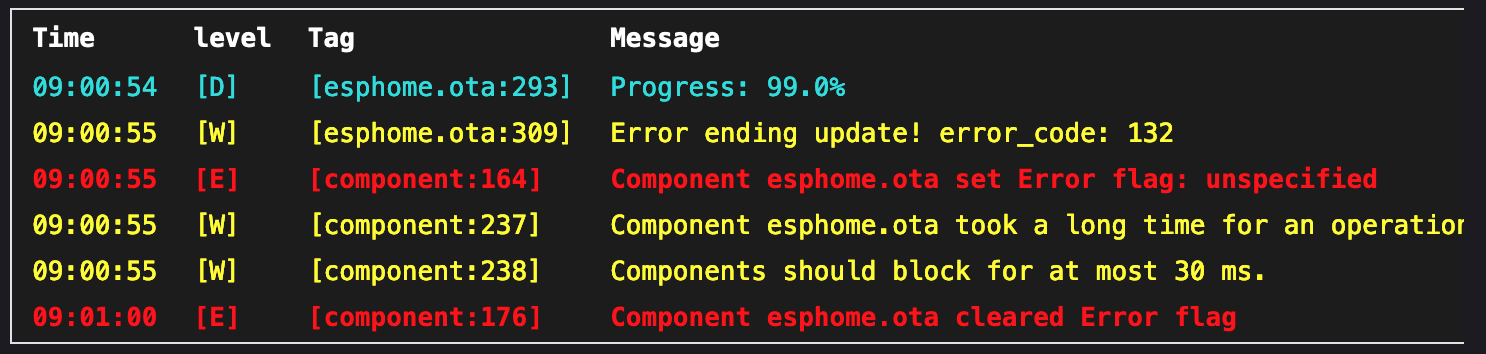
Second, when attempting to do an OTA update after the Onkyo RI firmware on the ESP32 S3 is running, it fails, indicating that Component esphome.ota took a long time for an operation (7339 ms)..
If I flash it back via USB with a default ESPHome config (via ESPHome web), it then OTA updates fine. This only happens on the ESP32 S3 and didn’t happen on the ESP32 WROOM, and seems related to how long the OTA takes on this module or maybe something caused by wireless transmission speeds? I didn’t try a serial upload nor troubleshoot any further as I both have a good workaround and see no need to reprogram the device any time soon.
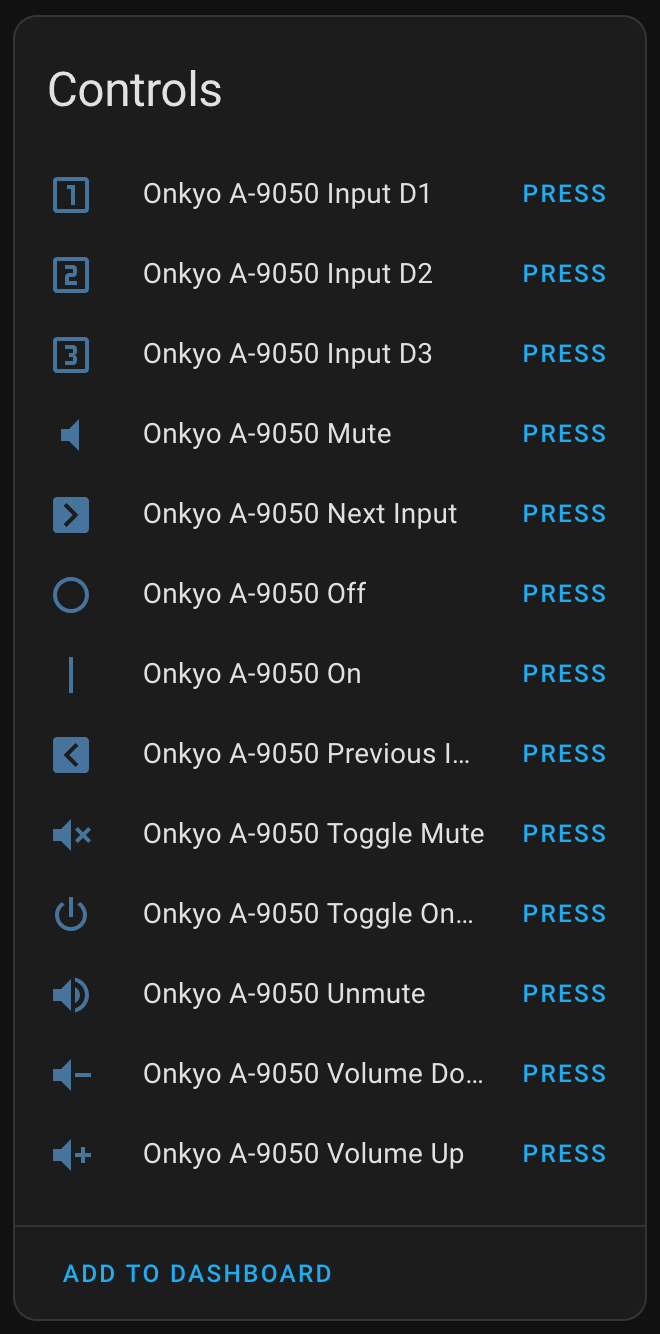
The ESPHome configuration used for the final version can be found here: onkyo-a-9050_seeed_xiao_esp32c3.yaml. This uses a handful of commands that I tested to work on the A-9050. For other Onyko RI receivers there may be different commands needed; I suggest consulting the protocol docs mentioned above to discover others. I made a point of adding rational icons to each so that once added to Home Assistant things look good.
Using these is then nice and straightforward in HA, such as a basic button here on my dashboard which sends the Toggle On/Off (power) command:
type: button
show_name: true
show_icon: true
tap_action:
  action: toggle
entity: button.onkyo_a_9050_toggle_on_off
name: Onkyo A-9050
hold_action:
  action: none
icon_height: 40px
I’m not sure where I’ll go next with this. Toggling power on the receiver from a dashboard is neat, but not that important. Ideally I’d like to have a single automation that will change a couple of lights, turn on the receiver, and result in the Apple TV and television itself being turned on, but there’s still pieces missing to allow this.
It seems an Apple TV can’t be woken over the network when sleeping, the TV is not network accessible, and the receiver does not transmit status. So, I can’t do this with my current setup. I believe that it may be possible to build an ESPHome HDMI CEC device and connect it to another input on the TV to wake things up using something like Palakis/esphome-native-hdmi-cec, but that’ll be another project… At least now I’ve got a spare breadboarded ESP32 to start down that path. Time to order some HDMI breakout connectors, I guess.