Last updated on November 9, 2021
With consolidating and upgrading my home network I’m moving Pi-hole from a stand-alone Raspberry Pi to running under Docker on my Synology DS1019+ running DiskStation Manager (DSM) v6.2.3.
This was a little bit confusing at first as the web management UI would work, but DNS queries weren’t getting answered. This ended up being caused by the bonded network interface, which is ovs_bond0 instead of the normal default of eth0.
Using the official Pi-hole Docker image, set to run with Host networking (Use the same network as Docker host in the Synology UI), setting or changing the following variables will set up Pi-hole work from first boot, configured to:
- Listen on
ovs_bond0(instead of the defaulteth0). - Answer DNS queries on the same IP as DSM (
192.168.0.2). - Run the with the web-based management interface on port 8081 with password
piholepassword. - Send internal name resolutions to the internal DNS/DHCP server at
192.168.0.1for clients*.internal.example.comwithin192.168.0.0/24. - Set the displayed temperature to Farenheit and time zone to
America/Detroit. - Listen for HTTP requests on
http://diskstation.internal.example.com:8081along side the defaultpi.holehostname.
DNS=127.0.0.1
INTERFACE=ovs_bond0
REV_SERVER=True
REV_SERVER_CIDR=192.168.0.0/24
REV_SERVER_DOMAIN=internal.example.com
REV_SERVER_TARGET=192.168.0.1
ServerIP: 192.168.0.2
TEMPERATUREUNIT=f
TZ: America/Detroit
VIRTUAL_HOST: diskstation.internal.example.com
WEB_PORT: 8081
WEBPASSWORD: piholepassword
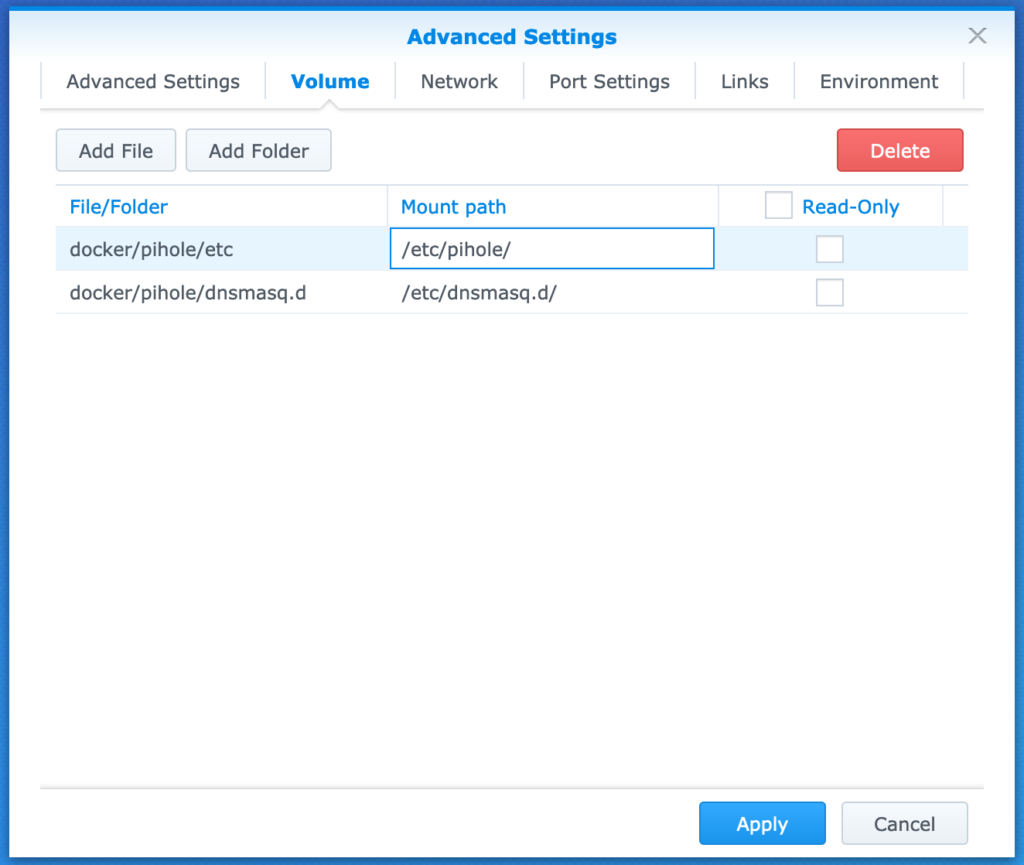
Additionally, setting up volumes for /etc/dnsmasq.d/ and /etc/pihole/ will ensure changes to the UI persist across restarts and container upgrades. I do this as shown here:
Note: If you stop the Pi-hole container, clear out the contents of these directories, and then restart the container, Pi-hole will set itself up again from the environment variables. This allows tweaking the variables without recreating the container each time.
UPDATE: With the update to Synology DSM 7.0 the interface is now called bond0.
