Flux Removal
About
I currently use solder containing Kester 285, Kester 331, and Kester 245 fluxes for most of my projects. Of these, only 245 is a no-clean flux, so I had to find an easy way to remove the flux using things around the house.
What follows here are the steps which I use to clean flux from PCBs after I'm done attaching components to them. Of course, take these directions with a grain of salt. What works for the parts I've soldered may not be right for things on your boards. Non-sealed components, displays, and many other things may not quite stand up to this. So, be careful.
These instructions are written to use common, easy to find ingredients and tools which one can find at most larger stores. It is likely that special purpose flux remover / PCB cleaner may be easier to use, but I doubt it would be as easy to find and may be more dangerous to work with.
Kester 285
Kester 285 is a mildly activated rosin flux which is very nice to work with, but it must be cleaned off after soldering. It does not clean up with water, but comes off easily with alcohol. This process should work fine with other alcohol-soluable fluxes, too.
Be sure to check that parts on the board can handle exposure to alcohol and water. If they cannot, you may wish to leave those components off until the board is clean, then solder them with a solder cored with Kester 245, a no-clean flux.
Caution
The isopropyl alcohol used is highly flammable. Read the container and take appropriate precautions.
Be sure to wash your hands with soap and water after you are done (and before eating or touching any mucus membranes) in order to get any solder dust or flux residue off.
Things Needed
- Toothbrush (New)
- Two Cheap 2" Paintbrushes, one Marked 'Alcohol' and one marked 'Water' (I use the $0.50 ones from Home Depot.)
- Bottle of 99% Isopropyl Alcohol (Do not use 'rubbing alcohol', as it is only about 70% alcohol. It won't work as well and will leave residue behind.)
- Gallon of Distilled Water (Must be distilled, not simply purified water, and especially not mineral or tap water.)
- Two Small Dishes or Glasses (Couple ounces -- I use a small ramekin. To hold alcohol and water.)
- Shallow, Wide Glass or Plastic Dish (I use a glass pie dish.)
- Tall-sided, Fairly Large Glass or Plastic Container (Known as 'slop bucket'. I use a one gallon generic dollar-store-type plastic container for this.)
- Clean, Dry Towel (This means no fabric softener or dryer sheet residue on the towel as well.)
- Air Compressor
- Hair Dryer (Not Required)
Steps
- Finish soldering everything to the PCB.
- Pour some isopropyl alcohol in the small dish.
- Holding the PCB over the shallow dish (to collect drips) use the paintbrush labeled 'Alcohol' to swab the entire PCB with isopropyl alcohol.
- Scrub the flux off of the PCB with the toothbrush, regularly dipping the brush in clean alcohol. The flux will mostly be on the solder side (bottom) of the PCB, and the whole process generally won't take much effort. Be sure to keep the board wetted with alcohol during the process.
- Gently scrub the entire PCB with clean alcohol using the 'Alcohol' paintbrush. Be sure to get both sides.
- Holding the PCB over the slop bucket, drizzle a more alcohol over it to wash off the remains from the previous scrubbing.
- Again with the PCB over the slop bucket, pour distilled water over both sides of the PCB to rinse off all the alcohol.
- Gently scrub both sides of the PCB with water using the paintbrush labeled 'Water'.
- Fully rinse the PCB once more with distilled water.
- After you are sure the PCB has been fully rinsed, gently shake water off of the PCB and pat it with the towel. It does not need to be completely dry, but one should remove the majority of the water.
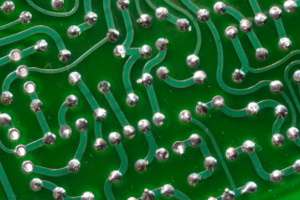
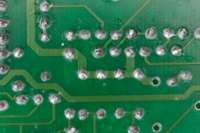
- Use the air compressor to blow the remaining water out of all sockets, vias, from under all components, and to generally dry the board. Once finished the board should look smooth and shiny, without any residual flux.
- If one wishes, a hair dryer set to warm may be used to dry the board further. This isn't required and must be done with care. One should be careful using any heat source around flammable materials (the alcohol) and one doesn't want to heat any on-board component above the maximum specified temperature.
Kester 331
Kester 331 is a water soluable flux designed for use in cored solder. I personally find that solder bearing Kester 285 is a bit easier to work with, but the ease of clean-up with this flux makes it worth using.
The steps for cleaning off Kester 331 are similar to those used for 285, except things are much easier. Again, be sure the parts you are using can handle getting wet. If some of these parts cannot get wet, either be very careful when cleaning the board or leave them off until the board is cleaned, then solder them with a solder cored with Kester 245, a no-clean flux.
Things Needed
- Toothbrush (New)
- Cheap 2" Paintbrush (I use the $0.50 ones from Home Depot.)
- Gallon of Distilled Water (Must be distilled, not simply purified water, and especially not mineral or tap water.)
- Medium Sized Plastic Measuring Cup
- Clean, Dry Towel (This means no fabric softener or dryer sheet residue on the towel as well.)
- Air Compressor
- Hair Dryer (Not Required)
Steps
- Finish soldering everything to the PCB.
- Take the PCB to a sink, preferably one like a laundry tub, and scrub the flux off with a paint brush under warm running water. This will not be difficult to do, as it mostly rinses off. I find that it helps to use both a toothbrush-style brush and a softer paintbrush.
- Pour some distilled water into the measuring cup, and gently rinse all the tap water from the board. This will ensure there are no mineral deposits or spotting.
- After you are sure the PCB has been fully rinsed, gently shake water off of the PCB and pat it with the towel. It does not need to be completely dry, but one should remove the majority of the water.
- Use the air compressor to blow the remaining water out of all sockets, vias, from under all components, and to generally dry the board. Once finished the board should look smooth and shiny, without any residual flux.
- If you wish, a hair dryer set to warm may be used to dry the board further. This isn't required and must be done with care. One should be careful using any heat source around flammable materials (the alcohol) and one doesn't want to heat any on-board component above the maximum specified temperature.
Kester 245
Kester 245 is a low residue flux, designed to be used in cored wire. I typically use solder bearing this flux only in situations where I will not be able to remove flux safely, such as with connectors on LCDs, potentiometers, motors, transformers, and other such places.
As this is a no-clean flux, I don't actually clean it off. It's only included here so that people will know of its existance and think of it as an alternative to 285 and 331.